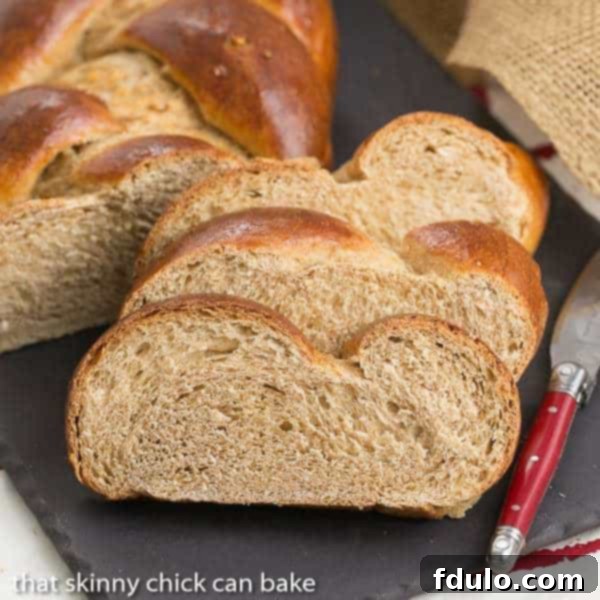
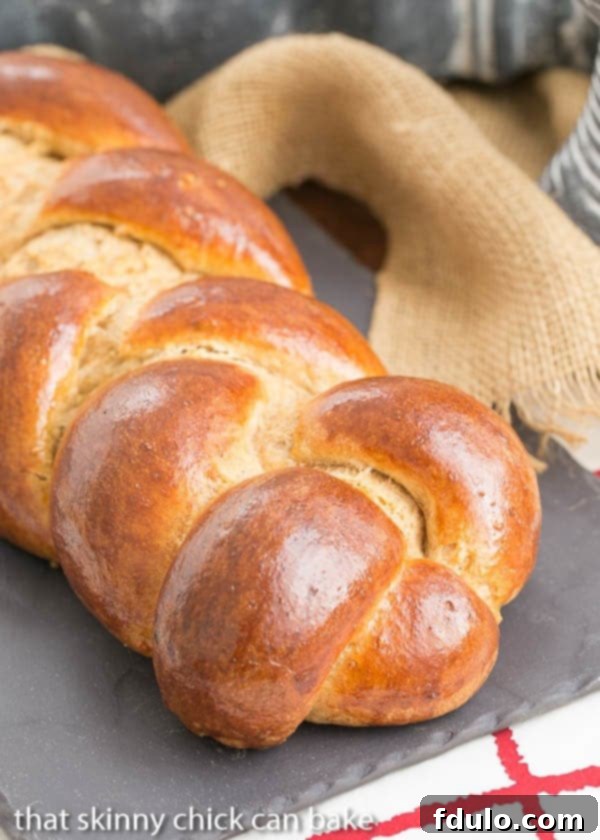
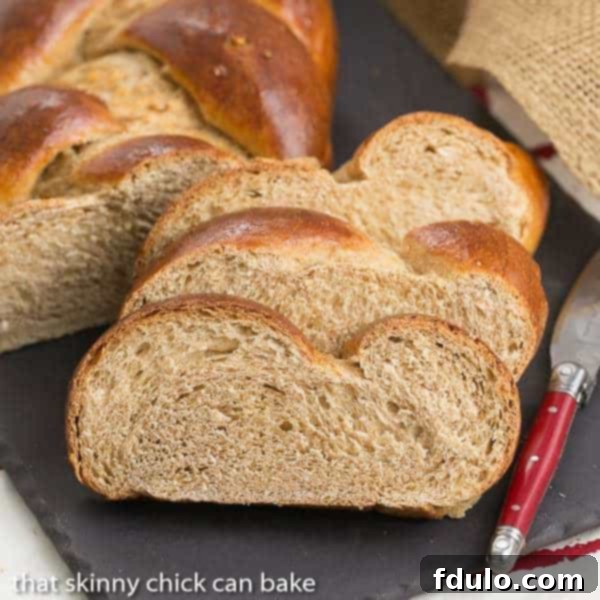
Whole Wheat Challah is a delightful twist on a classic, offering all the tender, egg-based richness of traditional challah with the added nutritional benefits and hearty flavor of whole wheat flour. This beautifully braided bread isn’t just a treat for the eyes; it’s a deeply satisfying loaf that promises a chewy crust and a soft, airy interior. Whether enjoyed warm from the oven with a smear of butter or transformed into the most incredible French toast, this Whole Wheat Challah recipe is an experience not to be missed.
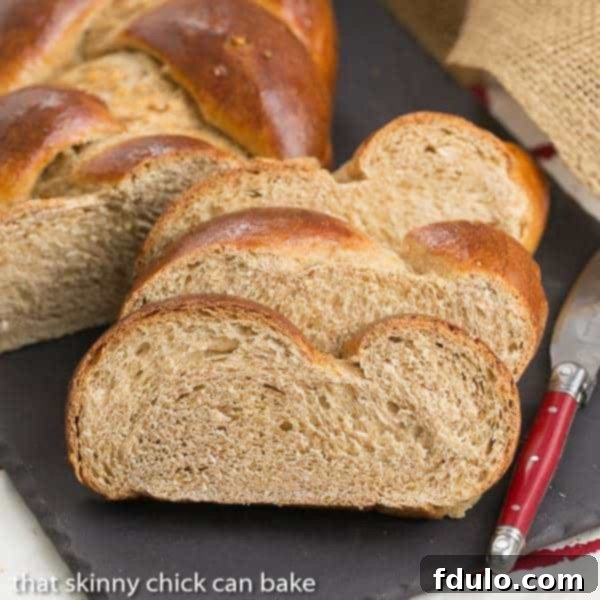
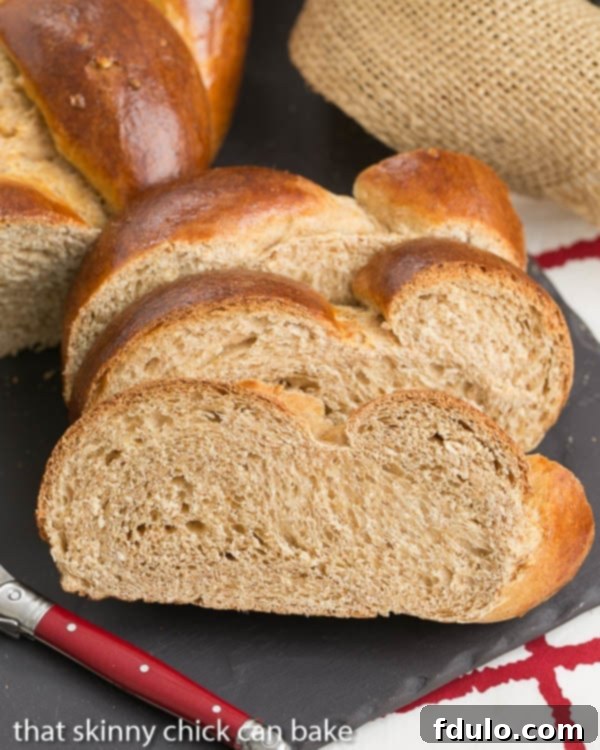
There’s something uniquely comforting about a slice of freshly baked bread. When that bread is a warm, slightly sweet, and incredibly tender slice of Whole Wheat Challah Bread, the experience transcends ordinary enjoyment. The rich, golden crust gives way to a soft, resilient crumb that practically melts in your mouth. Pair it with a pat of melting butter, a drizzle of honey, or your favorite jam, and you’ve created a moment of pure culinary bliss. This Challah Recipe demystifies the baking process, making it accessible even for those new to yeast breads, ensuring a sensational result every time.
Baking the Perfect Whole Wheat Challah: A Journey into Flavor and Tradition
My journey with challah began far from its traditional roots, in the quiet town of Ames, Iowa. Growing up, this rich, braided bread wasn’t a staple in our home. It wasn’t until much later, after I’d left my childhood home, that my mom, inspired by a new neighbor, discovered the magic of baking these exquisite loaves. This newfound passion became a cherished tradition, one I eagerly embraced during a period when my husband, Bill, was completing a cardiology fellowship in nearby Des Moines. Living just 30 miles from my parents’ house, we frequently visited, eager for our son to spend time with his grandparents and, I must admit, to indulge in my mom’s home cooking.
It was during these visits that I truly fell in love with her challah – a bread so rich, subtly sweet, and wonderfully eggy. However, for years, I denied myself the pleasure, consistently opting for whole grain alternatives and avoiding white flour whenever possible. The thought of adapting such a beloved recipe to whole wheat seemed daunting, a culinary challenge I regrettably put off. Looking back, not attempting a whole wheat challah recipe sooner was a significant oversight! The moment I decided to rectify this, I printed out a handful of recipes, armed myself with enthusiasm, and embarked on what would become a rewarding baking adventure. The result exceeded all expectations, proving that whole wheat challah could be every bit as tender, flavorful, and visually appealing as its traditional counterpart.
Why Choose Whole Wheat Challah? Benefits Beyond Taste
While traditional challah is undeniably delicious, incorporating whole wheat flour brings a host of benefits, making it a fantastic choice for those looking to enjoy a classic bread with a healthier twist. Whole wheat flour retains the bran and germ of the wheat kernel, which are typically removed in white flour. This means it’s packed with dietary fiber, essential vitamins (like B vitamins), and minerals (such as iron, magnesium, and zinc). The fiber content aids in digestion, helps regulate blood sugar levels, and contributes to a feeling of fullness, making this challah a more substantial and nourishing option.
Beyond nutrition, whole wheat adds a delightful depth of flavor and a slightly chewier texture that complements the richness of challah beautifully. It imparts a subtle nuttiness that enhances the overall taste profile, making each bite more complex and satisfying. Don’t let the “whole wheat” aspect intimidate you; this recipe is designed to produce a challah that is tender and moist, dispelling any myths that whole grain breads must be dense or dry. It’s a smart choice for a wholesome yet indulgent bread.
The Art of Braiding: Crafting Your 3-Strand Challah Loaf
One of the most distinctive features of challah is its beautiful braided appearance. While there are elaborate braiding patterns, the 3-strand braid is classic, elegant, and surprisingly simple to master. I’m a huge fan of braided breads, and once you get the rhythm of plaiting, it’s truly a cinch. Growing up with three sisters during an era of long, straight hair, I had plenty of practice!
Though I’ve experimented with more complex six-stranded challah braids, I generally stick to the 3-strand version for its straightforward beauty and ease. Here’s a detailed guide to achieve a perfect 3-strand braid:
- Prepare Your Strands: Begin by dividing your dough into three equal portions. Roll each portion into a long, even rope, aiming for about 12-14 inches in length. It’s helpful if the middles are slightly thicker and the ends gently tapered.
- Arrange the Ropes: Lay the three ropes out side by side on a lightly floured surface or a piece of parchment paper. Ensure one set of tapered ends is facing you.
- Pinch and Secure: Firmly pinch the three strands together at the end furthest from you. This creates an anchor point for your braid.
- Start Braiding – Right Over Middle: Take the strand on the far right and cross it over the middle strand. The right strand now becomes the new middle strand.
- Continue Braiding – Left Over New Middle: Next, take the strand that is now on the far left and cross it over the *new* middle strand. This left strand now takes the middle position.
- Repeat the Pattern: Continue this alternating pattern: always take the strand on the far right and cross it over the middle, then take the strand on the far left and cross it over the new middle. Maintain even tension as you braid to create a uniform loaf.
- Finish the Braid: When you reach the end of the ropes, firmly pinch together the loose strands at the end closest to you.
- Tuck and Shape: Tuck both sets of pinched ends (the starting end and the finishing end) neatly under the loaf. This creates a clean, rounded appearance for your challah. Your beautifully braided loaf is now ready for its final proofing.
For visual learners, countless excellent YouTube videos demonstrate the braiding process. Tori Avey’s blog, for example, offers terrific braiding tutorials that can provide helpful visual cues.
Essential Tips for Baking a Flawless Whole Wheat Challah
Baking challah is a rewarding process, and a few key techniques can elevate your homemade loaf from good to truly exceptional. These tips focus on achieving that signature glossy crust, ensuring optimal texture, and knowing when your bread is perfectly done.
- The Secret to a Glossy Crust: Egg Wash: Challah is renowned for its beautiful, shiny surface. This characteristic glaze is achieved by brushing the loaves with an egg wash before baking. A simple egg beaten with a teaspoon of water or milk creates that rich, golden hue and lovely sheen.
- Choosing Your Brush: I prefer using a silicone brush for glazing. It applies the wash smoothly, is easy to clean (often dishwasher-safe), and doesn’t shed bristles into your dough, unlike some natural bristle brushes.
- Dorie Greenspan’s Double Glaze Trick: For maximum shine and even coverage, employ a trick I learned from the esteemed baker Dorie Greenspan. Apply the first layer of egg wash before the loaf goes into the oven. Then, after the challah has baked for about 15 minutes and has begun to expand and rise from the heat, apply a second layer of egg wash. This ensures that the newly exposed surfaces of the expanding bread also get coated, resulting in a uniformly glossy crust across the entire loaf.
- Perfect Kneading with the Window Pane Test: Whether you’re kneading by hand or with a stand mixer, proper kneading is crucial for developing the gluten structure that gives challah its chewy yet tender texture. You’ll know the dough is kneaded long enough when it passes the “window pane” test. Gently stretch a small piece of dough between your fingers; if it stretches thin enough to be translucent (like a window pane) without tearing, it’s ready. If it rips, continue kneading for a few more minutes and retest. This indicates sufficient gluten development and elasticity.
- Knowing When Your Challah is Done: The most accurate way to determine if your challah is fully baked is by using an instant-read thermometer. Insert the thermometer into the thickest part of the loaf. When the internal temperature reaches 190°F (88°C), your challah is perfectly cooked through. This method prevents under-baking or over-drying the bread, guaranteeing a moist interior.
I genuinely hope this comprehensive guide inspires you to try baking a braided loaf of whole wheat challah! The process is incredibly satisfying, and the end result is a truly special bread that’s perfect for any occasion.
Frequently Asked Questions About Challah
Challah (pronounced KHAH-luh), also spelled Hallah or Challa, is a rich, traditional Jewish yeast bread. It’s typically made with eggs, oil (or butter in non-kosher versions), sugar, and often braided into an oblong loaf or a round shape, particularly for holidays like Rosh Hashanah. Served on the Sabbath (Shabbat) and other Jewish holidays, challah symbolizes the manna that fell from heaven. In biblical Hebrew, the word ‘challah’ originally referred to a portion of dough set aside as an offering to God, but over time, it came to refer to the bread itself.
Both methods are effective, and the choice often comes down to personal preference and equipment availability. Kneading by hand can be a therapeutic process, but it requires significant physical effort and will take at least 20 minutes to achieve the proper smooth, elastic consistency. If you use the dough hook attachment of a stand mixer, the process is much quicker and less strenuous, typically taking 5 to 10 minutes, depending on your mixer’s power and dough consistency.
The “Window Pane” test is the most reliable indicator. Take a small piece of dough (about the size of a golf ball) and gently stretch it between your fingers. If you can stretch it thin enough to see light pass through it without the dough tearing, resembling a translucent window pane, then the gluten has been sufficiently developed, and your dough is ready. If it tears easily, continue kneading for a few more minutes and test again.
The most accurate method is to use an instant-read thermometer. Insert the probe into the center of the loaf. Your challah is fully baked and safe to remove from the oven when its internal temperature reaches 190°F (88°C). The crust will also be a beautiful golden brown.
Absolutely! Challah dough can be prepared a day in advance. After the first rise, punch down the dough, cover it tightly with plastic wrap, and refrigerate it overnight. The cold temperature slows down yeast activity, allowing the dough to develop more flavor. On baking day, remove the dough from the refrigerator, let it come to room temperature for about 30-60 minutes, then proceed with shaping, braiding, and the second rise as usual.
Freshly baked challah is best enjoyed the day it’s made. To store leftovers, allow the bread to cool completely. Then, wrap it tightly in plastic wrap or foil, or place it in an airtight container. It will stay fresh at room temperature for 2-3 days. For longer storage, challah freezes exceptionally well.
Serving Suggestions and Delicious Variations
Whole Wheat Challah is incredibly versatile and can be enjoyed in numerous ways. Its slightly sweet and rich flavor makes it perfect for both sweet and savory applications. Serve warm slices with butter, cream cheese, or your favorite jam for a delightful breakfast or brunch. It’s also fantastic for sandwiches, providing a soft yet sturdy base for your fillings. And, of course, challah is the ultimate bread for making the most decadent French toast imaginable!
Looking to get creative? Here are a few variations you might consider:
- Sweet Challah: Add a handful of raisins or dried cranberries to the dough during the kneading stage. A sprinkle of cinnamon sugar over the egg wash before baking also adds a lovely touch.
- Savory Challah: Incorporate herbs like rosemary or thyme, or finely chopped caramelized onions into the dough. A sprinkle of sesame seeds or poppy seeds on top before baking adds both flavor and visual appeal.
- Honey Challah: Substitute some of the brown sugar with honey for a deeper, more aromatic sweetness, particularly lovely for Rosh Hashanah.
- Chocolate Chip Challah: For a kid-friendly treat, fold in miniature chocolate chips during the final stages of kneading.
You May Also Like These Braided Loaves:
- Russian Braided Bread with Pesto Filling from Barbara Bakes
- Braided Semolina Bread from Foodie with Family
- Chocolate Challah Bread from Belly Full
- Braided Challah Bread
- Pumpkin Challah
- Spinach Onion Braid
- Braided Cinnamon Danish
- Plus, Challah Pretzels
- More Bread Recipes
Whole Wheat Challah Recipe
The Recipe:
Whole Wheat Challah Recipe
20 minutes
30 minutes
50 minutes
2 loaves
A rich, egg-based bread made with whole wheat, featuring a tender crumb and a beautiful braided crust.
Ingredients
- 2 (.25 ounce) packages instant yeast (Red Star Platinum recommended)
- 1 cup warm water (105-115°F / 40-46°C)
- ½ cup brown sugar
- ½ cup unsalted butter, at room temperature
- 2 teaspoons salt
- 3 large eggs
- 2 cups whole wheat flour
- 2 cups all-purpose flour (may add up to 1/2 cup more if needed)
- ½ cup old-fashioned rolled oats
- 1 egg, beaten with 1 teaspoon water (for egg wash)
Instructions
- In the bowl of a stand mixer, combine the instant yeast and warm water. Let stand for about 5 minutes until foamy.
- With the paddle attachment, mix in 3 eggs, brown sugar, softened butter, salt, whole wheat flour, 2 cups of the all-purpose flour, and rolled oats until just combined.
- Switch to the dough hook attachment. Knead the dough on medium-low speed until it becomes smooth and elastic, about 5 to 10 minutes. Add more all-purpose flour, one tablespoon at a time, if the dough is too sticky, until it clears the sides of the bowl. Perform the “window pane” test to ensure proper kneading.
- Shape the dough into a ball and place it in a large, lightly oiled bowl. Flip the dough over once to coat the entire surface with oil. Cover the bowl loosely with plastic wrap or a damp kitchen towel and let it rise in a warm, draft-free area until doubled in size, approximately 2 hours.
- Gently punch down the risen dough to release the air. Recover the bowl and let the dough rise again until doubled, about 1 hour. This second rise develops more flavor and improves texture.
- Punch down the dough a second time. Divide the dough in half to make two loaves.
- Take one-half of the dough and divide it into 3 equal pieces. Roll each piece into a rope, about 12-14 inches long, tapering the ends slightly. Pinch the three ropes together at one end to secure, then braid them as described in the “Art of Braiding” section above.
- Place the braided loaf on a baking sheet lined with parchment paper. Repeat the braiding process with the remaining half of the dough for the second loaf.
- Cover the braided challah loaves loosely with a dry cloth and let them rise in a warm spot until doubled in size, about 1 hour. This is the final proofing.
- While the loaves are proofing, preheat your oven to 350°F (175°C).
- Once risen, gently brush the first layer of egg wash (1 egg beaten with 1 teaspoon water) over the surface of both loaves.
- Bake in the preheated oven for 20-30 minutes, or until golden brown. After about 15 minutes of baking, open the oven and carefully brush the loaves with a second layer of egg wash for an extra glossy finish. Continue baking until the internal temperature reaches 190°F (88°C) using an instant-read thermometer.
- Remove the challah from the oven and transfer it to a wire rack to cool completely before slicing and serving.
Notes
Use an instant-read thermometer to check for doneness. Your challah should read 190°F (88°C) when fully baked to ensure a moist interior.
Recommended Baking Essentials
As an Amazon Associate and member of other affiliate programs, I earn from qualifying purchases.
- Thermapen Instant Read Thermometer
- Reynolds Cookie Baking Sheets Non-Stick Parchment Paper
- USA Pan Bakeware Half Sheet Pan
- KitchenAid Artisan Tilt-Head Stand Mixer
Nutrition Information (per serving):
Amount Per Serving (based on 24 servings per loaf):
Yield: 24 servings (for two loaves)
- Calories: 1657
- Total Fat: 58g
- Saturated Fat: 32g
- Trans Fat: 2g
- Cholesterol: 362mg
- Sodium: 1317mg
- Carbohydrates: 246g
- Fiber: 21g
- Sugar: 37g
- Protein: 45g
Stay in touch through social media @ Instagram, Facebook, and Pinterest. Don’t forget to tag me when you try one of my recipes! And if you love the results, please consider giving it a 5-star rating in the comments section below.
