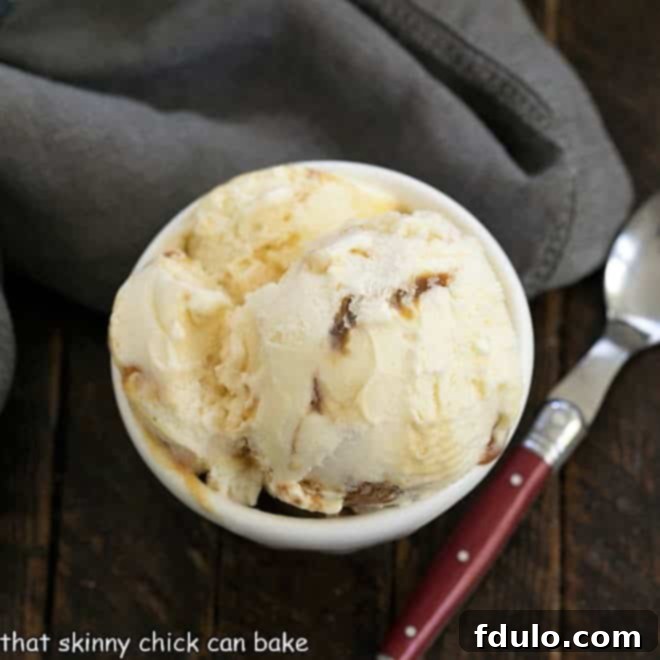
Irresistible Vanilla Caramel Swirl Ice Cream: Your New Favorite Homemade Treat
Indulge in the luxurious fusion of creamy vanilla bean ice cream and luscious, buttery caramel sauce. This fabulous Vanilla Caramel Swirl Ice Cream is a dream come true for any dessert lover, proving once and for all that caramel desserts reign supreme! Get ready to elevate your homemade ice cream game with this exquisite recipe.
This Caramel Ice Cream masterpiece transforms a classic Vanilla Ice Cream Recipe into an extraordinary culinary experience. If you consider yourself a true caramel enthusiast, prepare to be captivated from your very first spoonful. The rich, smooth vanilla base perfectly complements generous ribbons of sweet, golden caramel, creating a symphony of flavors that will leave you utterly swooning.
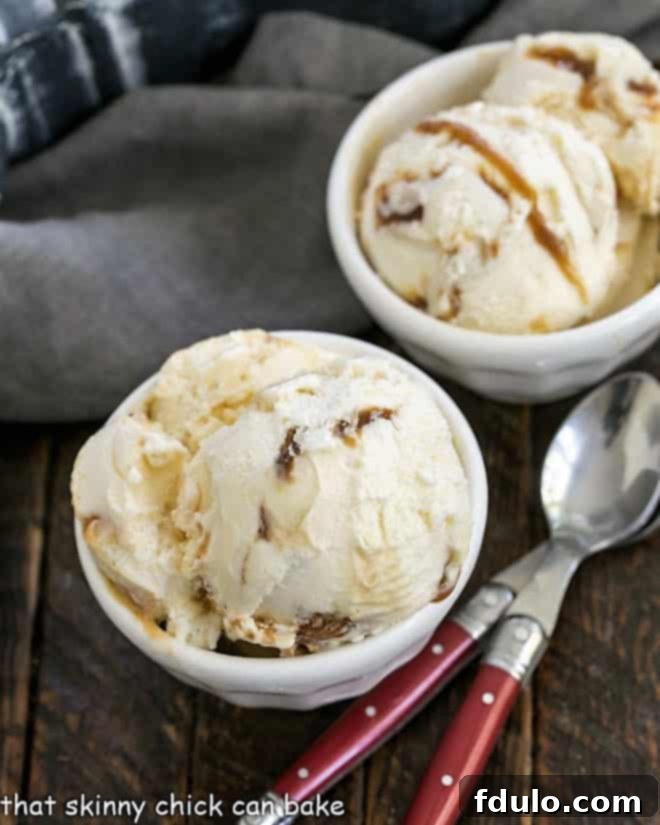
Why You Absolutely Must Make This Decadent Ice Cream
There are countless reasons why this Vanilla Caramel Swirl Ice Cream needs to be at the top of your dessert bucket list. Beyond its incredible flavor, making this recipe offers several delightful benefits:
- **A Caramel Lover’s Dream:** If you find yourself consistently drizzling caramel sauce or rich dulce de leche over your store-bought ice cream, imagine the unparalleled delight of homemade ice cream with perfectly integrated swirls. This recipe takes that simple pleasure and amplifies it into a gourmet experience.
- **Two Recipes in One:** This isn’t just an ice cream recipe; it’s a dual culinary lesson! You’ll master the art of creating both a lusciously smooth vanilla bean ice cream base and a rich, velvety homemade caramel sauce. These are fundamental skills that can be applied to countless other desserts.
- **Customizable Indulgence:** Craving that popular sweet and savory balance? It’s incredibly simple to transform this into a Salted Caramel Swirl Ice Cream by adding a touch more kosher salt to your homemade caramel. This slight savory note enhances the sweetness, creating an even more complex and satisfying flavor profile that will have you reaching for a second scoop.
- **Impress Your Guests (or Yourself!):** Serving homemade ice cream, especially one as visually stunning and flavorful as this caramel swirl, is a sure-fire way to impress. It’s a labor of love that truly shines through in every bite, making any occasion feel special.
- **The Ultimate Comfort Food:** There’s something inherently comforting about a scoop of rich, creamy ice cream. When that ice cream is infused with the warm, buttery notes of caramel, it becomes the ultimate treat for a cozy night in or a sunny afternoon.
The Story Behind the Swirl: A Denver-Inspired Delight
Inspiration can strike anywhere, even during a simple evening stroll! During a recent trip to Denver, my family and I enjoyed nightly rituals of visiting the hotel lobby for single servings of Häagen-Dazs. My son, Bill, predictably chose chocolate, but it was my daughter, Katie, who sparked the idea for this recipe with her adventurous pick: dulce de leche. That rich, caramelized milk flavor instantly ignited a creative spark.
I immediately knew I had to recreate that sublime experience, but with my own signature twist. The challenge was to develop a homemade vanilla ice cream recipe that was decadent enough to stand on its own, yet perfectly complemented by a swirl of equally amazing caramel. The goal was to develop a recipe that would thrill both Katie and myself, and after some delightful recipe testing, this Vanilla Caramel Swirl Ice Cream was born, capturing that Denver-inspired sweetness in every perfect ribbon.
Essential Ingredients for the Perfect Caramel Swirl Ice Cream
Creating extraordinary ice cream begins with high-quality ingredients. Here’s a closer look at what you’ll need and why each component is vital for achieving that rich flavor and creamy texture:
For the Vanilla Custard Base:
- Egg Yolks: These are the secret to a rich, silky, and incredibly creamy ice cream. Yolks act as an emulsifier, binding the fat and water, and contribute to the custard’s luxurious body and mouthfeel. Don’t skip them for that gourmet texture!
- Dark Brown Sugar: While light brown sugar can be used, dark brown sugar is preferred for its deeper molasses notes. These subtle undertones enhance the caramel flavor in the base, providing a more complex and harmonious foundation for the caramel swirl.
- Heavy Cream (36%-38% Butterfat): The star of any truly decadent ice cream! The high butterfat content is crucial for a smooth, rich, and scoopable texture, preventing ice crystals from forming. For the custard, it can be cold, but for the caramel sauce, ensure it’s at room temperature to prevent seizing.
- Whole Milk: Don’t compromise on the fat content here. Whole milk adds to the overall richness and creamy consistency of the ice cream. Skim milk will result in a less satisfying, icier product.
- Kosher Salt: A pinch of salt in the ice cream base isn’t just for flavor; it helps to balance the sweetness and enhances the vanilla notes, bringing out their full potential.
- Vanilla Bean Paste: This is my preferred choice for that authentic, gourmet touch. Vanilla bean paste offers intense vanilla flavor and those beautiful, visible specks of vanilla seeds, indicating quality. Pure vanilla extract (not imitation) can be substituted in equal amounts if paste isn’t available, but you’ll miss the visual appeal.
For the Luscious Caramel Swirl:
- Granulated Sugar: The foundation of our caramel. While seemingly simple, mastering the caramelization process of sugar is key to its depth of flavor.
- Heavy Cream (Warmed): As mentioned, it’s critical for this portion of the heavy cream to be at room temperature or slightly warmed. Adding cold cream to hot caramelized sugar can cause the mixture to seize and clump. Warming it ensures a smooth, even incorporation.
- Kosher Salt: Essential for enhancing the caramel’s buttery richness and preventing it from becoming cloyingly sweet. For a salted caramel ice cream, you might increase this slightly.
- Vanilla Extract: Added at the end, vanilla extract rounds out the caramel’s flavor, providing a fragrant warmth that complements its sweetness.
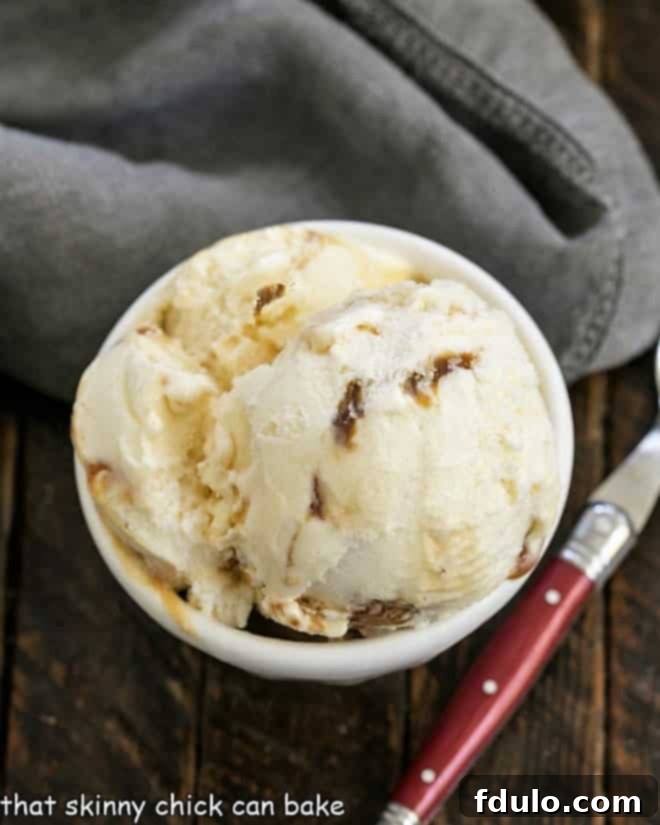
Master the Art of Homemade Ice Cream: Expert Tips for Success
Making homemade ice cream, especially with a luscious caramel swirl, can seem intimidating, but with these expert tips, you’ll achieve perfect results every time. Whether you’re a novice or an experienced home cook, these insights will ensure a smooth and delicious process.
Crafting the Creamy Vanilla Custard Base:
- **Temper Your Eggs with Care:** The ice cream base is essentially a custard, and egg yolks are a delicate component. When combining the hot cream mixture with the egg yolks, it’s vital to temper them. This slow warming process prevents the eggs from scrambling. Slowly whisk a small amount (about ½ cup) of the hot cream into the egg yolks constantly, then repeat. This gradually brings the eggs up to temperature before they’re fully incorporated into the hot liquid.
- **Chill Thoroughly for Flavor and Texture:** For the best results, chill your custard base overnight. This allows it to become exceptionally cold, which is crucial for efficient churning in your ice cream maker. More importantly, it gives the vanilla flavor ample time to infuse deeply into the base, resulting in a richer and more pronounced vanilla taste.
- **The “Coat the Back of a Spoon” Test:** This classic culinary technique confirms your custard has reached the perfect thickness. Dip a spoon into the custard, then draw your finger across the back of the spoon. If it leaves a clean, distinct stripe that doesn’t run, your custard is ready.
- **Strain for Ultimate Smoothness:** Don’t skip the straining step! Passing the cooked custard through a fine-mesh strainer will catch any minuscule bits of cooked egg or impurities, ensuring your final ice cream is incredibly smooth and velvety.
- **Add Vanilla Bean Paste AFTER Straining:** If you’re using vanilla bean paste for those beautiful specks, add it to the custard after you’ve strained it. Straining beforehand would filter out those lovely vanilla seeds, defeating the purpose.
Achieving Perfect Homemade Caramel Sauce:
- **Patience is Key:** Making caramel requires your full attention and patience. Do not rush the process by cranking up the heat, as sugar burns quickly and easily. A steady medium-high heat is ideal for a controlled caramelization.
- **Room Temperature Cream is a PRO-Tip:** This is perhaps the most crucial tip for a smooth caramel. Ensure your heavy cream is at room temperature before adding it to the hot sugar. Cold cream will cause the hot sugar to seize and harden instantly, making it difficult to melt out the lumps. Drizzling it in slowly while continuously stirring also aids in seamless incorporation.
- **Don’t Fear the Lumps (Most of the Time!):** Even with careful attention, sometimes small lumps of hardened sugar can form when the cream is added. Don’t panic! Simply reduce the heat to low and continue stirring gently. The residual heat will slowly melt the sugar lumps back into the smooth caramel sauce.
- **Watch for the Color Change:** Caramel’s flavor deepens with its color. Aim for an amber to deep copper color. Too light, and it will lack depth; too dark, and it will taste burnt. Practice makes perfect here!
Step-by-Step Guide: How to Create Irresistible Vanilla Caramel Swirl Ice Cream
Embark on your journey to homemade ice cream perfection with this detailed, easy-to-follow guide. We’ll break down the process into three main parts: preparing the vanilla custard, crafting the caramel sauce, and finally, swirling your delicious creation.
Part 1: Preparing the Velvety Vanilla Custard
- Prepare the Egg Yolks: In a large, heatproof measuring cup or bowl, thoroughly whisk the egg yolks with ¼ cup of the dark brown sugar until the mixture is pale yellow and slightly thickened. Set this aside.
- Heat the Cream Mixture: In a heavy-bottomed saucepan, combine the heavy cream, whole milk, kosher salt, and the remaining ¼ cup of dark brown sugar. Place the pan over medium-high heat, stirring occasionally.
- Bring to a Simmer: Watch the mixture carefully. As soon as it begins to simmer gently around the edges, reduce the heat immediately to low to prevent scorching.
- Temper the Egg Yolks: This crucial step ensures a smooth custard. While continuously whisking the egg yolk mixture, slowly drizzle about ½ cup of the hot cream mixture into the yolks. This gradually warms the eggs. Repeat this process with another ½ cup of hot cream mixture.
- Combine Mixtures: Pour the warmed egg-cream mixture back into the saucepan with the remaining hot cream, whisking constantly as you pour to ensure everything is well combined and smooth.
- Cook the Custard: Continue to cook the mixture over medium heat, stirring constantly with a wooden spoon or spatula. Do not allow it to boil. The custard is done when it thickens enough to “coat the back of a spoon”—meaning if you run your finger across the back of the spoon, it leaves a clean path. This typically takes about 1-2 minutes after combining.
- Strain and Cool: Immediately strain the hot custard mixture through a fine-mesh strainer into a clean, heatproof container. This removes any small bits of cooked egg, ensuring a super smooth texture. Place this container into an ice-water bath (a large bowl or your sink filled with ice cubes and some water works well). Stir the custard occasionally until it is thoroughly cooled.
- Add Vanilla: Once the custard has cooled, stir in the vanilla bean paste. Adding it now preserves its delicate flavor and ensures those beautiful specks remain visible.
- Chill Overnight: Remove the container from the ice bath, cover it tightly with plastic wrap, and refrigerate for a minimum of 2 hours, or ideally, overnight. A well-chilled custard churns into the creamiest ice cream.
Part 2: Crafting the Silky Caramel Sauce
- Prepare for Caramel: While your ice cream base chills, you can prepare the caramel sauce. Have your warmed heavy cream ready and close to the stove – its room temperature is key.
- Initial Sugar Melt: Place 2 tablespoons of granulated sugar into a clean, heavy-bottomed saucepan over medium-high heat. Allow the sugar to melt around the edges and begin to turn golden before gently stirring.
- Gradual Sugar Addition: Add another 2 tablespoons of sugar to the pan, stirring gently. Continue adding the remaining sugar 2 tablespoons at a time, stirring frequently. Allow most of the sugar to melt and caramelize before adding more. Watch the color carefully as it darkens from golden to a deep amber. This gradual process helps prevent burning and promotes even melting.
- Caramelization Complete: Once all the sugar has melted and caramelized to a beautiful deep amber color, slowly and carefully pour in the warmed heavy cream. The mixture will bubble furiously and steam will rise – this is normal! Be cautious and keep your face away from the steam.
- Smooth the Caramel: Once the vigorous bubbling subsides, gently stir the cream into the caramelized sugar until fully blended. If any hard sugar lumps form, simply reduce the burner heat to low and continue stirring until the sugar melts back into the smooth sauce.
- Flavor and Cool: Stir in the kosher salt and vanilla extract. Remove the caramel from the heat and allow it to cool completely to room temperature before using it. It will thicken as it cools.
Part 3: Assembling Your Swirled Masterpiece
- Churn the Ice Cream: Pour the thoroughly chilled vanilla custard base into your ice cream maker and churn according to the manufacturer’s instructions. This usually takes about 20-30 minutes, resulting in soft-serve consistency.
- Layer the Swirl: Once the ice cream is frozen to a soft-serve consistency, begin layering it into your chosen freezer-safe container. Start by spooning about a third of the ice cream into the container. Drizzle approximately 2 tablespoons of the cooled caramel sauce evenly over this layer.
- Repeat Layers: Repeat the layering process two more times: another third of the ice cream, followed by 2 tablespoons of caramel. You will likely have some leftover caramel sauce – perfect for topping individual servings later!
- Create the Swirl: Using a knife or a chopstick, gently swirl the caramel through the ice cream layers a few times. Don’t overmix, or you’ll lose the beautiful ribbon effect. You want distinct streaks of caramel.
- Final Freeze: If you prefer a softer, immediate-serve ice cream, you can enjoy it right away. For a firmer, more traditional scoop, cover the container tightly and freeze for at least 4 hours, or preferably overnight, before serving.
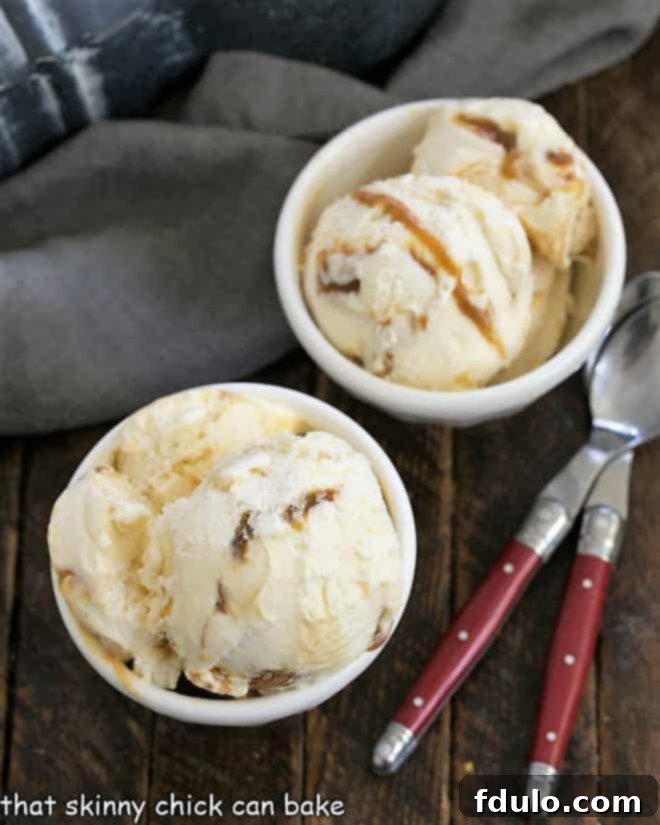
Frequently Asked Questions About Caramel Swirl Ice Cream
Caramel, like many sugar-based syrups and sauces, has a very high sugar content and relatively low water content. Sugar acts as an antifreeze, significantly lowering the freezing point of water. This means that water-based ingredients with a high sugar concentration, like caramel, won’t freeze to a hard, solid block at typical freezer temperatures. Instead, it remains soft and chewy, creating those delectable ribbons of goodness within the firmer ice cream.
There are primarily two delightful ways to infuse caramel into ice cream. The first method, which creates a more uniformly flavored ice cream, involves blending the caramel directly into the custard base before churning and freezing. This results in a subtle, caramel-infused ice cream. The second, and arguably more exciting method, is the one detailed in this recipe: swirling a rich caramel sauce into already-churned homemade vanilla ice cream. This creates distinct, beautiful ribbons of caramel throughout the creamy base, offering bursts of intense caramel flavor with every spoonful.
While this recipe is optimized for an ice cream maker to achieve the creamiest texture, you can adapt it to a no-churn method. After preparing and chilling the vanilla custard base, whip a batch of heavy cream to stiff peaks. Gently fold the chilled custard into the whipped cream. Then, proceed with layering the mixture and caramel sauce as directed in Part 3. The whipped cream helps to lighten the base and incorporates air, mimicking some of the benefits of churning. However, expect a slightly denser, less airy texture compared to machine-churned ice cream.
Homemade ice cream, without the stabilizers found in commercial varieties, is best enjoyed within 1-2 weeks for optimal freshness and texture. To store it effectively, transfer the finished ice cream to an airtight, freezer-safe container. Press a piece of parchment paper or plastic wrap directly onto the surface of the ice cream before sealing the lid. This barrier helps prevent the formation of ice crystals and freezer burn, keeping your ice cream wonderfully creamy. Always store it in the coldest part of your freezer, typically at the back, away from the door.
This recipe is a fantastic starting point for customization! For a truly addictive flavor, add a pinch of flaky sea salt to your caramel sauce (or even sprinkle some over the finished ice cream) to create a Salted Caramel Swirl Ice Cream. You could also fold in toasted pecans or walnuts for a textural crunch, or swirl in some chopped chocolate chunks for a chocolate-caramel fusion. A drizzle of chocolate fudge or a sprinkle of espresso powder could also elevate the flavor profile, making it uniquely yours.
Delicious Variations & Serving Suggestions
While this Vanilla Caramel Swirl Ice Cream is spectacular on its own, here are a few ideas to customize it or serve it for an even more memorable dessert:
- Salted Caramel Delight: As mentioned, simply add a pinch of flaky sea salt (like Maldon) to your caramel sauce during the final steps, or sprinkle it over the ice cream before serving. The contrast of sweet and salty is irresistible.
- Nutty Crunch: Fold in toasted pecans, walnuts, or even candied almonds during the final layering stage for an added textural element and nutty flavor.
- Chocolate Lover’s Dream: Swirl in some mini chocolate chips or finely chopped dark chocolate along with the caramel for a decadent chocolate-caramel fusion.
- Coffee Kiss: A teaspoon of instant espresso powder dissolved in a tiny bit of hot water and added to the caramel sauce can give it a subtle, rich coffee undertone that pairs beautifully with vanilla and caramel.
Serve this exquisite ice cream in classic scoops, perhaps with an extra drizzle of the leftover homemade caramel sauce, a dollop of whipped cream, or a sprinkle of chopped nuts. It’s also fantastic alongside a warm brownie, a slice of apple pie, or as the centerpiece of an elegant dessert spread.
More Decadent Dessert Recipes You’ll Love
If you’re a fan of rich, satisfying desserts, be sure to explore these other fantastic recipes to satisfy your sweet cravings:
- Salted Caramel Ice Cream by Noshing with the Nolands
- Oreo Ice Cream
- Fresh Peach Ice Cream
- No-Churn Ice Cream Cake
- Chocolate Ice Cream Pie
- Discover more of theBest Dessert Recipes
Stay in touch through social media @ Instagram, Facebook, and Pinterest. Don’t forget to tag me when you try one of my recipes! And if you love the results, please give it a 5-star rating in the recipe card.
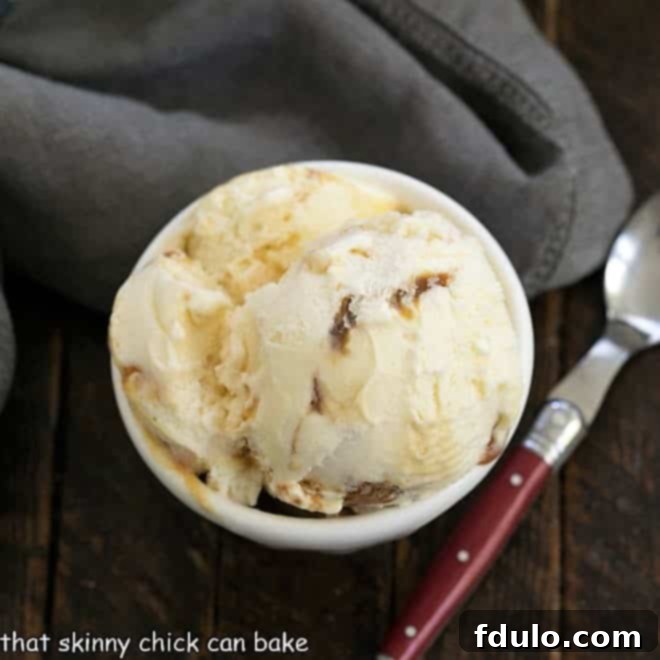
Vanilla Caramel Swirl Ice Cream
30 minutes
25 minutes
8 hours
8 hours 55 minutes
8 servings
A luscious vanilla bean ice cream swirled with rich, homemade caramel sauce. The ultimate homemade indulgence!
Ingredients
For the Vanilla Custard Base:
- 5 large egg yolks
- ½ cup packed dark brown sugar, divided
- 1 ¾ cups heavy cream (36-38% butterfat)
- ¾ cup whole milk
- ¼ teaspoon kosher salt
- 2 teaspoons vanilla bean paste (or pure vanilla extract)
For the Caramel Swirl Sauce:
- 1 cup granulated sugar
- ¾ cup heavy cream, warmed to room temperature
- ⅛ teaspoon kosher salt
- 1 teaspoon pure vanilla extract
Instructions
- Prepare Egg Yolks: In a large Pyrex measuring cup or heatproof bowl, whisk the egg yolks with ¼ cup of the dark brown sugar until light and creamy. Set aside.
- Heat Cream Mixture: In a heavy saucepan, combine 1 ¾ cups heavy cream, ¾ cup whole milk, ¼ teaspoon kosher salt, and the remaining ¼ cup of dark brown sugar. Place over medium-high heat, stirring until sugar dissolves and mixture just begins to simmer.
- Temper Egg Yolks: Remove about ½ cup of the hot cream mixture from the saucepan. While continuously whisking the egg yolk mixture, slowly drizzle the hot cream into the yolks. Repeat this step with another ½ cup of hot cream to gradually warm the eggs.
- Combine and Cook Custard: Pour the warmed egg-cream mixture back into the saucepan with the remaining hot cream, whisking constantly. Cook over medium heat, stirring continuously, until the custard thickens enough to coat the back of a spoon (about 1-2 minutes). Do not boil.
- Strain and Cool: Immediately strain the custard through a fine-mesh strainer into a clean container. Place the container into an ice-water bath and stir occasionally until thoroughly cool.
- Add Vanilla: Stir in the 2 teaspoons of vanilla bean paste (or vanilla extract).
- Chill Base: Remove the container from the ice bath, cover with plastic wrap, and refrigerate for at least 2 hours or, ideally, overnight.
- Make Caramel Sauce: While the ice cream base chills, prepare the caramel. Have the ¾ cup warmed heavy cream (room temperature) nearby. In a heavy saucepan over medium-high heat, add 2 tablespoons of the granulated sugar. When it melts and turns golden around the edges, stir gently and add another 2 tablespoons. Continue adding the remaining sugar 2 tablespoons at a time, stirring frequently, until all sugar is melted and caramelized to a deep amber color.
- Add Cream to Caramel: Slowly and carefully pour the warmed heavy cream into the hot caramelized sugar. It will bubble vigorously. Once bubbling subsides, gently stir until smooth. If lumps form, reduce heat to low and cook, stirring, until lumps dissolve.
- Flavor Caramel: Stir in the ⅛ teaspoon kosher salt and 1 teaspoon vanilla extract into the caramel. Allow the caramel sauce to cool completely to room temperature.
- Churn Ice Cream: Pour the chilled custard base into your ice cream maker and churn according to manufacturer’s instructions until it reaches a soft-serve consistency.
- Layer and Swirl: Transfer about a third of the churned ice cream into a freezer-safe container. Drizzle 2-3 tablespoons of the cooled caramel sauce over it. Repeat this layering process two more times.
- Create Swirls: Use a knife or chopstick to gently swirl the caramel through the ice cream. Do not overmix.
- Freeze: Cover the container tightly and freeze for at least 4 hours, or until firm, before serving. You will have leftover caramel for topping.
Notes
Yields approximately 1 quart of ice cream.
Total time includes chilling the custard base (at least 2 hours, ideally overnight) and final freezing time (at least 4 hours).
Adapted from Epicurious.com
For a shortcut, use 6-8 tablespoons of good quality store-bought dulce de leche or premium jarred caramel sauce for swirling.
Recommended Products
As an Amazon Associate and member of other affiliate programs, I earn from qualifying purchases.
- Fine-Mesh Sieve
- Ice Cream Maker
- Durable Ice Cream Scoop
Nutrition Information:
Yield:
8
Serving Size:
1 scoop
Amount Per Serving:
Calories: 445Total Fat: 30gSaturated Fat: 19gTrans Fat: 1gUnsaturated Fat: 10gCholesterol: 202mgSodium: 136mgCarbohydrates: 40gFiber: 0gSugar: 40gProtein: 5g
HOW MUCH DID YOU LOVE THIS RECIPE?
Please leave a comment on the blog or share a photo on Pinterest
