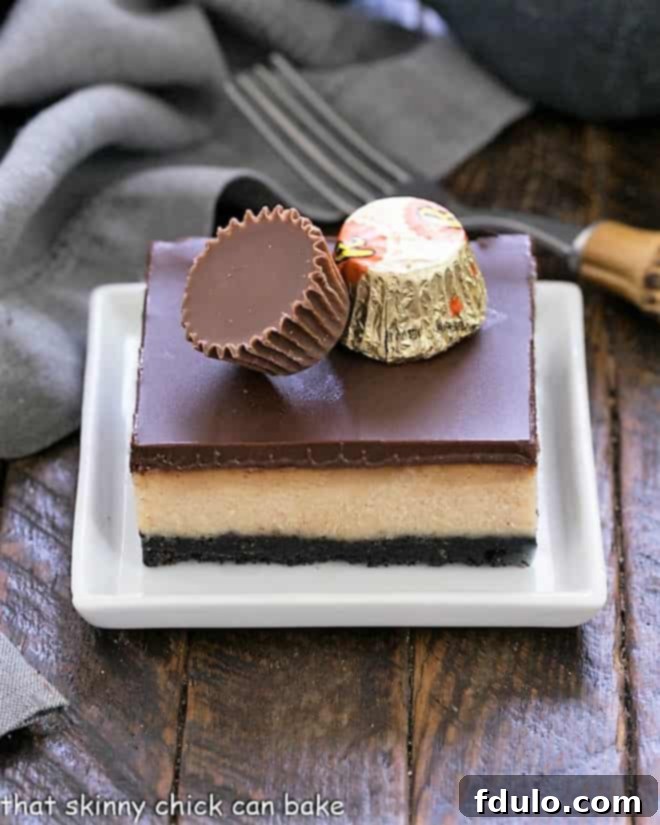
Welcome to a world where creamy cheesecake meets the irresistible allure of peanut butter and chocolate. Our Cheesecake Peanut Butter Bars are not just a dessert; they are an experience, a symphony of flavors and textures designed to captivate your senses. Imagine a rich, crunchy Oreo crust, a velvety smooth peanut butter cheesecake filling, and a decadent blanket of chocolate ganache crowning it all. This isn’t just an easy dessert; it’s an outrageously delicious one that promises to satisfy even the most intense chocolate-peanut butter cravings. Get ready to be utterly enchanted!
For those who adore the classic combination of chocolate and peanut butter, these bars offer a sophisticated and incredibly satisfying twist. Far simpler to prepare than a traditional cheesecake, this recipe strikes the perfect balance, delivering a harmonious blend of sweet, salty, and utterly luscious notes in every single bite. If you’re a fan of peanut butter cups, prepare to discover your new favorite indulgence. These layered marvels are an instant hit, designed to make every occasion feel a little more special, or simply to elevate your everyday snacking.
Why These Peanut Butter Cheesecake Bars Are an Absolute Must-Make
In a world full of desserts, these Peanut Butter Cheesecake Bars truly stand out. They are more than just a sweet treat; they’re a celebration of iconic flavors coming together in perfect harmony. Here’s why you absolutely need to add this recipe to your baking repertoire:
- The Ultimate Chocolate & Peanut Butter Fusion: If the thought of rich chocolate paired with creamy peanut butter makes your mouth water, then this recipe is tailor-made for you. It takes that beloved flavor combination to a whole new level of gourmet indulgence.
- A Dreamy Cheesecake Core: What sets these bars apart is the sublime peanut butter layer – it’s a luscious cheesecake! This adds an incredible creaminess and a slightly tangy richness that complements the sweetness of the peanut butter and chocolate beautifully, creating a complex and satisfying taste.
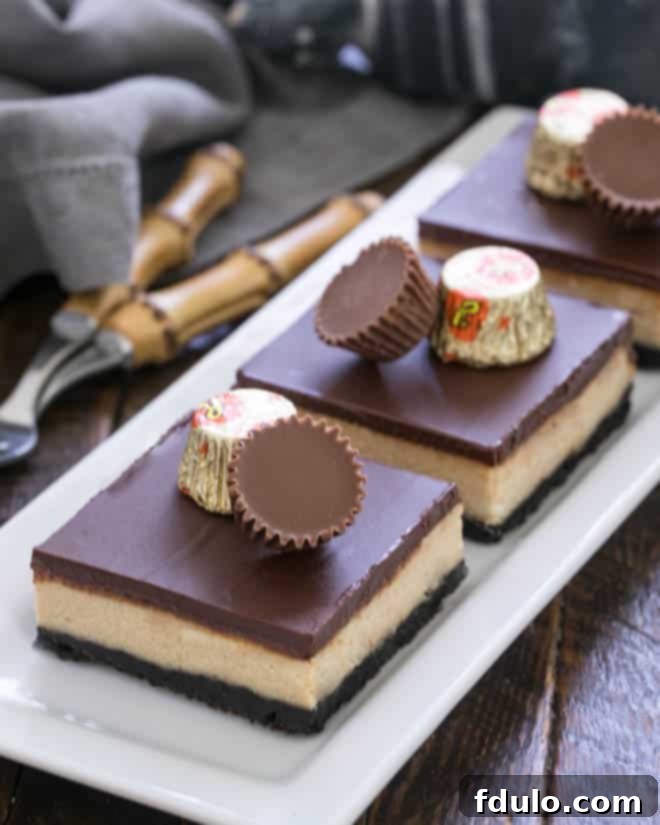
- Visually Stunning Layers: When cut, these bars reveal three distinct, beautifully contrasted layers: a dark, crumbly crust, a light, creamy peanut butter cheesecake, and a glossy chocolate ganache. Their impressive appearance makes them ideal for dazzling guests at parties, potlucks, or any special gathering.
- Easier Than Traditional Cheesecake: While they deliver all the sophistication of a classic cheesecake, these bars are significantly less fussy to make. No complicated water baths or delicate cracking worries – just pure baking joy.
- Perfect for Any Occasion: Whether you’re hosting a dinner party, celebrating a holiday, or simply craving something extraordinary on a quiet evening, these bars fit the bill perfectly. They’re robust enough to travel well and fancy enough to impress.
I recently found myself with an abundance of cream cheese and a persistent craving for a peanut butter dessert, even after finishing a batch of Stuffed Peanut Butter Rice Krispie Treats. The idea of more peanut butter bars wasn’t just appealing; it was a calling. So, I experimented and crafted these truly spectacular cheesecake bars, infusing them with that beloved peanut butter flavor. The result? Three heavenly layers: a robust Oreo crust, a creamy peanut butter cheesecake center, and a lavish, silky smooth chocolate ganache topping. For an extra touch of festive charm, I often garnish them with mini peanut butter cups – a delightful addition when serving company or celebrating a special moment.
Crafting Perfection: A Step-by-Step Guide to Your Peanut Butter Cheesecake Bars
Having perfected numerous cheesecake bars over the years, including delightful Twix Cheesecake Bars, refreshing Blackberry Cheesecake Bars, and vibrant Strawberry Cheesecake Bars, I’ve gathered invaluable insights. Each recipe boasts its unique charm, yet there are foundational tips that are universally essential for achieving that irresistibly creamy texture and stunning presentation. Here’s how to master these Peanut Butter Cheesecake Bars:
- Read the Recipe Thoroughly (Twice!): This might seem elementary, but it’s the most crucial first step. Before you even pull out your mixing bowls, take a moment to read the entire recipe from start to finish. More often than I’d like to admit, I’ve discovered a missing ingredient halfway through, leading to an inconvenient dash to the grocery store. Familiarizing yourself with each stage ensures a smooth and stress-free baking process.
- Prepare Your Pan Flawlessly: Proper pan preparation is the secret to effortless removal, clean cuts, and elegant serving. I highly recommend lining your baking pan with non-stick foil, leaving an overhang on the sides. This simple trick allows you to lift the entire batch of bars out of the pan and onto a cutting board, making the cutting process significantly easier. This method is particularly effective for 8×8-inch or 9×9-inch dessert pans, ensuring your bars maintain their pristine shape.
- Strive for Even Layers: The visual appeal of these bars lies in their distinct, even layers. To achieve this, pay attention to how you distribute each component. For the crust, after combining the cookie crumbs and melted butter, press them firmly and evenly into the bottom of the pan. You can use your hands, a flat-bottomed glass, or even the back of a measuring cup to compact it smoothly. An even crust provides a stable and visually appealing base.
- Master the Art of Spreading: For the cheesecake layer, pour the batter over the pre-baked crust and use an offset spatula to gently spread it out, ensuring an even thickness across the pan. Repeat this technique when applying the chocolate ganache topping. After spreading the ganache, a gentle shake of the pan back and forth will help it self-level and create a perfectly smooth, glossy surface. These small details make a significant difference in the final presentation.
Unlocking Cheesecake Excellence: Expert Tips for Success
When the magic of cheesecake is involved, a few simple tricks can elevate your dessert from good to absolutely sensational, ensuring an ultra-creamy, smooth texture that melts in your mouth. These minimal extra efforts are incredibly rewarding, transforming your Peanut Butter Cheesecake Bars into a truly spectacular treat. Heed these expert tips for cheesecake perfection:
- PRO-Tip: Embrace Room Temperature Ingredients. This is perhaps the most critical tip for any cheesecake, especially our peanut butter version. Ensure your cream cheese and eggs are at proper room temperature before you begin mixing. Cold ingredients, particularly cream cheese, will not blend smoothly, resulting in a lumpy batter and a less-than-silky final texture. Room temperature ingredients emulsify beautifully, drastically improving the texture and consistency of your cheesecake filling.
- PRO-Tip: Mind Your Mixing Technique. To achieve that dense, creamy cheesecake texture we all crave, it’s essential to minimize the incorporation of air into your batter. If you’re using a stand mixer, opt for the paddle attachment over the whisk. The paddle gently combines ingredients without whipping in excess air, which can lead to a soufflé-like, airy, or even cracked cheesecake. If you’re using a hand mixer, be careful not to overmix. Use a lower speed and stop as soon as your ingredients are just combined and homogenous. Overmixing at high speeds can introduce too much air, compromising the desired dense, rich texture.
- Avoid Overbaking the Cheesecake Layer. This is another common pitfall. Cheesecake continues to set as it cools. When you gently jiggle the pan, the very center of the cheesecake layer should still have a slight wobble, like softly set gelatin. The edges, however, should appear set. If it’s perfectly firm in the oven, it will likely be dry and cracked once fully cooled. Trust the jiggle – it’s your sign of a perfectly baked, creamy cheesecake.
- Cool Completely Before Ganache. Patience is a virtue here. After baking, allow the cheesecake bars to cool completely to room temperature on a wire rack. Then, and this is crucial, refrigerate them until they are thoroughly chilled and firm. Attempting to pour warm ganache over a warm or even slightly cool cheesecake will result in a messy, unset topping. A cold cheesecake provides a firm base for the ganache, allowing it to set beautifully and create that perfect, glossy finish.
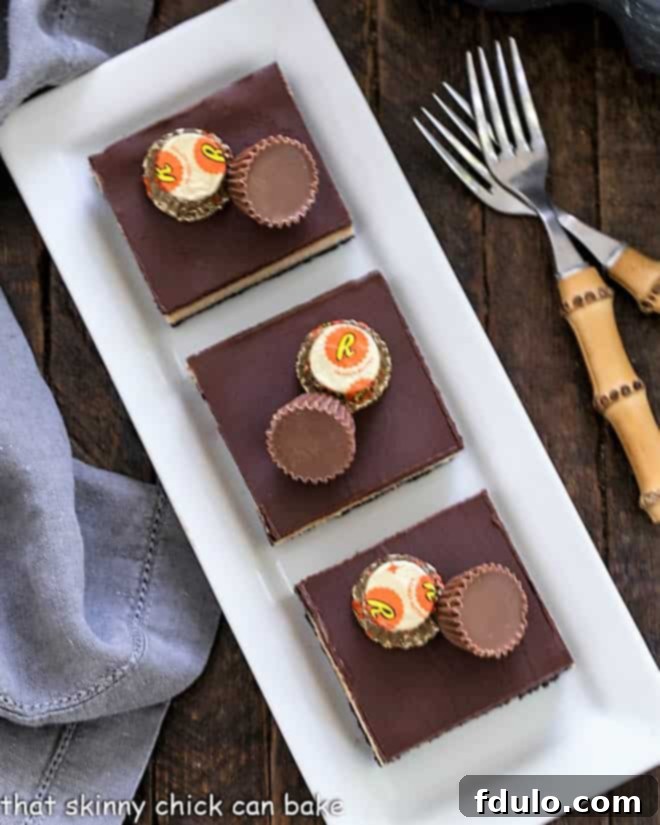
- Consider a Garnish for Extra Flair. While delicious on their own, a simple garnish can elevate these bars for special occasions. Mini peanut butter cups, a sprinkle of sea salt, or a drizzle of extra melted chocolate can add visual appeal and an extra layer of flavor and texture.
Frequently Asked Questions: All About Your Cheesecake Peanut Butter Bars
Due to their creamy, perishable cheesecake filling, these bars absolutely must be stored in the refrigerator. To maintain their freshness, prevent them from drying out, and protect them from absorbing other odors, cover them tightly with plastic wrap or aluminum foil. Properly stored, they will remain fresh and delicious for 3-5 days in the refrigerator, allowing you to enjoy them over several days.
Yes, happily, most cheesecake desserts, including these delightful bars, freeze exceptionally well. Freezing is an excellent option for meal prepping desserts or for saving leftovers. To freeze, ensure the bars are completely chilled and firm. Wrap individual bars or the entire batch (if uncut) tightly in plastic wrap, then an additional layer of aluminum foil, or place them in an airtight freezer-safe container. This double-layer protection helps prevent freezer burn. They can be frozen for up to 3 months. To defrost, simply transfer them to the refrigerator overnight. Be mindful of condensation on the wrapping or lid when you remove them after thawing; water droplets can leave undesirable marks on the chocolate ganache topping, so unwrap them carefully.
For the best flavor and texture, cheesecake is often enjoyed when it’s not ice-cold. Bringing the bars out of the refrigerator about an hour before serving allows them to come closer to room temperature, enhancing their creamy consistency and intensifying their flavors. For the cleanest, most precise cuts and a pristine presentation, always cut the bars while they are still cold and firm. Once cut, you can arrange them on a platter and allow them to sit at room temperature for a short while to take the chill off. For an added touch of elegance, I love to garnish these for company. The mini peanut butter cups are a fantastic choice, providing both visual appeal and an extra burst of peanut butter goodness that complements the bars perfectly.
Beyond the Bars: More Peanut Butter Dessert Delights
While my personal preference doesn’t extend to plain peanut butter (no sandwiches, crackers, or spoonfuls for me!), I possess an undeniable passion for exquisite peanut butter desserts. There’s something magical about how peanut butter transforms when combined with other ingredients, especially chocolate, creating truly unforgettable treats. If you, like me, revel in the world of baked goods featuring this beloved nutty spread, you’re in for a treat. Here are some more inspiring ideas for you to peruse, each promising a unique and delicious take on peanut butter perfection:
- Peanut Butter Butterfinger Pie from Inside BruCrew Life: A crunchy, creamy pie packed with Butterfinger goodness.
- Frozen Chocolate Peanut Butter Pie: A cool, refreshing, and deeply satisfying treat for chocolate and peanut butter lovers.
- Peanut Butter Truffle Brownies: Rich brownies topped with a luscious peanut butter truffle layer – pure decadence!
- Chocolate Peanut Butter Caramel Bars: A symphony of flavors with chocolate, peanut butter, and gooey caramel.
- Peanut Butter Chocolate Mousse Cake: An elegant dessert featuring light, airy mousse layers.
- Peanut Butter Cheesecake Bars: If you can’t get enough, these are another fantastic variation to try!
- Plus, explore even more of the Best Dessert Recipes on our site for endless inspiration.
Stay connected and be part of our vibrant baking community! Follow us on social media @ Instagram, Facebook, and Pinterest. Don’t forget to tag me when you whip up one of my recipes – I love seeing your delicious creations! And if these Peanut Butter Cheesecake Bars win your heart (which I’m sure they will!), please show your appreciation by giving them a 5-star rating in the recipe card below. Your feedback helps other dessert enthusiasts discover these amazing treats!
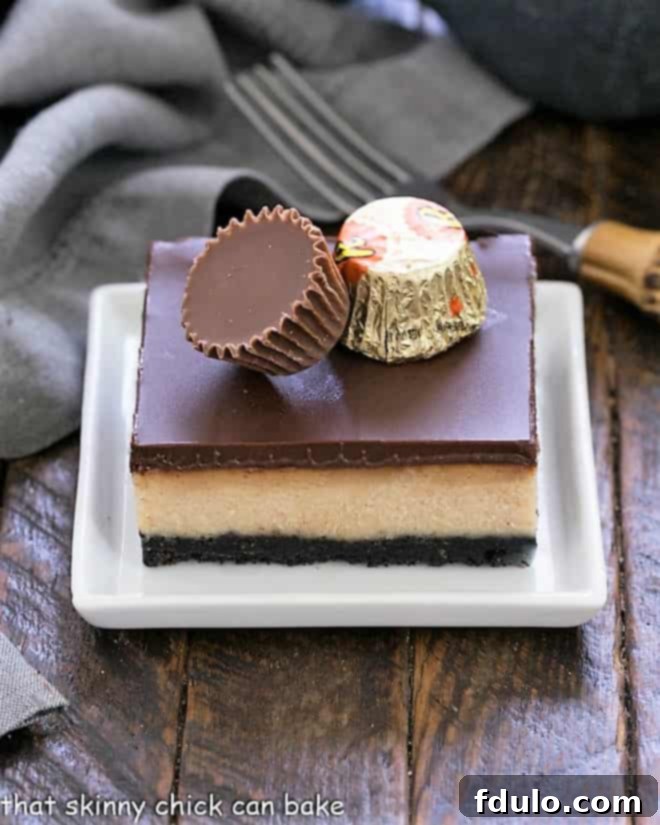
Peanut Butter Cheesecake Bars
30 minutes
45 minutes
1 hour 15 minutes
24
Luscious Peanut Butter Cheesecake Bars with an Oreo crust, peanut butter cheesecake filling and a chocolate ganache glaze.
Ingredients
For Crust:
- 36 Oreos, processed to crumbs in food processor
- ½ cup salted butter, melted
For Cheesecake:
- 24 oz cream cheese, at room temperature
- 1 cup sugar
- ¼ cup sour cream
- 1 cup creamy peanut butter
- 1 teaspoon vanilla
- pinch of salt
- 3 eggs
For Chocolate Topping:
- ½ cup butter
- 1 cup chocolate chips or 6 ounces chopped semisweet chocolate
Instructions
- Preheat the oven to 350°. Line a 9×13 pan with nonstick foil.
- To make the crust, combine cookie crumbs and butter and press evenly into the bottom of the pan.
- Bake for 10 minutes.
- To make the cheesecake, beat cream cheese and sugar until smooth. Add sour cream, then the peanut butter, vanilla extract, and salt.
- Add the eggs one at a time and mix just until incorporated. Pour the batter over the crust and smooth with an offset spatula.
- Bake for 30-35 minutes or until cheesecake looks mostly set. There can be a slight jiggle in the very center.
- Cool to room temperature on a wire rack, and then chill until cold.
- To make the chocolate topping, melt butter and chocolate together in the microwave.
- Stir until smooth and pour on cold cheesecake. Chill at least an hour before cutting.
Notes
You can make half a batch in an 8 x 8-inch pan. You will need to use 1 ½ eggs. For the half egg, whisk a whole egg in a small bowl, then remove approximately half of the mixture to use in the recipe.
If you have a set of the small OXO liquid measuring cups, they come in handy for small liquid measurements.
Recommended Products
As an Amazon Associate and member of other affiliate programs, I earn from qualifying purchases.
- OXO Measuring Beakers
- KitchenAid 9-Speed Digital Hand Mixer
- 3 Pyrex Mixing Bowls
- 9 x 13 Baking Pan
Nutrition Information:
Yield:
24
Serving Size:
1
Amount Per Serving:
Calories: 426Total Fat: 32gSaturated Fat: 16gTrans Fat: 0gUnsaturated Fat: 11gCholesterol: 74mgSodium: 285mgCarbohydrates: 34gFiber: 2gSugar: 25gProtein: 6g
Thatskinnychickcanbake.com occasionally offers nutritional information for recipes contained on this site. This information is provided as a courtesy and is an estimate only. This information comes from online calculators. Although thatskinnychickcanbake.com attempts to provide accurate nutritional information, these figures are only estimates.
Varying factors such as product types or brands purchased can change the nutritional information in any given recipe. Also, many recipes on thatskinnychickcanbake.com recommend toppings, which may or may not be listed as optional and nutritional information for these added toppings is not listed. Other factors may change the nutritional information such as when the salt amount is listed “to taste,” it is not calculated into the recipe as the amount will vary. Also, different online calculators can provide different results.
To obtain the most accurate representation of the nutritional information in any given recipe, you should calculate the nutritional information with the actual ingredients used in your recipe. You are solely responsible for ensuring that any nutritional information obtained is accurate.
HOW MUCH DID YOU LOVE THIS RECIPE?
Please leave a comment on the blog or share a photo on Pinterest
