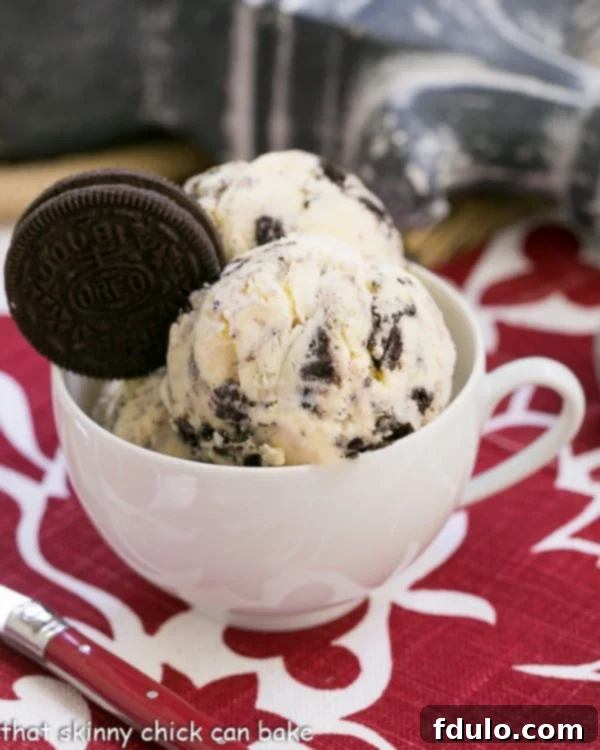
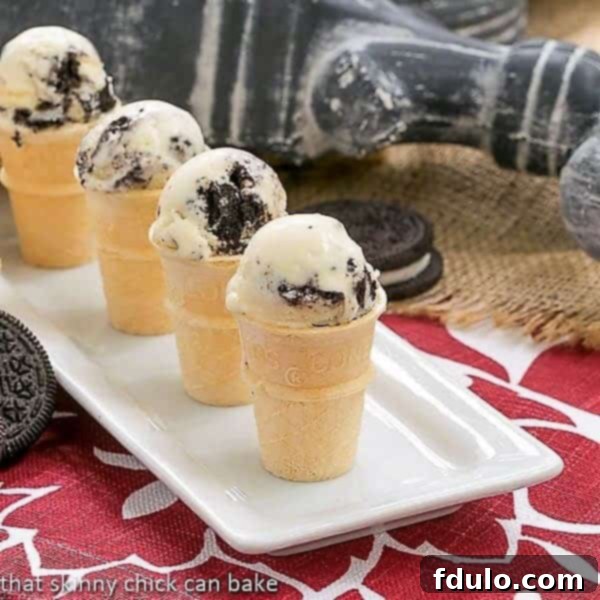
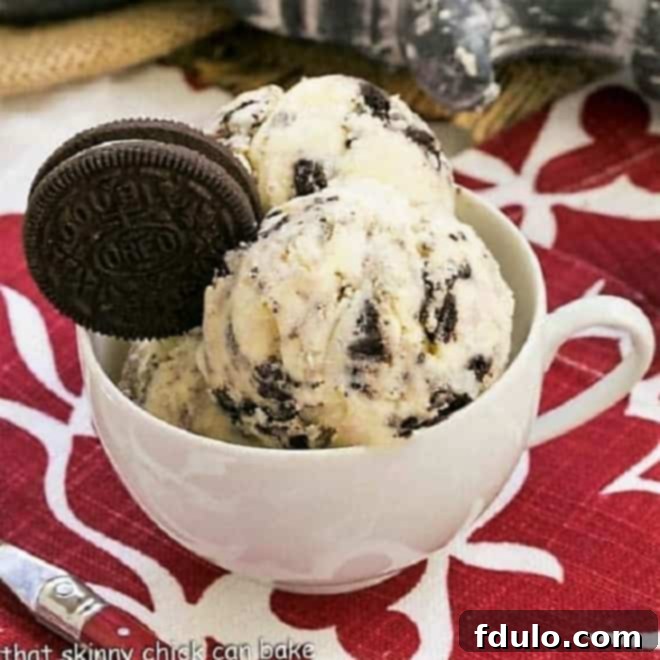
Few things bring a smile to faces quite like a bowl of homemade ice cream, and when that ice cream is bursting with the irresistible crunch of America’s favorite cookie, you know you’ve got a winner! This summer, our kitchen embraced the classic combination, resulting in what we proudly call the Ultimate Homemade Oreo Ice Cream. It’s a delightful, creamy concoction that disappeared almost as quickly as it was made – a true testament to its irresistible charm.
Our pantry is a steadfast sanctuary for snack lovers, perpetually stocked with a variety of Oreos, especially the beloved Double Stuf. This consistent supply made the decision to craft a rich and velvety Cookies and Cream Ice Cream an easy one. The joy of creating something so beloved from scratch, packed generously with those iconic chocolatey cookies and sweet cream filling, is truly unmatched. Get ready to embark on a sweet adventure that promises to be a major hit with family and friends.

Why You’ll Love This Dreamy Homemade Oreo Ice Cream
There’s a special magic that comes with homemade desserts, and this Oreo ice cream is no exception. Beyond the sheer delight of eating it, making it yourself offers a myriad of benefits:
- An Instant Family Favorite: If your household, like mine, is populated by enthusiastic Oreo aficionados, then this Oreo Ice Cream recipe isn’t just a dessert; it’s an event. Prepare for delighted squeals and requests for second (and third!) servings. It’s the perfect treat to bring everyone together.
- Customizable Cookie Crunch: Store-bought cookies and cream ice cream often leaves you wishing for more (or fewer) cookie pieces. When you craft it at home, you are the master of your cookie destiny! Add a gentle sprinkle for a subtle hint, or go all out with generous handfuls of crushed Oreos for an intense cookies-and-cream experience. The power is in your hands to achieve your perfect ratio.
- Endless Flavor Possibilities: While a classic vanilla base forms the perfect canvas for the Oreo chunks, don’t feel limited. For a richer, more indulgent twist, consider swapping out the vanilla for a chocolate ice cream base. Imagine double chocolate goodness with crunchy Oreos! The creative options are truly boundless, allowing you to tailor this recipe to your unique cravings. You could even experiment with mint Oreos for a refreshing twist, or peanut butter Oreos for an extra layer of decadence.
- Superior Freshness and Flavor: Crafting ice cream from scratch means you control every ingredient. This results in a depth of flavor and a creamy texture that simply can’t be matched by most commercial brands. You’ll taste the rich dairy, the pure vanilla, and the fresh crunch of the cookies in every spoonful.
- A Fun and Rewarding Project: Making ice cream is a wonderfully satisfying culinary endeavor. It’s a fantastic activity to share with family, creating delicious memories along with a delightful dessert. The anticipation of churning and then tasting your own creation is part of the fun!
- No Mystery Ingredients: Say goodbye to artificial flavors, colors, and preservatives. When you make homemade Oreo ice cream, you know exactly what goes into it – pure, wholesome ingredients.
Essential Ingredient Notes for Perfect Creaminess
Achieving that dreamy, smooth, and rich ice cream texture starts with understanding your ingredients. Here are some key tips for selecting and preparing what you’ll need:
- Egg Yolks – For this French-style custard base, use large eggs. The yolks are crucial for adding richness, body, and a wonderfully smooth texture to your ice cream, preventing it from becoming icy.
- Sugar – Regular granulated sugar is your go-to here. It dissolves easily and provides the perfect level of sweetness to complement the cookies.
- Heavy Cream – This is where the magic happens for ultimate creaminess. Ensure your heavy cream has at least 36% butterfat. Anything less, like whipping cream, won’t deliver the same luxurious, melt-in-your-mouth texture. The higher fat content is vital for preventing ice crystal formation.
- Whole Milk – Just like the heavy cream, the fat content in whole milk is important. Substituting skim or 2% milk will result in a less creamy, potentially icier ice cream. Stick to whole milk for the best results.
- Kosher Salt – Don’t skip the salt in desserts! It’s a powerful flavor enhancer that balances the sweetness and brings out the depth of the vanilla and chocolate flavors. If you don’t have kosher salt on hand, use slightly less table salt (about 3/4 of the 1/4 teaspoon called for, as table salt is finer and more concentrated).
- Real Vanilla Extract – This is non-negotiable for a truly delicious ice cream. Real vanilla extract offers a complex, aromatic flavor that imitation vanilla simply cannot replicate. Invest in a good quality pure vanilla extract for the best possible taste.
- Oreo Cookies – The star of the show! Any type of Oreo will work beautifully. We often use Mega Stuf for an extra burst of creamy filling, but classic Oreos, Double Stuf, or even flavored varieties will be delicious. The key is to chop them into bite-sized pieces rather than pulverizing them, so you get distinct chunks throughout the ice cream. Measure out what you have available and don’t be afraid to experiment with your favorite type!

Crafting Your Own Heavenly Oreo Ice Cream
My journey with Oreos has been a gradual one. As a child, while my siblings enthusiastically devoured the entire cookie, I admit I was more partial to the creamy filling, twisting apart the halves to savor the sweet center. It wasn’t until I discovered their magic in a chocolate cookie pie crust that I truly embraced the versatility of these iconic sandwich cookies in my baking. Fast forward to today, and with my children inheriting their father’s unwavering devotion to our tin of Oreos, I knew a homemade ice cream featuring these beloved treats would be a runaway success.
The introduction of MegaStuf Oreos felt like a culinary revelation, promising even more of that delicious filling, perfect for embedding within a rich ice cream base. My family’s taste test confirmed my prediction: the generous amount of filling in MegaStuf Oreos creates an incredibly satisfying texture within the frozen dessert. However, please feel entirely free to use any variety of Oreo cookies you prefer for this recipe – the joy is in making it your own!
Now, let’s dive into the simple yet crucial steps to create this indulgent dessert:
- PREPARE YOUR EGG MIXTURE: Begin by whisking together the egg yolks and a portion of the granulated sugar in a heatproof bowl. I find a large Pyrex measuring cup with a spout incredibly useful for this step, as it makes pouring easier later on. Whisk until the mixture is pale yellow and slightly thickened. Set this aside.
- SIMMER THE DAIRY: In a medium saucepan, combine the remaining sugar, heavy cream, whole milk, and kosher salt. Heat this mixture over medium heat, stirring occasionally, until it just begins to simmer. You’ll see small bubbles forming around the edges. This warming step is essential for dissolving the sugar and preparing the base for the custard.
- TEMPER THE EGGS: This is a critical step to prevent scrambling the egg yolks. Slowly and gradually drizzle about half a cup of the hot cream mixture into your egg yolk mixture, whisking constantly and vigorously. Repeat this process with another half cup of hot cream. This slow introduction of heat gradually brings the egg mixture up to temperature without cooking the eggs instantly.
- CREATE THE CUSTARD: Once tempered, pour the entire egg mixture back into the saucepan with the remaining hot cream. Continue to heat over medium heat, stirring continuously with a spoon or spatula. Do not stop stirring!
- THICKEN THE CUSTARD: Continue stirring the mixture for another 1-2 minutes, or until it visibly thickens enough to coat the back of a spoon. If you run your finger across the coated spoon, the line should remain clear. Be careful not to boil the mixture, as this can curdle the eggs.
- STRAIN FOR SMOOTHNESS: Remove the custard from the heat and immediately pour it through a fine-mesh strainer into a clean bowl. This crucial step removes any tiny bits of cooked egg that may have formed, ensuring your ice cream base is silky smooth and luxurious. Stir in the real vanilla extract at this point.
- COOL THE CUSTARD: To rapidly cool the custard, place the bowl in an ice bath (I usually fill my sink with ice and water). Stir the custard occasionally to help it cool evenly and prevent a skin from forming. Continue stirring until the mixture reaches room temperature.
- CHILL THOROUGHLY: Cover the cooled custard bowl with plastic wrap, pressing it directly onto the surface of the custard to prevent a skin from forming. Place the bowl in the refrigerator and chill for at least 2 hours, or ideally, overnight. A well-chilled base is paramount for achieving the best texture in your ice cream.
- CHURN THE ICE CREAM: Once thoroughly chilled, transfer the custard base to your ice cream maker. Follow your manufacturer’s instructions for churning. This usually takes between 20-30 minutes, depending on your machine, until the ice cream is soft-serve consistency.
- LAYER WITH OREOS & FREEZE: As soon as the ice cream is churned, scoop about a third of it into a freezer-safe container. Sprinkle half of your chopped Oreo cookies evenly over this layer. Repeat with another third of the ice cream and the remaining cookies. Finally, top with the last third of the ice cream. This layering ensures that the Oreos are distributed throughout. You can enjoy it immediately as a soft serve, or for a firmer scoopable ice cream, cover and freeze for at least 4 more hours.
Frequently Asked Questions About Cookies and Cream Ice Cream
The true origin of Cookies and Cream ice cream is a delightfully contested topic! Numerous individuals, academic institutions, and companies lay claim to its invention. Ice cream consultant Malcolm Stogo is often credited with developing Oreo ice cream in the late 1970s (specifically 1976, ’77, or ’78). However, South Dakota State University’s dairy department also asserts that they invented it in 1979. Commercially, Blue Bell Creameries began producing their version of cookies and cream in 1980, though Edy’s/Dreyers challenges this, stating they were the first to mass-produce it in 1982. Regardless of its exact birthplace, it quickly became a global sensation!
Cookies and Cream ice cream holds a coveted spot in the hearts of dessert lovers worldwide. In 2020, it impressively tied for 5th place with Cookie Dough ice cream among adults in the U.S., showcasing its enduring popularity. Its universal appeal lies in the perfect textural contrast and familiar flavor combination, making it a staple in freezers and scoop shops everywhere.
For the best textural experience in ice cream, I highly recommend chopping the Oreos into irregular, bite-sized pieces rather than finely crushing them. This method helps to keep the cookie filling largely intact, preventing it from “oozing” out and disappearing into the ice cream base during the mixing process. You’ll get distinct, delightful chunks of cookie and cream in every bite. If you prefer a more finely crushed cookie, place the Oreos in a gallon-sized Ziploc bag, seal it, and use the flat side of a meat mallet or a rolling pin to break them into your desired consistency.
The beauty of homemade ice cream is the freedom to customize! While this specific recipe was made with Double Stuf Oreos for their generous filling, it is equally delicious with any of your favorite types. Classic Oreos provide a balanced cookie-to-cream ratio, while Mega Stuf offers an even creamier experience. Don’t hesitate to experiment with seasonal or flavored Oreos like Mint, Peanut Butter, or Birthday Cake to add your unique twist to this classic dessert!
The inclusion of egg yolks in this recipe creates what’s known as a French-style custard base, or “Philadelphia-style” if no eggs are used. The yolks are crucial for several reasons: they provide additional fat, which contributes significantly to the ice cream’s incredibly rich and creamy texture. They also act as an emulsifier, helping to create a smoother, more stable base that resists ice crystal formation, resulting in a luscious, almost velvety mouthfeel.
To keep your homemade Oreo ice cream fresh and free from freezer burn, proper storage is key. Always transfer the finished ice cream to an airtight, freezer-safe container. For an extra layer of protection against frost, press a piece of plastic wrap directly onto the surface of the ice cream before sealing the container with a lid. This minimizes air exposure, which is the primary cause of ice crystal formation and flavor degradation.

Explore More Delicious Dessert Recipes
If you’ve enjoyed this delightful homemade Oreo ice cream, you’re in for a treat! Here are a few more irresistible dessert recipes to tempt your taste buds:
- Cinnamon Chunk Ice Cream by Farm Fresh Feasts
- Chocolate Mint Frappe by Noshing with the Nolands
- Homemade Ice Cream Round Up
- Cookie Dough Ice Cream
- Marshmallow Ice Cream
- More of theBest Dessert Recipes
Stay in touch through social media @ Instagram, Facebook, and Pinterest. Don’t forget to tag me when you try one of my recipes! And if you love the results, please give it a 5-star rating in the recipe card.

Oreo Ice Cream
30 minutes
15 minutes
45 minutes
1 quart
Luscious vanilla ice cream with chunks of Oreo cookies
Ingredients
- 5 egg yolks
- ½ cup granulated sugar, divided
- 1¾ cups heavy cream
- ¾ cup whole milk
- ¼ teaspoon kosher salt
- 2 teaspoons vanilla extract
- 1¼ cups chopped Oreo cookies (I used 10 Mega-Stuf, you will need more regular Oreos)
Instructions
- Whisk together the egg yolks and ¼ cup of the sugar in a large Pyrex measuring cup or heatproof bowl; set aside.
- Heat the remaining ¼ cup of sugar, cream, milk, and salt in a saucepan over medium heat.
- When the mixture begins to simmer, slowly drizzle ½ cup into the egg yolk mixture, whisking constantly.
- Repeat with another ½ cup of hot cream, still whisking constantly, then add the egg mixture back to the saucepan, whisking continuously.
- Continue to stir the mixture over medium heat until the mixture thickens, about 1-2 minutes.
- Pour the custard through the strainer into a clean bowl and stir in the vanilla extract.
- Place the bowl in an ice bath (I fill the sink with ice and water), stirring occasionally, until the mixture reaches room temperature.
- Cover the bowl and place the mixture in the refrigerator and chill for at least 2 hours, or overnight.
- Freeze the ice cream in your ice cream maker according to the manufacturer’s instructions.
- Once the ice cream is ready, scoop a third of it into a freezer-safe container, top with half the chopped cookies, and repeat. Top cookies with the last ⅓ of the ice cream. You may eat immediately or freeze for 4 more hours for firmer ice cream.
Notes
Straining the custard will help remove any tiny bits of cooked egg, ensuring your ice cream base is incredibly smooth and luxurious. This step is key for that perfect, creamy texture.
To elevate this into an irresistible dessert pie, scoop the freshly churned Oreo ice cream into a pre-made chocolate cookie crust. Smooth the top evenly and freeze until firm. For an extra touch of decadence, drizzle with warm fudge sauce before serving or freeze again with the sauce for a firmer topping.
Recommended Products
As an Amazon Associate and member of other affiliate programs, I earn from qualifying purchases.
- Pyrex Measuring Cups
- Ice Cream Scoop
- Ice Cream Maker
Nutrition Information:
Yield:
12
Serving Size:
1 scoop
Amount Per Serving:
Calories: 294Total Fat: 19gSaturated Fat: 10gTrans Fat: 0gUnsaturated Fat: 8gCholesterol: 118mgSodium: 155mgCarbohydrates: 27gFiber: 1gSugar: 20gProtein: 4g
HOW MUCH DID YOU LOVE THIS RECIPE?
Please leave a comment on the blog or share a photo on Pinterest
