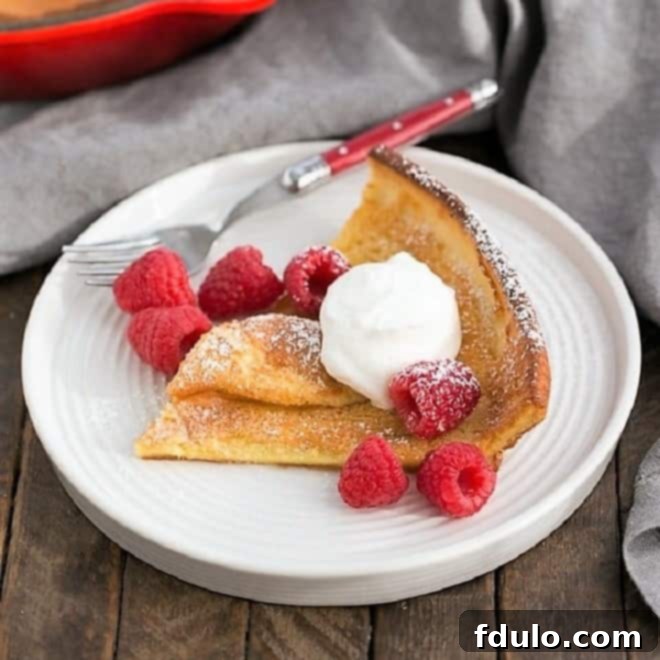
Welcome to the ultimate guide for crafting the perfect Dutch Baby Pancake! This beloved breakfast and brunch dish, also known as a German Pancake, Oven Pancake, or Puffed Pancake, offers a delightful combination of a tender, custardy center and crisp, golden-brown edges. Imagine a generously puffed pancake, fresh from the oven, ready to be adorned with your favorite sweet or savory toppings. Even the most discerning palates will find it irresistible – my once-picky husband now gives it rave reviews!
With its impressive rise and dramatic collapse, the Dutch Baby Pancake is a true showstopper. It shares a wonderful textural similarity with Yorkshire pudding, making it a unique and unforgettable addition to any breakfast spread. Forget flat, ordinary pancakes; this oven-baked wonder delivers a culinary experience that’s both simple to achieve and incredibly rewarding.
Why You Must Make This Dutch Baby Pancake Recipe
The Dutch Baby Pancake holds a special place in my heart, thanks to my mom introducing it to my younger sisters after I had already left for college. They were treated to this magnificent German pancake, often served simply with a sprinkle of powdered sugar and a squeeze of fresh lemon juice. My mom affectionately called it a “Pancake Man,” a charming nickname that, despite a quick search, seems to be unique to our family or perhaps a very localized term. Whatever you call it, its appeal is universal.
Here’s why this recipe deserves a prime spot in your kitchen:
- A Timeless Classic: This pancake boasts a rich history spanning over a century, with deep German roots that speak to its enduring appeal.
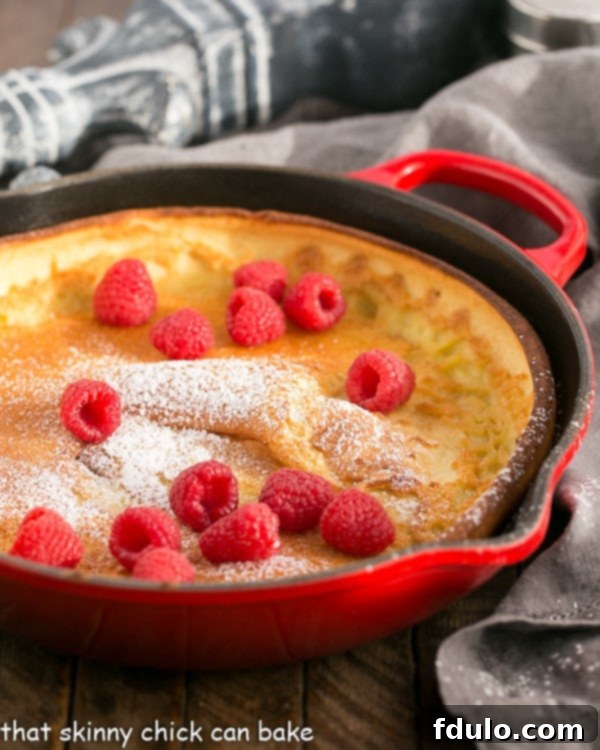
- Spectacular Presentation: Witnessing the pancake dramatically puff up in the oven, reaching impressive heights, only to gracefully collapse upon cooling, is a truly captivating experience. It’s a visual feast before you even take the first bite!
- Incredibly Versatile: Whether you’re a traditionalist who loves butter and maple syrup, or an adventurous eater who prefers a medley of fresh berries and a cloud of whipped cream, the Dutch Baby accommodates every taste. The possibilities for toppings are endless, making it perfect for any preference or occasion.
- Effortless Elegance: Despite its impressive appearance, this dish is surprisingly easy to prepare, requiring minimal hands-on time and simple ingredients.
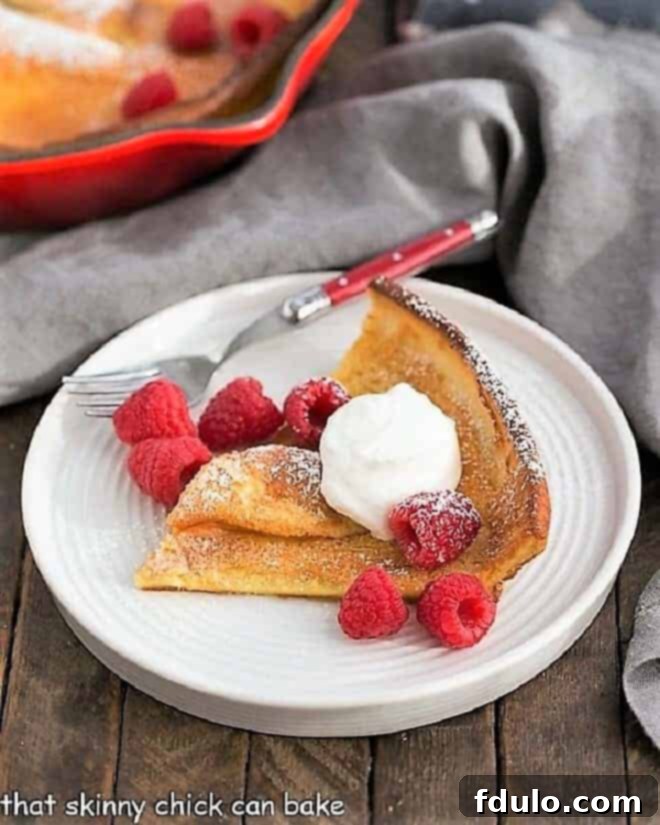
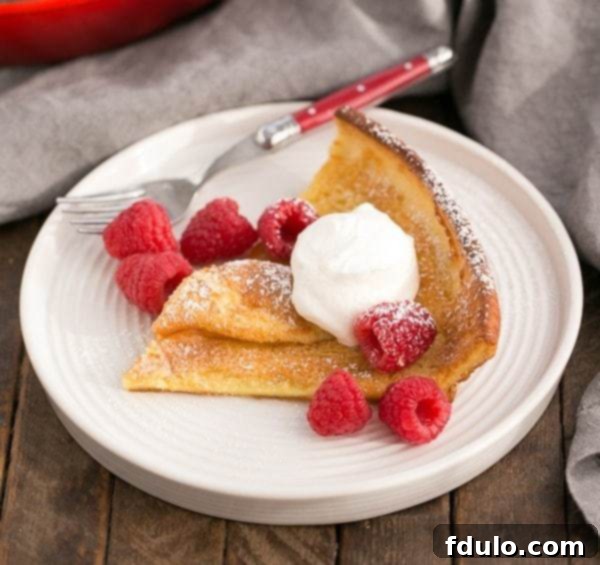
No matter the name, this Dutch Baby Pancake recipe is simply delicious. My husband, who previously wasn’t a huge fan of puffed pancakes, absolutely adored this version, especially when generously topped with powdered sugar, fresh raspberries, and a dollop of sweetened whipped cream. It’s a game-changer, and I’m thrilled to have another fantastic breakfast option for guests or lazy weekend mornings!
Mastering the Dutch Baby Pancake: How to Make It Perfectly
Creating a truly magnificent Dutch Baby Pancake isn’t complicated, but a few key techniques will guarantee a perfect result every time. These simple tricks elevate your pancake from good to absolutely marvelous, ensuring a tender, airy, and beautifully puffed treat.
- PRO-Tip: Preheating is Key! Begin by preheating your cast iron skillet simultaneously with your oven. This crucial step ensures the pan is incredibly hot when the batter is poured in, which is vital for achieving that impressive puff. The immediate sizzle and rapid heating of the batter create steam, forcing the pancake to rise dramatically.
- PRO-Tip: The Gluten Rest Secret! Once your batter is thoroughly mixed, resist the urge to bake it immediately. Instead, pop the batter into the refrigerator for at least an hour. This resting period allows the gluten in the flour to relax, resulting in a much more tender and delicate finished pancake, rather than a tough or chewy one. For ultimate convenience, you can even prepare the batter the night before!
- Butter Up Your Hot Pan: Carefully place the butter into your preheated skillet. Keep a close eye on it to prevent burning. As soon as it’s almost entirely melted, swirl the butter around the pan to evenly coat the bottom and sides. This prevents sticking and contributes to the crispy edges. Immediately pour in your chilled batter.
- The Initial Bake & The Grand Puff: Bake the Dutch Baby for 15-20 minutes at a higher temperature, or until it has spectacularly puffed up and its edges are a gorgeous golden brown. Watch it rise through the oven door – it’s quite a sight!
- The Gentle Finish & Golden Crust: After the initial puff, reduce the oven temperature and continue baking for another 5 minutes. This lower-temperature finish helps set the custardy interior and ensures the edges become wonderfully crisp without burning.
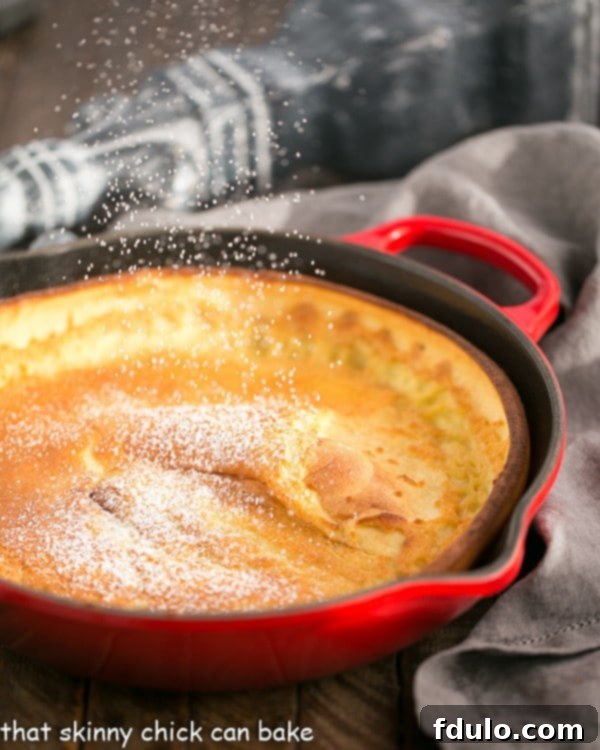
- Serve with Style: As soon as it comes out of the oven, dust generously with powdered sugar. Slice into wedges and serve immediately with a variety of toppings. Fresh berries, a dollop of sweetened whipped cream, a drizzle of pure maple syrup, a sprinkle of cinnamon sugar, or a squeeze of lemon juice are all fantastic choices.
My recent success with this tweaked recipe, coupled with the generous toppings of whipped cream and berries, finally converted my husband into a puffed pancake enthusiast. This transformation means I now have the perfect, impressive breakfast solution for our next overnight guests!
Expert Tips for a Flawless Dutch Baby Every Time
Achieving Dutch Baby perfection is easier than you think with these expert tips:
- Room Temperature Ingredients: Always ensure your milk and eggs are at room temperature before you start mixing the batter. This helps them combine more smoothly and creates a more uniform batter, contributing to a better rise.
- The Power of the Blender: Use a blender for mixing the batter. It ensures a perfectly smooth consistency, free of lumps, which is essential for that signature light and airy texture.
- Chilling is Crucial: As mentioned, the blended batter must be chilled for at least an hour. This resting period for the gluten is non-negotiable for a tender pancake.
- PRO-Tip for Planning Ahead: For ultimate convenience, prepare your batter the night before. Cover it tightly and store it in the refrigerator. In the morning, give it a quick, gentle stir if needed, but avoid re-blending, which could reactivate the gluten.
- Heat is Your Ally: The secret to a magnificent rise lies in a very hot oven and an even hotter cast iron pan. Don’t skip the preheating step for both!
- The Best Pan Choice: A heavy, well-seasoned cast iron skillet (typically 10-inch) is the ideal choice. Its ability to retain and distribute heat evenly is unmatched, ensuring a consistent bake and a beautiful golden crust.
- Resist the Urge to Peek: Once the Dutch Baby is in the oven, try not to open the oven door too frequently. Sudden temperature drops can cause the pancake to deflate prematurely.
- Festive Topping Bar: If you’re serving this for a special occasion like a holiday brunch or for company, create a “topping bar.” Offer a wide assortment of sweet and savory options to allow everyone to customize their perfect pancake. Think fresh fruits, different syrups, jams, nuts, chocolate chips, or even a sprinkle of bacon bits for a savory twist!
Frequently Asked Questions About Dutch Baby Pancakes
A Dutch Baby Pancake is a traditional German pancake, often compared to a large popover or Yorkshire pudding. It’s distinctive for its dramatic puffing as it bakes in a hot oven, followed by a gentle collapse once removed, leaving a delightful eggy, custardy base with irresistibly crisp edges. It’s typically served for breakfast or brunch, with sweet versions being the most common, though savory preparations also exist and are equally delicious.
The spectacular rise of a Dutch Baby is a combination of factors. The whole eggs provide structure and air, while the gluten in the flour contributes elasticity. When the chilled batter hits a preheated, sizzling hot pan and then enters a hot oven, the moisture in the batter rapidly turns into steam. This steam becomes trapped within the batter, forcing the pancake to inflate and puff up dramatically, creating its iconic airy structure.
No, they are essentially the same dish! The terms “Dutch Baby,” “German Pancake,” “Oven Pancake,” and “Puffed Pancake” are often used interchangeably to describe this unique oven-baked pancake. The name can vary depending on regional preferences or personal family traditions.
Despite its name, the Dutch Baby Pancake has no ties to the Netherlands. Its origins are firmly German. The most widely accepted story attributes its naming to Victor Manca, a Seattle restaurateur in the early 1900s. He featured a German pancake, or Pfannkuchen, on his menu at Manca’s Cafe. Legend has it that one of his daughters, attempting to pronounce “Deutsch” (German), mispronounced it as “Dutch,” and the charming name stuck. Manca’s Cafe even claimed to have trademarked the name in 1942.
The beauty of the Dutch Baby lies in its versatility when it comes to toppings. While classic options include powdered sugar, fresh berries, or a generous drizzle of maple syrup, don’t stop there! Consider a simple sprinkle of sugar and a squeeze of fresh lemon juice for a bright tang, a dollop of creamy lemon curd, your favorite fruit jams or preserves, or a comforting cinnamon sugar mixture. For a more indulgent treat, try sliced bananas with a caramel drizzle, toasted nuts, or even a scoop of ice cream for a dessert-like experience. Savory options like sautéed mushrooms, cheese, or crispy bacon bits are also fantastic!
While a Dutch Baby is undoubtedly best enjoyed fresh from the oven, leftovers can be stored in an airtight container in the refrigerator for 3-4 days. To reheat, gently warm individual portions in the microwave until just heated through. You can also re-crisp it briefly in a toaster oven, though it may not regain its original puffed texture.
You May Also Like: More Brunch Inspiration
Whether you’re planning a special Mother’s Day brunch, an Easter feast, or simply hosting overnight guests, a truly terrific brunch recipe is always a hit. Explore these other delicious ideas for your next gathering:
- Asparagus & Pancetta Frittata from The Chef Next Door
- Spinach Bell Pepper Frittata
- Chunky Maple Coconut Granola
- Strawberry Mascarpone Stuffed French Toast
- Cranberry Apple Bread
- Tex-Mex Breakfast Burritos
- Breakfast Sliders
- More of my Breakfast Recipes
- More of my Brunch Recipes
Stay in touch through social media @ Instagram, Facebook, and Pinterest. Don’t forget to tag me when you try one of my recipes! And if you love the results, please give it a 5-star rating in the recipe card.
Best Dutch Baby Pancake Recipe
5 minutes
25 minutes
30 minutes
3 servings
A puffy pancake that makes a fabulous brunch entree!
Ingredients
- 3 large eggs
- ½ cup all-purpose flour
- ½ cup whole milk
- ½ teaspoon pure vanilla extract
- 3 tablespoons granulated sugar
- 4 tablespoons unsalted butter, cut into 3-4 pieces
- For Serving (Optional): Powdered sugar, fresh raspberries, sweetened whipped cream, maple syrup, lemon wedges, fruit preserves.
Instructions
- Combine eggs, flour, milk, sugar, and vanilla extract in a blender. Blend on high until the mixture is completely smooth and no lumps remain.
- For optimal tenderness, let the batter rest in the refrigerator for at least one hour. This allows the gluten to relax.
- Preheat your oven to 425°F (220°C). Place a 10-inch cast iron skillet into the oven as it preheats, allowing it to get very hot.
- Carefully remove the hot skillet from the oven. Place the butter pieces into the hot pan, watching closely as it melts to prevent burning. Once almost entirely melted, swirl the butter around to coat the bottom and sides of the skillet, then immediately pour in the chilled pancake batter.
- Return the skillet to the oven and bake for 15-20 minutes, or until the Dutch Baby is spectacularly puffed up and its edges are a beautiful golden brown.
- Reduce the oven temperature to 300°F (150°C) and continue baking for another 5 minutes to ensure the center is set and the edges are crisp.
- Carefully remove the Dutch Baby from the oven. It will deflate slightly. Sprinkle generously with powdered sugar and cut into wedges.
- Serve immediately. Garnish each piece with fresh berries and a dollop of sweetened whipped cream, or a drizzle of maple syrup, or any other favorite toppings you desire.
Notes
Total time listed does not include the optional chilling time for the batter.
The calorie count provided below does not include any additional toppings.
Nutrition Information:
Yield: 3 servings
Serving Size: 1
Amount Per Serving (without toppings):
Calories: 537
Total Fat: 22g
Saturated Fat: 12g
Trans Fat: 1g
Unsaturated Fat: 8g
Cholesterol: 232mg
Sodium: 213mg
Carbohydrates: 76g
Fiber: 1g
Sugar: 58g
Protein: 10g
HOW MUCH DID YOU LOVE THIS RECIPE?
Please leave a comment on the blog or share a photo on Pinterest
