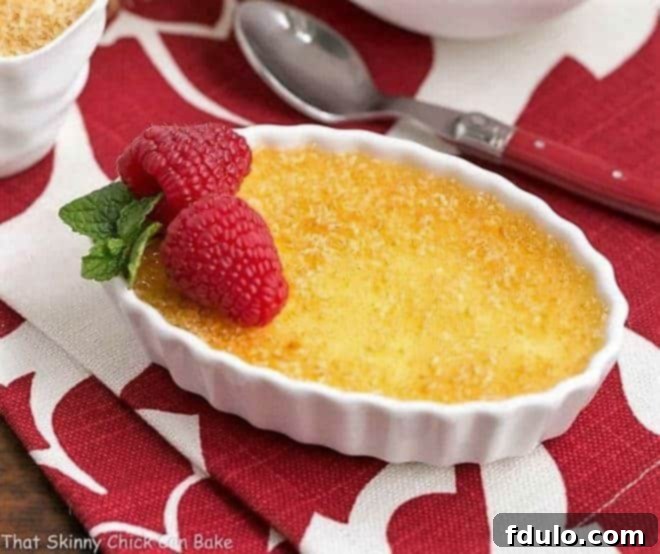
Indulge in the timeless elegance of this Le Cirque Classic Crème Brûlée recipe, a culinary masterpiece that promises an unforgettable dessert experience. This particular version holds a special place, being the very first Crème Brûlée I ever prepared, inspired by a feature on Martha Stewart’s show nearly two decades ago. Since then, no other rendition has quite matched its perfection, solidifying its status as a cherished family favorite. What started as a daring venture into a dessert I had never even tasted, quickly transformed into a signature dish, admired for its exquisite balance of textures and flavors.
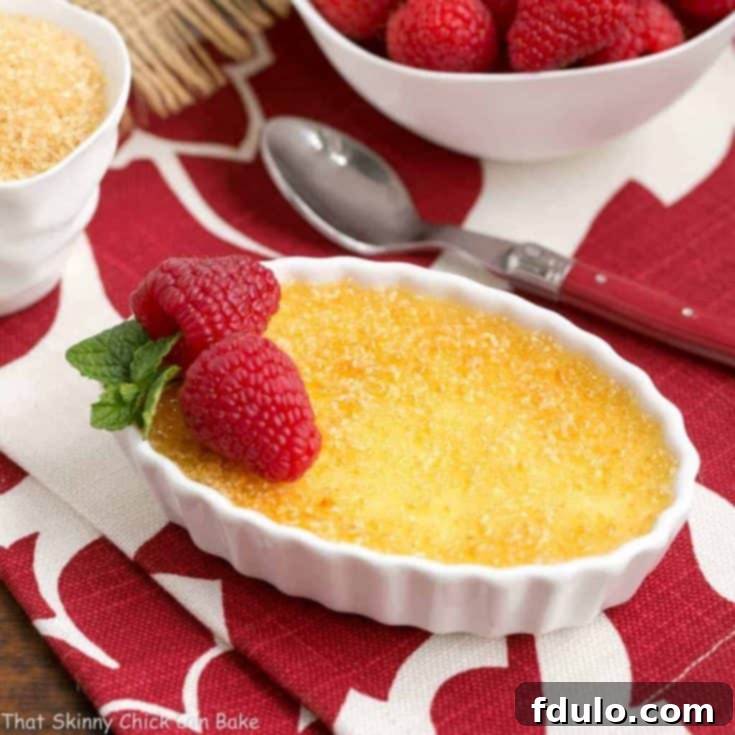
The magic truly unfolds when the coarse sugar topping undergoes its transformation, kissed by intense heat from my broiler, turning this luxurious vanilla custard into an extraordinary after-dinner treat. The moment a spoon cracks through the brittle, caramelized sugar crust, revealing the silky-smooth custard beneath, is nothing short of delightful. This dramatic contrast of a crisp, sugary shell yielding to a cool, creamy interior embodies the two quintessential elements that make this Easy Crème Brûlée Recipe universally famous and utterly irresistible.
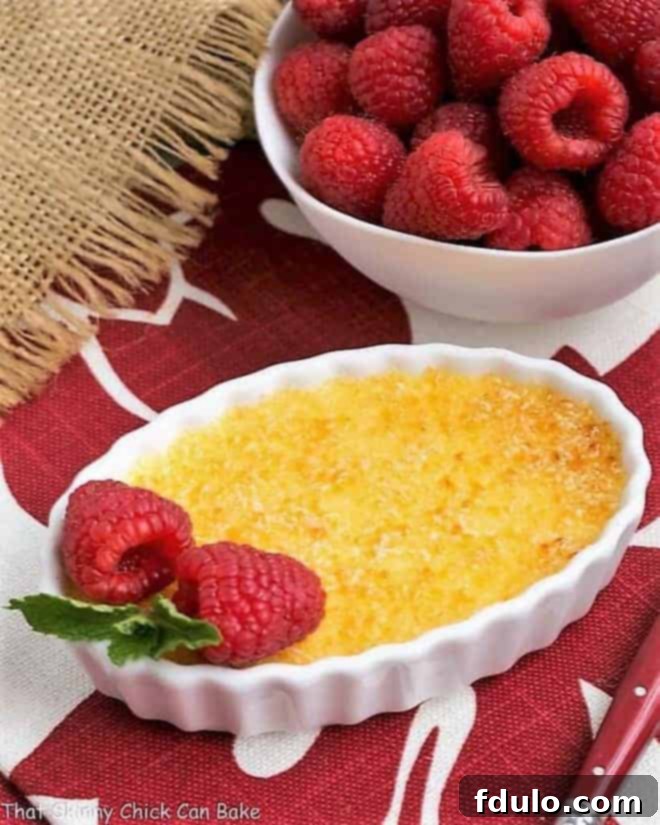
Discover the Irresistible Charm of Homemade Crème Brûlée
Crème brûlée, also affectionately known as Burnt Cream or Trinity Cream, is a quintessential French dessert that captivates with its rich, creamy custard base crowned by a thin, crisp layer of caramelized sugar. Its sophisticated appearance belies a surprisingly straightforward preparation, making it an ideal candidate for any home cook looking to impress. This particular recipe, hailing from New York City’s legendary restaurant, Le Cirque, sets the gold standard for what a Crème Brûlée should be.
Here’s why this Classic Crème Brûlée recipe will become your new go-to dessert:
- Unmatched Quality: Once you experience this homemade version, restaurant Crème Brûlée will simply not compare. My husband, Bill, for instance, now refuses to order it when dining out, convinced that no restaurant can replicate its perfection. It’s a testament to the superior flavor and texture achievable right in your own kitchen.
- A Touch of Legend: This isn’t just any recipe; it’s directly sourced from the esteemed kitchens of Le Cirque, a name synonymous with culinary excellence. Preparing a dessert from such a prestigious establishment brings a piece of fine dining history directly to your table.
- The Quintessential Recipe: This recipe truly embodies the ideal Crème Brûlée. It strikes the perfect balance between a velvety smooth custard and a beautifully crackable sugar crust, delivering an experience that is both elegant and deeply satisfying. It’s a recipe you’ll return to again and again, knowing it consistently delivers perfection.
- Impress Without Stress: Despite its gourmet pedigree, this recipe is incredibly manageable, making it perfect for entertaining. Prepare the custards in advance, and simply torch the sugar topping right before serving for a show-stopping finale that will leave your guests utterly charmed.
Essential Ingredients for a Perfect Crème Brûlée
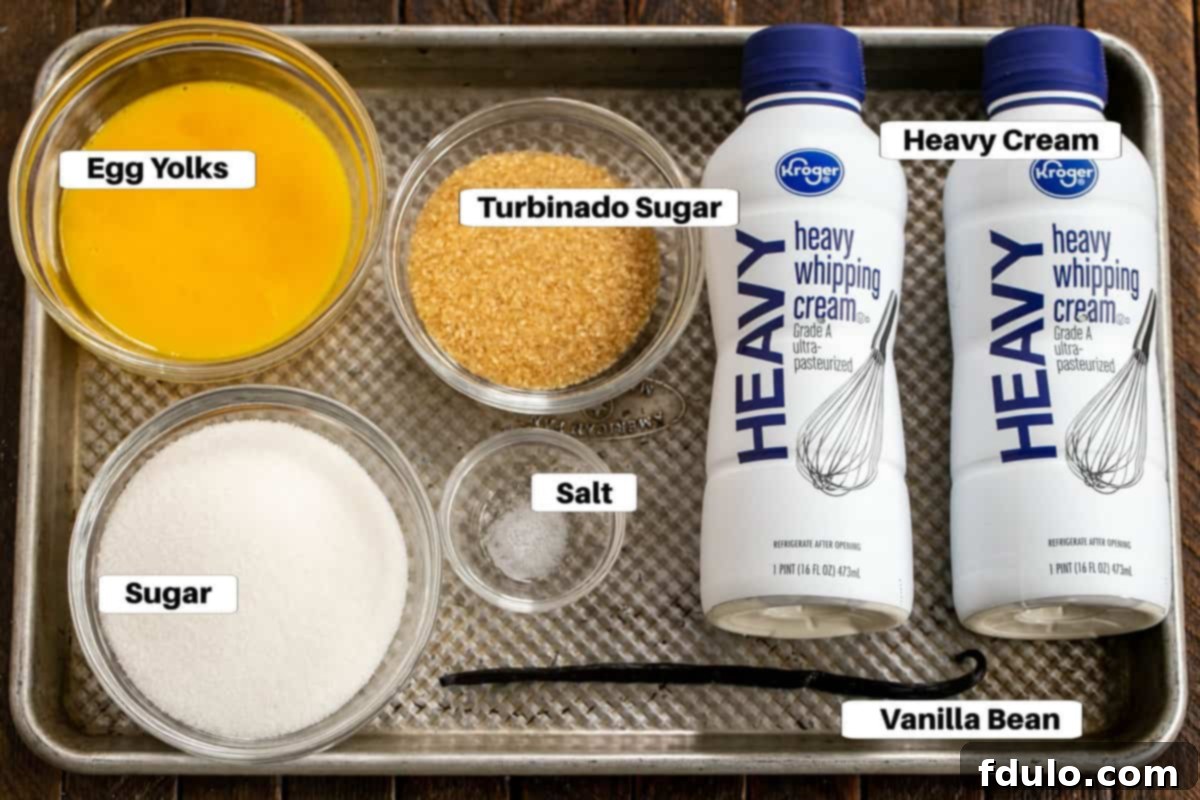
Crafting the perfect Le Cirque Classic Crème Brûlée begins with selecting high-quality ingredients. Each component plays a vital role in achieving that signature creamy texture and exquisite flavor profile. Understanding their purpose will elevate your baking from good to truly exceptional.
- Granulated Sugar (Regular White Sugar): A fundamental ingredient, granulated sugar not only sweetens the custard but also forms the crisp, caramelized topping. Its fine texture allows it to dissolve smoothly into the cream mixture and melt evenly under heat, creating that iconic crunchy crust.
- Heavy Cream (36% Butterfat): This is the heart of your custard. Using heavy cream with at least 36% butterfat is crucial for achieving the rich, luxurious, and undeniably smooth consistency that defines an authentic Crème Brûlée. Do not substitute with lighter creams, as they will result in a less decadent and potentially thinner custard.
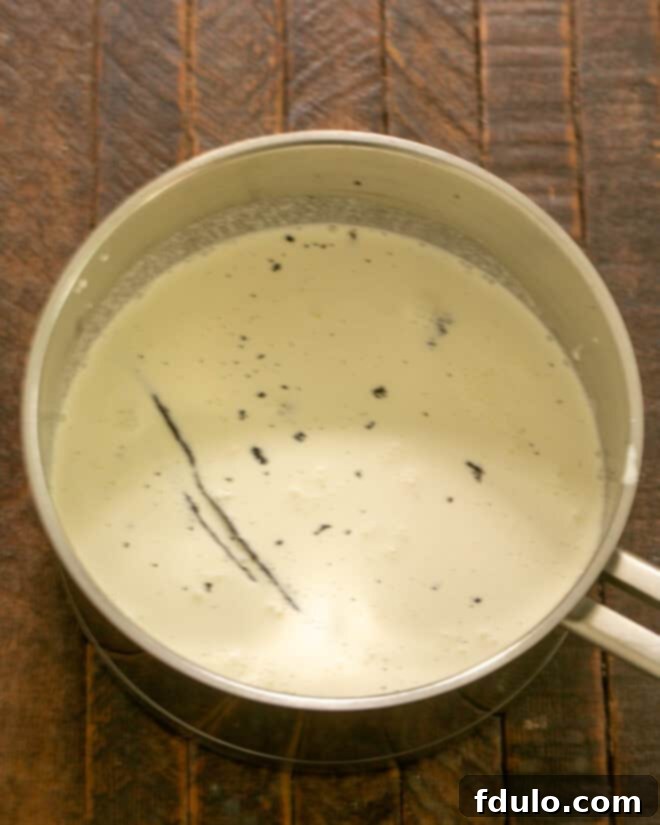
- Vanilla Bean: For the most profound and aromatic vanilla flavor, a fresh vanilla bean is indispensable. Slit the bean lengthwise, scrape out the tiny, fragrant seeds, and add both the seeds and the pod to the heavy cream. As the cream heats, the vanilla infuses deeply, creating a complex, warm aroma far superior to extract.
- Egg Yolks: Egg yolks are the emulsifiers and thickeners in Crème Brûlée, giving the custard its silky texture and rich yellow hue. For best results, separate eggs when they are cold, as the yolks are firmer and less likely to break. Remember to save the whites for other delicious recipes!
- Salt: While it might seem counterintuitive to add salt to a dessert, a tiny pinch of salt (preferably fine table salt for quicker dissolution) dramatically enhances the overall flavor profile. It doesn’t make the dessert salty but rather accentuates the sweetness of the vanilla and cream, preventing the custard from tasting flat or one-dimensional.
- Turbinado Sugar (Sugar in the Raw): This coarse, blonde-colored sugar is ideal for the caramelized topping. Its larger crystals and delicate molasses flavor contribute to a thicker, more robust crust than granulated sugar, and it melts beautifully. To caramelize, you can use a handheld kitchen torch for precision or your oven’s broiler. If using the broiler, keep the oven door slightly ajar and watch vigilantly to achieve a golden brown crust without burning.
Step-by-Step Guide to Crafting Perfect Crème Brûlée
Mastering how to make Crème Brûlée is a rewarding culinary journey. Follow these detailed steps to achieve a dessert that’s restaurant-quality and guaranteed to impress.

Mastering Crème Brûlée: Expert Tips for Success
Once you’ve tried making homemade Crème Brûlée, it will quickly become a favorite dessert for any occasion. Whether for special company, holidays, or simply treating your family, these expert tips will ensure a flawless result every time.
- Temper with Precision: When incorporating the egg yolks into the hot cream mixture, the key is patience and continuous movement. Pour the hot cream into the whisked yolks very slowly, in a thin stream, while whisking constantly. This gradual heating (tempering) prevents the yolks from scrambling and ensures a smooth, lump-free custard. Rushing this step is the most common pitfall.
- Strain for Supreme Smoothness: Even with careful tempering, tiny bits of egg might coagulate when mixed with the hot cream. For the silkiest, most luxurious custard, always pass the mixture through a fine-mesh sieve before pouring it into the ramekins. This step guarantees an impeccably smooth texture that is the hallmark of a perfect Crème Brûlée.
- The Importance of Salt: Don’t skip the pinch of salt in your custard! It might seem unusual for a dessert, but salt is a powerful flavor enhancer. It brightens and balances the sweetness of the cream and vanilla, preventing the custard from tasting overly sweet or bland. Just a small amount makes a world of difference.
- Chill Thoroughly: For optimal texture and flavor, your Crème Brûlée custards must be thoroughly chilled before serving and, especially, before torching the sugar topping. Allow them to chill in the refrigerator for at least 2 hours, or ideally, overnight. A well-chilled custard holds its shape better and provides a delightful cool contrast to the warm caramelized sugar.
- Choosing Your Sugar Topping: Turbinado sugar (also known as sugar in the raw) is highly recommended for the topping due to its larger crystals and subtle molasses notes, which create a more substantial and flavorful crust. However, granulated sugar or even light brown sugar can also be used. For an extra thick crust, some chefs recommend applying a thin layer of sugar, torching it, then repeating the process.
- Torch vs. Broiler for Caramelization: A culinary mini-torch offers the most control, allowing you to evenly melt and brown the sugar without overcooking the custard. If you don’t have a torch, your oven’s broiler is a viable alternative. Place the ramekins on a baking sheet directly under the broiler element (about 4 inches away) and watch them *very* carefully. The sugar will caramelize quickly, so remove them as soon as it turns golden brown to prevent burning.
Essential Crème Brûlée Equipment
Having the right tools can make all the difference in achieving a perfect homemade Crème Brûlée. While some items are essential, others offer advantages in terms of presentation and ease of use.
- Ramekins: These small, individual ceramic dishes are perfect for single servings of Crème Brûlée. While I prefer flat oval ramekins for quicker baking and an elegant presentation, round, deeper versions work just as well. Just be aware that deeper ramekins may require a slightly longer baking time to ensure the custard is fully set. The custard should have a slight jiggle in the very center, but be firm around the perimeter when properly baked.
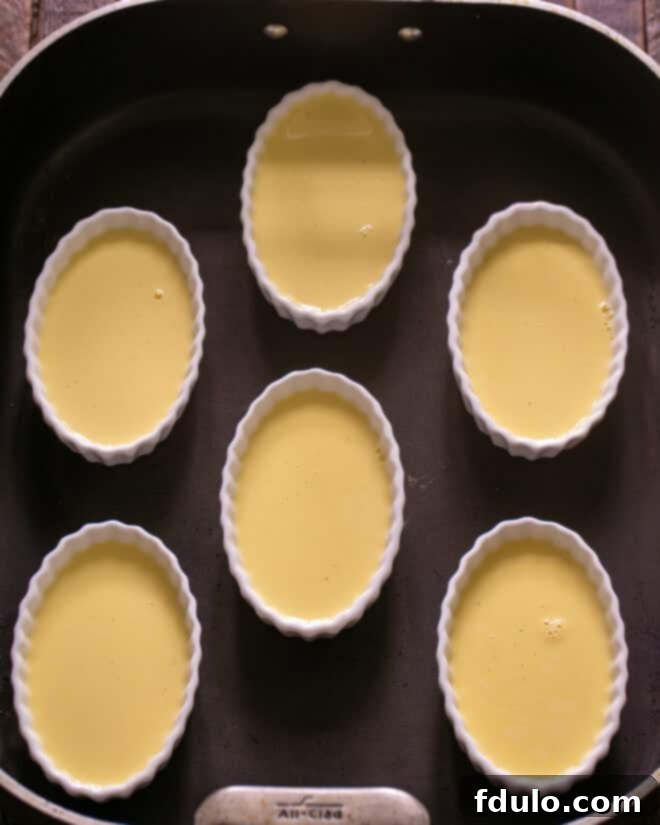
- Bain-Marie (Water Bath) Pan: Crème Brûlée is traditionally baked in a bain-marie, the French term for a water bath. This method involves placing the ramekins into a larger roasting pan filled with hot water. The water bath provides a gentle, even heat environment, preventing the custards from curdling or developing a rubbery texture, and instead promoting the creamiest results. The water should come about halfway up the sides of your ramekins. It’s crucial to prevent any water from splashing into the custard itself. A sturdy roasting pan is ideal for this purpose.
- Culinary Torch or Broiler: To achieve that signature crisp, caramelized sugar topping, you’ll need either a culinary torch or your oven’s broiler. A culinary torch offers precise control over the caramelization process, allowing you to evenly melt and brown the sugar without overheating the custard. If using a broiler, ensure your ramekins are placed directly under the heating element, and watch them continuously, as the sugar can burn very quickly.
- Fine-Mesh Sieve: An often-underestimated tool, a fine-mesh sieve is crucial for achieving the silkiest custard. Used to strain the mixture before pouring into ramekins, it removes any small bits of cooked egg yolk or vanilla bean particles, ensuring an impeccably smooth texture.
- Heat-Resistant Measuring Cup with Spout: For ease of pouring the strained custard into the individual ramekins, a large Pyrex measuring cup with a spout is incredibly helpful. Its heat-resistant nature and convenient spout minimize spills and make the process much cleaner.
The Art of Straining Crème Brûlée Custard
One of the secrets to an impeccably smooth and luxurious Crème Brûlée is the crucial step of straining the custard mixture. This simple technique elevates your dessert from good to truly exceptional.
- Why Strain? Even when you meticulously temper the egg yolks by slowly adding hot cream while whisking constantly, small bits of egg can sometimes cook and coagulate. These tiny cooked pieces, along with the vanilla pod and any larger seeds, would compromise the silken texture of your final custard. Straining ensures that only the smoothest, creamiest liquid makes it into your ramekins.
- Consequences of Skipping: If you neglect to strain, your Crème Brûlée will likely have a less refined texture, possibly containing small lumps or a grainy mouthfeel. Furthermore, if you added the eggs too quickly or didn’t whisk consistently, resulting in a significant amount of coagulated egg bits, there might not be enough active egg protein left in your custard to set properly. In such a scenario, your custards might not firm up as they should, potentially leading to a runny or un-set dessert. Don’t ask how I know this – it’s a lesson learned from experience!
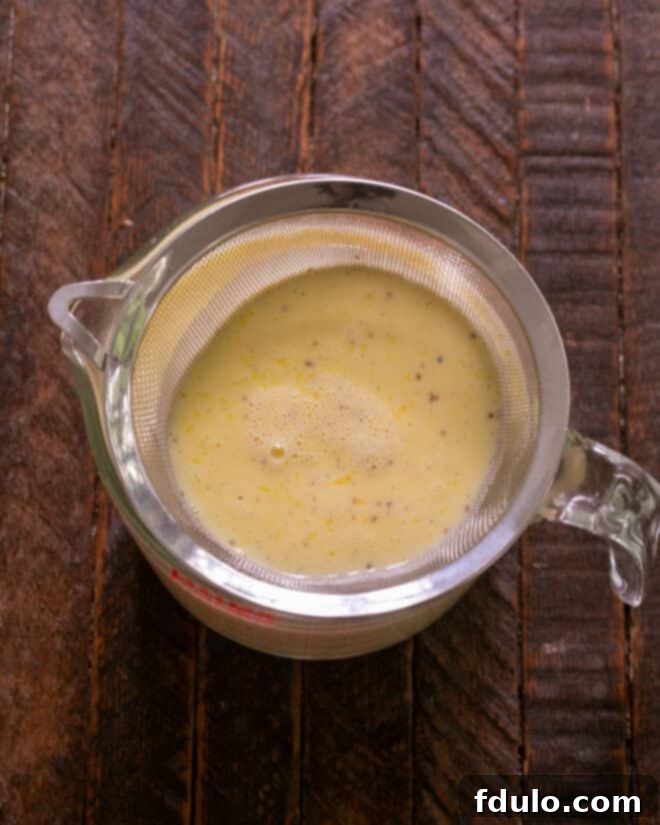
- PRO-Tip for Easy Pouring: To make the straining and pouring process as seamless as possible, I highly recommend straining your custard into a 4-cup Pyrex measuring cup equipped with a spout. The spout allows for precise and clean pouring of the liquid into your individual ramekins, minimizing drips and mess.
Perfecting the Caramelized Sugar Topping
The iconic, brittle sugar topping is what truly makes Crème Brûlée sing, offering a delightful textural contrast to the creamy custard beneath. Achieving that perfect, golden caramel crust is an art in itself, and you have a few excellent options.
- Sugar Choices: While I consistently use turbinado sugar (also known as sugar in the raw) for its coarse texture and subtle molasses notes that contribute to a robust crust, you’re not strictly limited. Granulated sugar will also work, creating a thinner, slightly more delicate crust, and some even prefer brown sugar for a richer, deeper caramel flavor. Experiment to find your personal preference.
- Layering Technique: For an extra-thick and satisfyingly crisp sugar layer, some chefs advocate for a double-layer technique. This involves sprinkling a thin layer of sugar, torching it until melted, letting it cool briefly, and then repeating the process with another thin layer. Generally, a single, even layer of sugar is sufficient for a fantastic result, and it’s my usual approach.
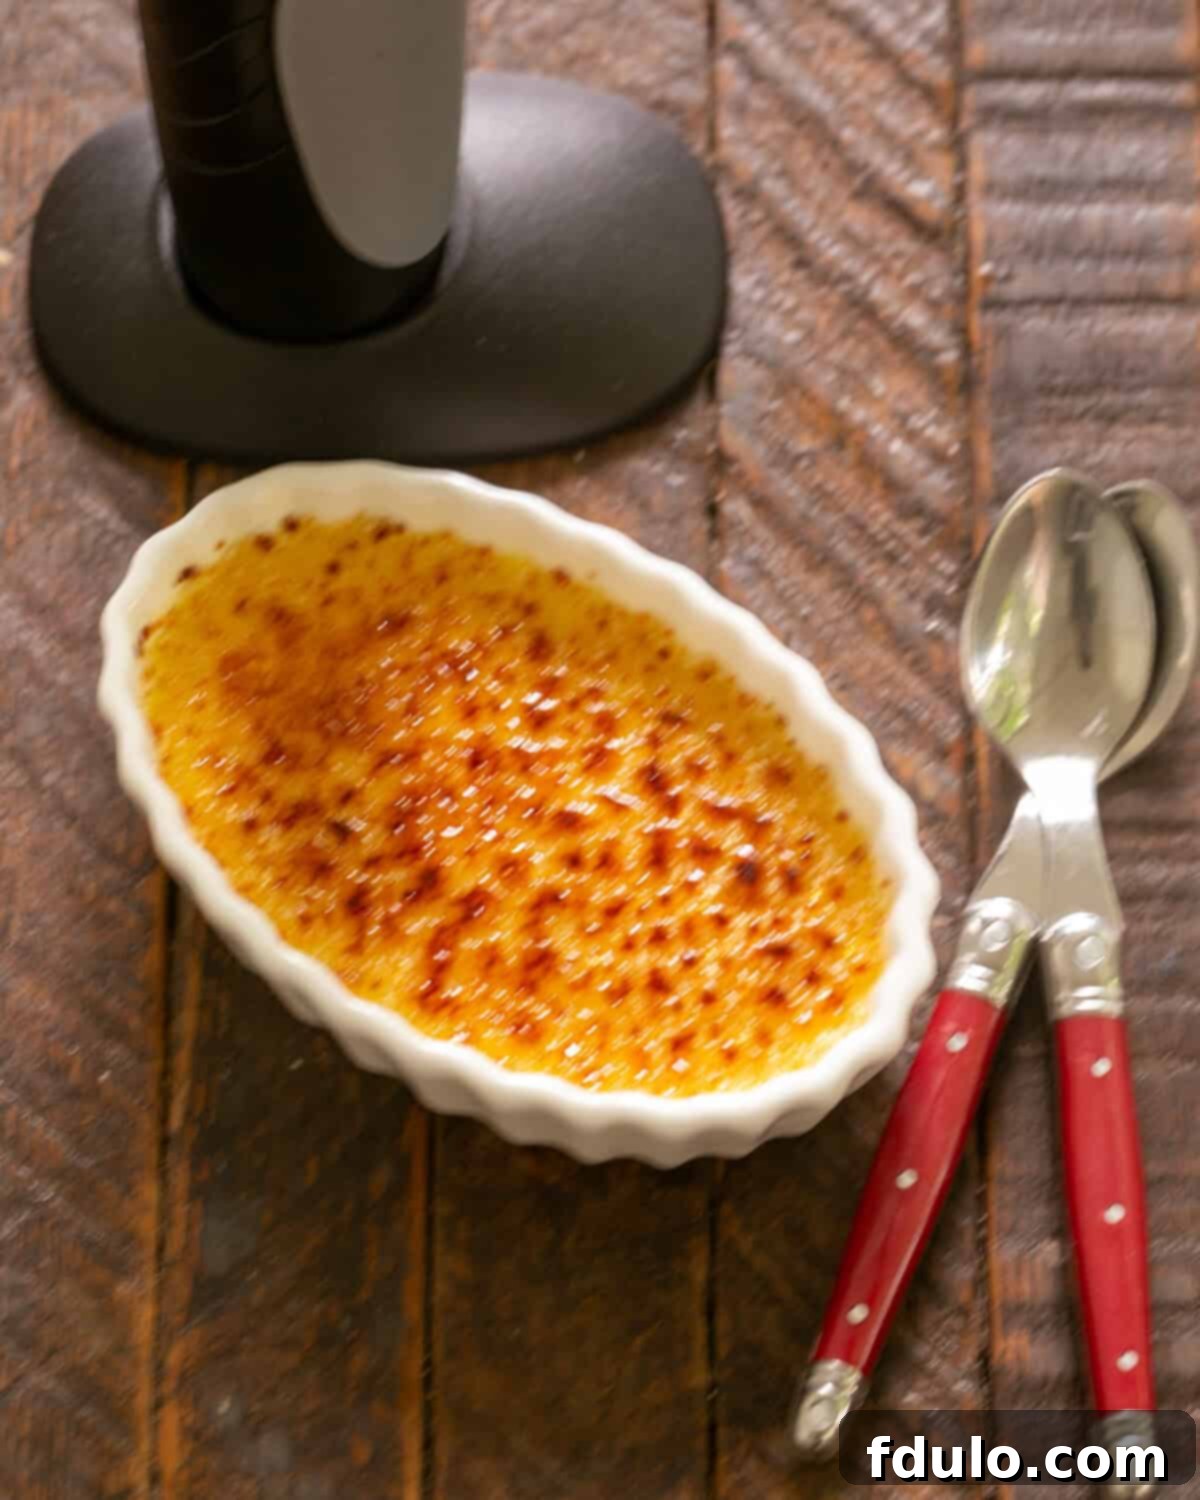
- Using a Culinary Torch: A handheld culinary mini-torch is the preferred method for caramelizing the sugar. It provides precise control, allowing you to direct the heat exactly where needed, ensuring even browning without overcooking the chilled custard. Hold the flame a few inches above the sugar, moving it steadily until the sugar melts, bubbles, and turns a beautiful amber color. For those comfortable with them, even a larger welding torch can be used, but extreme caution is advised.
- Broiler Method: If you don’t own a culinary torch, your oven’s broiler is a perfectly acceptable alternative. Place the chilled ramekins on a baking sheet and position them about 4 inches directly under the broiler element. Crucially, you must watch them *very* carefully and continuously. The sugar will caramelize rapidly, often in a matter of seconds. Remove them the moment the sugar bubbles and turns golden brown to prevent it from burning, which can impart a bitter taste.
Serving Your Exquisite Crème Brûlée
Presenting and enjoying your Classic Crème Brûlée is the final, satisfying step in this culinary journey. A few considerations can elevate the experience even further, from presentation to timing.
- Chill Before Torchino: Always ensure your Crème Brûlée custards are thoroughly chilled before you apply the sugar and torch it. The cold custard provides a buffer against the heat of the torch or broiler, preventing it from liquefying completely. While a slightly warmer, softer custard is still delicious (and rarely draws complaints!), chilling ensures the perfect textural contrast.
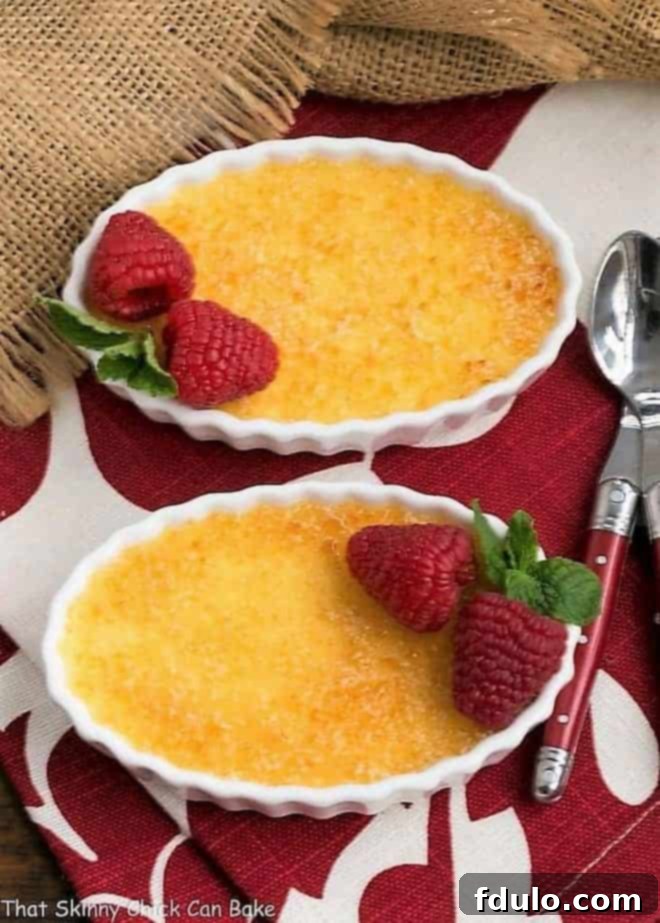
- Elegant Garnishes: While this classic dessert is perfectly lovely served unadorned, adding a simple garnish can truly jazz up its presentation, especially when entertaining. A couple of fresh raspberries, a few sliced strawberries, or a delicate sprig of mint can add a pop of color and freshness that beautifully complements the rich vanilla.
- The Power of Salt: As mentioned in the expert tips, a tiny pinch of salt in the custard is transformative. My recipe incorporates this wisdom, inspired by accomplished pastry chef Jenni Field’s insights on salting desserts. It enhances the vanilla bean custard’s depth, preventing it from tasting merely sweet and instead creating a more complex and satisfying flavor profile. If you’ve never made an easy Crème Brûlée recipe before, consider it for a special occasion like Valentine’s Day – a truly heartfelt dessert for your loved ones.
- Make Ahead Magic: One of the greatest advantages of Crème Brûlée, especially for entertaining, is that the custards can be prepared well in advance. You can bake them, cool them, and then store them covered in the refrigerator for up to three days. This allows you to handle most of the preparation ahead of time, leaving only the exciting step of torching the sugar right before serving for maximum impact.
Creative Ways to Use Up Leftover Egg Whites
After preparing this delightful Crème Brûlée, you’ll find yourself with a handful of leftover egg whites – seven, to be precise. Rather than discarding them, embrace the opportunity to create another wonderful treat! Egg whites are incredibly versatile and can be transformed into light, airy, and equally delicious desserts.
Here are some fantastic recipes that put those extra egg whites to good use:
- 2 Egg Whites: Simple Meringue Cookies – Delicate, crisp, and melt-in-your-mouth cookies perfect for a light sweet bite.
- 3 Egg Whites: Chocolate Velvet Pie – A rich and smooth chocolate pie, often beautifully complemented by a fluffy meringue crust.
- 4 Egg Whites: Fresh Strawberry Soufflés – Light, airy, and elegant individual desserts bursting with the flavor of fresh strawberries.
- 6 Egg Whites: Chocolate Raspberry Pavlova – A stunning dessert featuring a crisp meringue shell, often filled with cream and fresh berries, and drizzled with chocolate.
- 7 Egg Whites: Fresh Strawberry Meringue Cake – A show-stopping cake with layers of crisp meringue, fresh strawberries, and cream, perfect for a special occasion.
Frequently Asked Questions About Crème Brûlée
Here are answers to some common questions about this beloved French dessert, from pronunciation to preparation tips, ensuring you’re well-equipped to master the art of Crème Brûlée.
The French phrase “Crème Brûlée” translates literally to “Burnt Cream.” While the accent marks might seem daunting, the pronunciation is quite straightforward: “krehm-broo-LAY.” Practicing it a few times will have you sounding like a dessert connoisseur in no time.
Absolutely! This is one of the fantastic features that makes Crème Brûlée an ideal dessert for entertaining. The custards can be fully baked, cooled, and then stored in the refrigerator, covered with plastic wrap, for up to 3 days. This significantly reduces stress on the day of your event. Remember to only sprinkle with sugar and torch the topping right before serving to ensure the crispest crust.
While a dedicated culinary torch is the preferred method for caramelizing the sugar topping, offering superior control and even browning, your oven’s broiler can certainly work in a pinch. To use the broiler, place the dishes of Crème Brûlée on a sturdy sheet pan and position them about 4 inches from the heating element. It is crucial to watch them continuously and intently, as the sugar can melt and burn very quickly. You may need to arrange your ramekins to be directly beneath the heat source for optimal results. Remove them as soon as the sugar turns a desirable golden-amber color.
Although New York City’s iconic Le Cirque restaurant played a significant role in popularizing Crème Brûlée in the United States during the 1980s, they did not invent the dessert. Versions of burnt cream can be traced back much further in history, with origins in 15th-century England (where it was known as “burnt cream”) and an even older Spanish version dating back to medieval times, known as “crema catalana.” Le Cirque simply reignited its popularity and made it a must-have on fine dining menus.
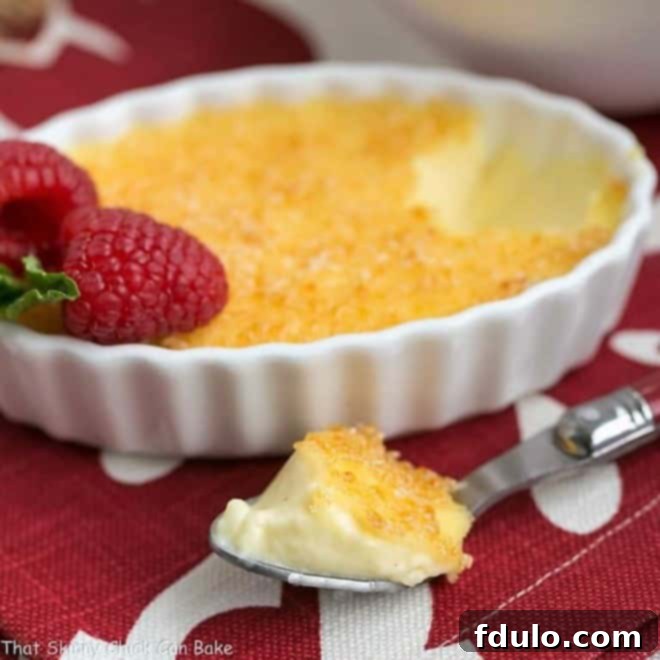
Crème Brûlée is an exquisite sensory experience. The base is a smooth, incredibly silky, and rich vanilla custard, deeply infused with the aromatic essence of vanilla bean. This luxurious custard is then crowned with a thin, brittle layer of caramelized sugar. The magic lies in the contrasting textures: the satisfying “crack!” as your spoon breaks through the hard sugar crust, followed by the luscious, cool creaminess of the custard beneath. The interplay of sweet, creamy, and slightly bitter caramelized notes makes it a truly memorable dessert.
Explore More Delicious Dessert Recipes
If you’ve fallen in love with the classic flavors of Crème Brûlée, you’ll be delighted to discover other recipes that capture its essence or offer a unique twist on this beloved dessert. Extend your culinary repertoire with these fantastic options:
- Creme Brulee Cookie Bars from Crazy for Crust – All the flavors of Crème Brûlée in a convenient, shareable bar form.
- No-Churn Creme Brulee Ice Cream from Big Bear’s Wife – Enjoy the decadent taste of Crème Brûlée in a creamy, no-fuss ice cream.
- Creme Brulee French Toast – A luxurious breakfast or brunch dish, perfect for special mornings.
- Creme Brulee Cheesecake – A rich and creamy cheesecake with the distinct caramelized topping.
- White Chocolate Creme Brulee – A delightful variation with the added sweetness of white chocolate.
- Creme Brulee with Raspberries – Classic Crème Brûlée brightened with the tartness of fresh raspberries.
- Discover more of the Best Dessert Recipes to satisfy every sweet craving.
Stay connected and share your culinary creations with me! Find me on Instagram, Facebook, and Pinterest. Don’t forget to tag me when you try one of my recipes! If you love the results, please consider leaving a 5-star rating in the recipe card below.
Classic Crème Brûlée Recipe
15 minutes
50 minutes
1 hour 5 minutes
9 servings
A creamy vanilla custard topped with a crisp “burnt” sugar topping, delivering a luxurious dessert experience.
Ingredients
- 4 cups heavy cream
- 1 vanilla bean, slit in half lengthwise and seeds scraped
- ¾ cup sugar
- Pinch of salt
- 7 large egg yolks
- Turbinado sugar (sugar in the raw) for topping
Instructions
- Preheat oven to 300ºF (150ºC).
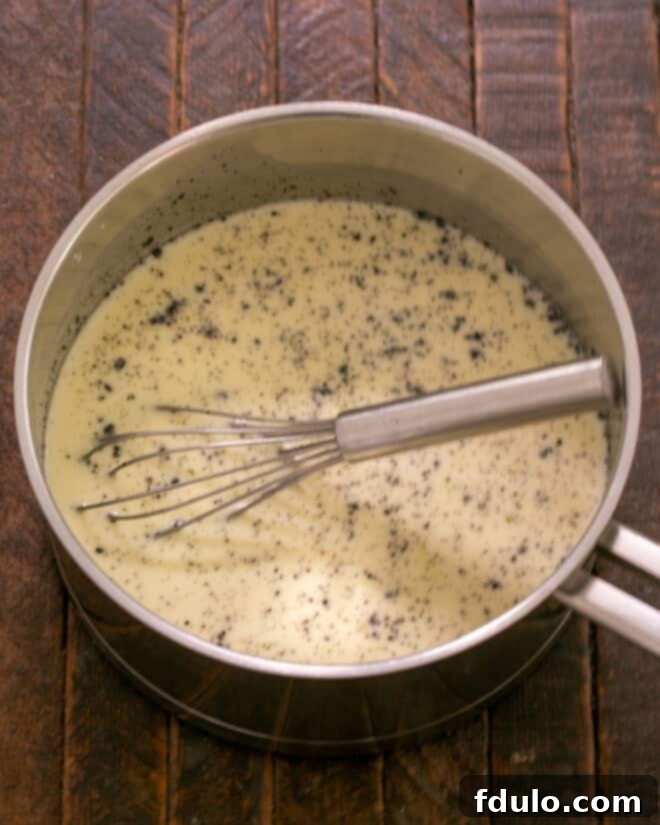
- In a medium saucepan, combine the heavy cream, vanilla pod, scraped vanilla seeds, ¾ cup granulated sugar, and a pinch of salt. Heat over medium heat, stirring occasionally, until small bubbles begin to form around the perimeter of the pan. Do not bring to a rolling boil. Remove from heat and let it steep for a few minutes.
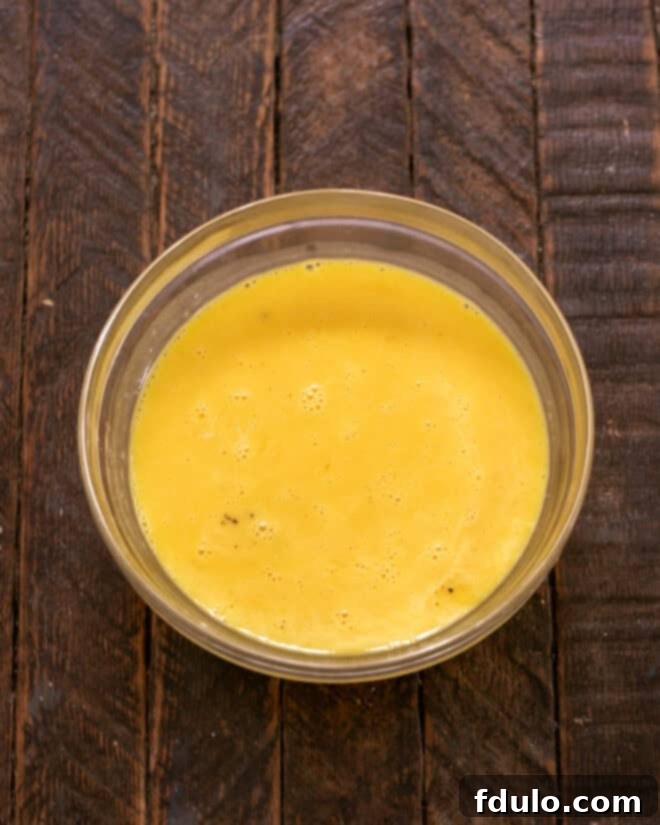
- In a large glass measuring cup or bowl, lightly whisk the 7 large egg yolks. To temper the yolks, slowly drizzle a small amount of the hot cream mixture into the whisked yolks while continuously whisking. Repeat this process a few more times, ensuring you add the hot cream very slowly and keep whisking vigorously to gradually warm the yolks without scrambling them.
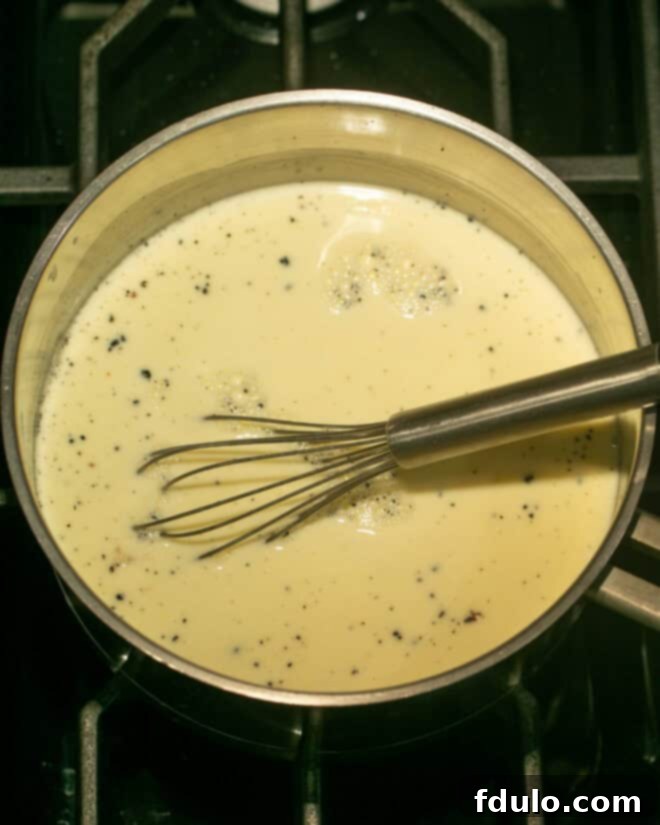
- Pour the tempered egg yolks back into the saucepan with the remaining cream mixture. Whisk gently until the mixture is smooth and well combined.
- Strain the entire custard mixture through a fine-mesh sieve into a clean bowl or back into the large measuring cup with a spout. This step removes the vanilla pod, seeds, and any tiny bits of cooked egg yolk, ensuring a perfectly silky custard.
- Place nine 8-ounce ramekins (or shallow ramekins as preferred) into a larger roasting pan. Fill the ramekins with the strained custard, almost to the top. Carefully place the roasting pan in the preheated oven. Then, pour enough boiling water into the roasting pan to come halfway up the sides of the ramekins, creating a water bath (bain-marie).
- Bake for approximately 40-50 minutes, or until the custard is set around the edges but still has a slight, delicate jiggle in the center when gently shaken. (For shallow ramekins, baking time might be closer to 40 minutes.)
- Carefully remove the ramekins from the water bath and allow them to cool on a wire rack for at least 30 minutes. Once cooled, chill the custards in the refrigerator for a minimum of 2 hours, or up to 3 days, covered with plastic wrap.
- Just before serving, sprinkle an even layer of turbinado sugar over the top of each chilled Crème Brûlée. Use a culinary torch to caramelize the sugar until it melts, bubbles, and turns a rich golden-amber color. If using a broiler, place the ramekins about 4 inches under the element and watch very carefully, removing them as soon as the sugar is melted and golden brown to avoid burning.
- Serve each exquisite Crème Brûlée immediately on a small plate to fully enjoy the warm, brittle crust contrasting with the cool, creamy custard.
Notes
For easier separation, crack your eggs when they are cold, as the yolk is less likely to break. Bring the egg whites to room temperature if using for other recipes.
Recommended Products
As an Amazon Associate and member of other affiliate programs, I earn from qualifying purchases.
- Turbinado Sugar
- Roasting Pan
- Shallow Ramekins
- Culinary Torch
Nutrition Information:
Yield:
9
Serving Size:
1 creme brulee
Amount Per Serving:
Calories: 488Total Fat: 42gSaturated Fat: 26gTrans Fat: 1gUnsaturated Fat: 14gCholesterol: 285mgSodium: 100mgCarbohydrates: 20gFiber: 0gSugar: 20gProtein: 8g
HOW MUCH DID YOU LOVE THIS RECIPE?
Please leave a comment on the blog or share a photo on Pinterest
