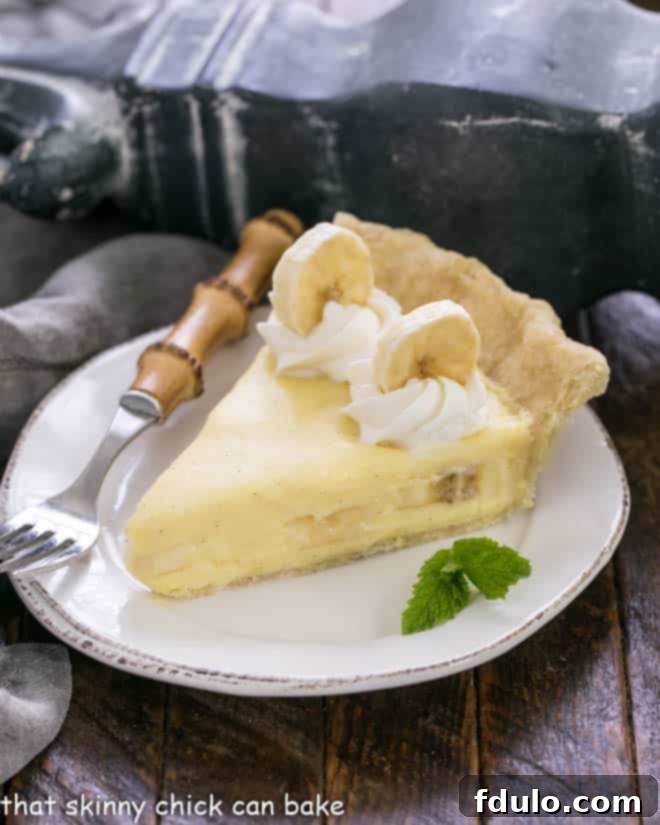
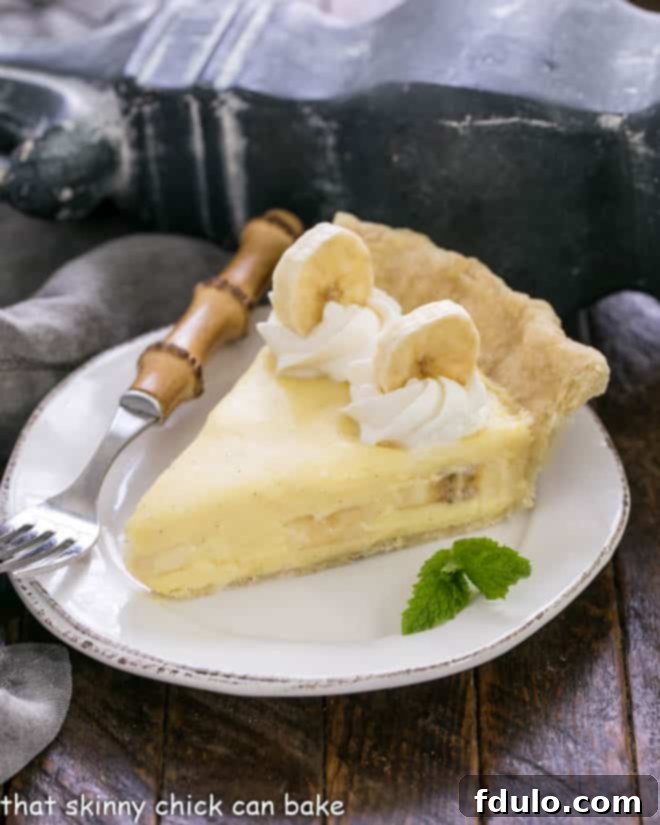
Indulge in the ultimate comfort dessert with this exquisite Banana Cream Pie Recipe. Featuring a golden, buttery pastry crust, a velvety smooth vanilla custard, perfectly ripe banana slices, and elegant swirls of freshly whipped cream, this pie promises a truly unforgettable experience. It’s a timeless classic, reimagined for modern home bakers seeking perfection in every bite.
This visually stunning Banana Cream Pie isn’t just a feast for the eyes; its rich, harmonious flavors make it taste even more delicious than it looks. Prepare to captivate your senses with a dessert that balances creamy indulgence with fresh, natural sweetness.
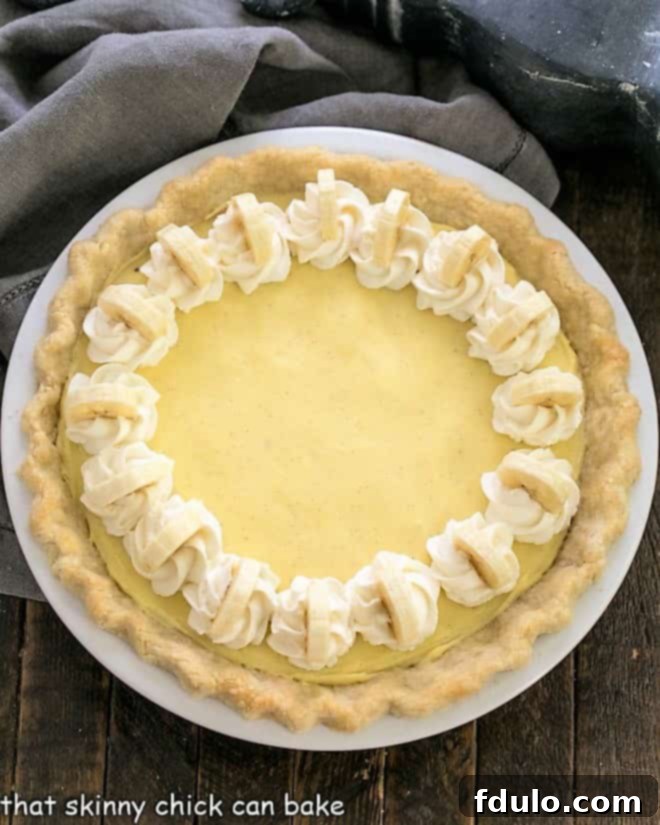
Why This Banana Cream Pie Will Become Your Go-To Recipe
Discover what makes this particular banana cream pie recipe stand head and shoulders above the rest. We believe in creating desserts that are not only delicious but also genuinely memorable, and this pie embodies that philosophy perfectly. Here are compelling reasons why you simply must try making it:
- Award-Winning Vanilla Custard: The heart of this pie is its extraordinary vanilla custard filling, a cherished recipe from Tom Douglas. As a multi-talented cookbook author and renowned Seattle restaurateur, Douglas’s expertise guarantees a custard that is unparalleled in its richness, smoothness, and depth of vanilla flavor. This isn’t just any custard; it’s a culinary masterpiece that forms the perfect foundation for our pie.
- Pure, Authentic Banana Flavor: Unlike many recipes that resort to artificial banana extracts, our pie celebrates the pure, unadulterated taste of fresh bananas. Each bite features luscious banana slices artfully tucked into the vanilla bean-speckled custard, ensuring an authentic and delightful fruit essence that complements the creamy filling without overpowering it.
- A Beloved Classic Reimagined: This isn’t just a dessert; it’s a culinary journey back to simpler times. This banana cream pie captures the essence of a classic diner pie that has captivated hearts for decades, but with an elevated, gourmet touch. It’s the perfect blend of nostalgic comfort and sophisticated flavor, making it ideal for any occasion, from casual family dinners to elegant gatherings.
- Irresistibly Creamy Texture: Prepare for a sensory delight as your spoon effortlessly glides through layers of flaky crust, tender banana, and an impossibly smooth, melt-in-your-mouth custard. The texture is designed to be lusciously creamy, providing a comforting and satisfying experience with every single bite.
- Perfect for Any Occasion: Whether you’re celebrating a special birthday, hosting a holiday meal, or simply craving a sweet escape, this banana cream pie is versatile enough to fit any event. Its elegant presentation and universally loved flavor make it a crowd-pleaser that consistently earns rave reviews.
While I often lean towards fruitier pies like peach, apple, or raspberry, especially when paired with a generous scoop of vanilla ice cream, there’s one particular pie that has always held a special place for Bill in our home: banana cream pie. And truthfully, after I snuck a sample of Tom Douglas’s meticulously crafted vanilla custard – the very filling I prepared for this pie – I knew instantly that this version was destined to be truly extraordinary.
What truly sets this custard apart is its reliance on natural flavors. There’s no artificial boost of banana here; instead, the focus is entirely on the pure, rich vanilla bean-speckled custard, perfectly complementing a generous layer of fresh banana slices. This luxurious concoction of sugar, eggs, whole milk, heavy cream, fragrant vanilla bean seeds, and a hint of vanilla extract transforms into a filling so fabulous, so captivating, that the bowl of vanilla-specked delight quickly became my new best friend. It’s this dedication to authentic, high-quality ingredients that elevates this pie to a whole new level of decadence.
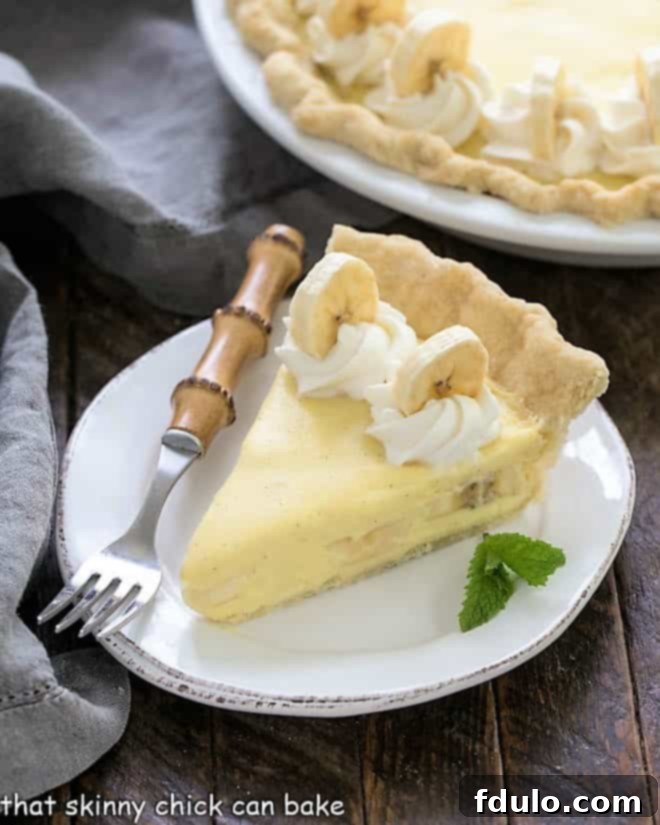
Mastering the Perfect Banana Cream Pie: Expert Recipe Tips
This recipe holds a special sentiment for me, as it was requested by my mother-in-law, Jane, for her 90th birthday. Having been my mother-in-law for 30 wonderful years, Jane is truly a gem – warm, incredibly generous, and possesses a heart of gold. We connected instantly from the day we met. Like her middle son, she has an unparalleled knack for storytelling, frequently leaving us in stitches as she regales us with entertaining tales of motherhood and witty anecdotes from her years of owning a pharmacy in a charming, tiny town. Hearing horror stories from friends about their mothers-in-law, I know I’ve truly been blessed.
Despite her petite frame, Jane, barely weighing 90 pounds, enthusiastically devoured a generous slice of this homemade banana cream pie. That’s a testament to its irresistible appeal! You, too, will find yourself unable to resist this amazing dessert. Here’s a detailed guide to help you achieve banana cream pie perfection:
- Prepare and Cool Your Pastry Crust: The Foundation of Flavor
The journey to a perfect banana cream pie begins with a flawless crust. Baking an empty pie crust before adding the filling is known as blind baking, and it’s a crucial step to prevent a soggy bottom and ensure a crisp, flaky texture. To keep the bottom of your crust from puffing up unevenly during baking, I highly recommend lining your pie shell with a round of parchment paper and then filling it with pie weights (or dried beans). These weights provide gentle pressure, ensuring the crust holds its shape. Bake the crust according to your recipe’s instructions, and remember to remove the pie weights towards the end of the baking time. This allows the bottom crust to achieve a beautiful golden-brown color and thorough crispness. It’s essential that your crust is completely cooled before you even begin preparing the filling, as any residual warmth can negatively impact the custard’s texture.
- An Alternative to Pie Weights: Docking the Crust
If you don’t have pie weights on hand, an alternative method for blind baking is “docking” the crust. This involves gently pricking the bottom and sides of the unbaked pie shell multiple times with a fork. These small holes allow steam to escape during baking, preventing the crust from bubbling up excessively. While not as effective as pie weights for an even bake, it’s a simple and accessible method to help maintain the crust’s shape.
- Crafting the Exquisite Vanilla Custard: The Heart of the Pie
Next, focus on creating the luxurious vanilla custard filling. This recipe elevates the flavor profile by using both a fragrant vanilla bean and high-quality real vanilla extract. The combination offers a complex, deep vanilla aroma and taste that synthetic flavors simply cannot replicate. If you find yourself without a vanilla bean, don’t fret! You can substitute it with 1 teaspoon of vanilla bean paste, which offers a similar visual speckled effect and robust flavor, or simply double the amount of vanilla extract to ensure a strong vanilla presence.
- The Science of Thickening: Egg Yolks and Cornstarch
The custard’s signature thickness and silky texture are achieved through a careful balance of egg yolks and cornstarch. Egg yolks provide richness and contribute to the creamy consistency, while cornstarch acts as a powerful thickening agent, giving the custard its pudding-like structure. Understanding their roles is key to a perfectly set filling.
- PRO-Tip: Mastering the Art of Tempering Eggs
One of the most critical steps in custard making is tempering the egg yolks. This technique prevents the eggs from scrambling when they encounter hot liquid. You must slowly and gradually drizzle a small amount of the hot milk and cream mixture into the whisked egg yolks, whisking constantly and vigorously. This gradual introduction slowly raises the temperature of the egg yolks without cooking them, preparing them for the hotter mixture. Failing to temper properly can result in unsightly yellow specks of cooked egg throughout your otherwise smooth and luscious custard, compromising both texture and appearance.
- PRO-Tip: Unleashing Cornstarch’s Full Thickening Potential
It’s important to remember that cornstarch only reaches its full thickening potential once the mixture comes to a full boil. Don’t be tempted to remove the custard from the heat prematurely! Ensure the pudding mixture gently bubbles and visibly thickens before you take it off the stovetop. Constant whisking during this stage is vital to prevent scorching on the bottom of the pan and ensure a uniformly smooth texture.
- The Secret to Silky Smooth Custard: Incorporating Butter with a Food Processor
This recipe includes a somewhat unusual yet ingenious step: adding butter to the slightly cooled pastry cream using a food processor. After the custard has cooked and cooled slightly (but is still warm enough to melt butter), transfer it to a food processor. Add the room-temperature butter in small pieces, along with the vanilla extract, and pulse until the butter is fully incorporated. This process not only makes the custard incredibly smooth and glossy but also adds a luxurious richness and helps to stabilize the emulsion, contributing to an even more decadent mouthfeel.
- Rapid Cooling for Optimal Texture and Safety
Once the custard is perfectly smooth, it needs to cool down quickly to halt the cooking process and prevent bacterial growth. Transfer the hot custard into a clean, medium-sized bowl. Then, place this bowl into a larger bowl filled with ice water (an ice bath). Stir the custard occasionally while it’s in the ice bath until it has cooled considerably. This rapid cooling ensures the custard retains its velvety texture. Once cooled, cover the surface of the custard directly with plastic wrap, pressing the wrap firmly against the surface to create an airtight seal. This crucial step prevents a “skin” from forming on top of the custard as it chills. Refrigerate for at least 3 hours, or until thoroughly set.
- Assembling the Pie: Layers of Delight
Once your crust is cool and your custard is thoroughly chilled and set, it’s time for assembly. Spread about half of the prepared vanilla pastry cream evenly across the bottom of your blind-baked pie crust. An offset spatula is an excellent tool for achieving a smooth, uniform layer.
- Layering with Fresh Bananas
Arrange your freshly sliced bananas over the first layer of custard. Use ripe but firm bananas to ensure they hold their shape and provide the best texture. Once the banana layer is complete, gently top with the remaining pastry cream, spreading it carefully to cover the bananas and create a smooth, inviting surface.
- The Grand Finale: Whipped Cream Garnish
For the grand finale, generously top the pie with freshly made, sweetened whipped cream. You can spread the whipped cream over the entire surface of the pie for a rustic, indulgent look, ensuring every slice is crowned with creamy perfection. Alternatively, for a more elegant presentation, use a piping bag fitted with a Wilton 1M tip (or similar star tip) to pipe beautiful swirls or rosettes around the perimeter of the pie. For an extra touch of flair and flavor, place a thin slice of fresh banana on top of each whipped cream swirl just before serving. Remember to add the banana garnish right before serving to prevent discoloration from oxidation, ensuring your pie looks as fresh and appealing as it tastes.
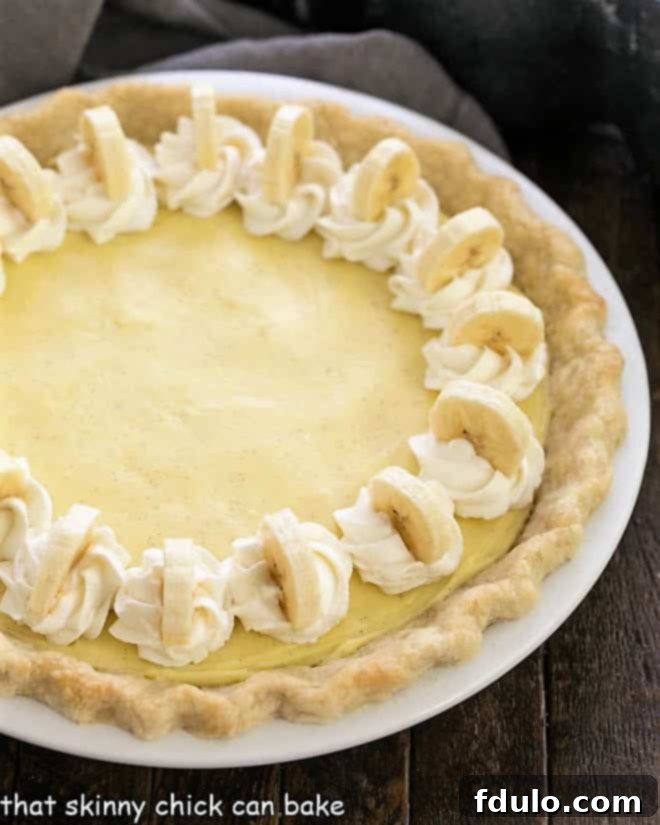
Frequently Asked Questions About Banana Cream Pie
Pies are a wonderfully diverse category of desserts, generally falling into four main types: cream pies, fruit pies, custard pies, and savory pies. A cream pie, like our delicious banana cream pie, is defined by its decadent filling made from pastry cream or pudding. These fillings are typically cooked on the stovetop until thick and creamy, then chilled to set, and often crowned with a generous layer of whipped cream. Fruit pies, in contrast, feature a sweet fruit filling, which can be baked within a single or double pastry crust. Custard pies, such as pumpkin or key lime pie, have a filling that is primarily thickened by baked eggs, resulting in a firm yet creamy texture when baked. Lastly, savory pies are a broad category, often filled with eggs (like a quiche), meats, vegetables, and a savory sauce, serving as a main course rather than a dessert.
Due to their dairy and egg-based fillings, cream pies are highly perishable and require careful storage to ensure both freshness and food safety. To prevent the risk of food-borne illness, cream pies should not be left at room temperature for longer than 2 hours. For optimal freshness and safety, it is always best to store your banana cream pie in the refrigerator. Ensure it is covered loosely with plastic wrap or aluminum foil to protect it from absorbing other odors and to maintain its moisture, especially the whipped cream topping.
Most cream pies, including this delightful banana cream pie, will retain their quality and remain safe to eat for approximately 3-4 days when properly refrigerated. However, it’s important to note that bananas, especially those used for garnishing and exposed to air, have a tendency to turn brown due to oxidation. While the pie will still be safe to eat for a few days, the appearance of the bananas might diminish. For the absolute best flavor and visual appeal, a banana cream pie is truly at its peak and most enjoyable on the day it is made. Planning to serve it within 24 hours of preparation will ensure the freshest taste and pristine presentation.
Unfortunately, I generally do not recommend freezing a cream pie, and particularly a banana cream pie. The delicate texture of the custard filling is likely to be compromised during the freezing and thawing process. It can become watery, grainy, or separate, significantly diminishing the luxurious creaminess that makes this pie so special. Additionally, bananas themselves do not freeze particularly well; they can become mushy and discolored upon thawing, further detracting from the pie’s quality. For the best experience, it’s always preferable to enjoy your banana cream pie fresh.
Garnishing is the final touch that elevates your banana cream pie from delicious to dazzling. Sweetened whipped cream is undeniably the most classic and complementary topping for this pie, adding a light, airy contrast to the rich custard. You can simply spread a generous layer of whipped cream over the entire surface of the pie, ensuring every slice gets its share of fluffy goodness. For a more professional and elegant presentation, utilize a piping bag fitted with a star tip, such as a Wilton 1M. Pipe beautiful swirls, rosettes, or a decorative border around the perimeter of the pie. To add a final flourish and hint at the delicious filling, top each piped swirl with a thin, freshly sliced banana. Remember this crucial tip: always add the fresh banana slices right before serving. This timing is key to prevent them from discoloring due to oxidation, ensuring your pie looks perfectly pristine and appealing when it reaches the table.
More Irresistible Pie Recipes You’ll Love:
If you have fallen in love with the art of pie making, or simply enjoy a beautifully crafted dessert, then you are in for a treat! Our collection of pie recipes goes beyond the classic, offering a range of flavors and textures to satisfy every craving. From tart fruit pies to decadent chocolate creations, there’s a perfect pie waiting for you. Dive into these delightful recipes and expand your baking repertoire:
- Cherry Almond Macaroon Pie from Cravings of a Lunatic: A delightful blend of sweet cherries and crunchy almond macaroon topping.
- Lemon Meringue Pie Recipe: A zesty, bright lemon filling topped with fluffy, toasted meringue.
- Classic Rhubarb Pie: A timeless favorite with its signature tart-sweet flavor and an elegant lattice crust.
- Pumpkin Pie Recipe: The quintessential holiday dessert, rich with spices and creamy pumpkin.
- Easy Chocolate Cream Pie: A simple yet utterly indulgent chocolate cream pie in a crunchy graham cracker crust.
- Banana Cream Cheesecake Pie: A delightful fusion of creamy banana, rich cheesecake, and a perfect crust.
- For even more inspiration, explore our extensive collection of the Best Pie Recipes.
This comprehensive guide and recipe for the Best Banana Cream Pie was first shared in April 2016. The content, including photos and detailed text, was thoughtfully updated and expanded in 2020 to provide an even richer and more helpful resource for our valued readers. We continuously strive to enhance our recipes and ensure they remain fresh, inspiring, and accessible to all home bakers.
We love connecting with our community! Stay in touch through social media by following us on Instagram, Facebook, and Pinterest. Don’t forget to tag us when you try one of our delicious recipes – we absolutely adore seeing your culinary creations! And if you love the results as much as we do, please consider giving this recipe a 5-star rating in the recipe card below. Your feedback and support mean the world to us!
Best Banana Cream Pie
30 minutes
20 minutes
50 minutes
8 servings
Experience pure bliss with this luscious banana cream pie, featuring Tom Douglas’ renowned vanilla custard. A truly decadent dessert!
Ingredients
- 1 homemade or high-quality store-bought 9-inch pastry crust, fully baked and completely cooled
For the Exquisite Vanilla Custard:
- 1 vanilla bean, carefully split lengthwise, with seeds scraped out and both seeds and pod reserved
- 1 1/4 cups whole milk
- 1 cup heavy cream
- 3/4 cup granulated sugar
- 1/4 cup plus 1 teaspoon cornstarch
- 6 large egg yolks
- 6 tablespoons unsalted butter, softened to room temperature
- 1 teaspoon pure vanilla extract
For Assembly and Garnish:
- 2 ripe but firm bananas, peeled and thinly sliced
- 1 cup cold heavy cream (for whipped topping)
- 1/4 cup powdered sugar
- 1 teaspoon pure vanilla extract (for whipped topping)
Instructions for a Perfect Banana Cream Pie
- Prepare the Vanilla Infusion: Begin by splitting the vanilla bean lengthwise using a sharp knife. Carefully scrape out the tiny, fragrant seeds. Place the empty vanilla pod along with the whole milk and heavy cream into a medium saucepan. Set aside the vanilla bean seeds for later use.
- Whisk Dry Ingredients and Egg Yolks: In a large, heatproof bowl, thoroughly whisk together the granulated sugar and cornstarch until no lumps remain. Add the reserved vanilla bean seeds and the six egg yolks to this mixture. Continue whisking vigorously until the mixture is smooth, uniformly combined, and has lightened slightly in color, indicating it’s well aerated.
- Gently Heat Dairy Mixture: Place the saucepan with the milk, cream, and vanilla pod over medium heat. Bring the mixture to a gentle simmer, just until you see small bubbles forming around the edges of the pan. Do not allow it to come to a rolling boil.
- Temper the Egg Yolks: Remove the hot milk and cream mixture from the heat and carefully discard the vanilla pod. While continuously whisking the egg yolk mixture, slowly drizzle a scant cup (about 3/4 cup) of the hot liquid into the eggs. This crucial step, known as tempering, gradually raises the temperature of the egg yolks, preventing them from scrambling.
- Combine and Return to Heat: Once the egg yolks are tempered, slowly pour the remaining hot milk and cream mixture back into the large bowl with the tempered egg mixture, continuing to whisk constantly until everything is smooth and well combined.
- Cook the Custard: Return the entire mixture to the stovetop (preferably in the same saucepan) over medium heat. Cook, whisking constantly and diligently, until the mixture becomes very thick, resembling the consistency of a rich pudding. This step is vital for the cornstarch to fully activate.
- Cool Slightly: If necessary, adjust the heat to prevent any scorching on the bottom of the pan. Once thickened, remove the custard from the heat. Stir it a few times and allow it to cool slightly, aiming for a temperature of about 140ºF (60ºC).
- Achieve Silky Smoothness: Scrape the slightly cooled custard mixture into the bowl of a food processor. Add the softened butter and the vanilla extract. Pulse the food processor until the butter is completely melted and fully incorporated, and the custard appears incredibly smooth and glossy. This step gives the custard an incomparable silky texture.
- Chill the Custard: Transfer the smooth custard to a clean bowl. To rapidly cool it, place this bowl into a larger bowl filled with ice water (an ice bath). Stir the custard occasionally until it is thoroughly cool to the touch. (A useful tip: you can fill your kitchen sink partway with ice cubes and water to create a large ice bath.) Once cooled, press plastic wrap directly onto the surface of the custard to prevent a “skin” from forming. Refrigerate for a minimum of 3 hours, or until the custard is completely set and chilled.
- Assemble the Pie Layers: Once the custard is perfectly chilled, scrape about half of it into your prepared and cooled pie crust. Use an offset spatula or the back of a spoon to spread it evenly across the bottom. Arrange a layer of your thinly sliced bananas neatly over the custard. Then, carefully top with the remaining custard, spreading it gently to cover the bananas completely.
- Prepare and Garnish with Whipped Cream: In a clean, cold bowl, whip the cold heavy cream with the powdered sugar and vanilla extract until stiff peaks form. Generously top the pie with this freshly whipped cream. For an elegant finish, you can pipe decorative swirls of whipped cream around the pie’s edge and place a fresh banana slice on top of each swirl just before serving to prevent browning.
Notes on Serving and Storage
For the freshest flavor and best texture, this exquisite banana cream pie is truly best enjoyed on the day it is made. While it can be refrigerated for up to 3-4 days, the bananas tend to soften and discolor over time, especially those exposed to air. Therefore, for an optimal experience that highlights the crisp crust, creamy custard, and fresh bananas, we highly recommend serving it shortly after preparation and chilling.
Nutrition Information:
Yield:
8 Servings
Serving Size:
1 Slice
Amount Per Serving:
Calories: 497Total Fat: 37gSaturated Fat: 22gTrans Fat: 1gUnsaturated Fat: 12gCholesterol: 238mgSodium: 144mgCarbohydrates: 37gFiber: 1gSugar: 31gProtein: 6g
HOW MUCH DID YOU LOVE THIS RECIPE?
Please leave a comment on the blog or share a photo on Pinterest
