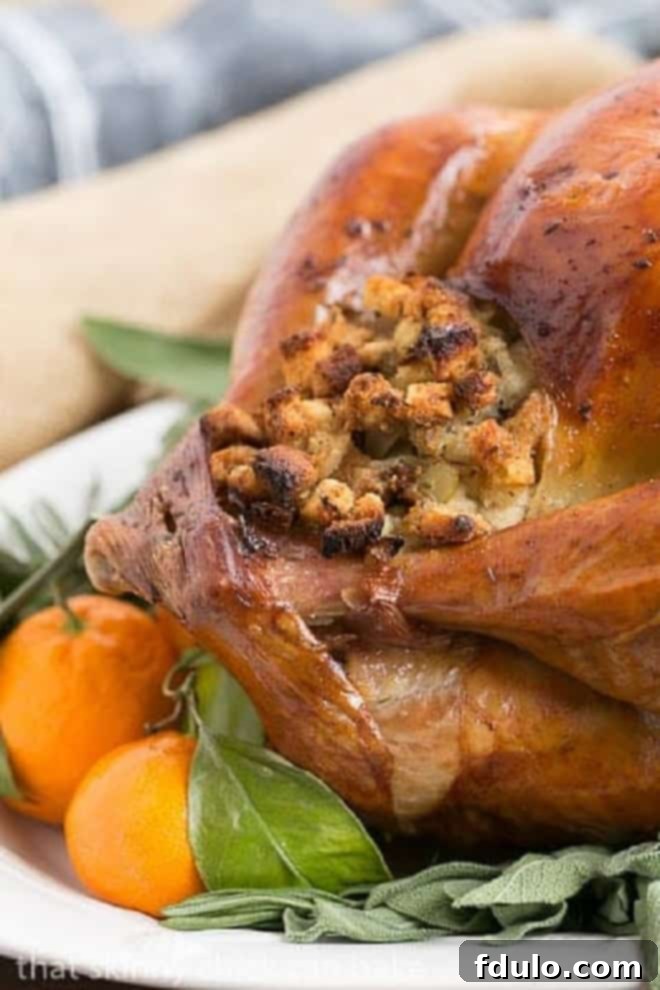
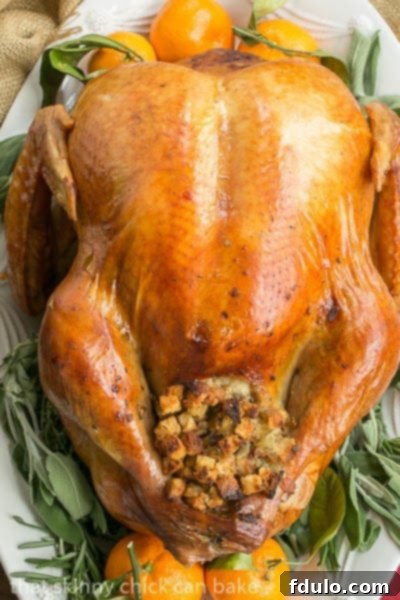
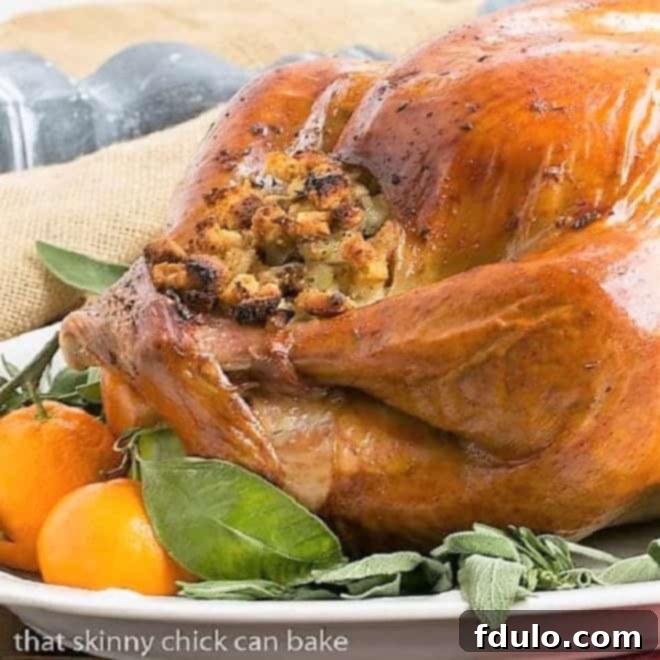
Dry Brined Turkey is truly the superior method for preparing your holiday centerpiece! If you’re tired of the logistical nightmare and messy cleanup associated with traditional wet brining, this dry brine turkey recipe offers a simple, elegant, and incredibly effective solution. Prepare to impress your guests with a turkey that boasts perfectly seasoned, succulent meat and irresistibly crispy skin, all with minimal fuss.
After decades in the kitchen, experimenting with countless preparations, this has become my unwavering go-to Thanksgiving Turkey Recipe. It consistently delivers the most delicious, moist results, making it the Best Turkey Recipe I’ve encountered in over 30 years of holiday cooking. Say goodbye to dry, bland birds and hello to a truly unforgettable feast!

Why This Dry Brined Turkey Recipe Will Change Your Holiday Season
If you’re still on the fence about trying dry brining, let me explain why this method isn’t just a convenience, but a game-changer for your holiday cooking:
- Effortless Preparation: Forget the enormous cooler, gallons of brining liquid, and the inevitable spills. Dry brining involves a simple rub-down, making it infinitely easier and significantly less messy than soaking a turkey overnight in a bulky brine solution. It frees up valuable refrigerator space and your peace of mind.
- Superior Flavor Infusion: By applying a salt and herb blend directly to the turkey and allowing it to rest for several days in the refrigerator, the salt works its magic through osmosis. It draws moisture out of the turkey, dissolves in that moisture, and then reabsorbs back into the meat, carrying the salt and herb flavors deep within. This process ensures the turkey meat is perfectly seasoned from within, not just on the surface.
- Unrivaled Moisture and Texture: This method doesn’t just flavor; it fundamentally improves the turkey’s texture. The salt helps the muscle proteins retain moisture more effectively during cooking, resulting in an exceptionally juicy turkey breast and tender dark meat. Furthermore, the dry air exposure in the refrigerator before roasting helps dry out the skin, leading to that coveted, shatteringly crisp golden-brown finish that every Thanksgiving host dreams of.
- Consistent, Reliable Results: Once you understand the simple steps, this dry brine turkey recipe consistently delivers show-stopping results. It takes the guesswork out of holiday cooking, allowing you to focus on other festive preparations and enjoy time with your loved ones.
Essential Ingredient Notes for Your Perfect Dry Brine
Achieving a spectacular dry-brined turkey starts with understanding your ingredients. Here’s what you need and why:
- Turkey – Unbrined is Key: This is perhaps the most crucial point. Your turkey absolutely should not have been previously brined, injected, or enhanced with a saline solution. Many commercially available turkeys, like Butterball and some store brands, are pre-brined. Double brining will result in an excessively salty and unpleasant turkey. Always check the label carefully for terms like “pre-brined,” “enhanced,” or “contains up to X% solution.” Opt for a natural, unbrined bird.
- Kosher Salt – The Right Grain: For dry brining, kosher salt is essential. Its larger, coarser crystal structure allows for better control during application and a slower, more even absorption into the meat compared to fine table salt. Table salt is much denser, and using the same volume would lead to a significantly saltier result. Stick to kosher salt for optimal seasoning and texture.
- Dry Herbs – Aromatic Flavor Boost: A blend of dry herbs adds wonderful aromatic depth to your turkey. Classic choices include rosemary, thyme, bay leaves, and sage. You’ll typically use about 1-2 teaspoons of each dried herb, or if you prefer fresh herbs, about 1 tablespoon per herb for a more vibrant flavor profile. Feel free to customize this blend to your taste – poultry seasoning can also be a great addition.
- Butter – For Golden Perfection: While optional for the brine itself, butter is highly recommended for basting during the roasting process. I often use salted butter, as the turkey is already seasoned, but unsalted butter works equally well if you prefer to control the salt content more precisely. The butter not only adds flavor but also contributes to that beautiful, crispy, golden-brown skin.

Expert Tips for a Flawless Dry Brined Turkey
Over the years, perfecting the dry brine has taught me a few invaluable lessons that ensure success every time. Last year, a slight miscalculation meant I didn’t get the full three days of brining, but the turkey still managed to be a showstopper. This year, I’m armed with foresight and preparation. The result? Unbelievably crispy skin and moist, perfectly seasoned meat. I even roasted a substantial 22-pound bird, and half of it vanished by day’s end – a testament to the appetite of two growing twenty-something sons! Here are my top tips:
- Timing is Everything: PRO-Tip: Begin planning well in advance. Purchase your turkey early enough so it has ample time to fully thaw in the refrigerator (allow approximately 24 hours per 4-5 pounds) and be ready for brining by the Monday before Thanksgiving. This ensures you get the full 3-day brining period for optimal flavor and moisture.
- Embrace Simplicity, Ditch the Mess: The dry brining process is incredibly simple compared to the traditional wet brine. There’s no wrestling a slippery turkey into a huge bag filled with water, salt, sugar, and spices, nor the logistical nightmare of finding cooler space. And for those of us with “paranoid husbands” worried about raccoons, there’s no need to construct critter-proof fortresses on the patio! It’s a clean, contained, and stress-free process.
- Understand Osmosis: PRO-Tip: The core principle behind dry brining is osmosis. The salt draws moisture out of the turkey, creating a concentrated brine on the surface, which then re-enters the meat, carrying the seasoning with it. For this scientific magic to happen effectively, your turkey needs to be fully defrosted a minimum of 3 days prior to its planned roasting time. This allows sufficient time for the salt to penetrate deeply and evenly throughout the meat.
- Choose Your Herb Blend Wisely: Select high-quality kosher salt and your favorite complementary herbs. Classic choices that pair beautifully with turkey include sage, rosemary, bay leaves, and thyme. A good quality poultry seasoning blend can also be a fantastic shortcut. You can use just two or three, or a more complex mix – it’s all about personal preference.
- Uniform Herb Distribution: For the best flavor distribution, lightly pulse your chosen herbs together with the kosher salt in a food processor. This ensures they are finely broken down and thoroughly interspersed with the salt, creating a uniform rub that adheres well to the turkey’s skin.
- Prepare the Turkey: Before applying the brine, ensure your turkey is thoroughly dry. Pat the skin dry with paper towels inside and out. This dryness is crucial for two reasons: it allows the salt mixture to adhere better, and it’s the first step towards achieving that incredibly crispy skin during roasting.
- Generous Application: Liberally cover the entire surface of your dried turkey with the salt and herb mixture. Don’t forget to get some under the skin, especially over the breast meat, and a little inside the cavity. Place the seasoned turkey into a large food-safe plastic bag (a brining bag or an extra-large oven bag works well) and seal it, removing as much air as possible.
- Daily Care During Brining: Store the bagged turkey in the refrigerator. Each day, rub the turkey through the bag to redistribute the salt mixture and ensure even brining. On the third day, flip the turkey to ensure all sides are benefiting from the process.
- Crucial Food Safety: PRO-Tip: Always prioritize food safety when handling raw poultry. Wash your hands thoroughly with soap and warm water for at least 20 seconds before and after handling the turkey, and clean all surfaces, utensils, and cutting boards that come into contact with it. Poultry is known to harbor bacteria like salmonella, so vigilance is key.
- Pre-Roasting Prep: About an hour before you plan to roast, remove the turkey from the refrigerator and the brining bag. Allow it to sit at room temperature for approximately one hour. This helps the turkey cook more evenly. Do not rinse the turkey before roasting, as this removes the beneficial salt concentration on the skin and prevents it from becoming truly crisp. Baste the turkey generously with melted butter before it goes into the oven, then continue basting periodically throughout the roasting process.
- Achieving Perfect Doneness: Roast your turkey until the internal temperature reaches 165°F (74°C) in both the thickest part of the breast and the inner thigh, without touching the bone. A reliable meat thermometer is your best friend here.
I can still recall the exhaustion of our previous wet-brining exploits. If you haven’t yet discovered the magic of using a dry brine for your Thanksgiving Turkey Recipe, I am confident you will be absolutely delighted with the delicious, moist, and crispy results if you give this method a try. It truly simplifies the holiday meal without compromising on flavor or quality.
P.S. For those who enjoy experimenting with different brining techniques, I also have a delightful Holiday Honey Brined Turkey Recipe that offers a unique wet brining experience.

Make the Most of Your Feast: Delicious Recipes for Turkey Leftovers
Once the main event is over, the joy of a perfectly cooked dry-brined turkey continues with a plethora of delicious leftover possibilities. Don’t let a single shred go to waste! Here are some fantastic ideas to transform your extra turkey into exciting new meals:
- 21 Easy Recipes for Turkey Leftovers from Foodie Crush – A comprehensive guide to inspire your post-holiday culinary adventures.
- Leftover Turkey Monte Cristo from Wishes and Dishes – A delightful sweet and savory sandwich that’s perfect for brunch or a hearty lunch.
- Turkey Nachos from The View from Great Island – A fun and flavorful way to enjoy your turkey, great for casual family meals.
- Turkey Tetrazzini – A classic comfort food casserole that’s creamy, savory, and incredibly satisfying.
- Turkey Enchilada Casserole – Give your leftovers a delicious Tex-Mex twist with this easy-to-assemble casserole.
- Turkey Soup Recipe – Warm, hearty, and perfect for a chilly day, this soup is a fantastic way to use up bones and meat.
- Curried Turkey Salad – A flavorful and light option for sandwiches or wraps, offering a refreshing change from traditional turkey preparations.
Frequently Asked Questions About Dry Brining Turkey
For many years, I relied on wet brining, and while the mess and hassle were considerable, the juicy results seemed worth it at the time. However, once I discovered dry brining, my preference shifted entirely. Dry brining offers a significantly easier and, in my opinion, tastier alternative. While the total brining time for a dry brine might be longer (typically 3 days), almost all of this is hands-off time in the refrigerator. The primary advantages include less mess, superior flavor penetration directly into the meat, and most notably, an incredibly crispy skin due to the lack of excess moisture. Wet brines can sometimes lead to a slightly “hammy” texture and often result in less crispy skin. For a truly superior flavor and texture profile with minimal fuss, dry brining consistently comes out on top.
No, it is highly recommended not to use regular table salt for dry brining. Table salt has much finer crystals and is considerably denser than kosher salt. If you use table salt in the same volume as kosher salt, your turkey will become extremely and unpleasantly salty, potentially ruining your holiday meal. The larger, coarser crystals of kosher salt allow for better control during application and a more gradual, even absorption into the meat, resulting in perfectly seasoned turkey without being overly salty. Always opt for coarse kosher salt for dry brining.
To successfully dry brine a turkey, you’ll need a few key items. First and foremost, you need a turkey that has *not* been pre-brined or injected with a solution. Brands like Butterball often fall into this category, so always check the label. You’ll also need coarse kosher salt – this is non-negotiable for proper brining. For flavoring, have a selection of dry herbs on hand; sage, rosemary, thyme, and bay leaves are excellent choices, and a good quality poultry seasoning blend can also enhance the flavor. Lastly, you’ll need a large, food-safe brining bag or oven bag to contain the turkey during its refrigeration period, along with a roasting pan and rack for cooking.
For optimal results, the general rule of thumb for dry brining is to allow enough time for a thorough process. This typically involves brining the turkey, covered in its bag, for about 2 days in the refrigerator. Following this initial period, remove the turkey from the bag and return it to the refrigerator, uncovered, for an additional 1 day (or at least 8-12 hours) to air dry. This crucial air-drying step helps to desiccate the skin, creating a surface that will crisp up beautifully and achieve that desirable golden-brown color during roasting. Ensure you allocate enough overall time for this 3-day brining and drying cycle.
Yes, you absolutely can stuff a dry-brined turkey! Despite some advice to the contrary, stuffing a dry-brined bird is perfectly fine and often preferred for flavor. The main concern with stuffing is ensuring it reaches a safe internal temperature (165°F or 74°C). While a wet-brined turkey needs a thorough rinse to prevent the stuffing from becoming overly salty, the risk is significantly reduced with a dry-brined turkey. However, I still recommend a quick rinse of the turkey cavity before stuffing to remove any lingering surface salt, ensuring your stuffing maintains its intended flavor profile without being too salty. Always use a meat thermometer to check the stuffing’s temperature for food safety.
No, there is generally no need to rinse your dry-brined turkey before roasting, and in fact, it’s often advisable *not* to. Rinsing the turkey will wash away the concentrated salt on the skin, which is essential for achieving that sought-after crispy, golden-brown finish. While the skin might taste slightly salty on its own, I’ve never found it to be excessively so when eaten with the meat and other accompaniments. Furthermore, rinsing poultry in your sink significantly increases the risk of cross-contamination, spreading harmful bacteria like salmonella or other pathogens around your kitchen. Patting the turkey dry with paper towels after removing it from the brine bag, and before roasting, is the only preparation needed.
Roasting a dry-brined turkey follows a similar process to roasting any other turkey, but with the added benefit of enhanced flavor and moisture retention. First, ensure your unrinsed turkey is placed on a rack within a large roasting pan. This allows for even air circulation around the bird, promoting crispy skin. Preheat your oven to a higher temperature initially (e.g., 425°F or 220°C) for about 30 minutes to get a good crisp on the skin, then reduce the temperature (e.g., 325°F or 160°C) for the remainder of the cooking time. Baste the turkey periodically with melted butter, or a mixture of butter and white wine or chicken broth, to keep the skin moisturized and promote browning. Continue roasting until the turkey reaches the FDA’s recommended internal temperature for doneness (165°F / 74°C in the breast and thigh). If the skin starts to brown too quickly, you can loosely tent it with aluminum foil.
The most reliable way to determine if your turkey is fully cooked and safe to eat is by using a meat thermometer. Insert the thermometer into the thickest part of the thigh and the thickest part of the breast, ensuring it doesn’t touch any bones. The USDA recommends a minimum internal temperature of 165°F (74°C) in these areas. If you’ve stuffed your turkey, the stuffing itself should also reach 165°F (74°C). While some cooks still rely on the “clear juices” method (where juices run clear when the turkey is pierced), this is less accurate and not recommended as the sole indicator. As a guideline, consult your turkey’s packaging or an online cooking chart for estimated cooking times based on its weight, but always start checking about 30-60 minutes before the estimated time to avoid overcooking. An overcooked turkey can quickly become dry, even if it’s been brined.
Resting your roasted turkey is a critical step that often gets overlooked but is essential for a moist and tender result. Once the turkey is removed from the oven, cover it loosely with aluminum foil and allow it to rest for at least 20-30 minutes, or even up to an hour for larger birds, before carving. During the roasting process, the juices inside the turkey migrate towards the center due to the heat. Resting allows these juices to redistribute evenly throughout the meat. If you carve the turkey immediately, these juices will simply run out, leaving you with dry meat. By allowing it to rest, the muscle fibers relax and reabsorb those delicious juices, ensuring every slice is as succulent and flavorful as possible.
You May Also Like: Complementary Holiday Side Dishes and Desserts
A magnificent dry-brined turkey deserves an equally impressive supporting cast of side dishes and desserts. Here are some of my favorite recipes to complete your unforgettable holiday feast:
- Ciabatta Stuffing Recipe – A savory, aromatic dressing with the delightful texture of ciabatta bread.
- Cranberry Fluff – A light, sweet, and festive salad that adds a refreshing contrast to rich holiday dishes.
- Spinach Souffle – An elegant and fluffy side dish that’s surprisingly easy to make.
- The Best Sweet Potato Casserole – A decadent and comforting classic, perfect for any holiday table.
- Best Thanksgiving Dessert Recipes – A curated collection of sweet endings to your celebratory meal.
- 25+ Thanksgiving Recipes – More inspiration to build your ultimate holiday menu.
Stay in touch through social media @ Instagram, Facebook, and Pinterest. Don’t forget to tag me when you try one of my recipes! If you love the results, please consider leaving a 5-star rating and a comment below.

Dry-Brined Turkey Recipe
10 minutes
3 hours
3 hours 10 minutes
12
This winning recipe, inspired by renowned culinary experts, will make for a remarkably juicy and crisp turkey without the common mess of traditional wet brining. It’s designed for ease and spectacular results.
Ingredients
- 16-pound turkey, fully defrosted, giblets removed (adjust salt quantities proportionally if using a different weight turkey)
- 3 tablespoons kosher salt (as a general guideline, use 1 tablespoon for every 5 pounds of turkey)
- Herbs, optional (recommended blend: fresh or dried rosemary, thyme, and bay leaves for a classic flavor profile)
- 6 tablespoons melted butter, for basting during roasting
Instructions
- Begin by rinsing your fully thawed turkey thoroughly under cold water, then pat it completely dry, inside and out, with paper towels. In a food processor, combine the kosher salt with about a tablespoon of your chosen dried herbs (rosemary, thyme, bay leaves work wonderfully). Pulse until the herbs are finely mixed with the salt.
- Lightly season the inside cavity of the turkey with a small amount of the herbed salt mixture. Then, generously sprinkle the breast side with a bit more than a tablespoon of the mixture, and each leg/thigh side with slightly less than a tablespoon. Ensure an even coating over all exterior surfaces. Carefully place the seasoned turkey into a large oven bag or specialized brining bag, removing as much air as possible before sealing it securely with a twist tie. Position the bagged turkey on a rimmed baking sheet to catch any potential drips.
- Refrigerate the turkey for 3 days. For the first two days, keep the turkey breast side up, gently rubbing the skin through the bag once a day to redistribute the salt mixture. On the third day, flip the turkey over. Approximately 8 hours before you plan to roast, remove the turkey from the bag and place it back on the rimmed baking sheet, uncovered, in the refrigerator. This crucial air-drying step will promote an incredibly crispy skin.
- About one hour prior to roasting, remove the turkey from the refrigerator and let it sit at room temperature. This allows for more even cooking. Position the turkey on a rack within a large roasting pan.
- Preheat your oven to 425ºF (220ºC). Brush the turkey generously with melted butter. Roast at this temperature for 30 minutes to initiate browning and crisping of the skin. After 30 minutes, reduce the oven temperature to 325ºF (160ºC). If the skin begins to brown too quickly, loosely tent the turkey with aluminum foil. Continue cooking until the turkey reaches the desired internal temperature (165ºF / 74ºC in the breast and thigh), basting periodically with the pan juices, additional melted butter, or a mixture of wine and chicken broth added to the bottom of the roaster, as needed.
Note: Cook time varies depending on the size of the turkey and oven calibration. Always rely on a meat thermometer for accurate doneness.
Notes
It is critically important to use a turkey that has not been pre-brined or injected with a solution (e.g., many Butterball turkeys). Using an already brined turkey will result in an excessively salty bird.
(Video demonstration of Dry Brined Turkey preparation is available on the original recipe page.)
Recommended Products
As an Amazon Associate and member of other affiliate programs, I earn from qualifying purchases.
- Turkey Baster
- Turkey Brining Bags
- Roasting Pan
Nutrition Information:
Yield:
12 servings
Serving Size:
1 serving
Amount Per Serving (estimated):
Calories: 423
Total Fat: 20g
Saturated Fat: 6g
Trans Fat: 1g
Unsaturated Fat: 31g
Cholesterol: 196mg
Sodium: 722mg
Carbohydrates: 0g
Fiber: 0g
Sugar: 0g
Protein: 58g
Data from the LA Times recipe is an estimate. Actual nutritional values may vary.
How Much Did You Love This Recipe?
Please leave a comment on the blog or share a photo on Pinterest
