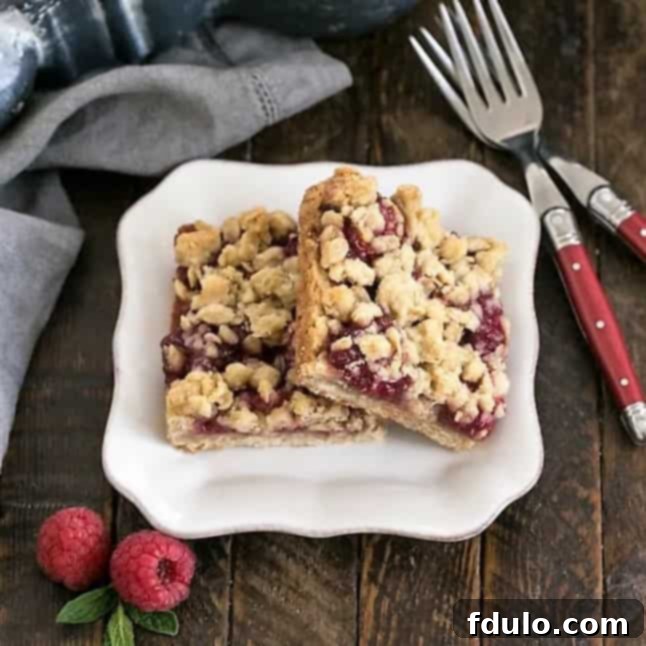
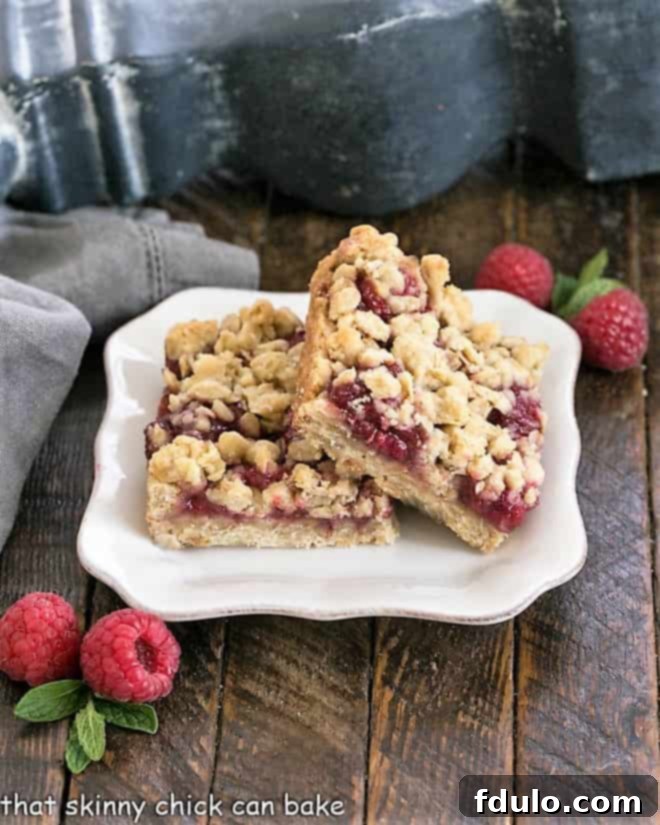
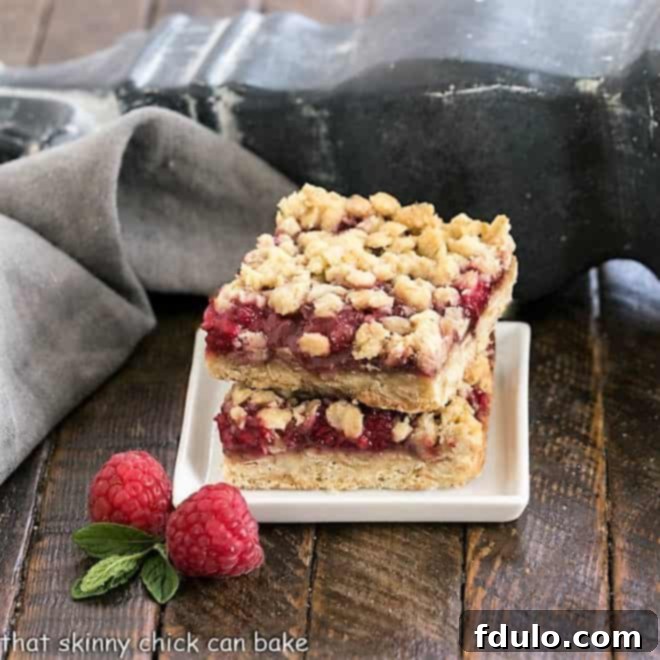
Raspberry Streusel Bars: Indulge in these scrumptious berry bars featuring a vibrant raspberry filling nestled between a golden, melt-in-your-mouth oatmeal crumb crust and a delightful streusel topping, perfect with fresh or frozen berries!
Imagine a dessert that effortlessly combines a buttery, sweet oatmeal crust with a generous layer of tart, juicy raspberries, all crowned with an irresistible crumbly topping. These divine Raspberry Streusel Bars are precisely that – a symphony of textures and flavors designed to captivate your taste buds. Whether you’re a seasoned baker or just starting, this recipe offers a straightforward path to creating a truly spectacular treat that’s impossible to resist.
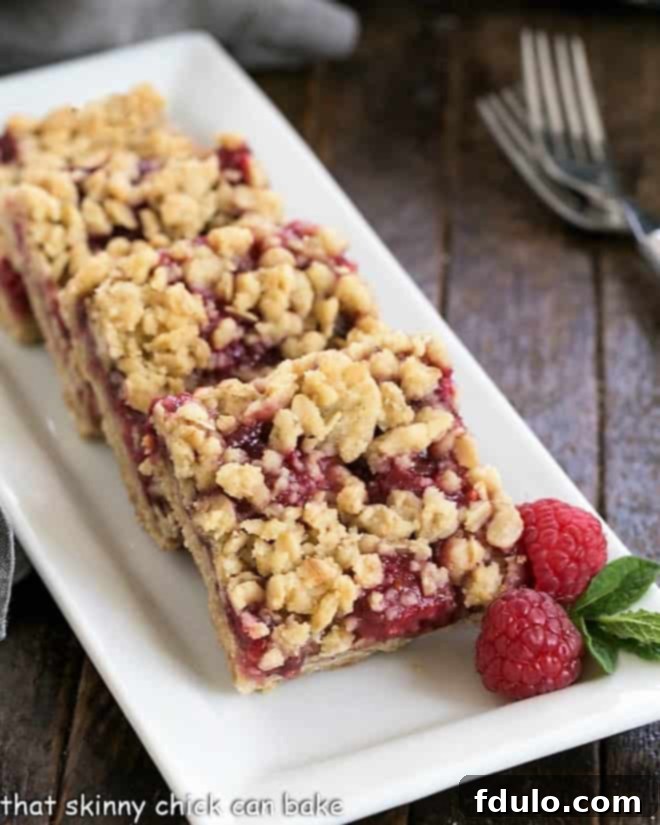
Delicious Raspberry Streusel Bars: Your Go-To Recipe for Easy Berry Perfection
There’s something uniquely comforting and utterly delicious about a homemade streusel bar. This recipe for Raspberry Streusel Bars takes that classic comfort to new heights, offering a perfect blend of sweet and tart, all wrapped up in a delightfully crumbly package. These bars are not just a dessert; they’re a celebration of fresh berry flavors, making them an ideal choice for any gathering, from backyard barbecues to elegant tea parties.
Why You’ll Adore These Raspberry Streusel Bars
I recently brought these exquisite, jewel-toned bars to my “knitting” group (I’m usually more of a chat-and-bring-goodies kind of friend, while they master their stitches!). The verdict was unanimous: they were a huge hit. While my family’s critiques often range from “good” to “eh,” my friends always deliver honest and enthusiastic praise. Here’s why these raspberry bars are destined to become a staple in your baking repertoire:
A Celebration of Flavor and Texture
These bars offer a sensational contrast of textures – a firm yet tender oatmeal crust, a soft and juicy raspberry filling, and a delightfully crunchy streusel topping. The sweet and tart raspberries burst with flavor, perfectly balanced by the rich, buttery oats. It’s a sensory experience that will leave everyone craving more.
Perfect for Any Occasion
Forget complicated pies or delicate tarts when you need a show-stopping dessert. These easy Raspberry Streusel Bars are versatile enough for any event. They serve beautifully as finger food for casual summer picnics, potlucks, and outdoor barbecues, yet are elegant enough to grace a dessert table at a more formal gathering. Their vibrant color makes them particularly appealing during festive seasons.
Effortless Elegance
Despite their impressive appearance and incredible taste, these bars are surprisingly simple to make. They offer a fantastic way to showcase the bounty of fresh raspberries without the fuss of more time-consuming recipes. The process is straightforward, allowing even novice bakers to achieve professional-looking and tasting results. Plus, a hint of wholesome oatmeal and a dose of Vitamin C from the fresh raspberries might just make them a tiny bit healthier than, say, a decadent chocolate mousse!
Year-Round Enjoyment
Whether raspberries are in peak season or you’re craving a taste of summer in the colder months, this recipe accommodates both fresh and frozen berries. This flexibility means you can enjoy these delightful treats whenever the craving strikes, making them a truly versatile dessert option for any time of year.
Essential Ingredients for Perfect Raspberry Bars
Creating truly exceptional Raspberry Streusel Bars starts with understanding the role each ingredient plays. While the recipe calls for standard pantry staples, a few nuances can elevate your baking from good to extraordinary:
- Oatmeal: The base of our incredible crust and streusel. The original recipe specifies classic (rolled) oats, which provide a chewier texture and more rustic feel. However, quick oats can be used in a pinch, though they might result in a slightly finer, less textured crumb. Avoid instant oats, as their texture can be too mushy.
- All-purpose Flour: The foundational dry ingredient, providing structure to both the crust and the streusel. Ensure it’s properly measured for the best consistency.
- Brown Sugar: This provides a deeper, more caramel-like sweetness compared to white sugar, complementing the oats and berries beautifully. If you find yourself without brown sugar, you can make an emergency substitution: add one tablespoon of molasses to a cup of white granulated sugar and mix thoroughly. Using your fingers helps to fully incorporate the molasses and achieve that moist, packed brown sugar texture.
- Butter: The key to rich flavor and a tender crumb. While the original recipe may have called for softened butter, melted butter often makes for an easier, more consistent crumb mixture for bars like these. I always opt for salted butter in my baking unless otherwise noted, as salt acts as a crucial flavor enhancer, bringing out the sweetness in desserts without making them taste salty.
- Fresh or Frozen Raspberries: The star of the show! Fresh, plump, red raspberries without any signs of deterioration will offer the best flavor and texture. If using frozen raspberries, make sure to defrost them thoroughly. Frozen berries tend to release more juice, so if your defrosted raspberries seem particularly juicy, consider adding an extra tablespoon of flour to the filling mixture to help absorb excess moisture and prevent a soggy center.
- Lemon Peel (Zest): A fine zest from one whole lemon adds a bright, aromatic counterpoint to the sweetness of the berries and sugar. Always zest your lemon before squeezing it, as it’s much easier to handle a firm fruit. The zest contains concentrated oils that provide intense lemon flavor without adding tartness.
- Fresh Lemon Juice: Just a touch of fresh lemon juice enhances the tartness of the raspberries, brightening the overall flavor profile of the filling. Always use freshly squeezed lemon juice; bottled varieties often lack the vibrant, authentic flavor that fresh lemons provide.
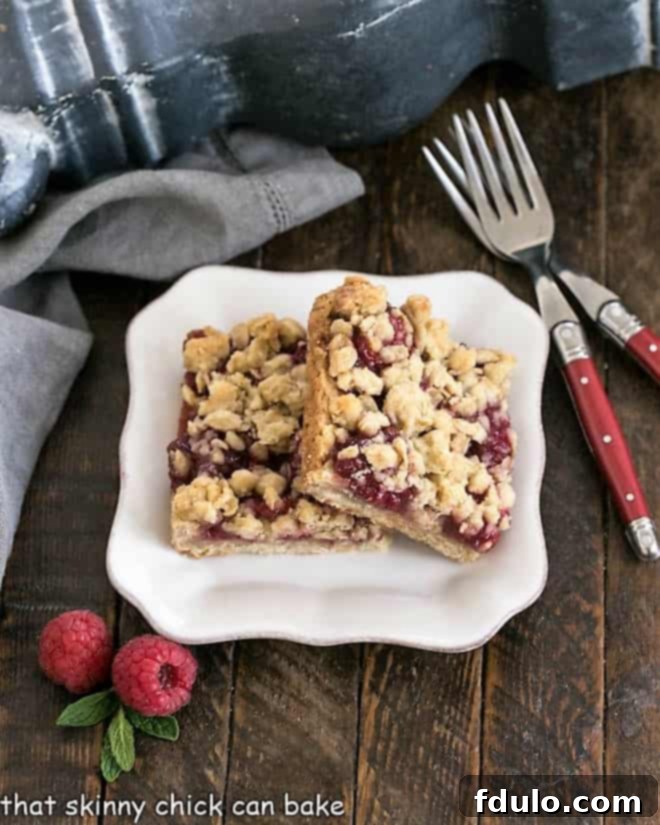
How to Make Raspberry Oatmeal Bars: A Step-by-Step Guide
Even my picky husband, who prefers his oatmeal strictly for breakfast (cooked to a nearly inedible consistency and loaded with brown sugar), wasn’t initially convinced about oatmeal in dessert. But I’m a persistent baker! These bars are so simple and delightful, they’re sure to win over even the toughest critics. Follow these steps to create your own batch of spectacular raspberry oatmeal bars:
Preparing for Success: Preheat and Line
Begin by preheating your oven to the specified temperature (usually 350°F / 175°C). This ensures the oven is at the correct heat from the moment your bars go in, promoting even baking. Next, prepare your baking pan. Lining it with non-stick foil is a game-changer. Not only does it prevent sticking, but it also creates a convenient “sling” that allows you to easily lift the cooled bars out of the pan for clean cutting.
The Irresistible Oat Crumb Mixture
In a large bowl, combine the dry ingredients for the crumb mixture: oats, all-purpose flour, and brown sugar. Mix them well to ensure everything is evenly distributed. Then, pour in the melted butter and mix until the dry ingredients are thoroughly moistened and resemble coarse, moist crumbs. This mixture will serve as both the delectable crust and the crispy streusel topping.
Assembling the Layers: Crust, Filling, Streusel
Take about two-thirds of the oat crumb mixture and press it firmly and evenly into the bottom of your prepared baking pan. This will form your sturdy and delicious crust. Bake this crust for about 12-15 minutes, or until it’s lightly golden brown at the edges. While the crust is baking, gently combine your fresh or defrosted raspberries, raspberry preserves, fresh lemon juice, lemon zest, and an optional tablespoon of flour (especially if using frozen berries) in a separate bowl. Once the crust is partially cooled (you don’t need it to be completely cold), spread the vibrant berry mixture evenly over it. Finally, crumble the remaining one-third of the oat mixture over the berry filling, creating that signature streusel topping.
Baking to Golden Perfection
Return the pan to the preheated oven and bake for another 22-25 minutes, or until the streusel topping is golden brown and the berry filling is bubbly around the edges. Keep an eye on it to prevent over-browning. The enticing aroma will fill your kitchen, signaling that a delicious treat is on its way!
Cooling and Serving
Patience is key here! Allow the bars to cool completely in the pan on a wire rack before attempting to cut them. This cooling time allows the layers to set properly, ensuring clean, neat bars. Once cool, use the foil sling to lift the entire slab onto a cutting board. Slice into individual bars and get ready to enjoy! The crew I shared these with made them disappear in record time, saving me the “torturous” task of eating them all myself.
Creative Variations and Customization for Your Berry Bars
The original recipe called for fresh blueberries with raspberry jam, but I preferred an all-raspberry experience. The beauty of these bars lies in their adaptability. You can easily experiment with different fruits and flavors to create your own signature streusel bars:
Different Berries and Jams
Feel free to swap out raspberries for other complementary berries. Consider using fresh or frozen blueberries, blackberries, or even a mixed berry blend. Pair them with a corresponding jam or preserve, such as blueberry jam, apricot preserves, or strawberry jam, for an exciting twist.
Adding Nuts or Spices
For an extra layer of flavor and crunch, consider incorporating chopped nuts like pecans, walnuts, or almonds into the streusel topping. A pinch of cinnamon or nutmeg added to the oat mixture can also provide a warm, inviting spice note, especially appealing during cooler months.
Chocolatey Twists
If you’re a chocolate lover, a handful of white chocolate chips or mini dark chocolate chips sprinkled over the raspberry filling before adding the streusel topping can create a delightful flavor combination. Raspberries and chocolate are a classic pairing for a reason!
Pro Tips for Flawless Berry Bars
Achieving bakery-quality Raspberry Streusel Bars is easier than you think with these expert tips:
Choosing Your Berries Wisely
Always opt for red, plump raspberries that show no signs of bruising, mold, or deterioration. Freshness directly impacts the flavor and texture of your filling. If using frozen, ensure they are fully thawed and drained well to avoid excess moisture.
Achieving the Perfect Thickness
If you prefer thicker, more substantial bars, use an 8-inch square pan instead of a 9-inch square pan. Keep in mind that thicker bars may require a few extra minutes of baking time, so monitor them closely for doneness.
The Non-Stick Foil Trick
As mentioned, lining your baking pan with non-stick foil is a game-changer. It prevents the bars from sticking and doubles as a convenient “sling” to effortlessly lift the cooled, baked bars out of the pan. This makes transferring them to a cutting board and slicing a breeze, resulting in perfectly neat bars every time.
Lemon: Freshness is Key
Always use fresh lemons for both the zest and the juice. One large lemon typically yields enough zest and juice for this recipe. The bright, acidic notes from fresh lemon are indispensable for balancing the sweetness and enhancing the vibrant flavor of the raspberries.
Elegant Serving Ideas
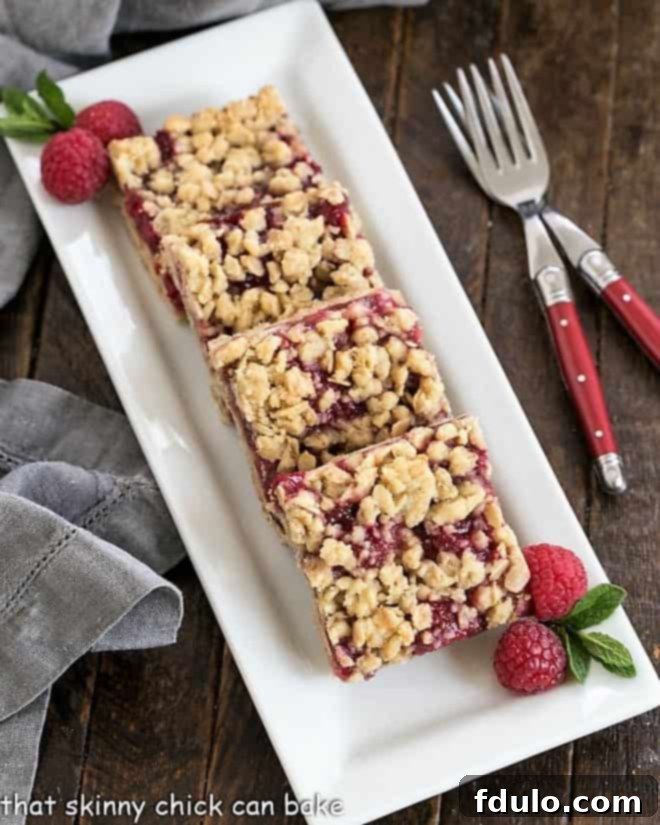
For a more refined dessert presentation, serve a single raspberry bar on a plate alongside a scoop of premium vanilla bean ice cream or a dollop of whipped cream. Garnish with a few fresh raspberries and a sprig of mint for an elegant touch that’s sure to impress.
Troubleshooting Common Issues
If your streusel topping isn’t crumbly enough, it might be due to too much butter or not enough dry ingredients. If it’s too dry, add a tiny bit more melted butter. If your bars seem too soft, they might need a bit more time in the oven, or they weren’t cooled completely before cutting. Patience during cooling is truly paramount!
Frequently Asked Questions About Raspberry Streusel Bars
While these delicious bars can typically be kept at room temperature for 1-2 days in an airtight container, it’s generally best to refrigerate them after that, especially if your kitchen is warm. Refrigeration helps maintain their freshness and prevents them from spoiling, extending their shelf life.
For the first day or two, store your raspberry bars in an airtight container or covered tightly with foil at room temperature. They are undeniably best when enjoyed fresh. For longer storage, transfer them to the refrigerator, where they will last for up to 5-7 days. You can also freeze them for up to 3 months; simply wrap individual bars tightly in plastic wrap and then place them in a freezer-safe bag or container.
The secret to a delightful crumb topping lies in the butter-to-dry ingredient ratio. Melted (or even softened) butter is combined with oats, flour, and sugar until a crumbly mixture forms. When sprinkling it over the berry filling, use your fingers to gently pinch some of the crumbs together, creating varied sizes – some fine, some larger – for an appealing, textured crunch after baking.
Absolutely! Frozen raspberries work wonderfully in these bars. Just be sure to defrost them completely before using. Since frozen berries tend to release more moisture when thawed, I recommend adding an extra tablespoon of flour to the raspberry filling mixture. This helps to absorb any excess juiciness, ensuring your bars have a perfectly set center rather than a soggy one.
Fresh raspberries are incredibly versatile! Beyond these delicious streusel bars, they shine in a variety of desserts. I love making classic raspberry pie, delightful peach raspberry pie, and rustic raspberry crisp. They are also fantastic in parfaits, vibrant fruit salads, as a garnish for cheesecakes, or blended into smoothies and sauces.
Yes, these bars freeze beautifully! Once completely cooled, cut them into individual portions. Wrap each bar tightly in plastic wrap, then place them in a freezer-safe airtight container or heavy-duty freezer bag. They can be stored in the freezer for up to 3 months. To enjoy, simply thaw them at room temperature or gently warm them in the oven for a freshly baked feel.
Explore More Delicious Bar Recipes
If you’ve fallen in love with these Raspberry Streusel Bars, you’ll be thrilled to discover more delightful recipes that are perfect for sharing or savoring all by yourself. Here are some other fantastic bar cookies and treats you might enjoy:
- Peanut Butter Blossoms by Like Mother Like Daughter – A timeless classic with a perfect balance of peanut butter and chocolate.
- Caramel Apple Streusel Bars – Experience the comforting flavors of apple, caramel, and a crunchy streusel topping in bar form.
- Streusel-Topped Raspberry Squares – Another wonderful take on raspberry and streusel, offering a slightly different texture profile.
- Plus, you’ll love tips on How to Cut Perfect Cookie Bars for beautifully presented treats every time.
- Discover More of My Best Bar Cookies for endless baking inspiration.
Stay in touch through social media @ Instagram, Facebook, and Pinterest. Don’t forget to tag me when you try one of my recipes! And if you love the results, please consider giving it a 5-star rating in the recipe card below.
Raspberry Streusel Bars
20 minutes
25 minutes
45 minutes
16 servings
Lovely berry bars with an oatmeal streusel topping!
Rated 4.7 out of 5 stars based on 63 reviews.
Ingredients
- 1 ½ cups oatmeal (classic or quick oats)
- 1 and ¼ cups all-purpose flour
- ½ cup brown sugar
- 1 ½ sticks of butter (¾ cup or 6 ounces), melted
- 1 ½ cups of fresh or frozen raspberries
- ½ cup of raspberry preserves
- 1 tablespoon all-purpose flour (for filling, optional, especially with frozen berries)
- 1 tablespoon lemon peel (finely zested)
- 1 teaspoon fresh lemon juice
Instructions
- Preheat oven to 350ºF (175°C). Line an 8×8 or 9×9-inch baking pan with non-stick foil, leaving an overhang on the sides for easy lifting.
- In a medium bowl, combine the oats, 1 and ¼ cups flour, brown sugar, and melted butter. Mix with a fork until thoroughly combined and crumbly. Reserve 1 cup of this oat mixture for the streusel topping and set aside.
- Press the remaining oat mixture firmly and evenly into the bottom of the prepared baking dish to form the crust. Bake for 15 minutes, or until the edges are lightly golden brown. Cool slightly in the pan.
- While the crust cools, prepare the filling. In a separate medium bowl, gently combine the raspberries, raspberry preserves, 1 tablespoon flour (if using), lemon peel, and fresh lemon juice. Mix until just combined.
- Spread the raspberry filling evenly over the partially cooled crust. Sprinkle the reserved 1 cup of oat mixture (streusel topping) over the berry filling, gently patting it down.
- Bake for another 22-25 minutes, or until the streusel topping is light golden brown and the filling is bubbly. Let the bars cool completely in the pan on a wire rack before attempting to cut them. Once cool, use the foil overhangs to lift the bars out of the pan and slice into squares or rectangles.
Notes
Feel free to use other berries such as blueberries or blackberries, or a mix of berries, for a delightful twist on this recipe. You can also experiment with different fruit preserves to match your chosen berries.
Recommended Products
As an Amazon Associate and member of other affiliate programs, I earn from qualifying purchases.
- Set of Glass Mixing Bowls
- 9 x 9-inch Baking Pan
- Raspberry Jam
Nutrition Information:
Yield:
16
Serving Size:
1
Amount Per Serving (estimate):
Calories: 278
Total Fat: 16g
Saturated Fat: 10g
Trans Fat: 1g
Unsaturated Fat: 5g
Cholesterol: 40mg
Sodium: 132mg
Carbohydrates: 33g
Fiber: 2g
Sugar: 20g
Protein: 2g
Thatskinnychickcanbake.com occasionally offers nutritional information for recipes contained on this site. This information is provided as a courtesy and is an estimate only. This information comes from online calculators. Although thatskinnychickcanbake.com attempts to provide accurate nutritional information, these figures are only estimates. Varying factors such as product types or brands purchased can change the nutritional information in any given recipe. Also, many recipes on thatskinnychickcanbake.com recommend toppings, which may or may not be listed as optional and nutritional information for these added toppings is not listed. Other factors may change the nutritional information such as when the salt amount is listed “to taste,” it is not calculated into the recipe as the amount will vary. Also, different online calculators can provide different results. To obtain the most accurate representation of the nutritional information in any given recipe, you should calculate the nutritional information with the actual ingredients used in your recipe. You are solely responsible for ensuring that any nutritional information obtained is accurate.
HOW MUCH DID YOU LOVE THIS RECIPE?
Please leave a comment on the blog or share a photo on Pinterest
