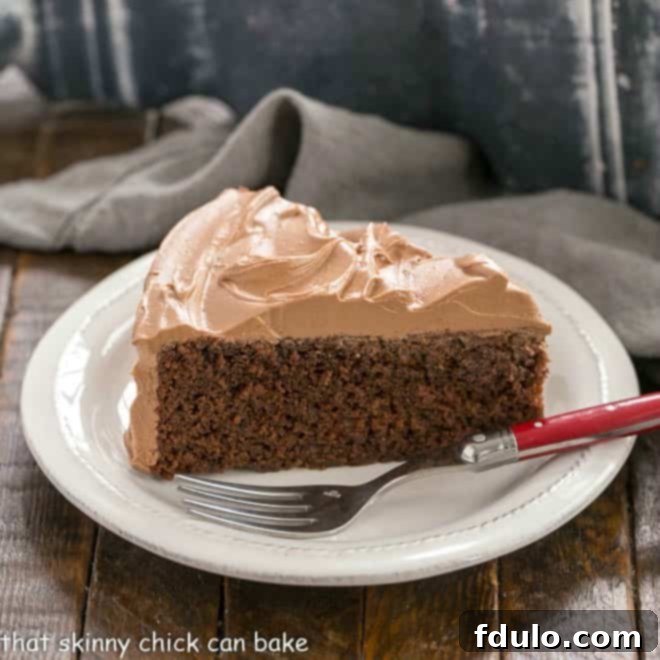
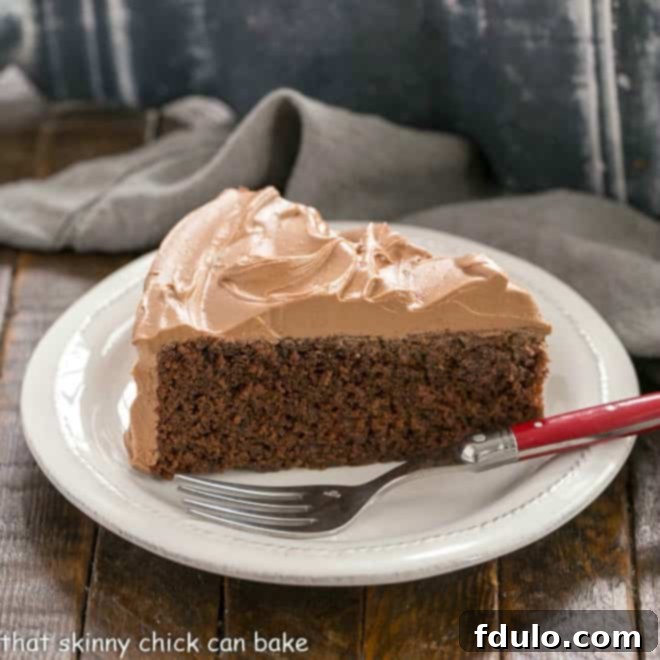
There’s something truly special about a homemade cake, especially one crafted for a beloved family member. For a recent birthday celebration, I recreated our cherished One Layer Mocha Cake – a dessert designed to delight any coffee and chocolate enthusiast. Previously, I might have split the batter into multiple pans and added a mousse filling, but this time, the simplicity of a single, majestic layer, adorned with an exquisite, cloud-like Chocolate Swiss Meringue Buttercream, proved to be a triumph. The result was a spectacularly rich, moist, and utterly celebratory cake that became the undisputed star of the party!
I confess, my intention was merely to savor a delicate sliver of this divine Mocha Cake. However, the sheer indulgence of the tender, coffee-infused chocolate cake paired with the silky buttercream quickly turned one sliver into several. The birthday honoree, a true mocha aficionado, wasted no time in devouring his generous slice, confirming its irresistible appeal.
Why This One Layer Mocha Cake is an Absolute Must-Bake
If you’re searching for a dessert that marries elegance with comforting flavors, look no further. This One Layer Mocha Cake stands out for several compelling reasons, making it an ideal choice for any occasion, big or small:
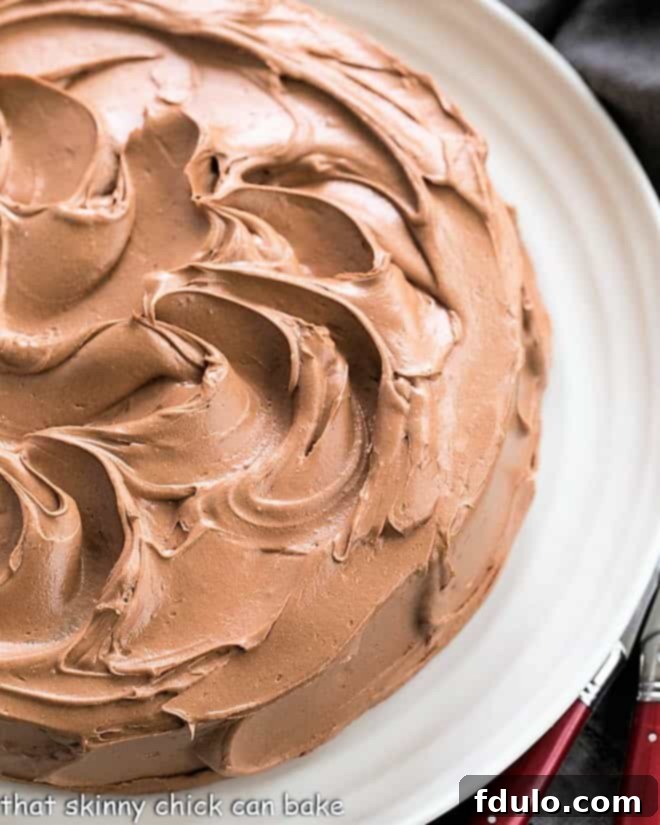
- The Frosting Alone is Reason Enough: Just one glance at that glistening, perfectly piped Chocolate Swiss Meringue Buttercream will tell you all you need to know. Its unparalleled silkiness and rich chocolate flavor are truly a dream, transforming a simple cake into a gourmet masterpiece. It’s lighter and less overwhelmingly sweet than traditional buttercreams, allowing the deep cocoa notes to shine alongside the subtle coffee undertones of the cake.
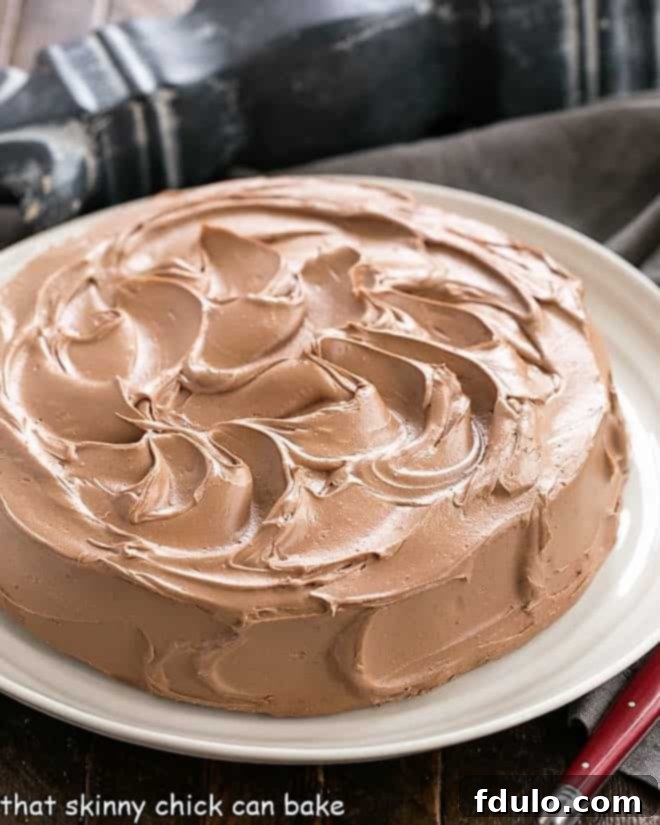
- Perfectly Portioned & Effortlessly Elegant: In a world of towering layer cakes, sometimes a single, well-executed layer is exactly what you need. This cake offers the perfect serving size for smaller gatherings or when you desire a dessert that feels substantial yet isn’t overly daunting to bake or serve. Its understated elegance speaks volumes, proving that you don’t need multiple tiers to impress.
- A Dream Come True for Coffee Lovers: For those who cherish the robust, aromatic embrace of coffee, especially when harmoniously blended with chocolate, this cake is an absolute revelation. It strikes a beautiful balance, offering enough coffee presence to awaken the senses without overpowering the decadent chocolate. It’s a sophisticated flavor profile that appeals to a wide range of palates.
This particular Mocha Cake recipe was born from a delightful challenge: creating a coffee-infused chocolate cake that would please both my coffee-loving oldest son and my husband, who prefers his coffee in very modest doses. The goal was to achieve a subtle mocha twist within a rich chocolate cake, ensuring the coffee notes enhanced the chocolate rather than dominating it.
To strike this delicate balance, I incorporated a precise amount of instant coffee – just 1 1/2 teaspoons. This subtle inclusion works wonders, amplifying the inherent depth of the chocolate without an overpowering coffee flavor that might deter less enthusiastic coffee drinkers. For those who adore a more pronounced mocha experience, this recipe is incredibly adaptable. You can easily increase the instant coffee to a full tablespoon or more, customizing the intensity to suit your preferences or those of your guests. Regardless of the cake’s coffee strength, I made certain that the accompanying Swiss Meringue Buttercream remained a pure chocolate delight, providing a luxurious counterpoint to the cake’s nuanced flavors.
Mastering the Art of Chocolate Swiss Meringue Buttercream
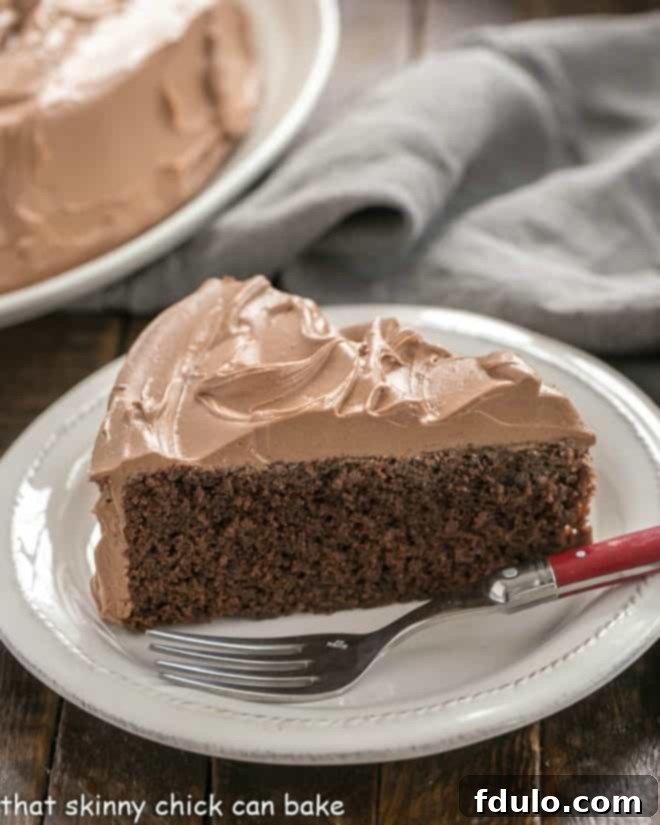
The secret to this cake’s heavenly texture and exquisite taste lies significantly in its frosting: the Chocolate Swiss Meringue Buttercream. If you’ve ever been intimidated by meringue-based buttercreams, fear not! Having frequently made an outstanding vanilla Swiss Meringue Buttercream for my White Chocolate Cupcakes, I approached this chocolate version with confidence, knowing the technique yields consistently stunning results. This buttercream is renowned for its incredibly silky texture, stability, and less cloyingly sweet profile compared to traditional American buttercream. Here’s a detailed look at the procedure:
- Gentle Heating of Egg Whites and Sugar: The first crucial step involves combining egg whites and granulated sugar in a heatproof bowl set over a double boiler (a saucepan of simmering water). Stir this mixture constantly until all the sugar crystals are completely dissolved. This gentle heating process not only pasteurizes the egg whites, making them safe to consume, but also creates a stable base for the meringue by fully dissolving the sugar, which is key to a smooth, non-gritty buttercream.
- Whipping to Glossy Peaks and Incorporating Butter: Once the sugar is dissolved and the mixture is warm to the touch (around 160°F or 71°C), transfer it to a stand mixer. Whip the warmed egg white mixture on medium-high speed until it transforms into stiff, glossy peaks and the bowl feels cool to the touch. This can take several minutes. Then, with the mixer on a lower speed, gradually add room temperature butter, one tablespoon at a time. It might look curdled or soupy initially – this is normal! Keep beating; the mixture will eventually come together into a wonderfully smooth, light, and airy buttercream. Patience is truly a virtue here.
- Folding in the Melted Chocolate: The final touch involves incorporating melted and slightly cooled chocolate. Once the buttercream is smooth and fluffy, slowly mix in the melted chocolate until it’s fully blended and uniform in color. Voila! You’ve created an amazing, rich, and incredibly decadent Chocolate Swiss Meringue Buttercream that’s perfect for frosting this mocha cake. I couldn’t resist sneaking countless swipes of the excess frosting directly from the mixing bowl – it’s a truly heavenly addition to any cake!
Essential Baking Tips for a Perfect One Layer Mocha Cake
Achieving a perfectly moist, tender, and flavorful mocha cake, especially when paired with a delicate buttercream, requires attention to detail. This recipe involves several key steps that, when followed carefully, guarantee exceptional results. From preparing your pan to understanding emulsification, these expert tips will guide you to baking success:
- The Art of Emulsification: You’ll notice the recipe instructs to slowly incorporate the oil into the batter in two stages. This isn’t just a random step; it’s a critical technique called emulsification. Emulsification is the process of blending two immiscible liquids (like oil and water/buttermilk in this case) into a smooth, stable mixture where one is dispersed evenly throughout the other. Think of mayonnaise or creamy salad dressings – they are perfect examples of emulsified liquids. In cake baking, properly emulsifying the oil helps create an incredibly fine crumb structure, resulting in a cake that is exceptionally moist, tender, and stays fresh longer. Take your time with this step; it truly makes a difference in the final texture of your cake.
- Proper Pan Preparation is Paramount: A well-prepared baking pan is the first line of defense against a cake sticking. While greasing and flouring are standard, here’s a PRO-Tip: Instead of using only flour, dust your buttered pan with a mixture of cocoa powder and flour. This clever trick helps prevent that unsightly white, floury coating on the exterior of a chocolate cake, ensuring a beautiful, uniform dark finish. Always line the bottom of your pan with parchment paper as an extra measure of security.
- Guard Against Grease in Egg Whites: For the Swiss Meringue Buttercream, the integrity of your egg whites is non-negotiable. PRO-Tip: Any trace of egg yolk, grease, or oil will inhibit the egg whites from whipping up into stable, voluminous peaks. To ensure optimal results, make sure your mixing bowl and whisk attachment (or beaters) are impeccably clean. Washing them in a dishwasher with a hot cycle is often the best way to remove any hidden grease residues.
- Room Temperature Ingredients are a Game-Changer: This is a recurring mantra in baking, and for good reason. PRO-Tip: Ensure your eggs, buttermilk, and butter are all at room temperature before you begin. Room temperature ingredients emulsify more effectively, creating a smoother, more uniform batter or frosting. Colder ingredients can lead to a lumpy batter, or a curdled-looking buttercream that takes much longer to come together. You can speed up the process by placing eggs in a bowl of warm (not hot) water for 10-15 minutes, and similarly with buttermilk and butter in separate bowls of warm water.
- Melting Chocolate with Care: Whether for the cake batter or the buttercream, melting chocolate requires a gentle touch. You can gently melt chocolate in the microwave, using 20-30 second intervals and stirring between each, stopping when it’s mostly melted. The residual heat will finish the job, preventing scorching. Alternatively, use a heat-safe bowl set over simmering water (a double boiler method) for an even gentler melt, ensuring the bowl does not touch the water.
- Baking Time is a Guideline, Not a Rule: Oven temperatures can vary significantly, and different types of baking pans conduct heat differently. Therefore, the stated baking time in any recipe should always be considered a suggestion. The most reliable way to determine if your cake is done is by using the toothpick test: insert a wooden toothpick into the center of the cake in more than one spot. If it comes out clean, your cake is perfectly baked. If you see wet batter, bake for another 5 minutes and recheck. Repeat until done.
- Achieve a Flatter Top with a Baking Strip (Optional): For those seeking an extra level of perfection, consider using a Fabric Bake Even Cake Pan Strip. This clever baking tool, moistened and wrapped around the perimeter of your pan, helps the cake bake more evenly by insulating the sides. This insulation allows the center to rise at a similar rate to the edges, resulting in a flatter, more uniform cake top that is easier to frost. While totally optional, it’s a fantastic trick for professional-looking results.
Frequently Asked Questions About Mocha Cake & Meringue
The term “mocha” is a delightful fusion, often misunderstood, with roots tracing back to the ancient port city of Mocha in Yemen. This historic Arabic port was one of the earliest and most significant centers for coffee trade, particularly known for its distinct, chocolate-toned coffee beans. Fast forward to the present day, and in the world of beverages, a “caffè mocha” or “mochaccino” is a popular coffee drink typically composed of espresso, hot milk, and chocolate (often in the form of cocoa powder or chocolate syrup). In the culinary realm, when a dessert is described as “mocha,” it signifies that it skillfully combines both rich chocolate and aromatic coffee flavors. This pairing creates a depth and complexity that elevates both ingredients, offering a sophisticated and comforting taste experience.
Meringue, at its core, is a simple concoction of whipped egg whites and sugar, yet there are three distinct methods to prepare it, each yielding a unique texture and stability, making them suitable for different culinary applications. The frosting for this cake begins with a Swiss meringue, but let’s explore all three:
- Swiss Meringue: This method is favored for its remarkable stability and smooth, dense texture. It involves gently heating egg whites and sugar together in a bowl over a double boiler, continuously whisking until the sugar completely dissolves and the mixture reaches a warm temperature (around 160°F or 71°C). This gentle cooking process ensures the egg whites are safe and creates a structure that, once whipped, becomes incredibly stable and glossy. Swiss meringue doesn’t expand as much as others but boasts a fine, uniform texture, making it ideal for topping pies, creating crisp meringue cookies, or, as in our case, forming the base for a luxurious buttercream frosting by slowly incorporating room temperature butter.
- French Meringue: This is arguably the most common and simplest form of meringue. It’s made by beating raw egg whites to soft peaks, then gradually adding granulated sugar while continuing to whip until stiff, glossy peaks form. French meringue is the least stable of the three but is prized for its light, airy, and crisp texture. It’s perfect for applications where it will be baked or dried, such as delicate meringue cookies, elegant soufflés, or the classic pavlova, where its fragility is part of its charm.
- Italian Meringue: Known for being the most stable and glossy of the meringues, Italian meringue is created by slowly pouring a hot sugar syrup (heated to the soft-ball stage, approximately 240°F or 115°C) into already whipped egg whites (beaten to soft peaks) while the mixer is running. The hot syrup cooks the egg whites as it’s incorporated, resulting in a very strong, smooth, and marshmallow-like meringue that holds its shape beautifully. Its exceptional stability makes it perfect for adding volume and lightness to mousses, decorating tarts, or creating incredibly robust buttercreams. I’ve used this method to create a stunning Chocolate Cream Torte.
Delightful Dessert Recipes You Might Also Enjoy
If this One Layer Mocha Cake has awakened your love for coffee and chocolate pairings, or if you’re simply in the mood for more exquisite desserts, here are some other recipes you might find equally delightful:
- Coffee Vanilla Ice Cream Pie by Moore or Less Cooking
- Frosted Mocha Cupcakes
- Palm Beach Mocha Brownies
- Mocha Chocolate Chip Cheesecake
- Homemade Coffee Ice Cream
- Mocha Ice Cream
- Explore more amazing Dessert Recipes
We love seeing your culinary creations! Stay connected with us through social media on Instagram, Facebook, and Pinterest. Don’t forget to tag us when you try one of our recipes! If you adore the results of this One Layer Mocha Cake, please consider leaving a 5-star rating and a comment in the recipe card below – your feedback truly helps others discover delicious baking joy!
The Recipe:
Mocha Layer Cake
1 hour
25 minutes
1 hour 25 minutes
12 servings
An exquisite, moist and tender mocha cake adapted from Tom Douglas, featuring a rich chocolate and coffee flavor profile with a luxurious Swiss Meringue Buttercream.
Ingredients
For the One Layer Mocha Cake:
- Softened unsalted butter, for greasing the cake pan
- 2 cups all-purpose flour (plus 2 tablespoons for dusting the baking pan)
- ¼ cup unsweetened cocoa powder (plus 2 tablespoons for dusting the baking pan)
- 1 cup plus 1 tablespoon granulated sugar, divided
- ½ teaspoon baking powder
- ½ teaspoon baking soda
- ½ teaspoon salt
- 2 large eggs, at room temperature
- ⅓ cup dark brown sugar, packed
- 1 cup high-quality vegetable oil
- 2 ½ ounces bittersweet chocolate, finely chopped and melted
- 1 cup buttermilk, at room temperature
- 1-3 teaspoons instant coffee granules (adjust to desired mocha intensity)
- 2 teaspoons pure vanilla extract
For the Chocolate Swiss Meringue Buttercream:
- 1 cup granulated sugar, processed finely in a food processor (or superfine sugar)
- 3 large egg whites
- ¼ teaspoon salt
- ½ teaspoon pure vanilla extract
- 1 cup plus 2 tablespoons (9 ounces) unsalted butter, cut into 1-tablespoon pieces, at room temperature
- 4 ounces bittersweet or semisweet chocolate, melted and cooled until slightly warm (not hot)
Instructions for Baking and Frosting
- Prepare Oven and Pan: Preheat your oven to 350°F (175°C). Generously coat a 9-inch round cake pan with softened butter. In a small bowl, combine 2 tablespoons flour and 2 tablespoons cocoa powder, then dust the buttered pan with this mixture, tapping out any excess. Line the bottom of the pan with parchment paper, butter, and dust it again.
- Combine Dry Ingredients: In a large bowl, whisk together the 2 cups flour, ¼ cup cocoa powder, ½ cup of the granulated sugar, baking powder, baking soda, and ½ teaspoon salt. Set this dry mixture aside.
- Whip Eggs and Sugars: In the bowl of a stand mixer fitted with the whisk attachment, beat the 2 large eggs with the dark brown sugar and the remaining ½ cup plus 1 tablespoon of granulated sugar at medium-high speed. Continue beating for about 5 minutes, or until the mixture is thick, pale, and has tripled in volume. Scrape down the sides of the bowl as needed.
- Emulsify Oil and Chocolate: Reduce the mixer speed to medium. Gradually add ½ cup of the vegetable oil in a slow, steady stream, beating for 3 minutes until the oil is fully absorbed and the mixture is emulsified. Beat in the melted bittersweet chocolate. Slowly add the remaining ½ cup of oil, beating until thoroughly blended and scraping down the sides and bottom of the bowl to ensure full incorporation.
- Prepare Wet Ingredients: In a separate small bowl, whisk the instant coffee granules (use 1 ½ teaspoons for a subtle boost, 1 tablespoon or more for a pronounced mocha flavor) and 2 teaspoons vanilla extract into the room temperature buttermilk.
- Combine Wet and Dry: With the mixer on low speed, gradually beat the buttermilk mixture into the batter until just combined. Remove the bowl from the mixer. Using a rubber spatula, gently fold in the reserved dry ingredients in three additions, mixing only until just incorporated. Be careful not to overmix, which can lead to a dense cake.
- Bake the Cake: Pour the cake batter evenly into your prepared 9-inch pan. Bake for approximately 50-60 minutes, or until a wooden toothpick inserted into the center of the cake comes out with only a few moist crumbs attached.
- Cool the Cake: Let the cake cool in the pan on a wire rack for 10 minutes. Then, carefully invert it onto the rack to cool completely. Gently peel off the parchment paper from the bottom. Ensure the cake is fully cooled before proceeding to frost.
- Make Swiss Meringue Base: To prepare the frosting, combine the finely processed sugar, 3 large egg whites, and ¼ teaspoon salt in a medium heatproof bowl (your metal stand mixer bowl works well). Place this bowl over a saucepan of simmering water, ensuring the bottom of the bowl does not touch the water. Whisk gently but constantly until the sugar is completely dissolved and the mixture is hot to the touch (around 160°F or 71°C), typically about 5 minutes.
- Whip Meringue: Carefully remove the bowl from the heat. Transfer the egg white mixture to the stand mixer fitted with the whisk attachment. Add ½ teaspoon vanilla extract and beat at medium-high speed until the meringue forms stiff, glossy peaks, and the bowl feels cool to the touch (this usually takes 8-10 minutes).
- Add Butter: Switch to the paddle attachment (if available). With the mixer on medium-low speed, begin adding the room temperature butter, one tablespoon at a time. Allow each addition to be fully incorporated before adding the next. The mixture may appear curdled or soupy initially; continue beating! It will eventually transform into a smooth, creamy buttercream. If it seems too runny, place the bowl in the refrigerator for 10-15 minutes, then resume beating.
- Incorporate Chocolate: Once the buttercream is smooth and fluffy, beat in the melted and slightly cooled chocolate until fully incorporated and uniform in color. Scrape down the bowl as needed. Chill the frosting briefly if it becomes too soft, or let it warm slightly at room temperature if it’s too firm to spread.
- Frost and Serve: Place the fully cooled cake on your desired serving platter. Evenly frost the top and sides of the cake with the exquisite Chocolate Swiss Meringue Buttercream. For the neatest slices, refrigerate the cake until the frosting is firm, then let it come to room temperature for about 30 minutes before serving. Enjoy your magnificent Mocha Cake!
Chef’s Notes
A critical point for success with Swiss Meringue Buttercream: the bowl and beaters used to whip the egg whites must be impeccably clean and completely free of any grease, oil, or even the smallest speck of egg yolk. Any fatty residue will prevent the egg whites from aerating and whipping properly, leading to a runny or failed meringue. Running your mixing bowl and whisk through a hot dishwasher cycle is an excellent way to ensure they are grease-free before you begin.
Recommended Baking Essentials
As an Amazon Associate and member of other affiliate programs, I earn from qualifying purchases.
- Fabric Bake Even Cake Pan Strip
- KitchenAid Artisan Tilt-Head Stand Mixer
- Baking Rack Cooling Rack Set
- 9-inch USA Pan Bakeware Round Cake Pan
Nutrition Information
(Approximate values per serving, based on 12 servings)
- Yield: 12 servings
- Serving Size: 1 slice
- Calories: 578
- Total Fat: 35g
- Saturated Fat: 11g
- Trans Fat: 1g
- Unsaturated Fat: 22g
- Cholesterol: 81mg
- Sodium: 312mg
- Total Carbohydrates: 58g
- Dietary Fiber: 3g
- Total Sugars: 38g
- Protein: 8g
© Liz Berg
Cuisine: American / Category: Cakes
