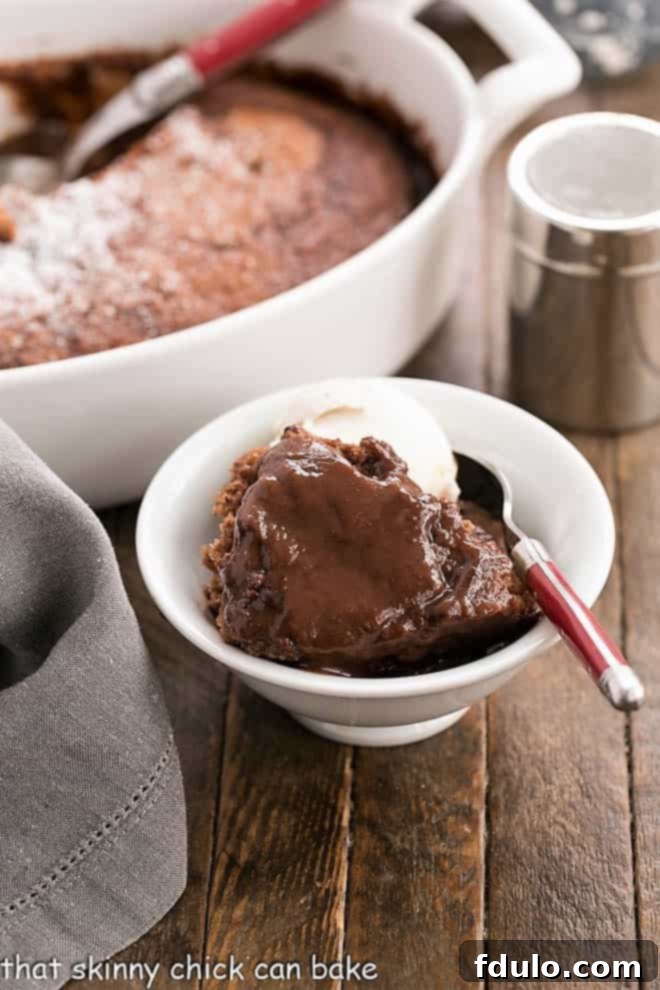
Indulge in the ultimate chocolate experience with this incredibly rich and delightfully simple Easy Chocolate Pudding Cake. A true marvel of baking, this self-saucing dessert creates its own luscious fudge sauce right in the oven, offering a warm, comforting treat that tastes far more complex than it is to make. You might be surprised by its secret ingredient that makes preparation a breeze, yet ensures an absolutely decadent result!
My journey with this particular Chocolate Dessert began nearly two decades ago. I first encountered this culinary gem at a gathering with wonderful neighbors, where conversations about travel to Ireland were as rich as the dessert itself. The memory of its deep chocolate flavor and magical self-saucing nature lingered for years. More recently, my friend Shelli graciously served it at our holiday book club meeting, reigniting my desire to recreate this beloved recipe. Thanks to a quick Google search, and the certainty that I could always text Shelli for the exact source, I knew it was time to bring this effortlessly elegant chocolate treat to my own family’s table.
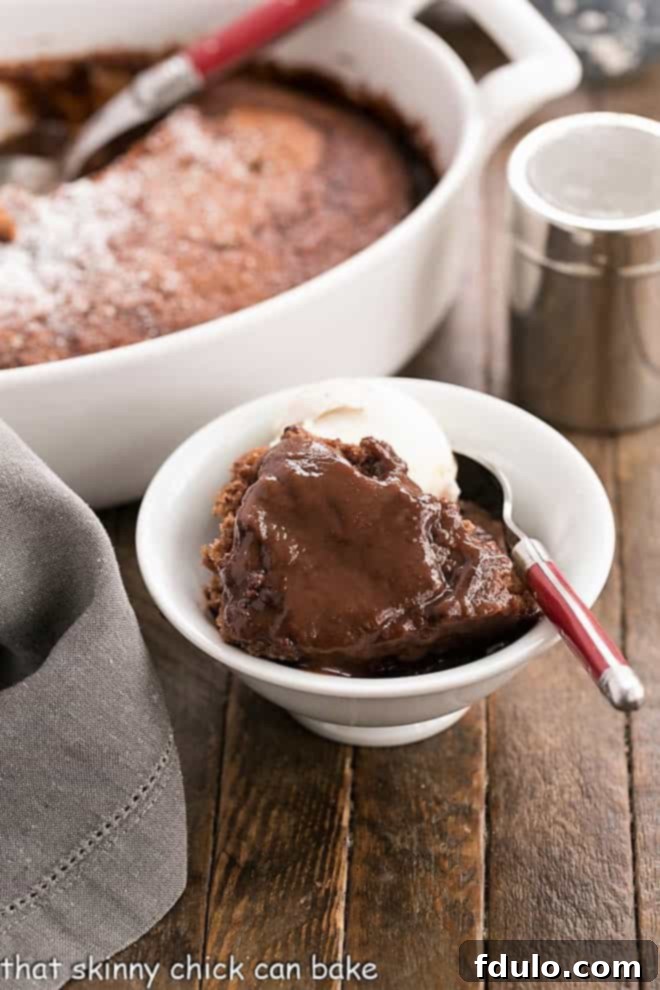
This recipe isn’t just about making a dessert; it’s about creating a moment of pure bliss with minimal effort. Imagine a tender, moist chocolate cake layer resting atop a warm, gooey, fudgy sauce – all from a single baking dish. It’s perfect for a cozy family night, yet impressive enough to wow guests at any dinner party. Prepare to discover your new favorite go-to chocolate delight!
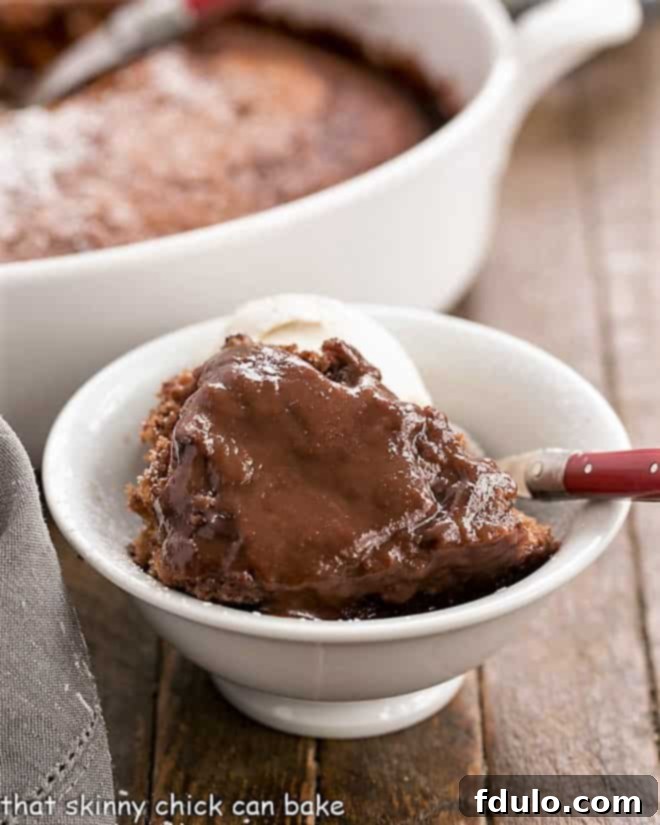
Why This Easy Chocolate Pudding Cake Will Become Your Favorite
If you’re seeking a dessert that delivers maximum impact with minimum fuss, this Easy Chocolate Pudding Cake is your answer. It’s more than just a sweet treat; it’s a delightful experience waiting to happen. Here’s why this recipe deserves a permanent spot in your culinary repertoire:
- Effortless Preparation: The genius of this recipe lies in its ingenious use of Bisquick. This all-in-one baking mix dramatically simplifies the ingredient list and cuts down on prep time, making it incredibly easy to “throw together” even on the busiest days. You won’t need to measure multiple flours, leavening agents, or salts – Bisquick handles it all, ensuring a consistent and foolproof cake base every time.
- Magical Self-Saucing Wonder: Who wouldn’t adore a dessert that creates its own rich, warm fudge sauce while baking? This unique characteristic is what truly sets pudding cakes apart. As it bakes, a magical chemical reaction occurs, separating the batter into a tender cake layer on top and a gooey, irresistible chocolate sauce at the bottom. It’s like getting two desserts in one, effortlessly!
- Versatile for Any Occasion: Whether it’s a casual weeknight family dinner or a special gathering with friends, this pudding cake fits perfectly. Simply served warm with a scoop of vanilla ice cream or a dollop of whipped cream, it transforms an ordinary meal into an extraordinary culinary moment. Its rustic charm and undeniable deliciousness make it a crowd-pleaser that requires no fancy plating.
- Comfort Food at Its Best: There’s something undeniably comforting about a warm, chocolatey dessert, especially one with a molten, fudgy core. This pudding cake embodies the essence of comfort food, offering a delightful warmth that soothes the soul, particularly on cooler evenings.
- A Secret Ingredient That Elevates: While chocolate pudding cakes aren’t new to our family, this particular version introduces a smart shortcut: Bisquick. You would never guess the secret ingredient just by tasting it. Though my family has transitioned to homemade pancakes and waffles for Sunday mornings, the expediency and consistent results Bisquick offers in this decadent chocolate self-saucing dessert remain unparalleled. It significantly reduces prep time without compromising the deep, rich flavor or the luxurious texture of the cake and its accompanying fudge sauce.
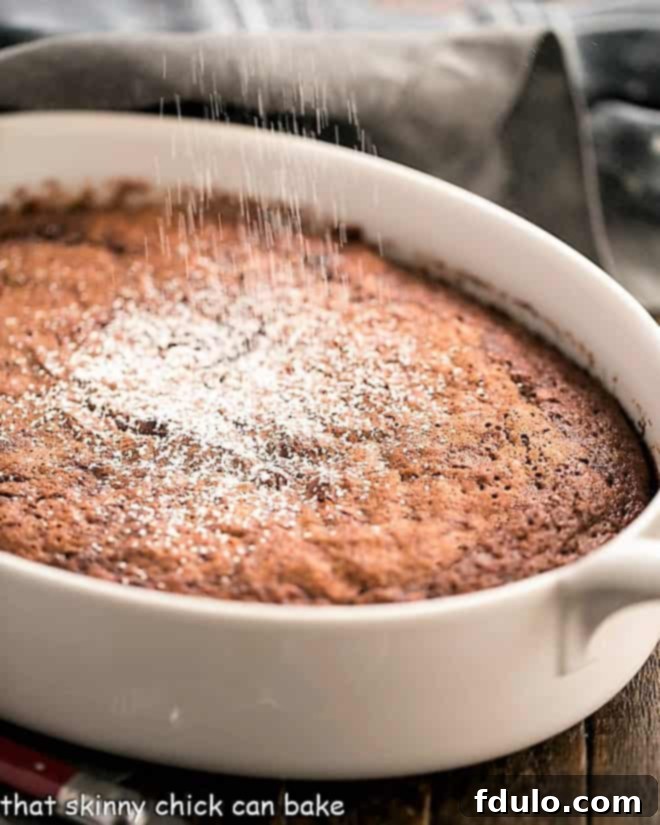
Creating Your Easy Chocolate Pudding Cake: A Step-by-Step Guide
Making this self-saucing chocolate cake is surprisingly straightforward. Follow these simple steps to bring this magnificent dessert to life:
- Prepare Your Oven: Begin by preheating your oven to 350°F (175°C). This ensures your oven is at the correct temperature for even baking, crucial for the cake and sauce to develop properly.
- Melt the Chocolate: In a microwave-safe bowl, melt ⅓ cup of your chocolate chips. Heat in 15-30 second intervals, stirring well after each, until smooth and fully melted. Alternatively, you can use a double boiler on the stovetop over low heat.
- Craft the Cake Batter: In a large mixing bowl, combine the melted chocolate, Bisquick baking mix, ⅓ cup of the sugar, milk, vegetable oil, vanilla extract, and one egg. Whisk these ingredients vigorously until they are well combined and form a smooth, uniform batter. The Bisquick acts as your flour, leavening, and salt, streamlining the process.
- Transfer to Baking Dish: Scrape the chocolate cake batter into an ungreased 9×9 inch (or comparable size, such as an 8×8 or a small oval casserole) baking dish. Spread the batter evenly across the bottom of the dish using a spatula. Set this aside temporarily.
- Prepare the Sauce Liquid: In a small saucepan, combine 1 ½ cups of hot water with the remaining ⅔ cup of sugar. Heat this mixture over medium heat, stirring occasionally, until it comes to a rolling boil and the sugar is completely dissolved.
- Infuse with Chocolate: Once the sugar water is boiling, remove it from the heat and stir in the remaining ⅔ cup of chocolate chips. Continue stirring until these chocolate chips are entirely melted and the mixture forms a smooth, rich chocolate liquid. This will become your magical sauce!
- Assemble the Pudding Cake: Carefully pour the hot chocolate liquid directly over the prepared cake batter in the baking dish. Important: Do not stir the liquid into the batter. The key to a self-saucing pudding cake is to keep the layers separate at this stage. The baking process will do the rest.
- Bake to Perfection: Place the baking dish into your preheated oven. Bake for approximately 35-40 minutes, or until the top cake layer appears firm and set. A toothpick inserted into the cake layer (not the sauce) should come out mostly clean.
Expert Tips for the Perfect Chocolate Pudding Cake
This unassuming pudding cake truly reveals its magnificence when you scoop out that first spoonful. That’s the moment the hidden, fudgy sauce is exposed, oozing deliciously to fill the void left by your serving. To ensure your Easy Chocolate Pudding Cake turns out perfectly every time, keep these expert tips in mind:
- Melting Chocolate Chips: The chocolate in this Bisquick pudding cake recipe comes from melted chocolate chips. For efficiency, I highly recommend using the microwave. Heat the chips in 15-30 second bursts, stirring thoroughly after each interval, until the chocolate is smooth and glossy. If you prefer, a stovetop double boiler method works well too; just remember to use low heat to prevent scorching. Don’t worry if a few tiny chocolate bits remain; they often melt fully during baking or add a pleasant textural surprise.
- The Magic of Pouring: The most crucial step in creating a successful pudding cake is pouring the hot liquid over the batter without stirring it in. This intentional layering is where the “magic of baking chemistry” happens. As the cake bakes, this hot, chocolatey liquid mysteriously makes its way to the bottom of the dish, transforming into that rich, luscious chocolate sauce we all adore. Resisting the urge to stir is key to achieving the perfect two distinct layers.
- Choosing Your Chocolate: While semi-sweet chocolate chips are a popular choice and provide a balanced sweetness, feel free to experiment. For a deeper, more intense chocolate flavor, opt for bittersweet chocolate chips. Dark chocolate lovers will appreciate the robust notes this variation brings.
- Baking Dish Selection: A 9×9 inch baking dish is ideal, but an 8×8 inch square pan or a comparable 2-3 quart oval casserole dish will also work. Just be mindful that a smaller dish might require a slightly longer baking time, and a larger dish might bake a bit quicker. Always check for firmness of the top cake layer.
- Temperature is Key: Ensure your hot water is indeed hot, as this helps the remaining sugar and chocolate chips dissolve smoothly, creating the foundation for your sauce. The contrast in temperature between the cake batter and the hot liquid also contributes to the distinct layering during baking.
- Don’t Overbake: While you want the top cake layer to be firm, avoid overbaking. Overbaking can dry out the cake and potentially thicken the sauce too much. The cake should still feel moist and tender.
- Retro Charm, Modern Convenience: This recipe echoes the simplicity of classic Bisquick recipes that might have once graced the back of their boxes. For those who prefer to bake from scratch, there are many beloved “hot fudge pudding cake” recipes that achieve a similar delicious result. For instance, my family also adores this Hot Fudge Pudding Cake. And if you’re ever in the mood for a different kind of chocolate indulgence, this No-Fail Chocolate Fudge is always a hit!
Serving and Storage Suggestions
This Easy Chocolate Pudding Cake is best enjoyed warm, allowing the rich, fudgy sauce to remain beautifully molten. Here are some ideas for serving and handling leftovers:
- Classic Pairing: A generous scoop of premium vanilla bean ice cream is the quintessential accompaniment. The cold, creamy ice cream perfectly contrasts with the warm, rich chocolate cake and sauce.
- Creamy Toppings: A dollop of freshly whipped cream provides a lighter, airy counterpoint to the cake’s richness. A sprinkle of powdered sugar or cocoa powder on top adds a touch of elegance.
- Fresh Fruit: For a burst of freshness and color, serve with fresh berries like raspberries or strawberries. The slight tartness of the fruit can beautifully cut through the chocolate’s sweetness.
- Coffee or Liqueur: For an adult twist, consider drizzling a small amount of coffee liqueur (like Kahlúa) or even a splash of orange liqueur over each serving.
- Storage: If you happen to have any leftovers, this pudding cake can be stored in an airtight container in the refrigerator for up to 3-4 days. The sauce may thicken slightly when chilled.
- Reheating: To enjoy it warm again, simply scoop a portion into a microwave-safe bowl and heat gently for 30-60 seconds, or until warmed through and the sauce is molten once more. You can also reheat larger portions in the oven at a low temperature (around 250°F / 120°C) until warm.
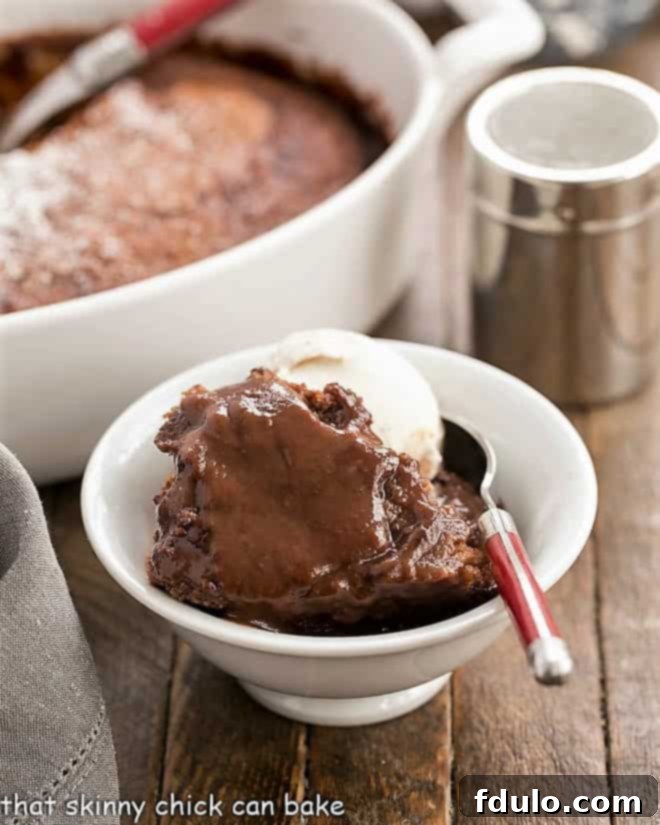
Frequently Asked Questions About Chocolate Pudding Cake
A pudding cake is a magical dessert that naturally separates into two distinct layers during baking: a tender, cake-like layer on top and a rich, saucy, pudding-like layer at the bottom. It’s truly like getting two desserts in one! My introduction to pudding cakes wasn’t even chocolate; my mother-in-law once treated us to a fantastic lemon pudding cake years ago, a recipe I still hope to track down! While some culinary definitions might liken it to a souffle with excess liquid, our version, which doesn’t rely on whipped egg whites, offers a unique and simpler twist on this delightful concept.
Absolutely. This dessert casserole bakes at 350°F (175°C) for over half an hour. During this time, the internal temperature of the cake and sauce will easily reach and exceed 140°F (60°C), which is the temperature required to fully cook the egg and eliminate any potential bacteria, ensuring a safe and delicious treat.
While the cake is best served warm and fresh from the oven, you can prepare the batter components in advance. Mix the cake batter and set aside. Then, just before baking, prepare the hot sauce liquid and proceed with pouring and baking. Leftovers store well, but reheating fresh gives the best “molten sauce” experience.
The consistency of the sauce can vary slightly depending on your oven and the exact proportions of your ingredients. If you find your sauce is too thin, try reducing the amount of water slightly next time (e.g., use 1 ¼ cups instead of 1 ½ cups). Ensure your chocolate chips are fully melted into the hot water for maximum richness.
Yes, you can use an 8×8-inch square pan for a slightly thicker cake and sauce, or a 9×13-inch rectangular pan for a thinner cake layer and wider spread. Just be aware that baking times may vary. A smaller, deeper pan might need more time, while a larger, shallower pan might need less. Always check for the firmness of the top cake layer.
Explore More Delicious Desserts
If you’ve fallen in love with the simplicity and decadence of this Easy Chocolate Pudding Cake, you’ll surely enjoy these other delightful dessert creations:
- Meyer Lemon Pudding Cake from Two Peas and Their Pod (for a citrus twist!)
- Easy Chocolate Mousse Tart (light, airy, and intensely chocolatey)
- No-Bake Oreo Cheesecake (a creamy, crunchy, no-fuss favorite)
- Quadruple Chocolate Cookies (for serious chocolate enthusiasts)
- Molten Lava Cakes (another self-saucing wonder, perfect for individual servings)
- Elegant Chocolate Mousse Cake (a showstopper for special occasions)
- Discover more of the Best Dessert Recipes from our collection.
- Find additional Homemade Chocolate Recipes to satisfy your cravings.
We love hearing from you! Stay in touch through social media @ Instagram, Facebook, and Pinterest. Don’t forget to tag us when you try one of our recipes! And if you love the results, please consider giving it a 5-star rating in the recipe card below – your feedback helps us grow and share more delicious recipes.
The Recipe:
Easy Chocolate Pudding Cake
15 minutes
40 minutes
55 minutes
8 servings
A self-saucing chocolate cake that magically makes a rich fudge sauce while baking! Incredibly easy and utterly delicious.
Ingredients
- 1 cup chocolate chips, divided
- 1 ½ cups Bisquick baking mix
- 1 cup sugar, divided
- ½ cup milk
- 2 tablespoons vegetable oil
- 1 teaspoon vanilla extract
- 1 large egg
- 1 ½ cups hot water
Instructions
- Preheat oven to 350 degrees F (175 degrees C).
- Melt ⅓ cup of the chocolate chips in a microwave-safe bowl, stopping to stir at 15-second increments until melted and smooth.
- In a large bowl, vigorously whisk together the melted chocolate, Bisquick, ⅓ cup of the sugar, milk, oil, vanilla, and egg. Scrape the batter into an ungreased 9 x 9-inch (or comparable-sized) baking dish, then spread evenly. Set aside.
- In a small saucepan, heat the water and the remaining ⅔ cup of sugar until it boils, stirring occasionally to dissolve the sugar. Stir in the remaining ⅔ cup chocolate chips until melted and smooth. Pour this hot chocolate liquid gently over the cake batter in the pan. Do NOT stir.
- Bake for about 35-40 minutes, or until the top of the dessert is firm and set. The sauce will be bubbling underneath.
Notes
I used semi-sweet chocolate chips for a balanced flavor, but you can use bittersweet chocolate chips for a more intense chocolate profile. Feel free to serve with a scoop of vanilla ice cream, whipped cream, or fresh berries for an extra touch of deliciousness.
Recommended Products
As an Amazon Associate and member of other affiliate programs, I may earn from qualifying purchases.
- 3 quart baking dish
- OXO Good Grips 11-Inch Better Balloon Whisk
- 3 Pyrex Mixing Bowls
Nutrition Information:
Yield:
8
Serving Size:
1
Amount Per Serving (estimated):
Calories: 411Total Fat: 17gSaturated Fat: 6gTrans Fat: 0gUnsaturated Fat: 10gCholesterol: 25mgSodium: 501mgCarbohydrates: 64gFiber: 2gSugar: 41gProtein: 5g
