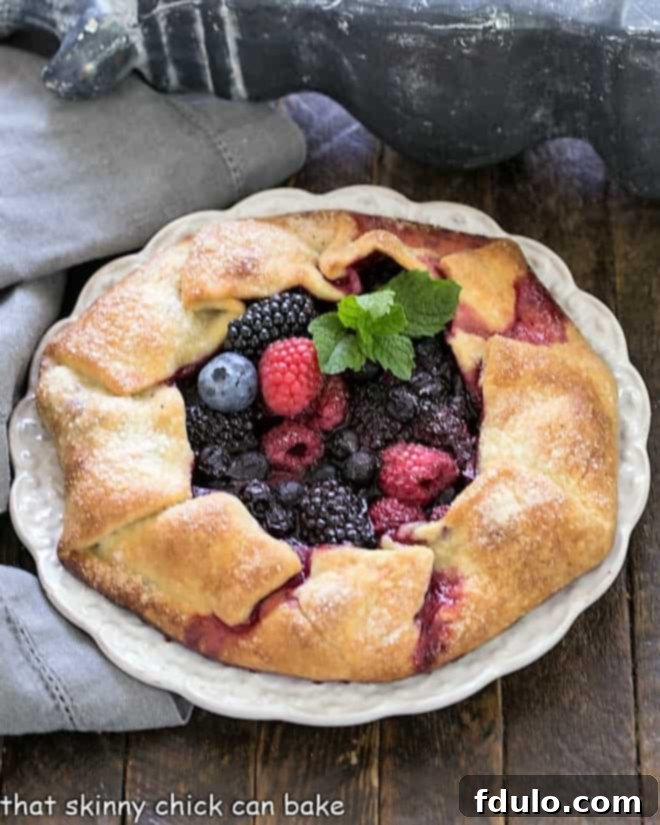
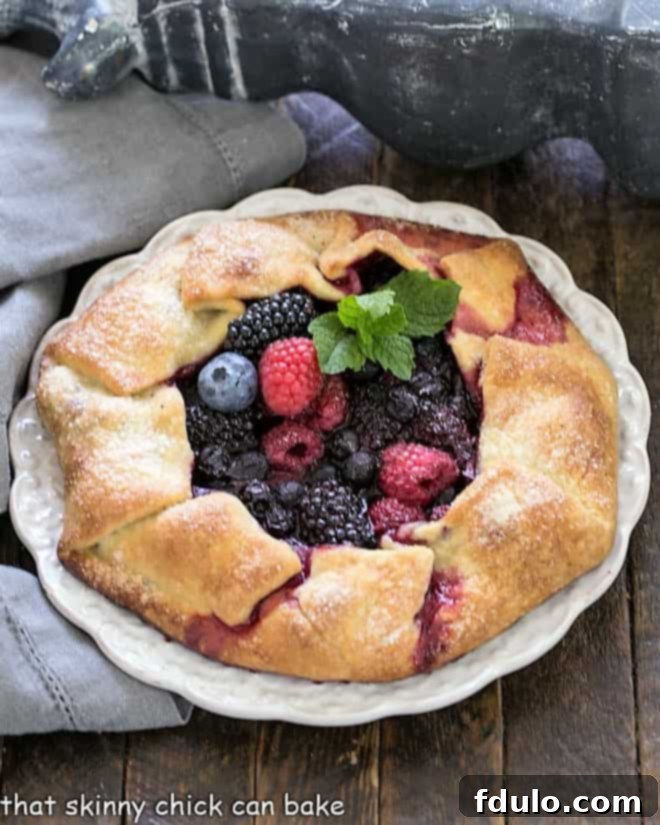
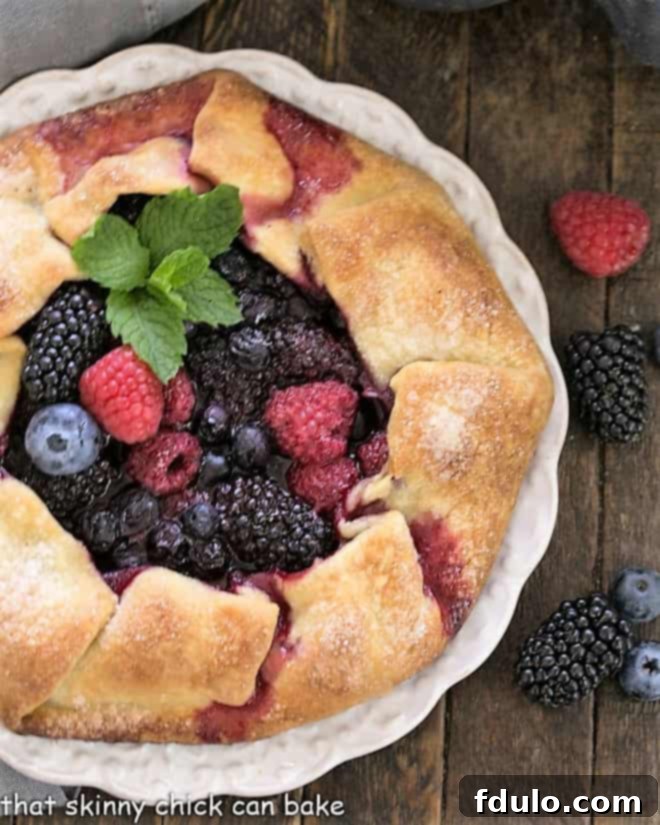
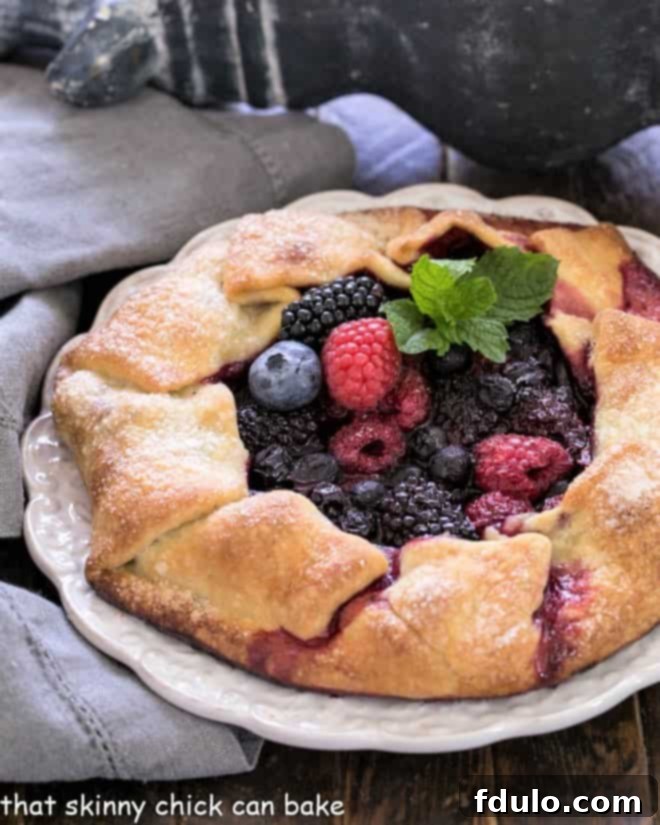
Experience the ultimate taste of summer with this delightful Mixed Berry Galette! This free-form fruit tart is not only incredibly simple to prepare but also promises to be the star of any gathering. Imagine a golden, flaky crust embracing a vibrant medley of sweet, juicy berries, creating a dessert that is as visually appealing as it is delicious. Be ready for guests to ask for the recipe – and perhaps a second slice – before your eyes.
A true culinary gem, this adaptable Berry Galette Recipe allows for endless customization. Whether you prefer a single type of berry or a mix of your favorite seasonal fruits, this rustic tart transforms simple ingredients into an unforgettable treat. Its charm lies in its effortless elegance, making it a perfect choice for both novice bakers and seasoned enthusiasts looking for a quick yet impressive dessert.
Why You’ll Absolutely Love This Mixed Berry Galette
This delightful Mixed Berry Galette first graced my dinner party table back in 2012, quickly becoming a beloved staple. As a co-hostess, I was responsible for part of the dessert spread, and this rustic fruit tart proved to be a resounding success. Drawing inspiration from a series of recipes in “Baking with Julia” by contributing baker Flo Braker, I crafted this simple yet elegant dish. The best part? No need to coax opinions from family members; a table full of appreciative guests, well-fed and relaxed, provided all the honest assessment needed. Their rave reviews confirmed it: this galette is a winner!
- Effortless Elegance: This galette stands out as an incredibly easy dessert that delivers impressive results. It can be made with virtually any fruit or combination of fruits, making it a versatile addition to your baking repertoire. Its free-form nature eliminates the need for intricate crimping or perfect edges, embracing a beautiful, rustic aesthetic.
- Simpler Than Pie: If the thought of making a traditional pie crust feels daunting, a galette is your perfect solution. It’s significantly easier than baking a pie or even a formal fruit tart, offering all the deliciousness without the fuss. The dough is forgiving, and the shaping process is wonderfully straightforward.
- Rustic Charm is Key: A galette recipe is inherently designed to be rustic, meaning perfection isn’t the goal. This takes all the pressure off, allowing you to enjoy the baking process without worrying about every fold or crease. Embrace the natural beauty of a handmade dessert that celebrates seasonal ingredients.
- Guaranteed Crowd-Pleaser: From my initial dinner party to countless gatherings since, this berry galette has consistently earned high praise. Friends and family adore its sweet, fruity filling and crisp, buttery crust. Prepare for compliments and requests for the recipe – your guests will love it just as much!
Key Ingredient Notes for the Perfect Galette
Crafting a truly exceptional Mixed Berry Galette begins with understanding the role of each ingredient. Quality and temperature are often paramount to achieving that coveted flaky crust and luscious filling. Here’s a closer look at what you’ll need and how to best use it:
- Kitchen Staples: You’ll start with common pantry ingredients such as all-purpose flour, granulated sugar, and table salt. Ensure your flour is fresh, and use fine-grain sugar for easy dissolution. Salt not only seasons the dough but also helps to balance the sweetness of the berries, enhancing all the flavors.
- Sour Cream: This ingredient is crucial for tenderizing the dough and adding a subtle tang that complements the sweet berries. Always use sour cream that is cold, directly from the refrigerator. Cold ingredients help to keep the butter from melting prematurely, which is essential for creating a flaky crust. As an alternative, you can substitute with cold plain yogurt or buttermilk; however, note that buttermilk is more liquid, so you may need slightly less than the amount of sour cream specified in the recipe.
- Ice Water: Just like sour cream, ice water plays a vital role in maintaining the cold temperature of your dough. To prepare, simply fill a liquid measuring cup with water, add a few ice cubes, and let it chill while you gather your other ingredients. When it’s time to measure, use a separate liquid measuring cup to ensure you add only the water, without any ice, to the dough mixture.
- Unsalted Butter: The secret to a rich, flaky crust lies in using very cold unsalted butter. Cut the butter into small pieces and keep it chilled until you’re ready to incorporate it into the flour mixture. Cold butter creates pockets of steam during baking, which results in those desirable flaky layers. If you only have salted butter on hand, remember to reduce the amount of added salt in the recipe by half to maintain proper seasoning.
- Mixed Fresh Berries: This is where the galette truly shines! Choose a combination of berries that look fresh, plump, and fragrant at your local market. My personal favorites for this recipe are blackberries, raspberries, and blueberries for their varied textures and balanced sweetness. However, feel free to experiment with any combination you love, or even use a single berry type. Alternatively, thinly sliced and peeled fruits like peaches or apples can also be used, though baking times may need to be adjusted slightly to ensure they cook through.
- Honey: An optional yet highly recommended addition, a drizzle of honey elevates the filling with an extra layer of sweetness and depth of flavor. It caramelizes beautifully during baking, enhancing the natural sweetness of the berries. If you don’t have honey on hand, you can omit it, and the galette will still be delicious.
Expert Recipe Tips for a Flawless Mixed Berry Galette
Even though galettes are celebrated for their rustic simplicity, a few expert tips can ensure your Mixed Berry Galette turns out perfectly every time. From preparing the dough to achieving that golden, crisp crust, these pointers will help you bake a dessert that tastes like it came from a professional patisserie.
- Handling the Dough with Ease: The galette dough is wonderfully soft and pliable, making it a joy to work with. The key is to ensure your work surface is generously dusted with all-purpose flour. This prevents sticking and allows for smooth rolling. A unique addition in this recipe is yellow cornmeal, which, when incorporated into the dough, provides a delightful subtle crunch and texture to the finished crust, adding another layer of sensory pleasure.
- Keep it Cool: When baking in the warmer months, dough can become soft and difficult to handle quickly. If your dough starts to feel too warm or sticky during the rolling process, don’t hesitate to pop it back into the refrigerator for 10-15 minutes. A brief chill will firm it up, making it much easier to work with and ensuring a flaky crust.
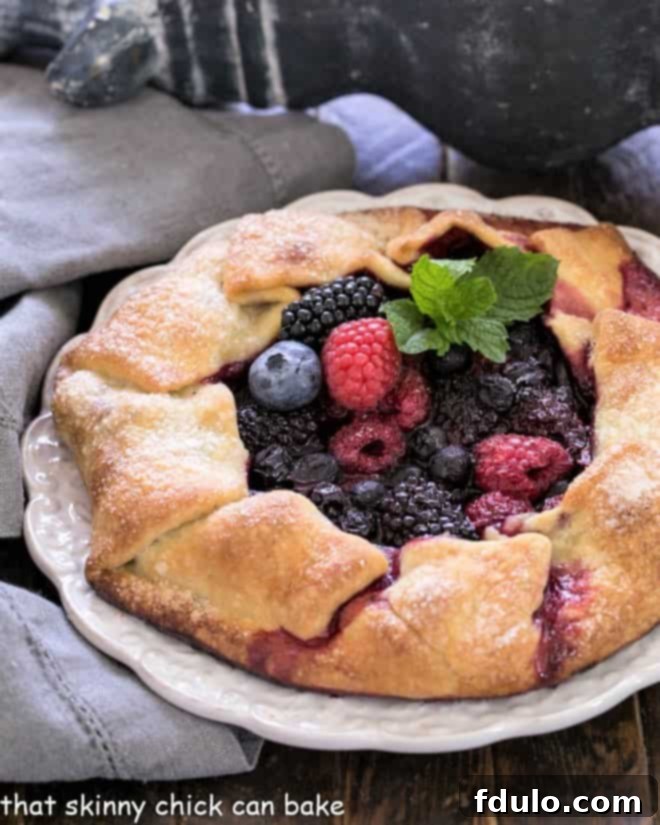
- Perfecting the Berry Filling: The magic of this galette lies in its simple yet incredible filling. A vibrant mix of blueberries, raspberries, and blackberries is lightly sweetened with a sprinkle of sugar and a luxurious drizzle of honey. Dotting the fruit with cold butter before baking ensures a rich, bubbling, and intensely flavorful filling. Remember, you can always use your favorite combination of fresh berries or seasonal fruits to customize your galette.
- PRO-Tip for Shaping: While the rustic nature of a galette means no need for perfection, a consistent round shape can make for an even bake and easier handling. I often use a mixing bowl as a template to gently guide the dough into a nice, uniform circle. This is entirely optional, but it can be helpful for beginners. Regardless of your shaping method, always ensure you leave a 2-3 inch border around the edge of the dough without fruit. This border is essential for easily folding and pleating the dough over the filling, creating that classic galette look.
- Selecting the Best Berries: The quality of your berries directly impacts the flavor of your galette. Always purchase fragrant, plump berries that are in season for the best possible results. While this recipe yields a simple-to-make galette, it typically serves 4 to 6 people. The only potential downside is its small size; it might disappear faster than you expect!
- Dough Prep for Future Baking: This recipe cleverly yields enough dough for two galette crusts. This is a fantastic opportunity to prepare ahead! Simply wrap the extra dough tightly in plastic wrap and store it in the freezer for up to a month. When you’re ready to use it, just defrost it overnight in the refrigerator. Having pre-made dough on hand means you’re always just a step away from a fresh, homemade galette.
Frequently Asked Questions About Mixed Berry Galettes
A galette is a French term referring to a flat, round pastry, similar in concept to a pie or a tart but traditionally baked free-form. Its Italian counterpart is often called a crostata. To prepare a galette, a pastry dough is rolled out, filled with a sweet (or sometimes savory) filling, and then the edges of the dough are folded casually over the filling, leaving the center exposed. This rustic dessert doesn’t require a special pie dish; it’s typically baked directly on a simple baking sheet, emphasizing its charmingly imperfect appearance.
Absolutely! Preparing the dough in advance is a fantastic time-saver. The galette dough can be stored in the refrigerator for up to two days, tightly wrapped to prevent it from drying out. For longer storage, you can wrap it airtight and freeze it for up to a month. When ready to use frozen dough, simply thaw it overnight in the refrigerator while still wrapped. For ultimate convenience, you can even roll the dough into 4-6-inch disks, place parchment paper between each round, and then freeze them wrapped in plastic. With this method, you’ll only need about 20 minutes to defrost a round of dough at room temperature before it can be rolled to the proper size, filled, folded into a galette, and baked. However, for the freshest taste and best texture, it’s always recommended to fill the galette on the same day you plan to bake it.
Yes, definitely! While a food processor makes quick work of pastry dough, it’s certainly possible to achieve a beautiful, flaky crust by hand. If you own a pastry blender – a hand tool designed to cut cold butter into dry ingredients – it will make the process much easier. Alternatively, you can use two table knives held in opposite hands to effectively cut the butter into the flour mixture, achieving a similar result. The key is to work quickly to keep the butter as cold as possible throughout the process.
A freshly baked galette is undoubtedly at its best on the day it’s made, when the crust is crisp and the filling is perfectly warm and juicy. However, you can store it at room temperature, loosely covered, for at least one day. For longer storage, especially due to the juicy berry filling which can soften the crust over time, it’s best to refrigerate the galette. Simply cover it well and store it in the fridge for up to 3-4 days. For extended preservation, a baked galette can be frozen for up to 3 months when wrapped thoroughly in plastic wrap and then foil. To enjoy a frozen galette, defrost it overnight in the refrigerator and then reheat it in an oven at 375ºF (190ºC) for about 10-15 minutes, or until warmed through and the crust regains some of its crispness.
Explore More Delicious Galette Recipes
If you’ve fallen in love with the simplicity and charm of this Mixed Berry Galette, you’ll be thrilled to discover the wide world of other galette variations. This versatile dessert can be adapted to almost any fruit, offering endless possibilities for seasonal delights. Here are some other fantastic galette recipes you might enjoy:
- Caramel Apple Pecan Galette from Foodness Gracious – A decadent twist on a classic, perfect for autumn.
- Rustic Apple Galette – The quintessential fall dessert with tender apples and a flaky crust.
- Maple Glazed Apple Galette – Elevate your apple galette with a sweet, aromatic maple glaze.
- Peach Galette Recipe – Sweet, juicy peaches baked into a rustic pastry, ideal for summer.
- Peach Blueberry Galette – A delightful combination of two summer favorites.
- Cheese Tomato Galette – For those who love savory options, this galette is a delicious meal.
- Plus, don’t miss this vibrant Berries Cake with Lemon Curd Whipped Cream and explore all my Pie Recipes for more baking inspiration!
This beloved recipe was first introduced in August 2012, and has since been updated with fresh photos and enhanced text in 2020 to provide the best possible baking experience for our readers.
Stay connected with us for more delicious recipes and baking tips! Follow us on social media @ Instagram, Facebook, and Pinterest. We love seeing your creations, so don’t forget to tag us when you try one of our recipes! If you adore the results, please consider leaving a 5-star rating in the recipe card below to help other bakers discover this wonderful treat.
Mixed Berry Galette
30 minutes
40 minutes
2 hours
2 hours 40 minutes
4-6 servings
A rustic fruit tart filled with luscious summer berries!
Ingredients
Dough (makes enough for 2 galettes, you’ll use half):
- 3 tablespoons cold sour cream
- ⅓ cup (approximately) ice water
- 1 cup all-purpose flour
- ¼ cup yellow cornmeal
- 1 teaspoon granulated sugar
- ½ teaspoon salt
- 7 tablespoons cold unsalted butter, cut into 6 to 8 pieces
Filling:
- 1 ½ cups mixed fresh berries (e.g., raspberries, blackberries, and blueberries, or cut-up peeled fruit)
- 1 tablespoon plus 1 teaspoon of granulated sugar
- 1 tablespoon honey (optional, for added sweetness and flavor)
- 1 tablespoon cold unsalted butter, cut into slivers
Instructions
- To prepare the dough using a food processor, start by stirring the cold sour cream and ⅓ cup of ice water together in a small bowl; set this mixture aside.
- Combine the all-purpose flour, yellow cornmeal, sugar, and salt in the bowl of your food processor. Pulse a few times to ensure these dry ingredients are well combined.
- Add the cold, cut-up butter pieces to the food processor. Pulse 8 to 10 times, or until the mixture resembles coarse bread crumbs with some pea-sized pieces of butter still visible.
- With the machine running, slowly add the sour cream mixture through the feed tube. Process just until the dough comes together and forms soft, moist curds. Avoid over-mixing.
- Carefully remove the dough from the processor, divide it in half, and gently press each half into a flat disk. Wrap each disk tightly in plastic wrap and chill in the refrigerator for at least 2 hours, or until firm.
- Before baking, position an oven rack in the lower third of your oven and preheat the oven to 400°F (200°C). Line a large baking sheet with parchment paper to prevent sticking.
- On a lightly floured work surface, take one disk of chilled dough (you can save the other for later). Roll it out into an 11-inch circle, approximately ⅛-inch thick. The dough is soft, so lift and re-flour your surface and the top of the dough occasionally to prevent sticking.
- Carefully roll the dough around your rolling pin and transfer it to the prepared baking sheet. Unroll it gently.
- Spread the mixed berries evenly over the dough, making sure to leave a clear 2 to 3-inch border around the edges. Sprinkle 1 tablespoon of sugar over the fruit, and if desired, drizzle with honey.
- Scatter the slivers of cold butter evenly on top of the fruit filling.
- Now, begin to fold the uncovered border of dough up over the filling. As you lift and fold, allow the dough to pleat naturally, working your way around the entire galette to encase the berries.
- For a beautiful golden crust, dip a pastry brush in water and lightly brush the folded edge of the dough. Then, sprinkle the crust with the remaining teaspoon of sugar.
- Bake the galette for 35 to 40 minutes, or until the pastry is deeply golden brown and crisp, and the fruit filling is bubbly.
- Once baked, transfer the baking sheet to a wire cooling rack and let the galette rest on the sheet for 10 minutes. This allows the filling to set slightly.
- After 10 minutes, carefully slide the galette off the baking sheet and onto a cooling rack to cool completely.
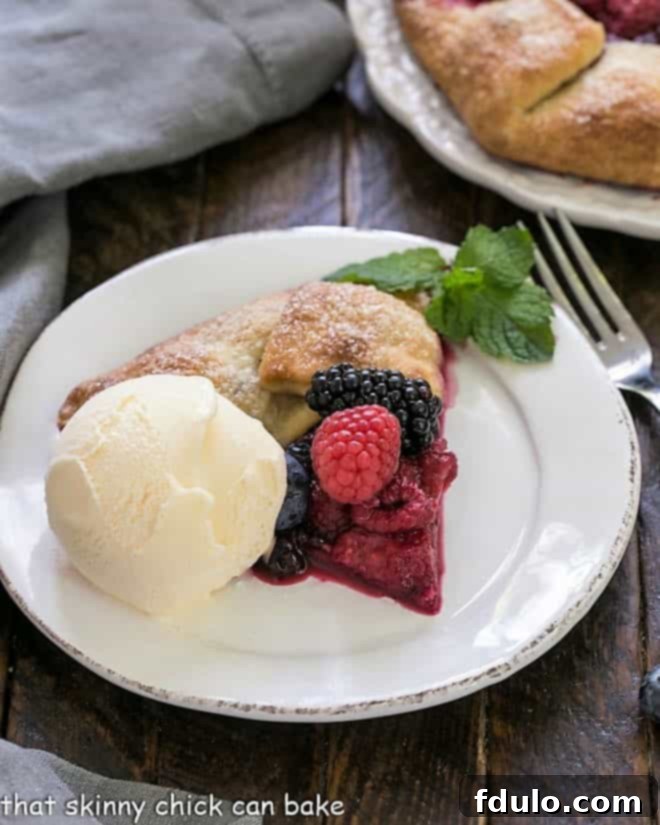
- Serve your Mixed Berry Galette warm or at room temperature. It’s especially delicious with a scoop of vanilla ice cream or a dollop of whipped cream.
Notes
For the dough, you have the option to substitute cold plain yogurt or buttermilk for the sour cream. Remember that buttermilk is thinner, so you might need a tiny bit less liquid overall.
Since this dough recipe yields enough for two galettes, you’ll have a second portion ready for another baking session! You can either make another galette right away or wrap the extra dough well and freeze it for a quick dessert later. It’s perfect to have on hand for unexpected guests or a spontaneous baking craving.
Recommended Products
As an Amazon Associate and member of other affiliate programs, I earn from qualifying purchases.
- Pastry Blender
- Reynolds Cookie Baking Sheets Non-Stick Parchment Paper, 25 Sheet, 4 Count
- USA Pan Bakeware Half Sheet Pan
- Food Processor
Nutrition Information:
Yield:
6
Serving Size:
1
Amount Per Serving (Estimated):
Calories: 276Total Fat: 17gSaturated Fat: 10gTrans Fat: 0gUnsaturated Fat: 6gCholesterol: 45mgSodium: 184mgCarbohydrates: 28gFiber: 2gSugar: 7gProtein: 3g
Thatskinnychickcanbake.com occasionally offers nutritional information for recipes contained on this site. This information is provided as a courtesy and is an estimate only. This information comes from online calculators. Although thatskinnychickcanbake.com attempts to provide accurate nutritional information, these figures are only estimates.
Varying factors such as product types or brands purchased can change the nutritional information in any given recipe. Also, many recipes on thatskinnychickcanbake.com recommend toppings, which may or may not be listed as optional and nutritional information for these added toppings is not listed. Other factors may change the nutritional information such as when the salt amount is listed “to taste,” it is not calculated into the recipe as the amount will vary. Also, different online calculators can provide different results.
To obtain the most accurate representation of the nutritional information in any given recipe, you should calculate the nutritional information with the actual ingredients used in your recipe. You are solely responsible for ensuring that any nutritional information obtained is accurate.
HOW MUCH DID YOU LOVE THIS RECIPE?
Please leave a comment on the blog or share a photo on Pinterest
