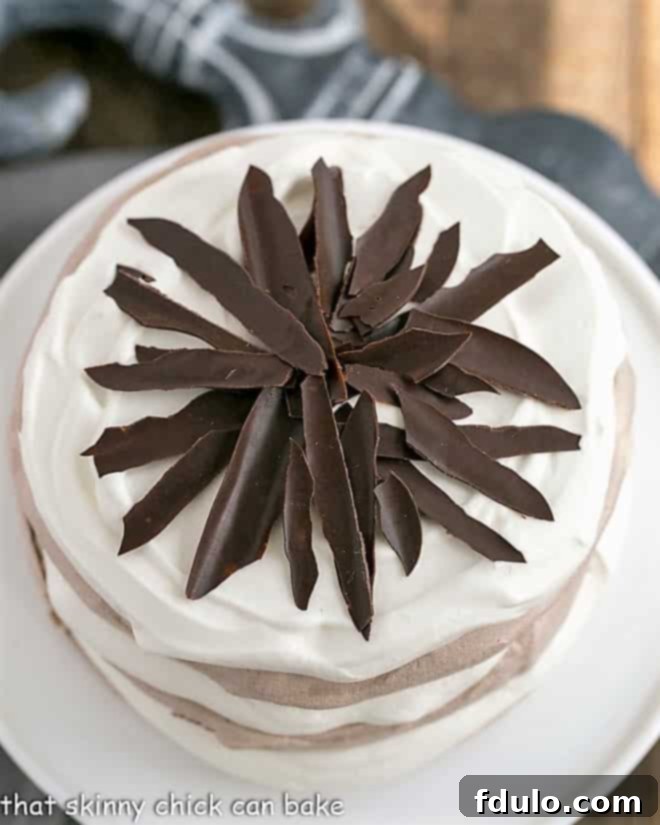
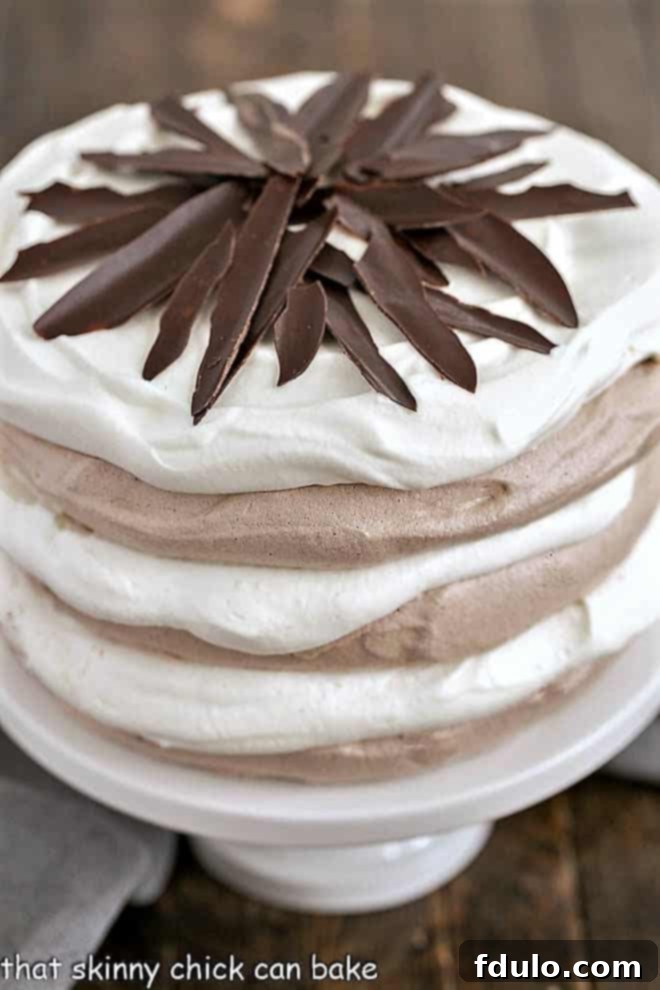
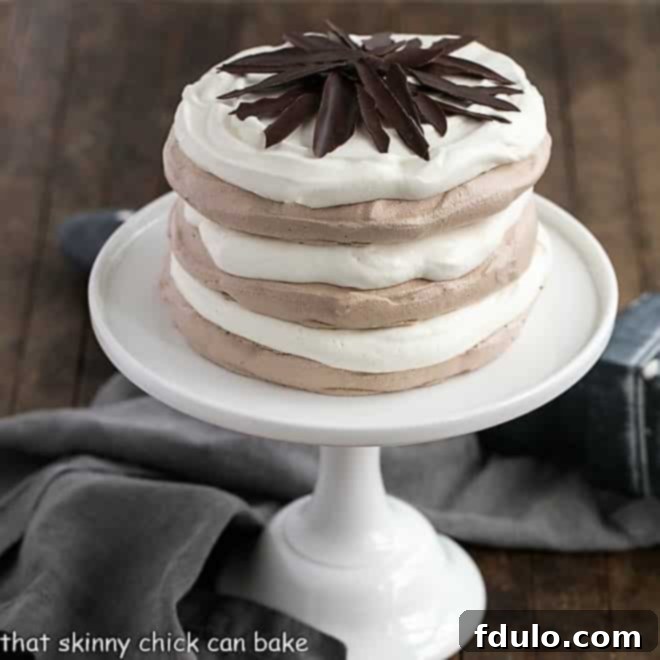
Imagine a dessert that’s both light as air and intensely decadent, visually stunning yet surprisingly simple to create. This Layered Chocolate Meringue Cake is exactly that: a show-stopping masterpiece inspired by a dreamy magazine feature. It elegantly combines three delicate chocolate pavlovas, generously layered with sweet, cloud-like whipped cream, and crowned with an exquisite array of homemade chocolate shards for an unforgettable culinary experience. This isn’t just a cake; it’s a celebration in every slice.

Why You Must Make This Exquisite Chocolate Pavlova Cake
For those who adore chocolate but sometimes find traditional chocolate cakes or fudgy frostings overwhelming, this Layered Chocolate Meringue Cake offers a beautifully balanced indulgence. It’s the perfect gluten-free dessert for even the most discerning chocoholics, like my daughter, who appreciates the essence of chocolate without the heavy intensity often found in richer treats.
- Perfectly Balanced Chocolate Flavor: Unlike intensely rich chocolate cakes, these chocolate meringues (or pavlovas, as we’ll discuss) feature just a kiss of high-quality cocoa powder, offering a subtle yet satisfying chocolate note. This is exquisitely complemented by a generous layer of luscious vanilla whipped cream and an elegant scattering of chocolate shards. The combination creates a harmonious symphony of flavors and textures that dance on your palate.
- A Refreshing Summer Dessert: Light, airy, and wonderfully cool, this chocolate pavlova cake is an impressive yet refreshing treat, especially during warmer months. Its delicate texture and creamy layers make it a delightful alternative to heavier baked goods, leaving you feeling satisfied but not weighed down. It’s ideal for garden parties, summer gatherings, or any occasion where you desire a dessert that’s both elegant and invigorating.
- Effortlessly Elegant Presentation: This isn’t merely a cake; it’s a work of edible art. The distinct layers of crisp meringue, billowy whipped cream, and glistening chocolate shards create a visual spectacle that will undoubtedly draw gasps of admiration from your guests. Despite its sophisticated appearance, it’s surprisingly approachable to make, allowing you to impress without the stress.
- Gluten-Free Indulgence: A fantastic option for those with gluten sensitivities or simply seeking a lighter dessert, this recipe naturally skips the flour, making it a wonderful gluten-free choice for any occasion. Everyone at your table can enjoy a slice of this magnificent creation.
- Unforgettable Texture: Experience the delightful contrast between the crisp, airy exterior of the pavlova and its uniquely soft, marshmallow-like interior, all enhanced by the smooth, creamy whipped topping and the satisfying snap of chocolate. It’s a textural journey in every bite that makes this dessert truly stand out.

Mastering Meringues and Pavlovas: Expert Tips for Perfection
While meringues and pavlovas have distinct characteristics, their foundations are similar, requiring careful attention to detail for the best results. Following these general rules will ensure your chocolate pavlova layers are light, crisp, and beautifully structured.
The Crucial Role of Eggs in Meringue Baking
- PRO-Tip: Room Temperature Egg Whites are Key. For optimal volume and stability, your egg whites must be at room temperature. This allows the proteins in the whites to relax, creating a more elastic structure that can trap more air when whipped, resulting in a higher, more stable meringue.
- Effortless Egg Separation: While room temperature whites whip best, eggs are much easier to separate when cold. The yolks are firmer and less likely to break. Therefore, I recommend separating your eggs straight from the refrigerator. Once separated, cover the whites with plastic wrap and let them sit at room temperature for at least 30 minutes, or up to an hour, before whipping. Don’t waste those precious yolks! Save them for other delicious creations like custards, ice creams, or even crème brûlée.
- The Three-Bowl Method for Flawless Whites: Fat is the enemy of meringue. Even the tiniest speck of egg yolk (which contains fat) can prevent your egg whites from whipping properly, leading to flat, weeping meringue. To mitigate this risk, employ the three-bowl method: use one bowl for your whites, one for your yolks, and a small “catch” bowl for separating each individual egg white. Separate an egg over the catch bowl; if the white is perfectly clean, transfer it to the main whites bowl. If a bit of yolk breaks into it, discard that white and clean the catch bowl before proceeding. This minimizes contamination of your entire batch of whites.
- Impeccably Clean Equipment: This cannot be stressed enough – your mixing bowls and beaters must be scrupulously clean and absolutely grease-free. Residue from previous baking, or even invisible traces of fat, will ruin your meringue. I always run my mixer bowl and beaters through the dishwasher to ensure they pass the ultimate cleanliness test. Any contact with fat, whether from equipment or a tiny speck of yolk, will prevent your egg whites from achieving the necessary volume and stiffness.
Whipping the Egg Whites to Perfection
- PRO-Tip: The Power of Superfine Sugar. While not strictly required, using superfine sugar (often available as Domino’s brand) is incredibly helpful as its finer granules dissolve more easily into the egg whites. This leads to a smoother, more stable meringue with less risk of a gritty texture.
- Why Homemade Superfine Sugar Isn’t Always Best: You might be tempted to make your own superfine sugar by processing granulated sugar in a food processor. However, studies suggest that this homemade version can be subpar. The processed sugar grains often have sharper edges, which can cut into the meringue’s delicate structure rather than dissolving smoothly, potentially hindering volume and stability. It’s often worth investing in commercially produced superfine sugar for the best results.
- The Art of Slow Sugar Addition: Patience is key here. Add the sugar very slowly, about 2 tablespoons at a time, allowing the egg whites ample opportunity to fully dissolve each addition. To check for grit, rub a small amount of the meringue mixture between your thumb and index finger. If it still feels grainy, continue mixing briefly. While a little grit is acceptable, avoid overbeating the meringue, which can cause it to become dry and brittle, especially for pavlova.
- Achieving Stiff, Glossy Peaks: You’ll know your meringue is perfectly whipped when it appears thick, glossy, and forms firm, upright peaks when you lift the beaters. It should hold its shape beautifully, without flopping over. This indicates that sufficient air has been incorporated and the sugar has fully dissolved, creating a stable and voluminous base for your pavlova layers.

Baking and Drying Your Chocolate Pavlova Layers
- Low and Slow Baking: Meringues and pavlovas are baked at a significantly lower temperature than most cakes or cookies. This gentle heat allows them to dry out slowly, preventing them from browning too quickly and ensuring a crisp exterior without a burnt taste. The extended baking time, about 3 hours for this recipe, is crucial for achieving the desired texture.
- The Critical Drying Period: Beyond the initial baking, this recipe calls for an additional 3-hour cooling and drying period inside the oven after it’s turned off. This passive drying is essential for developing the pavlova’s characteristic crisp outer shell and maintaining its structural integrity. It helps prevent cracking and ensures the meringue is completely dry.
- PRO-Tip: Prevent Accidental Oven Use. During the crucial 3-hour drying period, it’s imperative that the oven remains undisturbed and OFF. To avoid any accidental mishaps or family members inadvertently turning the oven on, place a visible Post-It note on your oven door as a friendly reminder not to open or use it while your pavlova layers are inside.
- Uniform Shapes with a Template: To ensure your three pavlova layers are all the same size and stack beautifully, use a template. Draw a 7-inch circle on each piece of parchment paper before lining your baking sheets. Remember to flip the parchment over so the ink doesn’t transfer to your food. An offset spatula is your best friend here, making it easy to spread the meringue evenly within the circles and create smooth, elegant sides and tops.
- Baking in Batches: If you only have two baking sheets, don’t worry! You can easily bake one pavlova on one sheet and the remaining two on another, assuming your oven is large enough to accommodate them without crowding. Just ensure even air circulation for consistent drying.
Serving Your Elegant Chocolate Meringue Cake
- Choosing the Right Serving Dish: While a tall cake stand makes for a stunning photographic presentation, I’ve found it can be quite challenging to slice this delicate meringue cake on a pedestal stand without making a mess. For practical and elegant serving, I highly recommend transferring the assembled cake to a flat cake plate. This provides more stability and makes slicing much easier.
- PRO-Tip: The Warm Knife Trick for Clean Slices. After my first attempt at slicing this cake resulted in crumbled meringue and oozing whipped cream, I discovered a game-changing technique. Heating a serrated knife makes an incredible difference, allowing for clean, precise cuts through the crisp meringue layers and creamy filling. Simply run your serrated knife under very hot tap water, wipe it completely dry with a clean cloth (to prevent water from seeping into the meringue), and then slice. Repeat this process for each cut. This ensures beautiful slices every time.
Frequently Asked Questions About Meringues and Pavlovas
While both meringues and pavlovas are enchanting egg white desserts, their culinary definitions are not interchangeable, primarily due to their internal texture. A classic meringue is typically crisp and dry throughout, offering a uniform crunch. In contrast, a traditional pavlova boasts a wonderfully crisp outer shell that gives way to a soft, pillowy, marshmallow-like center. This unique “squidgy” (as Nigella Lawson might describe it) interior is its signature characteristic, providing a delightful chewiness that sets it apart.
Strictly adhering to culinary definitions, this layered dessert is composed of three distinct pavlovas, making it a “pavlova cake.” The fundamental difference lies in their ingredients: meringues typically consist solely of egg whites and sugar, resulting in an all-crisp texture. Pavlovas, however, include additional ingredients like cornstarch and an acidic component (traditionally vinegar) which are crucial for achieving that signature soft, marshmallowy, and slightly chewy interior. For this recipe, I’ve opted for cornstarch combined with lemon juice instead of vinegar, which provides the necessary acid to create the classic, desired texture of a pavlova. However, given their close kinship, few will argue if you affectionately refer to this stunning creation as a layered chocolate meringue cake; the delicious result speaks for itself!
Yes, with a few considerations! The pavlova layers themselves can be baked and dried a day or two in advance. Store them in an airtight container at room temperature, away from any humidity. The whipped cream is best prepared closer to serving time to maintain its peak freshness and volume. For the best texture and appearance, assemble the cake no more than a few hours before you plan to serve it. This prevents the meringue from softening too much from the moisture in the whipped cream. If you are preparing it ahead for a party, store the assembled cake in the refrigerator for up to 3-4 hours, loosely covered.
Delicious Dessert Inspirations: You May Also Like
- Chocolate Raspberry Pavlova: Another exquisite pavlova variation, perfect for berry lovers.
- Individual Raspberry Pavlovas: Delightful personal-sized pavlovas for easy serving.
- Lemon on a Cloud: A bright and tangy meringue dessert that’s truly heavenly.
- Easy Meringue Cookies: Simple, melt-in-your-mouth meringues for a quick treat.
- Plus, explore all my Best Dessert Recipes for more sweet delights!
Stay connected and share your culinary creations with me on social media! Find me on Instagram, Facebook, and Pinterest. Don’t forget to tag me when you try one of my recipes! If you love the results, please consider leaving a 5-star rating and a review in the recipe card below – your feedback truly helps others discover these wonderful dishes.

Print Recipe
The Recipe:
Layered Chocolate Meringue Cake
30 minutes
3 hours
3 hours 30 minutes
12 servings
Three sweet, airy chocolate pavlova layers, generously filled with luscious whipped cream and crowned with chocolate shards, create an elegant and unforgettable gluten-free dessert!
Average Rating: 4.9 out of 5 stars based on 25 reviews.
Ingredients
- 6 egg whites, at room temperature
- 1 ½ cups superfine sugar (use granulated if superfine not available)
- 1 ½ tablespoons of cornstarch
- 3 tablespoons good quality cocoa powder
- 1 teaspoon lemon juice
- 2 cups heavy cream
- ½ cup powdered sugar
- 1 teaspoon vanilla extract
- Chocolate shards to garnish
Instructions
- Prepare Baking Sheets: Preheat your oven to 225°F (107°C). Line three large baking sheets with parchment paper. On each piece of parchment, draw a 7-inch (18 cm) circle, then flip the paper over so the drawn line is on the underside. Set these prepared sheets aside.
- Combine Dry Ingredients: In a small bowl, whisk together the superfine sugar and cornstarch until well combined. Set this mixture aside.
- Whip Meringue: In a meticulously clean, large mixing bowl, beat the room temperature egg whites using an electric mixer until they become satiny and hold soft peaks. Gradually, about two tablespoons at a time, add the sugar and cornstarch mixture while continuing to beat. Continue whipping until the meringue is stiff, glossy, and forms firm peaks. Gently sift the cocoa powder over the meringue and fold it in until just combined. Finally, fold in the lemon juice.
- Shape and Bake Pavlovas: Divide the meringue mixture evenly among the three prepared baking sheets, spreading it within the drawn 7-inch circles. Use an offset spatula to smooth the tops and edges for a neat appearance. Carefully place the baking sheets into the preheated oven and bake for 3 hours. The pavlovas should be dry on the edges and top and will likely show some cracking. After 3 hours, turn off the oven and leave the pavlovas inside for an additional 3 hours to cool down and dry out completely. Do not open the oven door during this drying period.
- Prepare Whipped Cream & Assemble: To serve, carefully place one cooled pavlova disc onto your chosen serving plate. In a separate bowl, whip the heavy cream with the powdered sugar and vanilla until it forms soft peaks. Spread about 1⅓ cups of the whipped cream evenly over the first pavlova layer. Gently place the second pavlova disc on top and repeat with another 1⅓ cups of whipped cream. Finally, add the third pavlova layer and top it with the remaining whipped cream.
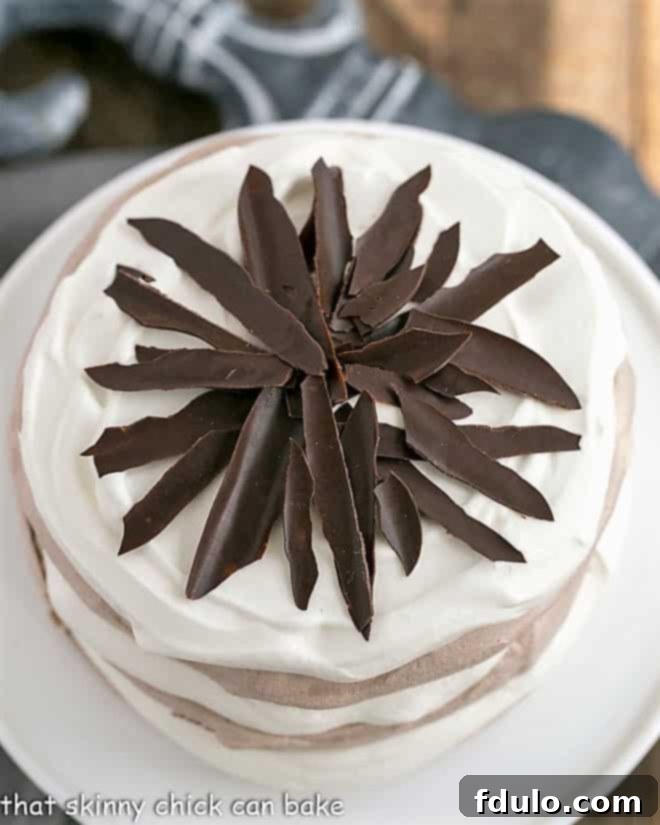
- Garnish & Serve: Garnish the top of the cake with grated chocolate, elegant chocolate curls, or homemade chocolate shards for a truly stunning presentation. Slice with a hot serrated knife for clean cuts and serve immediately to enjoy its delightful textures.
Notes
Ensure your mixing bowl and beaters are absolutely grease-free and that not a speck of egg yolk contaminates your egg whites. Any fat will prevent your egg whites from whipping properly, leading to a failed meringue.
This recipe draws inspiration from the legendary Nigella Lawson’s chocolate pavlova and the decadent Chocolate-Coconut Pavlova Cake featured in Southern Living, blending the best techniques for a flawless result.
Recommended Products
As an Amazon Associate and member of other affiliate programs, I earn from qualifying purchases.
- KitchenAid KSM150PSER Artisan Tilt-Head Stand Mixer with Pouring Shield, 5-Quart, Empire Red
- Reynolds Kitchens Non-Stick Baking Parchment Paper Sheets – 12×16 Inch, 22 Count
- USA Pan Bakeware Half Sheet Pan
Nutrition Information:
Yield:
12
Serving Size:
1 slice
Amount Per Serving:
Calories: 267Total Fat: 15gSaturated Fat: 9gTrans Fat: 0gUnsaturated Fat: 4gCholesterol: 45mgSodium: 39mgCarbohydrates: 32gFiber: 0gSugar: 31gProtein: 3g
