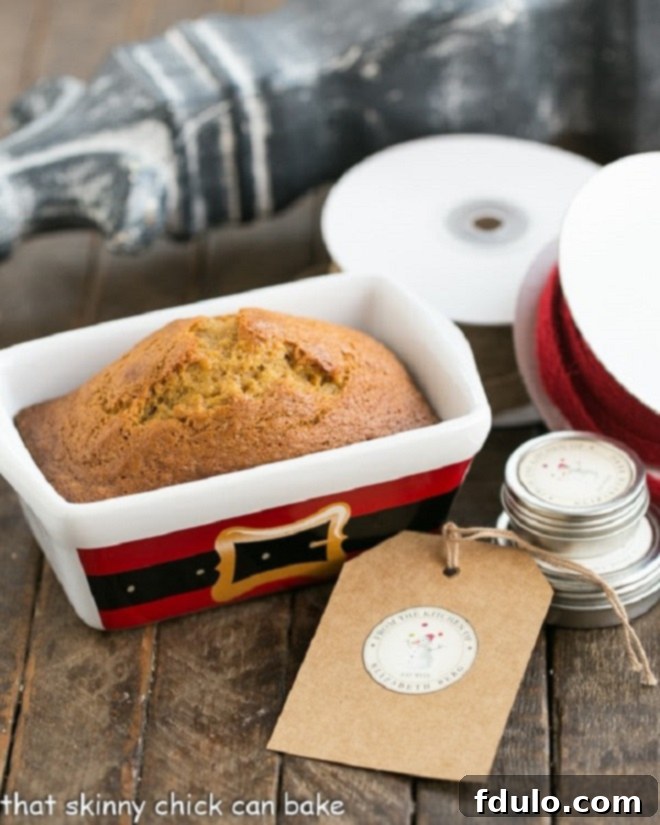
Delicious Mini Pumpkin Bread: Your Perfect Holiday Gifting Solution
There’s nothing quite like the aroma of freshly baked pumpkin bread to signal the start of the holiday season. These delightful Mini Pumpkin Breads aren’t just a treat for the senses; they are truly the best homemade food holiday gifts you can share. This easy quick bread recipe promises a wonderfully fragrant kitchen and heartwarming smiles from everyone who receives a loaf.
I have the pleasure of being part of a vibrant book club, and each December, we uphold a cherished tradition: exchanging gifts. As you might guess, my contribution always comes straight from my kitchen, infused with love and seasonal flavors. This year, I decided to bake a batch of these exquisite mini pumpkin loaves, using a time-honored family recipe. These small loaves of bread proved to be absolutely ideal for gifting, perfectly sized for a thoughtful gesture.
Why This Classic Mini Pumpkin Bread Recipe is a Must-Try
If you’re searching for a reliable, flavorful, and incredibly moist pumpkin bread recipe, look no further. This classic approach to pumpkin bread is an absolute winner, embodying everything you love about fall baking and holiday traditions.
- A Timeless Classic: This recipe delivers a truly classic pumpkin bread—dense, wonderfully moist, and bursting with warm, inviting spices. There’s no need for chocolate chips or streusel (though delightful variations exist); it’s absolutely perfect in its pure, simple form. It’s the kind of bread that evokes nostalgia and comfort with every bite.
- A Cherished Family Tradition: This very pumpkin bread holds a special place in our hearts. It’s the same beloved recipe one of our neighbors would faithfully bring over every Christmas. We’d eagerly slather slices with butter, and half the loaf would vanish in mere minutes, testament to its irresistible appeal. Sharing this recipe is like sharing a piece of our family’s holiday joy.
- Decades of Proven Deliciousness: I’ve been making this exact recipe for decades, refining it through countless batches to perfection. It’s a tried-and-true winner that never disappoints. If you haven’t yet found your go-to pumpkin bread recipe, make sure to save this one! It will quickly become a staple in your autumn and winter baking repertoire.
- Perfect for Gifting: The mini size makes these loaves incredibly charming and convenient for holiday gift-giving. They are easy to wrap, beautiful to present, and delightful for recipients to enjoy without feeling overwhelmed by a large loaf. It’s a personal touch that shows you care.
- Versatile and Crowd-Pleasing: Whether served for breakfast, brunch, an afternoon snack with coffee, or as a light dessert, this pumpkin bread is universally loved. Its comforting flavors appeal to almost everyone, making it an excellent choice for any gathering or simply for enjoying at home.
Essential Ingredient Notes for the Best Pumpkin Bread
While this recipe is straightforward, paying attention to a few ingredient details can make all the difference in achieving that perfect moist crumb and rich flavor.
- Kitchen Staples: You’ll need granulated sugar, vegetable oil (like canola), all-purpose flour, water, salt, and baking soda. These pantry essentials form the foundation of our delicious quick bread.
- Eggs: For optimal incorporation and a smooth batter, ensure your large eggs are at room temperature. If you forget to take them out ahead of time, simply place them in a bowl of warm (not hot!) water for 5-10 minutes while you gather other ingredients.
- Pumpkin Puree: Always use pure pumpkin puree, not pumpkin pie filling. Pie filling already contains spices and sweeteners, which will throw off the flavor balance of this recipe. You’ll only need one cup, so you might have some leftover from a standard can—perfect for another pumpkin-inspired dish!
- Baking Powder and Baking Soda: This recipe utilizes both leavening agents for optimal rise and texture. Baking soda typically has a longer shelf life, but baking powder often expires much sooner. Always check the expiration date on your baking powder before you start. A simple test: place a spoonful into a cup of hot water; if it bubbles vigorously, it’s still fresh and active.
- Warm Spices (Cloves, Allspice, Cinnamon): These spices are the heart of pumpkin bread’s comforting flavor. Over time, ground spices can lose their potency. If your spices have been in the pantry for a year or more, consider replacing them for the best possible flavor. Fresh spices make a noticeable difference!
- Vegetable Oil: Using oil instead of butter contributes to a very moist and tender crumb in quick breads, as oil remains liquid at room temperature, while butter solidifies. This helps keep the bread soft and delightful for longer.
Creative Ways to Package Homemade Holiday Breads for Gifting
Presenting your homemade mini pumpkin breads beautifully elevates them from a simple treat to a truly thoughtful and memorable gift. The presentation is almost as important as the deliciousness inside!
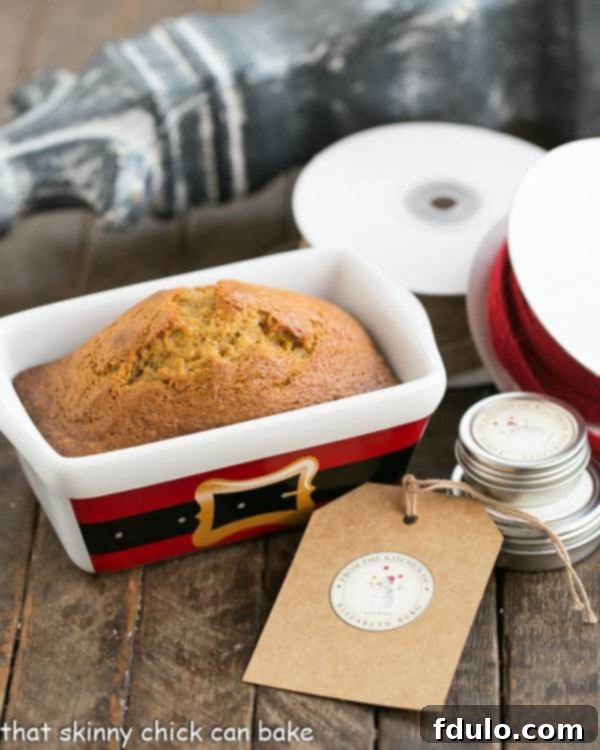
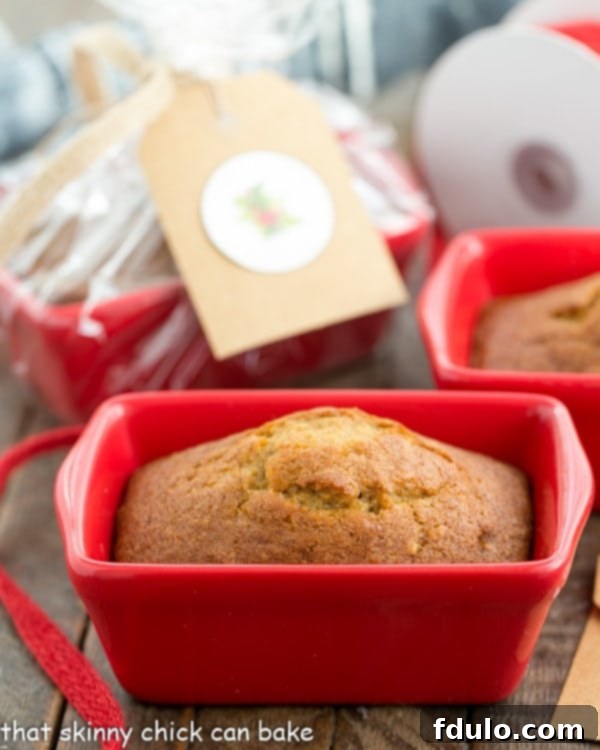
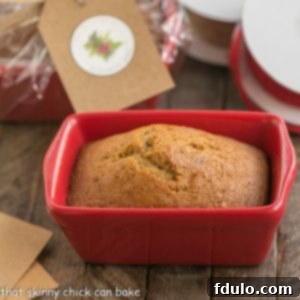
My talented blogger friend, Julie, once shared her Sweet Orange Bread beautifully packaged in small, inexpensive ceramic dishes from stores like Michael’s. Hers were solid white, exuding a minimalist charm. Since it was November, most of the dishes I found were adorned with holiday designs. Preferring a cleaner look, I opted for a dozen plain red dishes, plus one white one with a subtle Santa belt design—the least “obnoxious” of the festive options. I always try to stock up on the simple white dishes during the off-season for year-round gifting versatility.
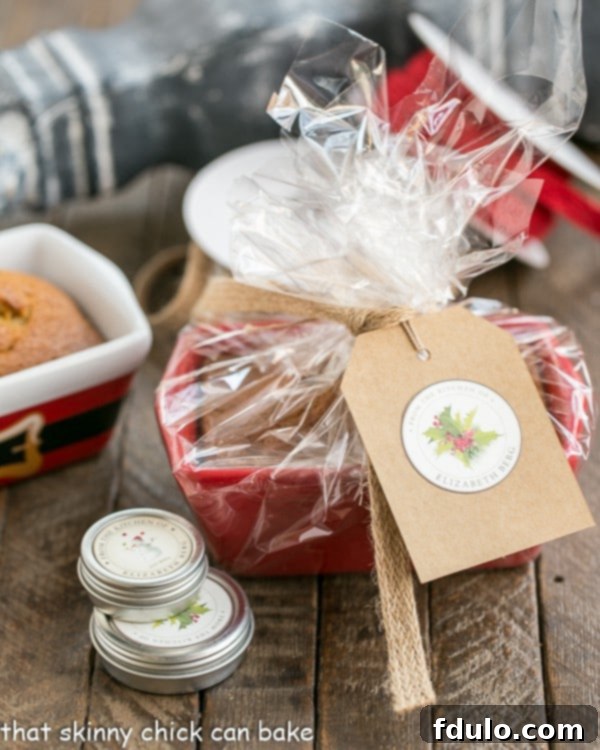
To complete the festive look, I use food-safe cellophane wrap to seal in freshness, tying it with a pretty ribbon that complements the dish. A charming gift tag adds the final personal touch, transforming each mini loaf into a festive and utterly delicious treat. For an extra touch of elegance, I love to splurge on beautiful Felix Doolittle Chef Medallions to affix to my gift tags. They add a sophisticated flair that makes the gift feel even more special and handcrafted.
Beyond ceramic dishes, consider other packaging ideas:
- Decorative Loaf Pans: Many stores offer disposable paper or foil loaf pans in festive designs that can be baked in directly and then gifted.
- Small Boxes: Line a small gift box with tissue paper or parchment, then place the cellophane-wrapped bread inside. Tie with twine and a sprig of rosemary or cinnamon stick for a rustic touch.
- Baskets: For a larger gift, combine a mini pumpkin bread with a small jar of homemade jam, a tea towel, or a bag of gourmet coffee beans in a charming basket.
- Custom Labels: Design and print your own labels with the recipe name, ingredients, and a personal message to truly make it your own.
The effort put into the presentation shows care and makes the act of giving even more meaningful.
Essential Recipe Tips for Perfect Pumpkin Bread Every Time
Quick breads and muffins are generally simple to master, but a few key tips can ensure your mini pumpkin loaves turn out perfectly moist, tender, and beautifully risen.
- Thorough Pan Preparation is Key: To prevent sticking and ensure your beautiful loaves release easily, prep your pans meticulously. I highly recommend using a flour-oil spray like Baker’s Joy. Additionally, for extra insurance, cut small rectangles of parchment paper, grease them lightly, and place them at the bottom of each mini loaf pan. This makes removal effortless.
- Cooling Time is Crucial: Allow the bread to cool in the pans for about 10-15 minutes after baking. This crucial step helps the loaves firm up and prevents them from breaking when you remove them. Any longer, however, and they might stick. After this initial cooling, transfer them to a wire rack to cool completely. If gifting in the same ceramic pan, gently remove the loaf, wash the pan, and then return the fully cooled loaf.
- PRO-Tip: Room Temperature Ingredients: Always aim to have your eggs and any other refrigerated ingredients at room temperature before mixing. Room temperature ingredients emulsify more easily with each other, creating a smoother, more uniform batter and a better texture in your finished bread.
- Quick Fix for Cold Eggs: If you forget to set your eggs out, don’t fret! Place them in a bowl of hot (but not boiling, you don’t want to cook them!) water for a few minutes while you gather your other ingredients. This will quickly take the chill off.
- PRO-Tip: Do Not Overmix: Overmixing is the enemy of tender quick breads. When combining the wet and dry ingredients, mix only until they are just incorporated. Overmixing develops the gluten in the flour, leading to a tough, chewy texture and potentially “tunnels” within the bread. If using a stand mixer, use the paddle attachment on a low speed. A wooden spoon or spatula is often the best tool for this step.
- Scrape the Bowl: After adding the dry ingredients, use a rubber spatula to give the bottom and sides of the bowl a good scrape. This ensures there are no pockets of unmixed flour, resulting in a consistent batter. Then, gently divide the batter among your prepared pans.
- PRO-Tip: Avoid Overfilling Pans: For an ideal dome and proper baking, fill your mini loaf pans approximately two-thirds of the way full. Keep in mind that mini loaf pans come in various sizes, so your baking time might vary slightly. Start checking for doneness a bit early, and once you find the perfect baking time for your specific pans, make a note of it on your recipe card for future batches.
- Check for Doneness Accurately: Start checking your bread about 5 minutes before the suggested baking time is up, or when your kitchen fills with that irresistible baked pumpkin aroma. All ovens bake differently, and you want to avoid overbaking. Insert a toothpick into a few spots across the middle of a loaf. If it comes out clean, your bread is perfectly done. If it comes out with wet batter, continue baking for a few more minutes and test again.
Frequently Asked Questions About Mini Pumpkin Bread
Can Fresh Pumpkin Puree Be Used for this Pumpkin Bread?
While fresh pumpkin puree is a lovely idea, its consistency often differs significantly from canned pumpkin puree. Canned pumpkin is typically denser and has less water content. If you can be 100% sure that your homemade puree has the exact same consistency as the canned version, it might work. However, fresh puree is often more watery, which can lead to loaves that don’t bake properly or have a soggy texture due to the extra liquid. I’d generally advise against it for this recipe unless you’re prepared to experiment and potentially adjust the liquid content.
Can Nuts or Chocolate Chips Be Added to this Pumpkin Bread?
Absolutely! Both nuts and chocolate chips would be delicious additions to this pumpkin bread, adding wonderful texture and flavor. For best results, try stirring in 1 to 1½ cups of either chopped nuts (like walnuts or pecans) or chocolate chips (milk, dark, or semi-sweet) into the batter just before you divide it among the pans. Mix gently to ensure they are evenly distributed without overmixing the batter.
Can the Batter Be Mixed Ahead of Time?
Unfortunately, no. Once the wet and dry ingredients are combined, the baking soda and baking powder begin to react, activating the leavening process. If the batter sits for too long before baking, these leavening agents will lose their potency, resulting in loaves that won’t rise properly in the oven. For the best rise and texture, it’s always best to mix the batter, add it to the pans, and bake as soon as possible.
More Delicious Recipes You May Also Like
I absolutely adore giving food gifts during the holidays. There’s something incredibly special and personal about sharing homemade treats. From various quick breads to delectable cookies, homemade candies, and even infused liqueurs, the possibilities for homemade holiday food gifts are endless and always appreciated!
Be sure to explore my Food Gifts Pinterest Board for a plethora of creative and delicious ideas perfect for holiday gifting!
- Pumpkin Bread with Apples
- Cinnamon Crusted Pumpkin Bread
- Classic Banana Walnut Bread
- Zucchini Bread
- Sour Cream Pear Bread
- Chocolate Chip Toffee Banana Bread
- Cranberry Orange Walnut Bread
- Southern Peach Bread
- Discover more Bread Recipes
- Explore more Food Gift Recipes
Stay connected and share your baking creations! Find me on Instagram, Facebook, and Pinterest. Don’t forget to tag me when you try one of my recipes! If you love the results, please consider leaving a 5-star rating in the recipe card below to help others discover this delightful recipe.
Mini Pumpkin Bread
20 minutes
40 minutes
1 hour
1 large loaf or 5 mini loaves
A classic pumpkin bread recipe that’s always a hit. Make mini loaves for hostess or holiday gifts!
Ingredients
- 1 ½ cup sugar
- ½ cup oil (vegetable or canola)
- 2 large eggs (at room temperature)
- 1 cup pure pumpkin puree (not pie filling)
- 1 ¾ cups all-purpose flour
- ¼ teaspoon baking powder (fresh)
- 1 teaspoon salt
- 1 teaspoon baking soda (fresh)
- ¼ teaspoon ground cloves
- ¼ teaspoon ground allspice
- ½ teaspoon ground cinnamon
- ⅓ cup water
Instructions
- Preheat your oven to 350ºF (175ºC). Generously grease your mini loaf pans or one large loaf pan. For best results, also line the bottom of each pan with a greased piece of parchment paper.
- In a large mixing bowl, combine the granulated sugar and vegetable oil. Whisk them together until well combined.
- Next, whisk in the room temperature eggs one at a time, ensuring each is fully incorporated. Then, add the pumpkin puree and mix until smooth.
- In a separate medium bowl, whisk together the dry ingredients: flour, baking powder, salt, baking soda, ground cloves, ground allspice, and ground cinnamon.
- Gradually add the dry ingredient mixture to the wet pumpkin mixture. Mix just until combined. Be careful not to over-mix; a few streaks of flour are acceptable. Scrape down the sides and bottom of the bowl with a rubber spatula to ensure everything is incorporated.
- Stir in the water until just blended. Divide the batter evenly among your prepared mini loaf pans, filling each about two-thirds full. If using a large loaf pan, pour all the batter into it.
- Bake the mini loaves for 35-40 minutes. For a full-size loaf pan, baking time will be longer; start checking at about 60 minutes, though heavy-duty loaf pans might take closer to 75 minutes.
- To check for doneness, insert a clean toothpick into the center of a loaf. If it comes out clean or with moist crumbs attached (not wet batter), the bread is done.
- Allow the loaves to cool in their pans for 10-15 minutes before carefully removing them to a wire rack to cool completely.
Notes
My mini ceramic pans typically measure 5 x 3 x 2 inches. These sizes are commonly found at craft stores like Michaels during holiday seasons.
While this classic recipe is perfect on its own, if you wish to add chocolate chips, start with 1 cup and mix into the batter. You can add up to another ½ cup if a richer chocolate flavor is desired.
Store leftover pumpkin bread tightly wrapped at room temperature for up to 3-4 days, or in the refrigerator for up to a week. It also freezes beautifully for up to 3 months.
Nutrition Information:
Yield:
10 servings
Serving Size:
1 slice
Amount Per Serving (Approximate):
Calories: 315Total Fat: 12gSaturated Fat: 1gTrans Fat: 0gUnsaturated Fat: 11gCholesterol: 37mgSodium: 365mgCarbohydrates: 48gFiber: 1gSugar: 31gProtein: 4g
HOW MUCH DID YOU LOVE THIS RECIPE?
Please leave a comment on the blog or share a photo on Pinterest!
