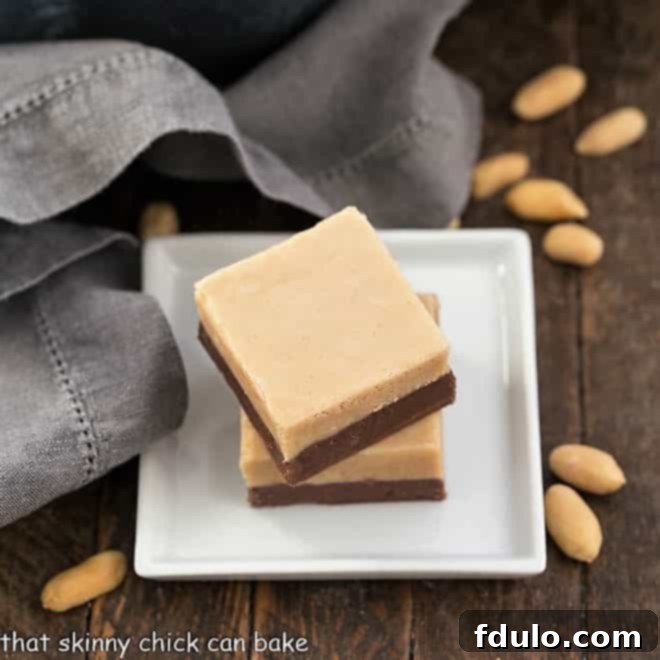
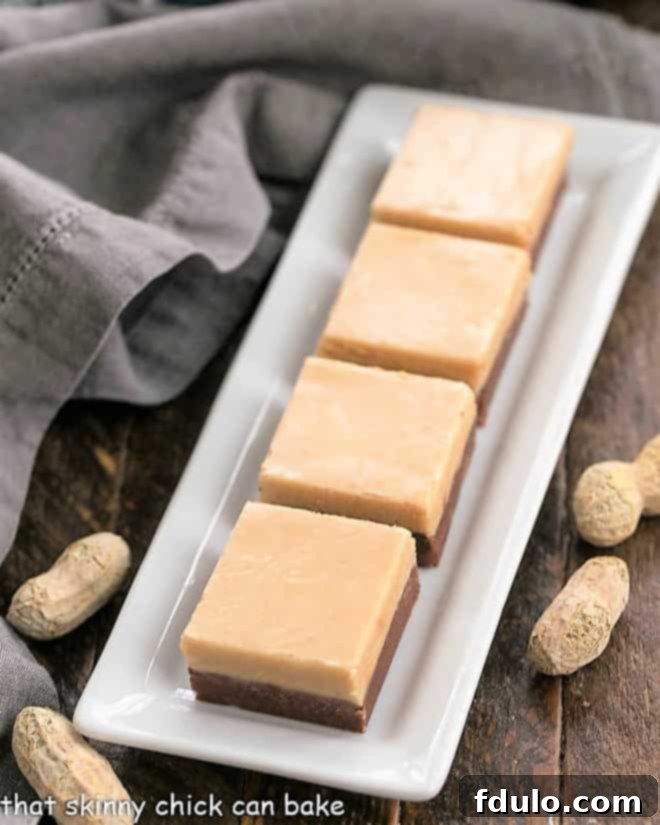
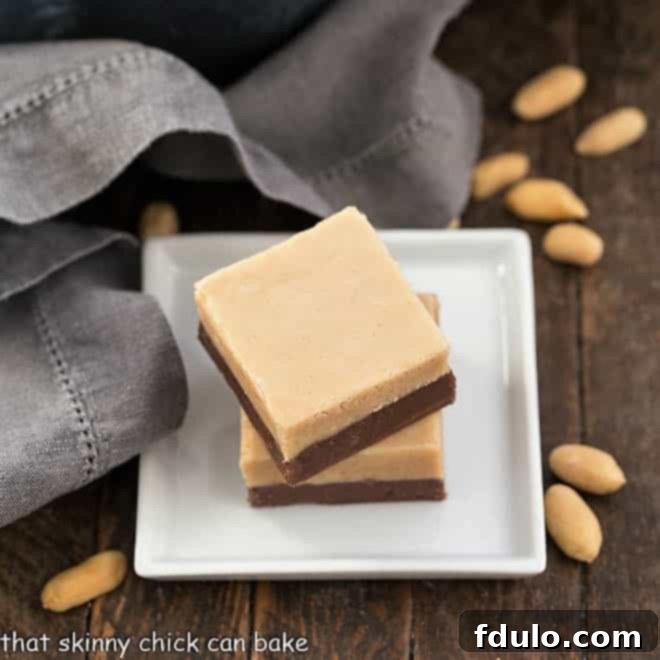
Indulge in a truly spectacular, incredibly creamy, and utterly irresistible layered chocolate peanut butter fudge. This decadent, melt-in-your-mouth confection is so delightful, you’ll find yourself making it time and time again for every special occasion or simply to satisfy a sweet craving.
This Easy Peanut Butter Fudge recipe, featuring a delightful chocolate layer, is the ultimate treat and makes for perfect hostess gifts or thoughtful food presents during the holiday season. The best part? Crafting this rich, two-toned candy requires minimal effort, making it a stress-free addition to your baking repertoire. No one needs to know how effortlessly you whipped up such a professional-looking and tasting dessert!
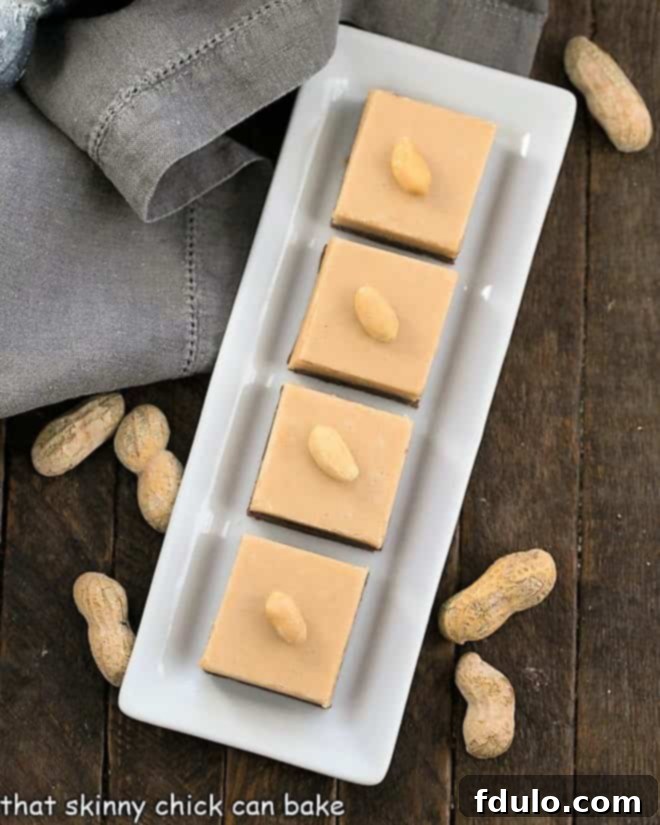
Why This Layered Chocolate Peanut Butter Fudge Will Become Your Favorite
If you’re searching for a dessert that consistently wows and delivers on rich flavor and creamy texture, look no further. This chocolate peanut butter fudge is more than just a treat; it’s an experience. Here’s why it deserves a prime spot in your recipe collection:
- It perfectly embodies the timeless and universally adored combination of rich chocolate and savory peanut butter. This pairing creates a symphony of flavors that is both comforting and exciting, appealing to almost every palate.
- This recipe offers a delightful twist on the classic “no-fail” fudge method, utilizing the magical ingredient of marshmallow creme. This key component ensures an incredibly smooth and creamy texture every single time, eliminating the dreaded grainy fudge common in traditional recipes.
- Beyond its incredible taste, this decadent fudge makes a truly impressive and delicious confection, ideal for festive gatherings and holiday celebrations. Its beautiful layered appearance adds an elegant touch, making it a standout dessert that guests will rave about.
- Its simplicity is a game-changer. Despite its gourmet appearance and taste, this recipe is surprisingly straightforward, allowing even novice candy makers to achieve professional results without breaking a sweat.
For too long, I hesitated to make this extraordinary confection, perhaps knowing that my self-control would be tested. My husband, surprisingly, isn’t a huge fudge fan, leaving me to grapple with the tempting task of keeping my distance. However, once I finally decided to try this easy peanut butter fudge recipe, it absolutely surpassed all my expectations. It was so incredibly smooth, rich, and flavorful that it proved utterly irresistible, quickly becoming a household favorite—even for those who claimed not to love fudge!
Essential Ingredients for Perfect Fudge
Crafting the perfect batch of layered chocolate peanut butter fudge starts with selecting quality ingredients. Each component plays a vital role in achieving that rich flavor and incredibly creamy texture. Here’s a closer look at what you’ll need and why each choice matters:
- Granulated Sugar: This is the foundation of any fudge. Ensure you have enough on hand, as it’s used in both the chocolate and peanut butter layers. Precision in measurement is key for the right consistency and sweetness.
- Butter: I opt for salted butter in this recipe. The small amount of salt acts as a brilliant flavor enhancer, beautifully balancing the sweetness without making the fudge taste overtly salty. It contributes to the fudge’s rich, smooth mouthfeel. If using unsalted butter, you might consider adding a tiny pinch of salt to each layer.
- Evaporated Milk: This ingredient is crucial for adding creaminess and moisture without making the fudge too thin. Unlike regular milk, evaporated milk has a thicker consistency and helps create a richer, more concentrated flavor base for the fudge.
- Vanilla Extract: Always reach for real vanilla extract, not artificially flavored substitutes. The pure, authentic vanilla flavor elevates both the chocolate and peanut butter layers, adding depth and a lovely aromatic quality that artificial versions simply cannot replicate.
- Semi-Sweet Chocolate Chips: High-quality chocolate chips are essential for a luscious chocolate layer. Brands like Ghirardelli or Nestlé Toll House work wonderfully, melting smoothly and providing a rich, balanced chocolate flavor that isn’t overly sweet. You want a consistent melt for a silky texture.
- Creamy Peanut Butter: For the signature peanut butter layer, creamy peanut butter is a must. Brands like Jif or Skippy are ideal as they offer a consistent, smooth texture that integrates beautifully into the fudge. Avoid natural peanut butter for this recipe, as its oil separation can affect the fudge’s setting and texture.
- Marshmallow Creme: This is the secret weapon for truly “no-fail” fudge. I use Jet-Puffed marshmallow creme, divided between the two layers. Marshmallow creme helps prevent sugar crystals from forming, ensuring your fudge is incredibly smooth and creamy, never grainy. A handy tip: spray your spoon with a little non-stick cooking spray (like Pam) before scooping to prevent it from sticking to the jar.
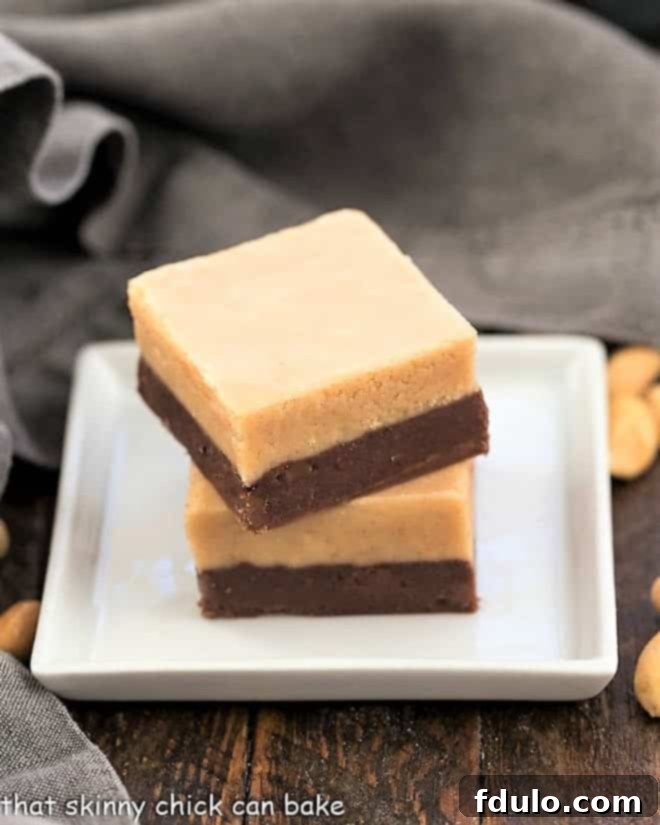
Mastering Your Layered Chocolate Peanut Butter Fudge: Pro Tips
This recipe is built upon a tried-and-true no-fail fudge base, but with a clever twist to create a stunning two-layer masterpiece. We’ll start with a classic chocolate fudge layer using marshmallow creme and chocolate chips, then elegantly top it with a rich peanut butter layer. Achieving perfect results is easy with these expert tips:
- Precision with a Candy Thermometer: While marshmallow creme is excellent at preventing sugar recrystallization, ensuring the correct temperature is still paramount for the ideal fudge consistency. I always recommend using a candy thermometer to guarantee the sugar melts properly and the mixture reaches the perfect stage. This small investment will dramatically improve your fudge-making success.
- PRO-Tip: The Magic Temperature: For velvety smooth fudge, the mixture should consistently reach a temperature of 234 degrees Fahrenheit (112 degrees Celsius). This “soft ball” stage is critical for the sugar to dissolve completely and prevent a grainy texture.
- PRO-Tip: No Thermometer? No Problem!: If you don’t own a candy thermometer, you can still achieve excellent results. Simply ensure your candy mixture comes to a full, rolling boil for a solid 4 minutes. A “rolling boil” means the bubbles don’t disappear when stirred. This method helps to cook the sugar sufficiently and achieve the desired consistency.
- Achieving Smooth Layers with an Offset Spatula: An offset spatula is your best friend for spreading each fudge layer evenly in the pan. Work quickly but gently to spread the mixture from edge to edge. Once a layer is spread, resist the urge to shake or move the pan until the fudge has fully set. This ensures a perfectly smooth, unblemished top surface for each layer.
- Lining the Pan for Easy Removal: For effortless removal and clean slicing, lining your baking pan with non-stick foil or parchment paper is a game-changer. Leave an overhang on the sides so you can easily lift the entire batch of cooled fudge out of the pan and transfer it to a cutting board. Slicing fudge when it’s out of the pan is significantly easier and yields cleaner, more uniform squares.
- Optimal Storage for Freshness: To keep your delicious easy peanut butter fudge fresh for as long as possible, store it in an airtight tin or container. This prevents it from drying out and maintains its creamy texture. When stored correctly at room temperature (in a cool, dry place), it should remain fresh for 2-3 weeks.
- Freezing Fudge: Fudge freezes exceptionally well, making it perfect for preparing ahead or extending its shelf life for months. Ensure you wrap it tightly in plastic wrap, then again in aluminum foil, or place it in an airtight freezer-safe container to prevent freezer burn. When ready to enjoy, defrost the fudge slowly in the refrigerator to minimize any condensation from forming on the surface, which could affect its texture.
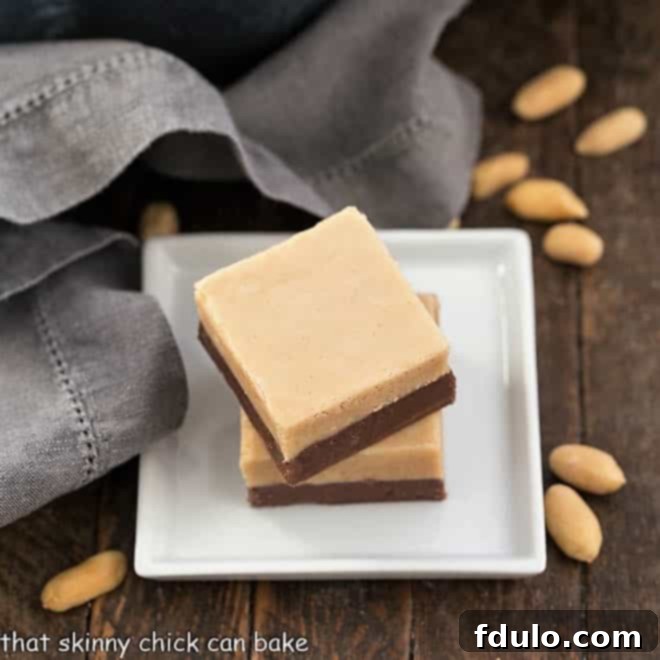
Frequently Asked Questions About Fudge
No-fail fudge refers to a specific type of fudge recipe that incorporates an ingredient designed to prevent the recrystallization of sugar molecules after they’ve been cooked with other ingredients. If you’ve ever bitten into a piece of fudge only to find it gritty or grainy, you know exactly how disappointing recrystallization can be. The secret weapon in “no-fail” fudge, particularly this recipe, is marshmallow creme. Its unique composition acts as a stabilizer, interfering with sugar crystal formation and ensuring a consistently smooth, velvety texture.
Several factors can contribute to grainy fudge, even beyond the absence of a “no-fail” ingredient. Excessive stirring while the fudge mixture is cooking can encourage sugar crystals to form. Allowing sugar crystals to accumulate on the interior sides of your pan during cooking can also lead to graininess, as these can fall back into the mixture and act as a seed for more crystals. Not cooking the fudge to the precise temperature (the soft-ball stage) or cooling your fudge too rapidly can also disrupt the sugar’s structure, causing it to recrystallize prematurely.
Proper storage is essential to maintain the freshness and delightful texture of your homemade fudge. Always ensure your fudge is wrapped airtight to prevent it from drying out and losing its creamy consistency. For short-term enjoyment, fudge can be kept at room temperature for up to a week, provided your kitchen isn’t excessively warm. For slightly longer storage, refrigerate it for up to 3 weeks. If you’re looking to extend its shelf life significantly, fudge freezes beautifully for up to 3 months. Remember to wrap it tightly in plastic wrap and then foil before freezing. When ready to serve, thaw it in the refrigerator to minimize condensation.
Absolutely! While semi-sweet chocolate chips provide a classic balance, you can experiment with other types. Dark chocolate will yield a more intense, less sweet fudge, while milk chocolate will result in a sweeter, creamier profile. Just ensure the chocolate melts smoothly and use a good quality brand for the best results.
Natural peanut butter, especially the stir-type, tends to separate its oils. This oil separation can prevent the fudge from setting properly, leading to a greasy and crumbly texture. Creamy, conventional peanut butter (like Jif or Skippy) has stabilizers that keep it smooth and consistent, which is crucial for the fudge’s structure.
Explore More Decadent Treats
This irresistible two-toned treat quickly disappeared among my family and friends. Tom, Katie, and I enthusiastically nibbled away, and I even sent a generous batch home with Tom for his roommates to enjoy (and save me from myself!). This extraordinary layered fudge recipe with marshmallow creme might just replace the beloved peanut blossom cookies I traditionally bake each year for the holidays. Its ease, beauty, and incredible flavor make it a strong contender for your new festive favorite. If you enjoyed this, you might also like to explore these other delightful recipes:
- Irresistible Chocolate Peanut Butter Cookies from Love from the Oven
- Delicious Peanut Butter Chocolate Tiger Bark
- Classic Chocolate Peanut Butter Bonbons
- Fun and Festive Cake Batter Fudge
- Easy Chocolate Peanut Butter Krispie Bars
- Don’t forget to check out more of my Best Holiday Recipes for inspiration!
Stay connected with us through social media on Instagram, Facebook, and Pinterest. We’d love to see your culinary creations! Don’t forget to tag us when you try one of our recipes, and if you adore the results, please consider giving it a 5-star rating!
Layered Chocolate Peanut Butter Fudge Recipe
20 minutes
20 minutes
1 second
40 minutes 1 second
36 fudge squares
A delectable, creamy two-layer fudge featuring rich chocolate and smooth peanut butter, perfect for any occasion!
Ingredients
- 3 cups granulated sugar, divided
- 12 tablespoons salted butter, divided
- ⅔ cup evaporated milk, divided
- 1 teaspoon pure vanilla extract, divided
- 1 cup semi-sweet chocolate chips (e.g., Ghirardelli or Nestlé)
- ½ cup creamy peanut butter (e.g., Jif)
- 7-ounce jar marshmallow creme, divided
Instructions
- Line a 9×9 inch baking pan with non-stick foil or parchment paper, leaving an overhang for easy removal. Set aside.
- For the chocolate layer: In a heavy saucepan, combine 1½ cups sugar, 6 tablespoons butter, and ⅓ cup evaporated milk.
- Bring the mixture to a rolling boil over medium heat, stirring constantly, until a candy thermometer registers 234ºF (112ºC) (the soft-ball stage). If not using a thermometer, boil for 4 full minutes.
- Remove the saucepan from the heat. Stir in ½ teaspoon vanilla extract, the 1 cup semi-sweet chocolate chips, and half of the marshmallow creme (approximately ½ cup). Mix vigorously until the chocolate chips are fully melted and the mixture is smooth and creamy.
- Immediately pour the chocolate fudge mixture into the prepared pan. Use an offset spatula to smooth the surface evenly. Let it cool slightly while preparing the next layer.
- For the peanut butter layer: Repeat the boiling process with the remaining 1½ cups sugar, 6 tablespoons butter, and ⅓ cup evaporated milk in a clean heavy saucepan. Bring to a boil and cook until it reaches 234ºF (112ºC).
- Remove from heat and stir in the remaining ½ teaspoon vanilla extract, the ½ cup creamy peanut butter, and the remaining half of the marshmallow creme. Mix until all ingredients are well combined and smooth.
- Carefully pour the peanut butter fudge mixture evenly over the chocolate fudge layer in the pan. Smooth the top with an offset spatula.
- Allow the layered fudge to cool completely to room temperature, which may take several hours. Once cooled and firm, use the foil overhangs to lift the fudge out of the pan onto a cutting board. Cut into desired squares and serve.
Notes
Total time does not include the essential cooling and setting time for the fudge. Each serving is approximately 2 squares.
Recommended Products for Fudge Making
As an Amazon Associate and member of other affiliate programs, I may earn from qualifying purchases.
- Nonstick Foil
- Thermapen Instant Read Thermometer
- 9 x 9-inch Baking Pan
Nutrition Information:
Yield:
36
Serving Size:
1 square
Amount Per Serving (estimated):
Calories: 167Total Fat: 7gSaturated Fat: 4gTrans Fat: 0gUnsaturated Fat: 3gCholesterol: 12mgSodium: 58mgCarbohydrates: 26gFiber: 1gSugar: 23gProtein: 1g
HOW MUCH DID YOU LOVE THIS RECIPE?
Please leave a comment on the blog or share a photo on Pinterest
