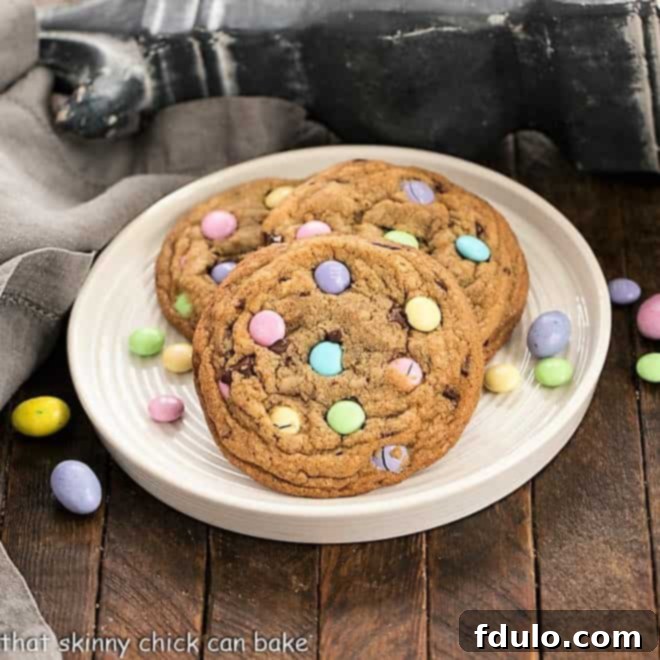
Welcome to a delightful world of homemade treats, where classic flavors meet festive charm. Prepare to bake the most irresistible Brown Butter Easter Cookies, a recipe designed to bring bakery-worthy deliciousness straight to your kitchen. Imagine golden-brown cookies, bursting with rich, nutty brown butter flavor, studded with vibrant pastel M&M’s and luscious chocolate chunks. These aren’t just any cookies; they are an experience, meticulously crafted with simple yet powerful techniques to ensure every bite is pure perfection. Whether you’re celebrating Easter, hosting a spring gathering, or simply craving an exceptional cookie, this recipe promises to deliver a memorable indulgence that will captivate both young and old. Get ready to impress with cookies that look as incredible as they taste, all thanks to a few expert tips and the magic of brown butter.
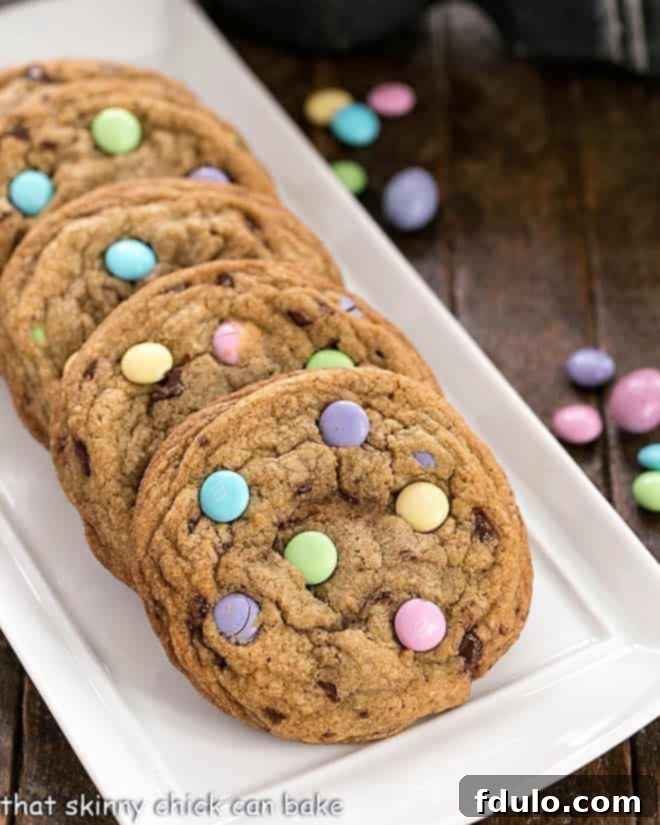
Why You Must Bake These Irresistible Brown Butter Easter Cookies
There are countless reasons why these Brown Butter Easter Cookies deserve a spot on your holiday baking list. They’re more than just a simple dessert; they’re a celebration of flavor, texture, and visual appeal, embodying the spirit of spring and festive joy.
- Unforgettable Flavor Profile: The star of this recipe is undoubtedly the brown butter. This simple technique transforms ordinary butter into liquid gold, infusing the cookies with a complex, nutty, and slightly caramel-like depth that is truly unparalleled. It elevates the classic chocolate chip cookie dough to an extraordinary level, making these cookies stand out from any other.
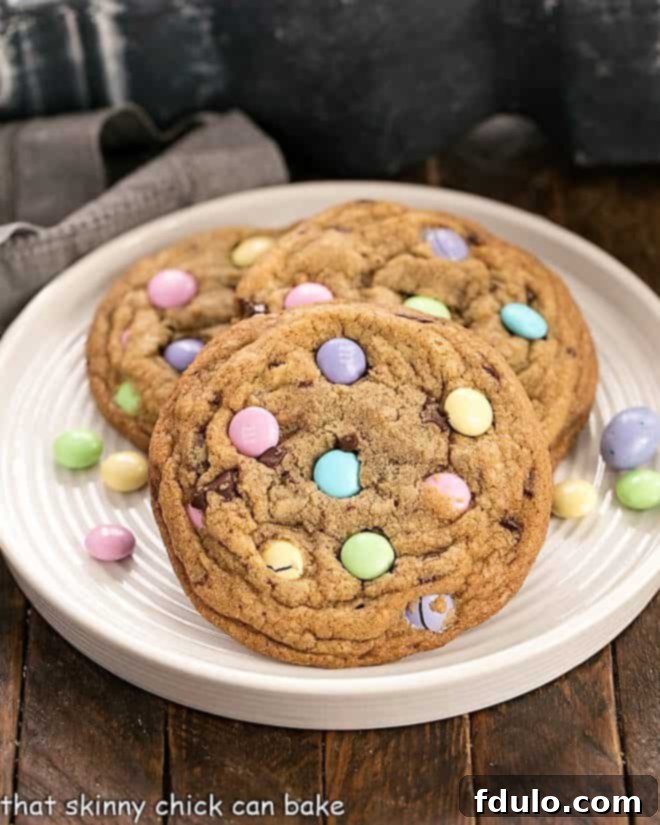
- Visually Stunning for Easter: Featuring vibrant pastel M&M’s, these cookies are a feast for the eyes, perfectly capturing the bright and cheerful essence of Easter and spring. Their colorful appearance makes them ideal for holiday gatherings, Easter baskets, or as a charming gift. While pastel M&M’s are perfect for the occasion, feel free to adapt the colors for any season or celebration.
- Bakery-Quality Results at Home: With our easy-to-follow recipe and professional baking tips, you’ll achieve cookies that rival those from your favorite bakeshop. From perfectly rounded edges to a chewy-yet-crisp texture, these cookies deliver on both aesthetics and taste, making you feel like a master baker.
- Simple Yet Sophisticated: Despite their gourmet taste and appearance, these cookies are incredibly straightforward to make. The techniques are easy to master, allowing even novice bakers to achieve spectacular results. It’s a recipe that proves simple ingredients, when treated with a little care, can yield profoundly delicious outcomes.
- Generously Sized for Ultimate Indulgence: This recipe yields 12 wonderfully large cookies, ensuring that each bite is substantial and satisfying. While the batch size might seem small, these aren’t your average bite-sized treats. They are designed for savoring, offering a truly indulgent experience that makes every cookie feel like a special occasion.
- Perfect for Any Occasion: While designed for Easter, the base recipe is incredibly versatile. Swap out the pastel M&M’s for seasonal colors or other mix-ins, and these brown butter cookies become a delicious treat suitable for any time of the year, proving their enduring appeal beyond the holiday season.
The Magic of Brown Butter: A Flavor Game Changer
At the heart of these exceptional cookies lies the incredible flavor of brown butter, also known as beurre noisette in French. This simple yet transformative technique is a secret weapon for many chefs and bakers, adding a depth and complexity that elevates any dish it touches. Understanding what brown butter is and how to make it perfectly is key to unlocking the full potential of these Easter cookies.
What Is Brown Butter?
Brown butter is essentially butter that has been gently cooked past its melting point until its milk solids caramelize and turn a beautiful golden-brown color. This process causes the water in the butter to evaporate, concentrating the fat and transforming the butter’s proteins through the Maillard reaction. This same reaction is responsible for the delicious crust on seared meats and the rich aroma of toasted bread. The result is a fragrant, nutty, and slightly sweet butter with hints of toasted hazelnuts and caramel. It’s a culinary marvel that can enhance both savory and sweet dishes, from pasta sauces to banana bread, and, of course, these amazing cookies.
How to Make Perfect Brown Butter: A Step-by-Step Guide
Creating brown butter is a straightforward process, but it requires a bit of attention to detail to achieve that perfect nutty aroma without burning it. Here’s how to master this technique:
- Preparation is Key: Begin by cutting your butter into evenly sized pieces. This ensures that the butter melts and cooks uniformly, preventing some parts from burning while others are still melting. Use a heavy-bottomed saucepan, preferably one with a light-colored interior (like stainless steel). A light interior allows you to clearly see the color changes, which is crucial for preventing burning.
- Melting Phase: Place the butter pieces in the saucepan and melt them over moderate heat. As the butter melts, it will begin to foam. Gently swirl the pan occasionally to help distribute the heat and prevent any hot spots from cooking the butter too quickly.
- The Transformation: Continue cooking and swirling. The butter will go through several visual changes:
- First, it will melt into a clear yellow liquid with some foam on top.
- Next, the foam will intensify, and the butter will turn a pale tan color.
- Finally, you’ll start to see tiny brown specks forming at the bottom of the pan, and the butter will deepen to a rich golden-brown, resembling the color of hazelnuts. This is accompanied by a distinct nutty, toasty aroma.
- Watch Like a Hawk: This stage is critical. The transition from perfectly browned to burnt can happen in a matter of seconds. As soon as you achieve that beautiful hazelnut color and nutty fragrance, immediately remove the pan from the heat. The residual heat in the pan will continue to cook the butter, so transfer it quickly to a heat-proof bowl to stop the cooking process. If you’re using brown butter in a recipe that calls for liquid, like these cookies, you can often add additional cold butter at this stage to quickly cool it down and stop the browning.
This process not only removes about 20% of the water from the butter but also unlocks a world of flavor compounds through the Maillard reaction, making your cookies exceptionally delicious.
Storing Brown Butter for Future Culinary Adventures
Once you’ve made a batch of brown butter, you have several options for its use and storage:
- Immediate Use: For recipes like these cookies, you’ll often use the brown butter in its warm, liquid form, combining it with other wet ingredients.
- Chilled and Solid: If you need solid brown butter for baking or spreading, simply pour it into an airtight container and refrigerate until firm. It will solidify and can be used just like regular butter in many recipes.
- Short-Term Storage: Covered and stored in the refrigerator, brown butter will keep beautifully for up to two weeks, ready to add a burst of flavor to your next meal or dessert.
- Long-Term Storage: For extended freshness, brown butter can be frozen. Ensure it’s wrapped airtight to prevent freezer burn, and it will remain good for several months, making it a convenient ingredient to have on hand.
Key Ingredients for Bakery-Style Brown Butter Easter Cookies
Achieving that perfect bakery-quality cookie starts with understanding the role of each ingredient. Here’s a closer look at what goes into these delightful Easter treats:
- Butter (Divided): The star! Divided butter ensures you get the intense flavor of brown butter while maintaining the right consistency for the dough by adding some cold butter back in. Always opt for unsalted butter to control the overall saltiness of your cookies.
- Granulated Sugar: Provides sweetness and contributes to the crisp edges of the cookies.
- Dark Brown Sugar: Essential for chewiness, moisture, and a deeper, more molasses-rich flavor that complements the brown butter beautifully. If you only have light brown sugar, don’t worry! You can easily make your own dark brown sugar by mixing one tablespoon of molasses into one cup of light brown sugar until thoroughly combined.
- Vanilla Extract: A crucial flavor enhancer that brings warmth and depth to the cookie dough. Use good quality pure vanilla extract for the best results.
- Eggs (Whole Egg and Egg Yolk): The combination of a whole egg and an extra egg yolk is key. The whole egg provides structure and moisture, while the extra yolk adds richness, chewiness, and helps create that desirable gooey center. Ensure your eggs are at room temperature for better emulsification with the butter and sugar, leading to a smoother, more uniform dough. For easier separation, eggs can be separated when cold, then allow the yolk to come to room temperature.
- Salt: Balances the sweetness and enhances all the other flavors, making the chocolate and brown butter notes pop.
- Baking Soda: Our leavening agent, which helps the cookies spread and become tender.
- All-Purpose Flour: Provides the structure for the cookies. Measure it correctly (preferably by weight or using the spoon-and-level method) to avoid dense or dry cookies.
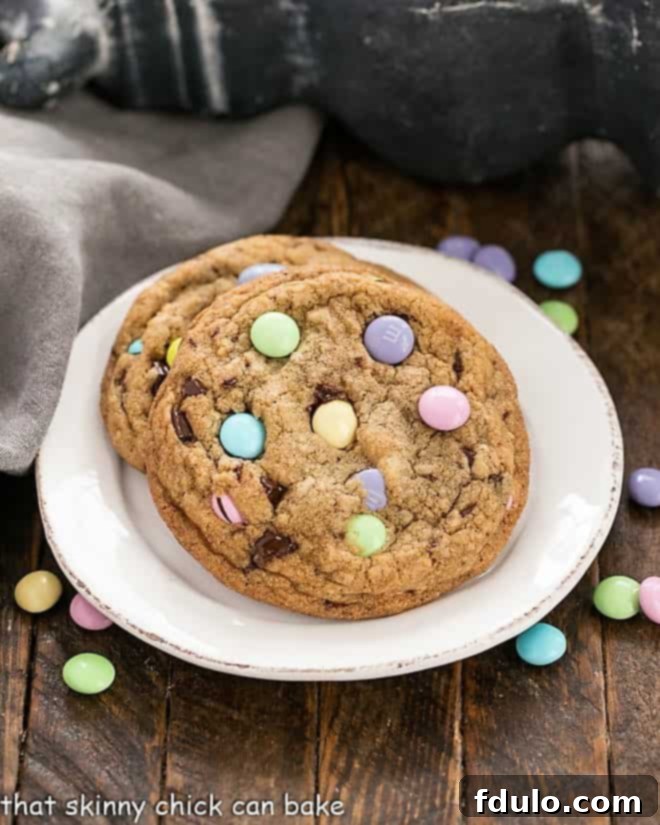
- White Chocolate M&M’s (Pastel-Colored): These festive candies are what make these “Easter” cookies! Their pastel hues are perfect for the holiday, and white chocolate offers a creamy contrast. Feel free to use classic milk chocolate M&M’s or any preferred flavor. For other times of the year, regular M&M’s work wonderfully.
- Semi-Sweet Chocolate Chunks: Chopping a good quality semi-sweet chocolate bar into small chunks ensures pockets of melty, rich chocolate throughout the cookie. This provides a superior texture and flavor compared to standard chocolate chips.
Expert Baking Tips for Flawless Cookies
Achieving bakery-level cookies at home is all about the details. Incorporate these expert tips into your baking process for truly exceptional results:
- Room Temperature Ingredients: Always use room temperature eggs. They emulsify better with the butter and sugar, creating a smoother, more uniform dough that bakes more evenly. If you forgot to take them out, place them in a bowl of warm water for 5-10 minutes.
- Consistent Cookie Size: Invest in a good quality cookie scoop. A 1/4 cup cookie scoop (or a 4-tablespoon scoop) is perfect for portioning out consistently sized dough balls. Uniform size ensures all cookies bake evenly and look professional.
- The “Cookie Tap” Trick: This is a game-changer! Immediately after taking the cookies out of the oven, while they are still hot and pliable, use the back of a spatula or a round cookie cutter slightly larger than your cookies to gently tap and push the edges inwards. This simple motion helps to reshape any irregularly spread cookies into perfect rounds, making them look like they came straight from a professional bakery.
- Garnishing for Visual Appeal: For that extra “wow” factor, gently press a few additional pastel M&M’s onto the surface of the warm, freshly baked cookies as soon as they come out of the oven. This creates a beautiful, vibrant display that makes your cookies even more inviting.
- Don’t Overmix: Once you add the flour, mix until just combined. Overmixing develops the gluten, leading to tougher cookies. A few streaks of flour are fine; they’ll disappear during baking.
- Chill Your Dough (Optional but Recommended): While not strictly required for this recipe, chilling the cookie dough for at least 30 minutes (or up to 24-48 hours) can significantly enhance the flavor and texture. Chilled dough spreads less, resulting in thicker, chewier cookies, and allows the flavors to meld together.
- Baking Sheet Preparation: Always line your baking sheets with parchment paper or a silicone baking mat. This prevents sticking, promotes even baking, and makes for easy cleanup.
- Customize Your M&M’s: While pastel M&M’s are perfect for Easter, don’t limit yourself! Use red and green for Christmas, red and pink for Valentine’s Day, or classic M&M’s for an everyday treat.
- For Smaller Cookies: If you prefer smaller cookies, use a tablespoon-sized scoop. Just be sure to reduce the baking time accordingly (typically 8-10 minutes) to prevent them from overbaking.
Serving and Storage Suggestions
These Brown Butter Easter Cookies are delicious on their own, but here are some ideas to enhance your enjoyment and keep them fresh:
- Warm and Gooey: Enjoy them fresh out of the oven when the chocolate is still melty and gooey. Pair them with a cold glass of milk for a classic treat.
- Easter Celebrations: Arrange them beautifully on a platter for your Easter brunch or dinner. They also make wonderful Easter favors when wrapped individually in cellophane bags tied with a pretty ribbon. Don’t forget to leave a couple out for the Easter bunny!
- Make-Ahead Dough: You can prepare the cookie dough up to 3 days in advance. Store it covered in the refrigerator. When ready to bake, scoop the dough and let it sit at room temperature for about 15-20 minutes to soften slightly before baking.
- Freezing Dough Balls: For fresh-baked cookies anytime, scoop the dough into balls and place them on a parchment-lined baking sheet. Freeze until solid, then transfer the frozen dough balls to an airtight freezer-safe bag or container. They can be stored for up to 3 months. Bake directly from frozen, adding an extra 2-4 minutes to the baking time.
- Storing Baked Cookies: Once completely cooled, store the cookies in an airtight container at room temperature for up to 3-5 days. To keep them soft, you can place a slice of bread in the container with them (replace the bread daily).
- Freezing Baked Cookies: Baked cookies can also be frozen for longer storage. Arrange cooled cookies in a single layer on a baking sheet and freeze until solid. Then transfer them to an airtight freezer-safe bag or container, separating layers with parchment paper. Thaw at room temperature before serving, or warm briefly in the microwave for a fresh-out-of-the-oven experience.
More Recipes to Explore
Delightful Easter Dessert Ideas
While these Brown Butter Easter Cookies are a fantastic choice, Easter is a time for an array of sweet treats. Here are a few more ideas for your holiday dessert table, from classic cakes to refreshing pies:
- Easter Bunny Cut Out Cookies from Princess Pinky Girl for a charming, customizable treat.
- Classic Carrot Cake, a quintessential Easter dessert known for its moist crumb and rich cream cheese frosting.
- Lemon Meringue Pie, with its bright, tangy filling and towering sweet meringue, offers a refreshing contrast.
- Coconut Cupcakes, light and fluffy with a tropical hint, perfect for spring.
- Hummingbird Cake, a southern classic featuring pineapple, banana, and pecans.
- Classic Strawberry Shortcake, showcasing the fresh flavors of the season.
- Explore more of the Best Holiday Recipes and Best Cookie Recipes for year-round inspiration.
Discover More Brown Butter Recipes
Once you fall in love with the nutty, rich flavor of brown butter, you’ll want to incorporate it into everything! If you’re eager to explore more recipes that harness the magic of brown butter, I highly recommend trying these:
- These Brown Butter Chocolate Chip Cookies offer a foundational understanding of how this ingredient transforms a classic.
- For a savory twist, try Roasted Asparagus with Balsamic Brown Butter, an elegant side dish.
- The easy Brown Butter Chocolate Chunk Bars provide a delightful, sliceable dessert option.
- Or indulge in Brown Butter Crepes, a sophisticated breakfast or dessert perfect with fresh berries.
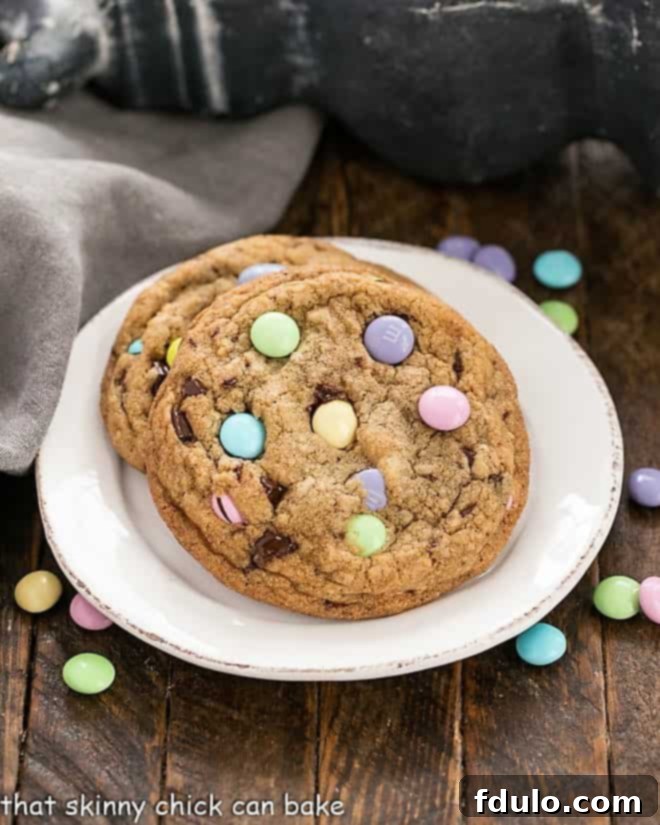
Brown Butter Easter Cookies
20 minutes
14 minutes
34 minutes
12 large cookies
Brown butter chocolate chunk cookies filled with pastel-colored white chocolate M&M’s for a fun Easter or spring treat! These bakery-worthy delights are easy to make with our expert tips.
Ingredients
- 14 tablespoons unsalted butter, divided
- ½ cup granulated sugar
- ¾ cup dark brown sugar (see blog post for how to make your own)
- 2 teaspoons pure vanilla extract
- 1 large egg, at room temperature
- 1 large egg yolk, at room temperature
- ½ teaspoon salt
- ½ teaspoon baking soda
- 1 ¾ cup all-purpose flour
- ¾ cup white chocolate M&M’s (pastel-colored for Easter), plus more for garnish
- 4 ounces semi-sweet chocolate, chopped into small chunks
Instructions
- Preheat your oven to 375ºF (190ºC). Line baking sheets with parchment paper or silicone mats.
- Melt 10 tablespoons of the butter in a heavy saucepan over medium-high heat. Continue cooking, swirling occasionally, until the butter turns a rich golden brown with a distinct nutty fragrance (this usually takes 5-7 minutes after melting). Immediately pour the brown butter into a heat-proof bowl and add the remaining 4 tablespoons of cold butter. Stir until the cold butter is completely melted and incorporated.
- Add the granulated sugar and dark brown sugar to the brown butter mixture, stirring until well combined. Stir in the vanilla extract. Then, mix in the room temperature egg and egg yolk until fully incorporated and the mixture is smooth.
- In a separate bowl, whisk together the flour, salt, and baking soda. Gradually add the dry ingredients to the wet ingredients, mixing on low speed or by hand until just combined. Be careful not to overmix.
- Fold in the white chocolate M&M’s and chopped semi-sweet chocolate chunks until evenly distributed throughout the dough.
- Using a 4-tablespoon (¼ cup) cookie scoop, portion out dough balls and place them about 2 inches apart on the prepared baking sheets.
- Bake for 10-14 minutes, or until the edges are golden brown and the centers are still slightly soft. For perfectly round cookies, use a spatula to gently tap the hot cookies back into shape immediately after removing them from the oven.
- While the cookies are still warm, gently press a few extra pastel M&M’s onto the surface of each cookie for a beautiful presentation.
- Allow the cookies to cool on the baking sheet for 5 minutes before transferring them to a wire rack to cool completely.
Notes
- Use a 1/4 cup scoop to make evenly sized cookies for uniform baking.
- The “cookie tap” trick with a spatula or round cookie cutter can transform irregularly shaped hot cookies into perfect rounds.
- Carefully pressing extra M&M’s onto the surface of the hot cookies enhances their visual appeal and makes them truly bakery-worthy!
- Recipe adapted from Cook’s Illustrated Perfect Chocolate Chip Cookies.
Recommended Products
As an Amazon Associate and member of other affiliate programs, I earn from qualifying purchases.
- 1/4 cup Scoop
- Heat-Resistant Spatula
- USA Pan Bakeware Half Sheet Pan
Nutrition Information:
Yield:
12
Serving Size:
1
Amount Per Serving:
Calories: 396Total Fat: 21gSaturated Fat: 13gTrans Fat: 1gUnsaturated Fat: 7gCholesterol: 69mgSodium: 270mgCarbohydrates: 49gFiber: 1gSugar: 34gProtein: 4g
HOW MUCH DID YOU LOVE THIS RECIPE?
Please leave a comment on the blog or share a photo on Pinterest. Don’t forget to connect with us on Instagram, Facebook, and Pinterest to stay updated with more delicious recipes!
