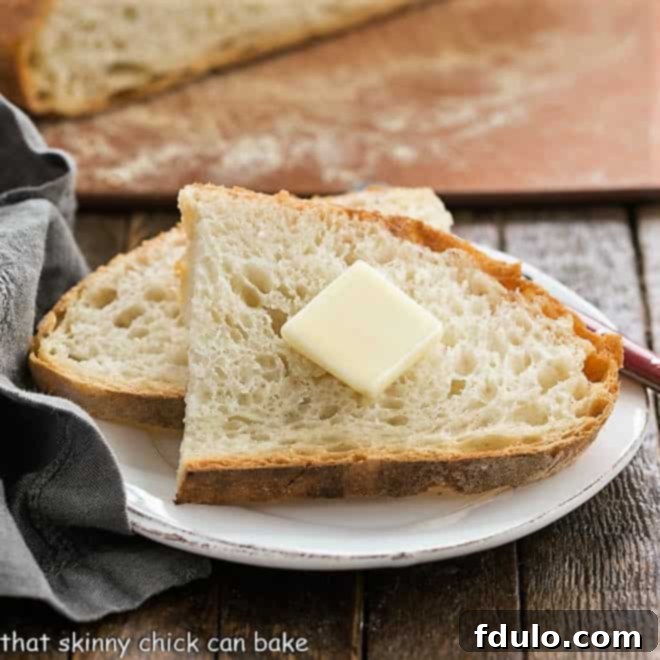
No-Knead Bread took the culinary world by storm, especially back when I was first dabbling in blogging, and for good reason. This revolutionary approach to bread making requires minimal ingredients, surprisingly little effort, and a healthy dose of patience, culminating in an utterly magnificent loaf of homemade bread that tastes like it came from a artisan bakery.
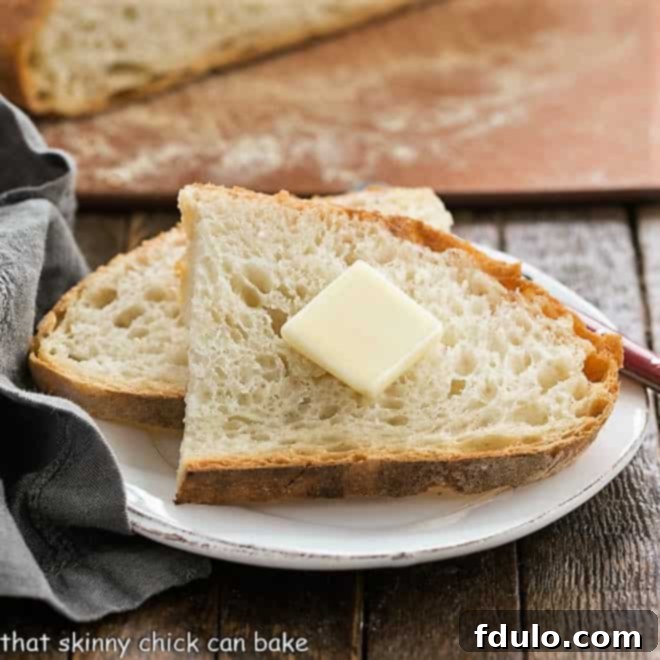
Simple, rustic, and incredibly satisfying, this is an easy bread recipe you’ll undoubtedly want to revisit time and time again. Its signature craggy, golden crust and airy, open crumb make it the ideal companion for hearty soups, rich stews, or any delightful dish where you long to soak up every last drop of a delicious sauce. Beyond the main course, slices of this bread also make for fantastic, flavorful croutons!
Why You Must Make This No-Knead Bread
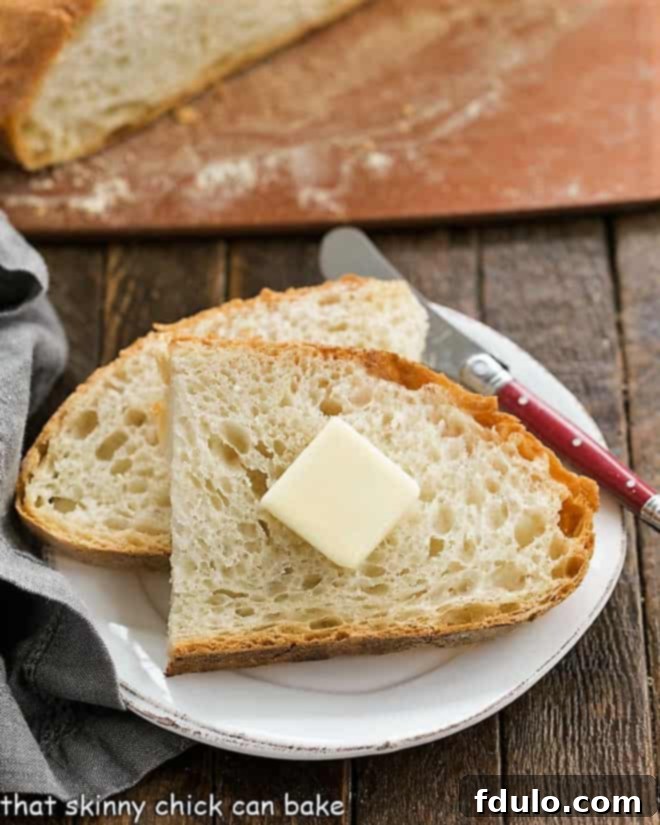
The culinary genius behind this unusual and groundbreaking no-knead bread recipe is Jim Lahey of New York’s renowned Sullivan Street Bakery. His innovative technique created a massive buzz among food enthusiasts and home bakers alike, particularly after it was featured prominently in the New York Times, sparking a bread-making revolution in kitchens across the globe.
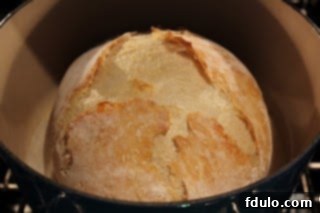
What makes this particular bread so unique and irresistible? It all comes down to a few key factors. First, the dough itself is exceptionally wet and develops a beautifully bubbly texture after its extended overnight rest. This long fermentation period isn’t just about convenience; it’s crucial for allowing the yeast to slowly work its magic, developing profound, complex flavors that you simply can’t achieve with quicker methods. Second, the baking technique, which involves baking the bread in a preheated Dutch oven, is a game-changer. The sealed environment of the Dutch oven effectively traps steam, creating the perfect conditions for an incredibly crispy, crackly crust and a wonderfully coarse, open crumb structure. You’ll notice a distinct, slightly yeasty aroma and flavor that perfectly complements the rustic texture. Prepare to fall in love with a warm, thick slice, generously slathered with cool, creamy butter – pure bliss!
Essential Ingredients for Your Perfect No-Knead Loaf
One of the beauties of this recipe is its simplicity, calling for just a handful of staple ingredients. However, understanding each component and using the right type can make all the difference in achieving that perfect rustic loaf.
- Bread Flour: This is a crucial ingredient. Bread flour has a significantly higher protein and gluten content compared to all-purpose flour. The extra gluten is vital for developing the strong structure needed to capture the gases produced during the long fermentation, resulting in that signature open crumb and chewy texture without any kneading.
- Instant Yeast: For this specific wet dough, instant yeast is highly recommended. PRO-Tip: I personally find Red Star Platinum Yeast to yield excellent results. It’s important to avoid “Rapid-Rise” or “Fast-Acting” yeasts, as they are designed for quicker rises and don’t perform as effectively with the prolonged, slow fermentation process that defines no-knead bread.
- Kosher Salt: Salt is not just for flavor; it also helps control yeast activity. If you’re substituting with regular table salt, remember that table salt is finer and denser, so you’ll need slightly less (typically ¾ teaspoon kosher salt equals about ½ teaspoon table salt, but always check your specific recipe for guidance).
- Warm Water: The temperature of your water is important for activating the yeast. Aim for water that feels comfortably warm to the touch, ideally between 70-80 degrees Fahrenheit (21-27 degrees Celsius). Water that’s too hot can kill the yeast, while water that’s too cold might hinder its activation.
- Olive Oil: While not strictly traditional in all no-knead recipes, adding a tablespoon of olive oil helps to enrich the dough, contributing to a slightly softer interior and potentially extending the bread’s freshness a little longer. You’ll also need a bit more for greasing the proofing bowl.
Essential Equipment
While the ingredients are simple, having the right tools makes the process even smoother:
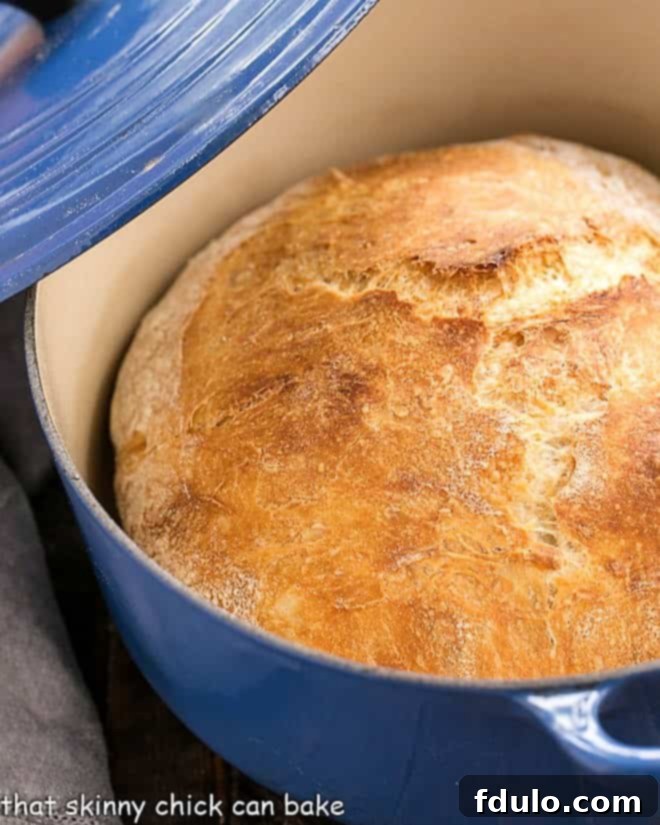
- Dutch Oven: This is non-negotiable for achieving the signature crust and texture of no-knead bread. A 5-quart or larger cast-iron Dutch oven with a lid is ideal. The heavy, enclosed pot acts like a mini-oven, trapping steam during the initial bake, which is essential for a beautiful crust, and then allowing it to brown once uncovered.
- Large Mixing Bowl: For combining ingredients and the first long rise.
- Plastic Wrap: To cover the bowl during the long fermentation.
- Cotton Kitchen Towel: For the second rise. Avoid terrycloth, as the dough might stick.
- Instant Read Thermometer: While not absolutely necessary for experienced bakers, it’s incredibly helpful for beginners to accurately check water temperature and later, the internal temperature of the baked bread for perfect doneness (aim for 200-210°F or 93-99°C).
Mastering the No-Knead Method: Step-by-Step Guide
Making no-knead bread is less about intensive labor and more about understanding the process and respecting the dough’s resting times. Here’s a detailed breakdown:
- Mix the Dough: In a large mixing bowl, combine the bread flour, instant yeast, kosher salt, warm water, and olive oil. Stir with a wooden spoon or a sturdy spatula until all the ingredients are just combined. Don’t worry if it looks shaggy, wet, and messy – it’s supposed to! There’s no need for intense mixing or kneading at this stage; just ensure there are no dry pockets of flour.
- First Rise (Overnight Fermentation): Lightly oil another large bowl, then transfer the sticky dough into it. Cover the bowl tightly with plastic wrap to prevent drying out. Let the dough rest on your countertop at room temperature for an extended period, anywhere from 12 to 20 hours. This long, slow fermentation is where the magic happens, allowing the yeast to develop deep, nuanced flavors and creating the airy structure without any physical kneading. You’ll notice the dough becoming bubbly and significantly increasing in volume.
- Prepare for the Second Rise: After the long rest, gently scrape the wet, bubbly dough onto a generously floured surface (using flour, not just dusting). With wet hands or a wet spatula, gently fold the edges of the dough towards the center a few times to create a somewhat round shape, forming a ball. Try to handle the dough as little as possible to maintain its developed air pockets.
- Second Rise (Proofing): Place the dough ball, seam-side down, onto a well-floured cotton kitchen towel (avoid terrycloth, as the dough will stick). Fold the towel loosely over the dough to cover it. Let it rest at room temperature for another 2 hours. During this time, the dough should noticeably increase in size, almost doubling.
- Preheat the Oven and Dutch Oven: About 1.5 hours into the second rise, place a 5-quart or larger cast-iron Dutch oven (with its lid) into your oven and preheat to 450°F (232°C). It’s crucial that the Dutch oven gets scorching hot. If your Dutch oven lid has a plastic or non-heat-safe handle, either cover it with aluminum foil or remove it if possible for peace of mind.
- Bake (Covered): Carefully remove the preheated Dutch oven from the oven using oven mitts. Gently, but quickly, invert the dough from the towel directly into the hot Dutch oven, seam-side up. Don’t worry too much about perfection; a rustic drop is fine. Shake the pot slightly to help the dough settle evenly. Immediately cover the Dutch oven with its hot lid. Bake for 30 minutes. The trapped steam will work wonders on your crust.
- Bake (Uncovered): After 30 minutes, remove the lid from the Dutch oven. Return the uncovered pot to the oven and continue to bake for another 15-20 minutes, or until the crust reaches a beautiful golden-brown color and sounds hollow when tapped.
- Cool Completely: This step is vital! Carefully remove the baked loaf from the Dutch oven and transfer it to a wire rack to cool completely. If you’re unsure about doneness, an instant-read thermometer inserted into the center should register between 200-210°F (93-99°C). Resist the urge to slice into it immediately, as the bread continues to cook and set as it cools, developing its final texture and flavor. Slicing too early can result in a gummy interior.
Tips for No-Knead Bread Success
Even though this recipe is incredibly forgiving, a few pointers can ensure your loaf turns out perfect every time:
- Resist the Urge for More Flour: The dough is intentionally sticky and wet. Adding extra flour during the initial mix or shaping will result in a dense, tough loaf, rather than the desired open, airy crumb. A well-floured surface for shaping is enough.
- Yeast is Key: Ensure your instant yeast is fresh and not expired. Old or inactive yeast is a common culprit for flat or poorly risen bread.
- Don’t Rush the Rise: The long fermentation is the backbone of this recipe’s flavor and texture. Stick to the recommended 12-20 hour first rise.
- Preheat That Dutch Oven Properly: A scorching hot Dutch oven is essential. It provides an immediate burst of heat that helps the bread rise quickly (oven spring) and creates a superior crust.
- Cool Completely: As mentioned, patience here is paramount. Slicing warm bread releases steam too quickly, leading to a gummy texture.
Serving Suggestions & Delightful Variations
This versatile no-knead bread is perfect on its own, but its rustic charm and robust flavor also make it a fantastic foundation for various culinary explorations:
- Classic Pairings: Serve warm slices with a simple spread of butter, alongside a steaming bowl of homemade soup, a rich beef stew, or a hearty pasta dish to sop up every last bit of sauce.
- Appetizer Star: It’s excellent for bruschetta, crostini, or simply dipped in high-quality olive oil and balsamic vinegar.
- Sandwich Base: Create gourmet open-faced sandwiches or hearty deli-style sandwiches.
- Homemade Croutons: Stale bread? Don’t toss it! Cut into cubes, toss with olive oil and seasonings, and bake until crispy for incredible homemade croutons.
Want to customize your loaf? Experiment with these simple additions during the initial mixing stage:
- Herbs: Add 1-2 tablespoons of finely chopped fresh rosemary, thyme, or oregano for an aromatic twist.
- Olives: Roughly chop ½ cup of pitted Kalamata or green olives for a briny Mediterranean flavor.
- Cheese: Fold in ½ cup of shredded hard cheese like Parmesan or Gruyère for a savory loaf.
- Garlic: Include 1-2 cloves of minced garlic or a teaspoon of garlic powder.
- Seeds: Mix in a tablespoon of sesame seeds, poppy seeds, or flax seeds for added texture and nutrition.
Frequently Asked Questions About No-Knead Bread
As the name suggests, no-knead bread is a revolutionary baking method where the dough ingredients are simply stirred together rather than being subjected to vigorous kneading by hand or with a stand mixer’s dough hook. The magic lies in its extended fermentation and high hydration. Typically, there are two resting periods: a lengthy first rise (often 12-20 hours overnight) that develops flavor and gluten structure, followed by a shorter second rise (around 2 hours) before baking. This New York Times No-Knead Bread recipe is an incredibly accessible option for beginner bread bakers, yielding professional-quality results with minimal effort – just be sure to choose the correct type of yeast!
Due to its high water content and rustic crust, no-knead bread is absolutely at its peak on the day it’s baked, offering the best texture and flavor. However, if you can’t finish the entire loaf within a day or two, you have options. To maintain the integrity of its delightful, crispy crust, the best storage method is to place the cut end of the loaf down on a cutting board and cover the entire loaf loosely with a clean paper sack or a clean kitchen towel. Storing it in plastic will soften the crust, but don’t despair – you can easily re-crisp a plastic-stored loaf by baking it in a 350ºF (175°C) oven for about 10 minutes. For longer storage, consider cutting the cooled loaf in half and freezing one half in an airtight bag or foil wrap. The addition of olive oil in this specific recipe does help keep the bread a little moister for longer compared to oil-free versions, but it will still dry out faster than commercially produced breads with added preservatives.
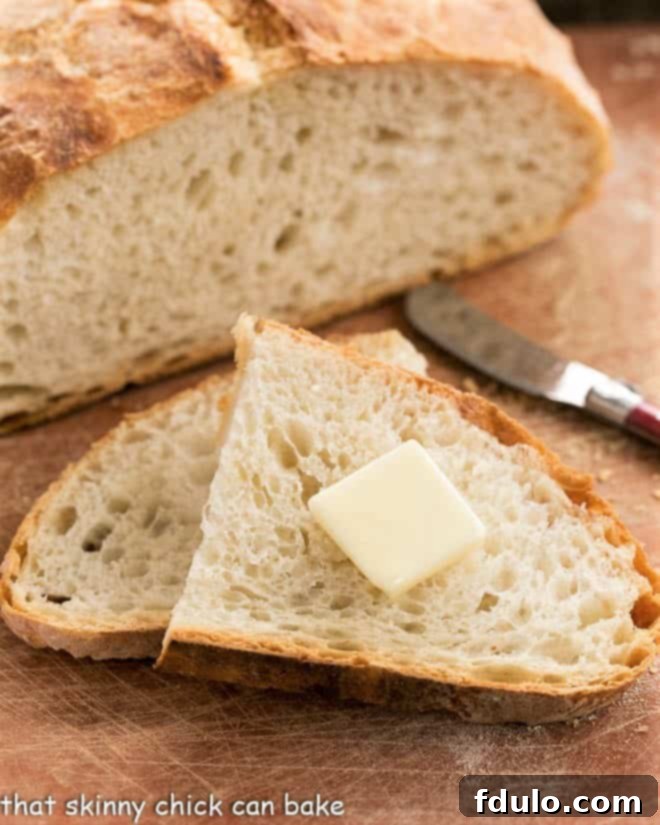
No-knead bread typically results in a rustic, crusty yeast bread. It’s characterized by a remarkably soft, open, and chewy interior (often called an “open crumb”) encased in a wonderfully crisp, golden-brown crust. Despite its gourmet appearance and texture, it’s surprisingly easy to make and consistently provides satisfying results, making it a favorite for those seeking homemade bread without the labor-intensive kneading process.
A common reason for a flat no-knead bread loaf is inactive or expired yeast. Yeast is a living organism, and if it’s old, it won’t produce enough carbon dioxide to make the bread rise properly. Other culprits could be water that was too hot (killing the yeast) or too cold (preventing activation), or an insufficient resting period during the first or second rise. Ensure your yeast is fresh and your water temperature is within the recommended range for optimal yeast activity.
The most frequent cause of dense no-knead bread is adding too much flour. The dough for this recipe is intentionally very sticky and wet; that’s entirely normal and crucial for its texture. Over-flouring, whether during the initial mix or while shaping, will alter the dough’s hydration ratio, leading to a tighter crumb and a dense, heavy loaf instead of the light, airy structure you’re aiming for. Stick strictly to the amount of flour called for in the recipe, and only use minimal flour for dusting your work surface when shaping.
The ideal rising time for no-knead bread dough is significantly longer than for traditional yeast breads, and it largely depends on the specific recipe and ambient temperature. For this particular recipe, the first bulk fermentation (the initial rest after mixing) should be between 12 to 20 hours on the countertop at room temperature. This extended period is fundamental for flavor development and gluten formation. The second rise, or proofing stage, after shaping, is typically shorter, around 2 hours. Always follow the timing recommended by your specific recipe, as altering it too much can impact the final texture and flavor.
Explore More Delicious Yeast Bread Recipes:
- English Muffin Yeast Bread from Kudos Kitchen by Renee
- Yeast Roll Knots
- The Best Cinnamon Rolls
- Homemade Potato Bread
- Homemade Bagels
- Rosemary Olive Bread
- More Yeast Bread Recipes
Stay in touch through social media @ Instagram, Facebook, and Pinterest. Don’t forget to tag me when you try one of my recipes! And if you love the results, please consider leaving a 5-star rating in the recipe card below.
No Knead Bread
30 minutes
50 minutes
2 hours (for the second rise)
3 hours 20 minutes (excluding first rise)
1 loaf
The easiest bread you’ll ever make! Only time and patience needed, no actual kneading!
Ingredients
- 3 cups bread flour
- ¼ teaspoon instant yeast (I use Red Star Platinum Yeast)
- ¾ teaspoon kosher salt or 1 teaspoon table salt
- 1 ½ cups warm water (70-80 degrees Fahrenheit / 21-27 degrees Celsius)
- 1 tablespoon olive oil plus more for greasing the bowl
Instructions
- Mix all of the ingredients in a large bowl with a wooden spoon until they come together. It will not be a cohesive dough, but rather messy and sticky-looking.
- Transfer the dough to an oiled bowl. Cover tightly with plastic wrap and let sit for 12-20 hours on the countertop at room temperature for the first rise.
- After the waiting period, the dough will be wet and bubbly. Gently dump the dough onto a generously floured surface. Then, with a wet spatula or wet hands, gently shape the dough into a ball by folding the edges towards the center.
- Set the dough ball onto a well-floured cotton towel (do not use a terrycloth towel, as it will stick), seam side down. Fold the towel loosely over the dough. Let rest for two hours at room temperature for the second rise. It should double in size.
- When the dough has risen for about 1 ½ hours into the second rise, place a 5-quart or larger cast-iron pot (Dutch oven) with its lid into the oven and preheat to 450ºF (232°C).
- If the handle of your lid is not heat-safe at this temperature, cover it with aluminum foil. Use any pot of that size with a lid that can withstand high temperatures.
- Carefully remove the scorching hot pot from the oven. Dump the risen dough into the pot, seam side up. Shake the pot a bit to help distribute the dough evenly.
- Cover the pot with the hot lid and bake for 30 minutes.
- Uncover and continue to bake for another 15-20 minutes, or until the crust is deeply golden brown and crispy.
- If you’re new to baking yeast bread, you can use an instant-read thermometer to check if the interior of the loaf is done (it should be around 200-210ºF or 93-99°C). Remove the loaf to a wire rack and allow it to cool completely before slicing. This is crucial for optimal texture.
Notes
Recipe slightly adapted from Jim Lahey.
Recommended Products
As an Amazon Associate and member of other affiliate programs, I earn from qualifying purchases.
- Nesting Mixing Bowls
- Red Star Platinum Yeast (Instant Yeast)
- Le Creuset Dutch Oven
Nutrition Information:
Yield:
12
Serving Size:
1 slice
Amount Per Serving:
Calories: 134Total Fat: 2gSaturated Fat: 0gTrans Fat: 0gUnsaturated Fat: 1gCholesterol: 0mgSodium: 310mgCarbohydrates: 25gFiber: 1gSugar: 0gProtein: 4g
HOW MUCH DID YOU LOVE THIS RECIPE?
Please leave a comment on the blog or share a photo on Pinterest
