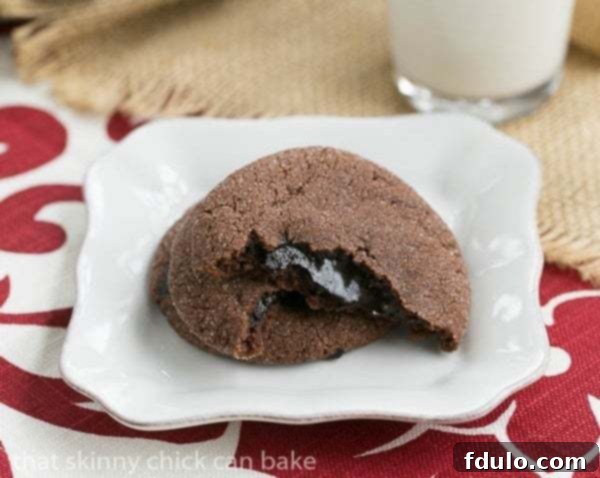
You’ve delighted in numerous lava cake recipes, but prepare to be captivated by the incredible charm of Chocolate Lava Cookies! These delectable treats were absolutely phenomenal, bringing together the best of both worlds: a rich, fudgy cookie exterior with an irresistibly molten chocolate center.
These extraordinary Chocolate Filled Cookies deliver a luxurious double dose of chocolate. Each bite begins with a deeply cocoa-flavored cookie dough, perfectly tender and robust. But the true magic lies within: a lavish, hot fudge sauce waiting at its core, ready to ooze out and create a truly unforgettable dessert experience.
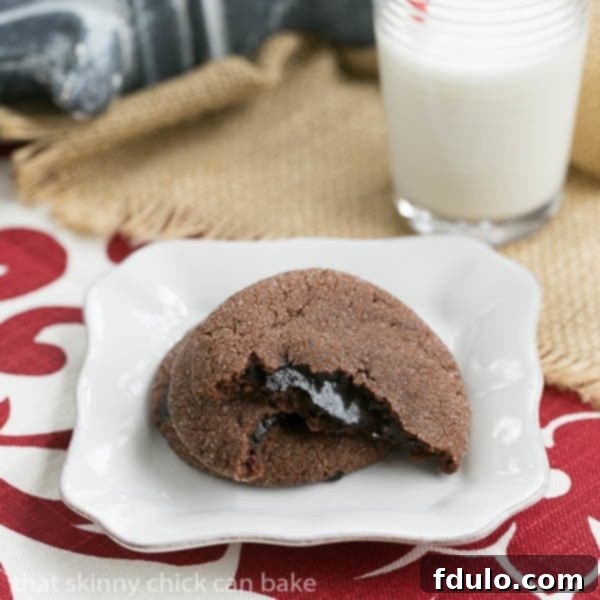
Unleash Your Inner Baker: Why You Absolutely Must Make These Chocolate Lava Cookies
Imagine a dessert that combines the satisfying chewiness of your favorite chocolate cookie with the luxurious, molten center of a lava cake. That’s precisely what you get with these incredible Chocolate Lava Cookies. They’re not just a treat; they’re an experience waiting to happen in your kitchen. Here’s why they should be next on your baking list:
- Inspired by Pure Chocolate Bliss: The inspiration for these cookies struck like a bolt of lightning after encountering a friend’s brilliant recipe. The idea of a rich chocolate cookie, lovingly stuffed with a warm, gooey fudge sauce, was simply too good to resist. It’s a concept that promises immediate gratification and ultimate indulgence.
- The Irresistible Butter-Based Difference: While some recipes might call for shortening, we’ve elevated this recipe by opting for an all-butter cookie base. This choice isn’t just about taste; it’s about creating a cookie that’s rich, flavorful, and incredibly tender. The butter ensures a melt-in-your-mouth texture that perfectly complements the decadent filling.
- Aroma That Transports You: As these cookies bake, your home will be filled with an intoxicating aroma reminiscent of fresh brownies, rich chocolate, and sweet warmth. It’s an olfactory delight that signals something truly special is coming out of the oven. While a few might spring a leak (adding to their rustic charm!), every single cookie, without exception, was consistently incredibly tasty, proving that even a little imperfection can’t diminish their deliciousness.
- A Showstopper Dessert: These aren’t just cookies; they’re a dessert event. Serving them warm, with that glorious hot fudge spilling out, creates a stunning visual and an unforgettable taste sensation that will impress anyone lucky enough to try them.
- Perfect for Any Occasion: Whether you’re baking for a special gathering, a cozy night in, or simply to satisfy a serious chocolate craving, these lava cookies fit the bill. They are comforting, exciting, and deeply satisfying.
What Exactly Are Chocolate Lava Cookies? Defining This Molten Masterpiece
Chocolate lava cookies are a marvel in the world of baked goods, ingeniously combining the best attributes of a classic chocolate cookie with the beloved molten core of a chocolate lava cake. At their heart, these are rich, cocoa-flavored cookies, boasting a tender, slightly chewy texture that melts in your mouth. But what truly sets them apart is their captivating secret: a luxurious center of warm chocolate or sumptuous hot fudge sauce that dramatically oozes out when the cookie is bitten into or broken open. This dramatic flow is precisely what gives them their name, reminiscent of the captivating flow of hot lava.
Unlike a traditional solid cookie, a chocolate lava cookie promises an interactive and multi-textured experience. You get the satisfying bite of the cookie exterior, followed by the soft, warm, and intensely chocolaty gush of the molten filling. This contrast in textures and temperatures—a firm exterior cradling a liquid interior—is what makes them so utterly irresistible. They are a decadent treat designed to surprise and delight, providing an instant burst of warm chocolate indulgence with every single bite.
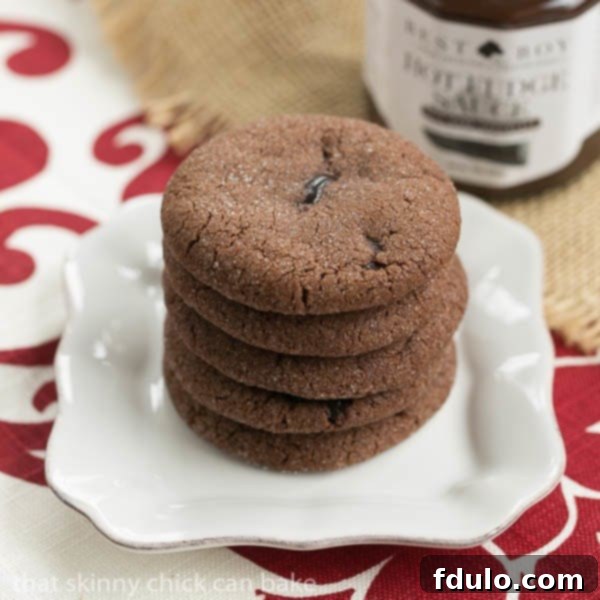
Mastering the Art: How to Perfectly Stuff Your Chocolate Lava Cookies
The secret to achieving that incredible molten center lies in the precise technique of stuffing the cookies. It might sound a bit intricate, but with a little practice and attention to detail, you’ll be creating perfectly filled cookies every time. The key is to start with a generously sized ball of cookie dough, larger than what you’d typically use for an unstuffed cookie, to ensure ample room for the glorious fudge filling. Here’s a detailed, step-by-step guide to stuffing your cookies like a pro:
- Prepare Your Dough Balls: Begin by scooping out generous portions of your rich chocolate cookie dough. A medium cookie scoop, which typically holds about 2 tablespoons of dough, is ideal for this. Aim for uniform balls of dough to ensure consistent baking and filling. Place these dough balls onto your parchment-lined cookie sheets, leaving enough space between them for flattening.
- Flatten for Filling: Gently flatten each dough ball onto the parchment paper using the palm of your hand. You want to create a disc that’s large enough to cradle the filling but not so thin that it tears easily. Think of it as creating a soft, pliable cup for your fudge. The edges should be slightly thicker than the center to provide a good seal later on.
- Add the Molten Core: Now for the star of the show! Scoop approximately half a teaspoon of your hot fudge sauce directly onto the middle of each flattened dough disc. Consistency is key here: aim for a thick, luscious fudge sauce rather than a pourable, runny chocolate sauce. A thicker fudge is much easier to manage and less likely to leak during baking.
- Seal the Deliciousness: This step requires a gentle touch. Carefully gather and fold the sides of the dough up and over the fudge filling. Work your way around the perimeter, pinching the dough together at the top to completely enclose the fudge. Ensure the seams are tightly sealed to prevent any delicious “lava” from escaping during baking.
- Shape for Perfection: Once sealed, gently roll each stuffed ball of dough between your palms. This helps to create a smooth, spherical shape and further reinforces the seal around the fudge. Aim for a consistent size and shape for all your cookies.
- Sweet Finish & Bake: For an extra touch of sweetness and a lovely texture, roll each perfectly formed cookie dough ball in granulated sugar before placing them back on the prepared baking sheets. This adds a delightful sparkle and a slight crunch to the cookie’s exterior. Finally, bake them according to the recipe instructions.
A Quick Note on Enjoyment: These chocolate lava cookies are truly at their absolute best when savored freshly baked and still warm. The “lava” filling remains wonderfully molten and gooey, providing that signature oozy experience. While the fudge will gradually absorb into the cookie as they cool and sit over time, we guarantee that no complaints will be heard from your taste testers, as they remain utterly delicious even at room temperature!
Expert Tips for Crafting Flawless Chocolate Lava Cookies Every Time
Achieving that perfect balance of a tender cookie and an erupting fudge center can be incredibly rewarding. Follow these expert tips to ensure your Chocolate Lava Cookies are nothing short of spectacular, minimizing leaks and maximizing molten delight:
- Precision in Dough Division: For consistently sized and perfectly filled cookies, take the time to divide your dough into 24 even pieces before you start rolling them into balls. This methodical approach ensures that each cookie has sufficient dough to fully encase the fudge sauce without being stretched too thin. Each piece should be slightly more generous than a typical medium cookie scoop’s worth.
- The Filling Moderation Rule: When it comes to the fudge filling, it’s always better to err on the side of using slightly too little rather than too much. Overfilling is the primary culprit behind leaks during baking. A half-teaspoon is typically adequate for creating a satisfying molten center without risking a messy eruption.
- Seal with Care and Attention: The integrity of your cookie depends entirely on how well you seal the dough around the filling. After folding the cookie dough over the fudge, take extra care to firmly pinch and press the seams together. Ensure there are no gaps or weak points where the precious fudge could escape as it heats up in the oven.
- Embrace the “Leakers” (and Learn from Them): Despite your best efforts, you might occasionally spot some filling breaking through on a few dough balls even before baking. Don’t fret! These cookies are still perfectly delicious to bake and enjoy. While they might not have a perfectly contained pocket of fudge, they’ll still offer an incredibly rich chocolate experience. Think of them as a bonus “fudge-burst” cookie! Learning from these instances can help you refine your sealing technique for future batches.
- The Butter vs. Shortening Debate: Experiment with your dough base. I’ve had great success making these cookies with all butter, which yields a rich flavor and tender crumb. However, if you’re looking for an even more pliable dough that is easier to work with when stuffing, consider using a blend of half butter and half shortening. The shortening helps create a softer, more forgiving dough, making the sealing process a bit simpler.
- The Golden Rule: Do Not Overbake! This is perhaps the most critical tip for achieving true “lava” cookies. Overbaking is the enemy of a molten center. The cookies should be removed from the oven when the edges are just set and the tops appear slightly puffed, but the very center still looks soft and potentially underbaked. Remember, they will continue to set slightly as they cool on the baking sheet. If you bake them until they are firm throughout, you will end up with delicious chocolate cookies, but sadly, without that signature gooey lava core.
- Chill the Dough (Optional, but Recommended): If your dough feels too soft or sticky to work with, a quick chill in the refrigerator for 15-30 minutes can make it much more manageable for stuffing and rolling, further reducing the risk of leaks.
- Quality Ingredients Matter: Use good quality cocoa powder for a deep chocolate flavor and a premium hot fudge sauce for the most decadent filling. The quality of your ingredients will directly impact the final taste and texture of your cookies.
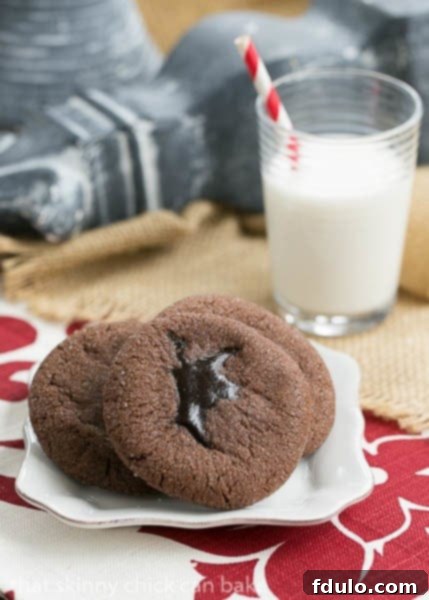
Discover More Decadent Chocolate & Lava Creations You’ll Adore:
If you’re a true chocolate connoisseur or simply can’t get enough of that wonderful molten center, then you’re in for a treat! Explore these fantastic recipes that celebrate the richness of chocolate and the delightful surprise of a gooey filling. From classic lava cakes to inventive filled cookies, there’s something here to satisfy every sweet craving:
- Chocolate Peanut Butter Lava Cakes from The Cookie Rookie: A dream combination of rich chocolate and creamy peanut butter in a molten cake form.
- White Chocolate Lava Cakes: For those who prefer a lighter, yet equally decadent, molten center.
- Lava Cakes with Kahlua Whipped Cream: An adult-friendly version with a delightful coffee liqueur kick.
- Classic Chocolate Lava Cakes: The timeless dessert that started it all, perfect every time.
- Caramel Filled Chocolate Cookies: Another delightful twist on filled cookies, for caramel lovers.
- Explore even more of the Best Chocolate Desserts on our site, guaranteed to inspire your next baking adventure.
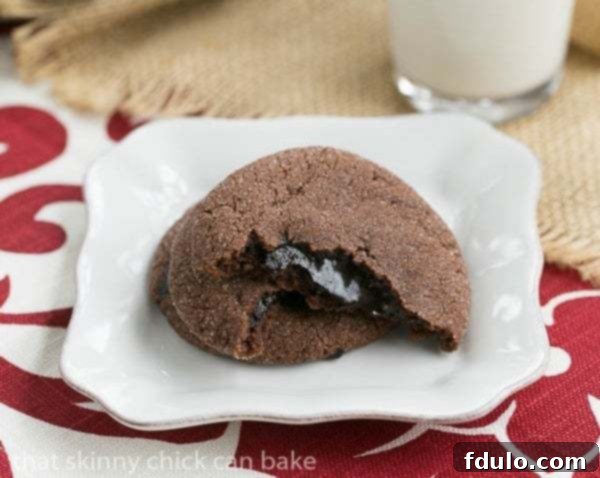
Chocolate Lava Cookies
20 minutes
12 minutes
32 minutes
24 decadent cookies
Indulge in these utterly delectable chocolate cookies, each generously stuffed with a rich, gooey hot fudge sauce that melts into a luscious “lava” center when warm.
Ingredients for Your Molten Masterpiece
- 1 cup (2 sticks) unsalted butter, softened to room temperature* (using high-quality butter enhances flavor)
- 1 cup granulated sugar (for sweetness and texture)
- 1 cup packed light brown sugar (adds moisture and a deeper, molasses-like flavor)
- 2 large eggs (for binding and richness)
- 1 teaspoon pure vanilla extract (enhances all chocolate flavors)
- ¾ cup unsweetened cocoa powder (Dutch-processed recommended for a darker color and milder chocolate flavor)
- 2 cups all-purpose flour (the structural base of your cookies)
- 1 teaspoon baking powder (for a soft, tender lift)
- 1 (8-ounce) jar high-quality hot fudge sauce (you will need about ¼ cup; ensure it’s thick, not a pourable syrup, for best results)
- Granulated sugar, for rolling (adds a delightful sparkle and slight crunch to the exterior)
Step-by-Step Instructions to Bake Lava Perfection
- Prepare Your Workspace: Preheat your oven to 350ºF (175ºC). Line several large baking sheets with parchment paper. This step is crucial for preventing sticking and ensures your beautiful cookies lift off easily. Set them aside while you prepare the dough.
- Craft the Rich Chocolate Dough: In a large mixing bowl, ideally with an electric mixer, cream together the softened butter, granulated sugar, and light brown sugar until the mixture is light, fluffy, and well combined (this usually takes 2-3 minutes). Beat in the eggs one at a time, ensuring each egg is fully incorporated before adding the next. Stir in the vanilla extract. Next, gradually add the cocoa powder, mixing until just combined and evenly distributed. Finally, add the baking powder and all-purpose flour. Mix on low speed just until the dough comes together and no dry streaks of flour are visible. Be careful not to overmix, as this can lead to tough cookies.
- Form and Flatten the Dough Discs: Using a medium cookie scoop (approximately 2 tablespoons), scoop out uniform balls of the rich chocolate dough. Place these dough balls onto your prepared baking sheets, ensuring at least 2 inches of space between each one to allow for spreading. With the palm of your hand, gently flatten each dough ball into a disc about ¼ to ⅓ inch thick. Make sure the edges are slightly thicker than the center, creating a shallow cup for the filling.
- Fill, Seal, and Shape: Scoop about a half teaspoon of the thick hot fudge sauce onto the center of each flattened dough disc. Carefully gather the edges of the dough and fold them up and over the fudge filling. Pinch the seams firmly together at the top to completely seal the fudge inside, preventing any leaks during baking. Once sealed, gently roll each stuffed dough portion between your palms to form a smooth, spherical ball. Repeat this process for all remaining dough and fudge. For an extra touch of sweetness and a pleasant textural contrast, roll each perfectly formed cookie dough ball in granulated sugar before placing them back on the baking sheets.
- Bake to Molten Perfection: Bake the cookies for 8-12 minutes. The exact baking time will depend on your oven and cookie size. You’ll know they’re ready when the edges are just set and appear slightly firm, but the centers still look soft, puffy, and potentially a bit underbaked. This is key for that molten lava center! Resist the urge to overbake, or your cookies will lose their gooey core. Carefully remove the baking sheets from the oven and allow the cookies to cool on the sheets for a few minutes before transferring them to a wire rack. These cookies are truly best enjoyed warm, right out of the oven, when the fudge is at its most molten.
Helpful Notes & Pro Tips
* For a cookie dough that is even more pliable and easier to work with when stuffing, consider using a blend of half shortening and half butter (e.g., ½ cup butter, ½ cup shortening). This can help prevent tears and make sealing easier.
** To guarantee that glorious lava center, I highly recommend baking a single “test” cookie first. This allows you to fine-tune your baking time. If the test cookie is overbaked, the fudge will integrate into the cookie dough instead of remaining molten, resulting in a delicious chocolate cookie, but not a true lava cookie.
For optimal moltenness, serve these cookies warm, perhaps with a scoop of vanilla bean ice cream or a glass of cold milk.
Recommended Baking Essentials
As an Amazon Associate and member of other affiliate programs, I earn from qualifying purchases, helping to support this blog at no extra cost to you.
- USA Pan Bakeware Half Sheet Pan (Essential for uniform baking)
- Reynolds Cookie Baking Sheets Non-Stick Parchment Paper (Pre-cut for easy use)
- OXO Good Grips Medium Cookie Scoop (Ensures consistent cookie size)
Nutrition Information:
Yield:
24 Cookies
Serving Size:
1 cookie
Amount Per Serving:
Calories: 150Total Fat: 2gSaturated Fat: 1gTrans Fat: 0gUnsaturated Fat: 1gCholesterol: 16mgSodium: 61mgCarbohydrates: 31gFiber: 1gSugar: 19gProtein: 3g
HOW MUCH DID YOU LOVE THIS RECIPE?
We’d love to hear from you! Please leave a comment on the blog with your thoughts or share a photo of your magnificent Chocolate Lava Cookies on Pinterest. Happy baking!
