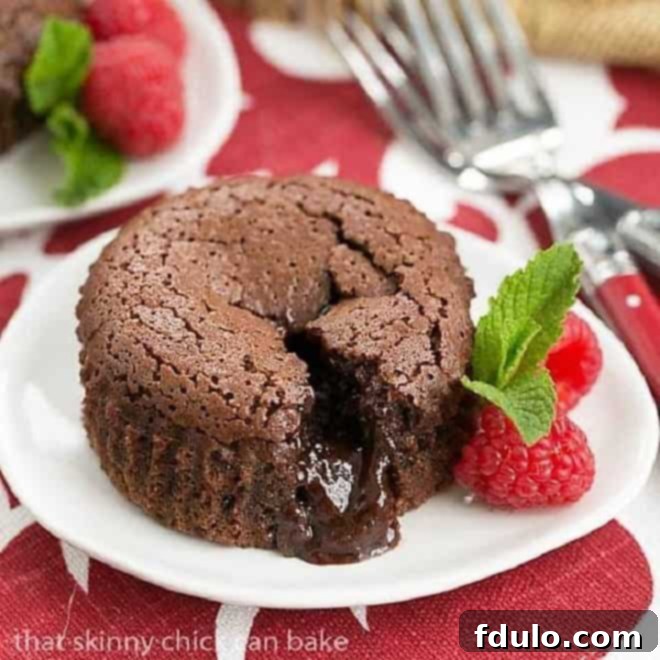
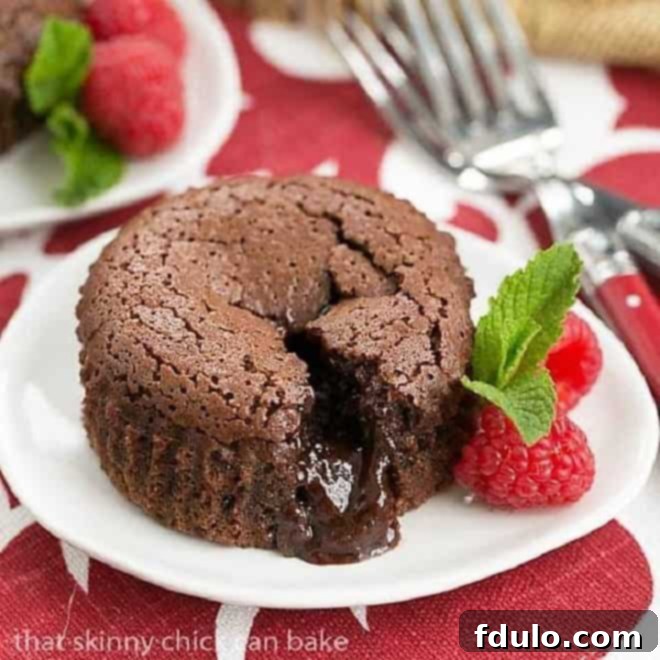
Chocolate Lava Cakes are more than just a dessert; they are an experience. With their decadent rich chocolate flavor, sweet berry accompaniments, and perfectly portioned individual servings, these elegant treats have become a cherished tradition for holidays and special occasions alike. Imagine cutting into a warm, delicate cake, only to have a luscious river of molten chocolate spill onto your plate—pure bliss!
Molten Lava Cakes are the quintessential indulgence, ideal for festive gatherings like Christmas dinner, romantic gestures on Valentine’s Day, or simply as a comforting après-ski treat to melt away the winter chill. Their unique appeal lies in the contrast of a firm outer shell and a gloriously gooey, liquid center, making them a showstopper dessert that never fails to impress.
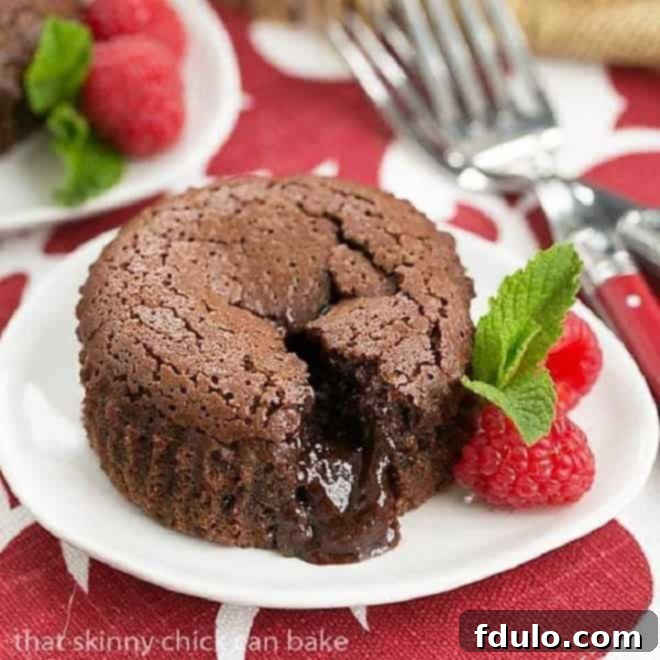
Indulge in the Ultimate Chocolate Lava Cake Recipe: A Decadent Delight for Any Occasion
There’s something uniquely magical about a molten chocolate lava cake. It’s not just a dessert; it’s a moment of pure, unadulterated pleasure. This comprehensive guide will walk you through creating the most exquisite chocolate lava cakes, ensuring a perfect balance of rich flavor, tender texture, and that iconic flowing center. Get ready to impress your loved ones with this surprisingly simple yet utterly sophisticated dessert!
Why This Molten Chocolate Lava Cake Recipe is a Must-Try
Having experimented with countless chocolate lava cake (also known as molten lava cake) recipes, from those baked in sugar-crusted ramekins to buttered and floured ones, I can confidently say that this particular method stands out. Inspired by Pam Anderson’s innovative approach using muffin tins with extra-large paper cupcake liners, this procedure is not only novel but also incredibly effective. Here’s why you absolutely need to add this recipe to your repertoire:
- Personalized Perfection: Every guest gets their very own individual chocolate cake, ensuring a special and elegant touch to any meal.
- Irresistible Fudgy Center: The warm, luscious, fudgy sauce hidden within each cake is truly over-the-top, creating an unforgettable sensory experience with every spoonful.
- Effortless Removal: Unlike many traditional lava cake recipes that can be tricky to unmold, baking these in muffin tins with paper liners makes them remarkably easy to remove and serve, minimizing stress and maximizing enjoyment.
- Impressive Presentation: Despite their simple preparation, these mini chocolate cakes look incredibly sophisticated and gourmet, making them perfect for entertaining.
- Versatile & Adaptable: Whether you’re a seasoned baker or a beginner, this recipe is forgiving and allows for easy customization to suit various tastes and occasions.
- Pure Comfort Food: On a cold day or after a long week, there’s nothing quite as comforting as a warm, gooey chocolate dessert.
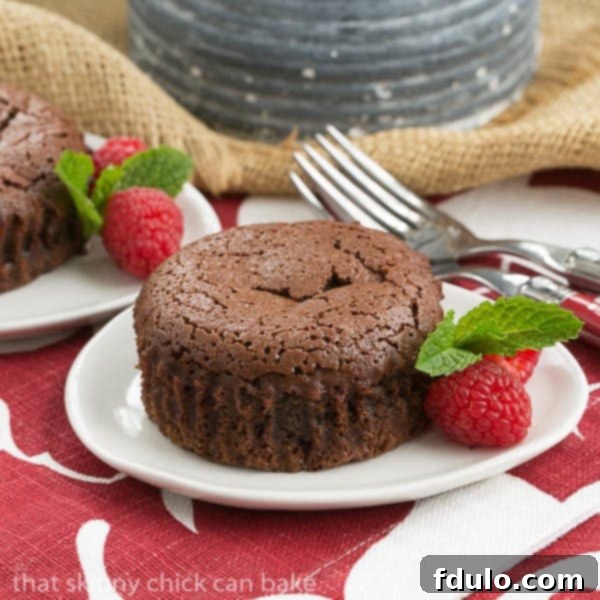
Mastering the Art of Molten Chocolate Lava Cakes: A Step-by-Step Guide
Whether you’re seeking a soul-warming dessert after a thrilling run down the ski slopes or simply enduring frigid temperatures at home, a warm, comforting molten chocolate lava cake is precisely what’s needed. While my family adores these so much they’ll happily indulge even on a scorching 90º summer day, perfecting them involves a few crucial tips. Here’s how to create these chocolate lover’s dreams:
- Prep Ahead for Ease: These molten lava cakes are incredibly flexible! You can easily prep the batter ahead of time and store it in the fridge. When ready to bake, simply bring the batter back to room temperature, pour into your prepared molds, and in a matter of minutes, you’ll have a fresh, hot chocolate masterpiece ready to delight. This makes them perfect for stress-free entertaining.
- The Golden Rule: Timing is Everything: The heart of a perfect chocolate lava cake recipe lies in its precise baking time. Bake for too long, and you risk losing that coveted molten center, transforming it into a solid cake. Bake for too short, and the cakes may collapse, or the edges won’t be firm enough to hold the “lava.” Aim for the sweet spot: the perimeter of the cake should appear firm, while the very center (about the size of a quarter) still looks visibly soft and jiggly. This can range from as little as 8 minutes to up to 12 minutes, depending on the unique characteristics of your oven. In my experience, 11 minutes often yields perfectly cooked cakes.
- Keep it Simple, Keep it Delicious: Beyond the baking time, the rest of the recipe is refreshingly straightforward. Begin by gently melting your chosen chocolate and butter until smooth and glossy. In a separate bowl, whisk the eggs, sugar, and a touch of vanilla until the sugar is fully dissolved and the mixture is light and airy. Finally, carefully combine the two, folding them together to create one luscious, irresistible batter. Remember, using the best quality ingredients will always lead to the most delicious and satisfying results.
- Choosing Your Vessels: Muffin Tins or Ramekins: Each lava cake typically requires about ½ cup of batter. If using a standard muffin tin, you might find that ½ cup is a generous amount for some liners. To prevent overflow and ensure easy removal, consider doubling up on paper liners in each muffin cup and spraying them generously with non-stick cooking spray. This adds a little extra height and structure. Alternatively, if your muffin tin cups are too shallow, or you simply prefer a more traditional presentation, individual ramekins (ideally ½-cup capacity) are an excellent choice.
- Greasing for Success: Even when using paper liners, a light spray with non-stick cooking spray is a good precaution. If you opt for ramekins without paper liners (as I have for many other lava cake recipes), thorough greasing is paramount. For absolute peace of mind and to entirely eliminate the risk of sticking, I highly recommend lining the bottom of each greased ramekin with a small round of greased parchment paper. This extra step ensures a pristine unmolding every single time.
- Safety First: Pasteurizing Eggs: Given that the molten centers of these cakes may not reach the 160ºF temperature required to kill salmonella, it’s wise to consider using pasteurized eggs. This is especially important when serving these delectable treats to children, the elderly, or anyone with a compromised immune system, providing an extra layer of food safety.
- Scaling Down: If you’re baking for a smaller crowd or simply craving a taste, you can easily halve this recipe. For instance, half a beaten egg measures approximately 1½ tablespoons plus an ⅛ teaspoon. When I’ve made half batches, I’ve found that ¾ cup capacity ramekins work beautifully as an alternative to a full muffin tin.
And here were the thoughtful comments from my family—brace yourself. “They complement the beer well.” “Thems good eats.” “Better than Arby’s.” Did you know Arby’s is now serving molten lava cakes? Me, either! So if you don’t want to get carryout lava cakes from Arby’s, I highly recommend making these in a couple of weeks for your Valentine, or surprising your family any day of the year when they need to warm up from the inside out. This Chocolate Lava Cakes Recipe is truly a winner that brings joy and warmth to any table!
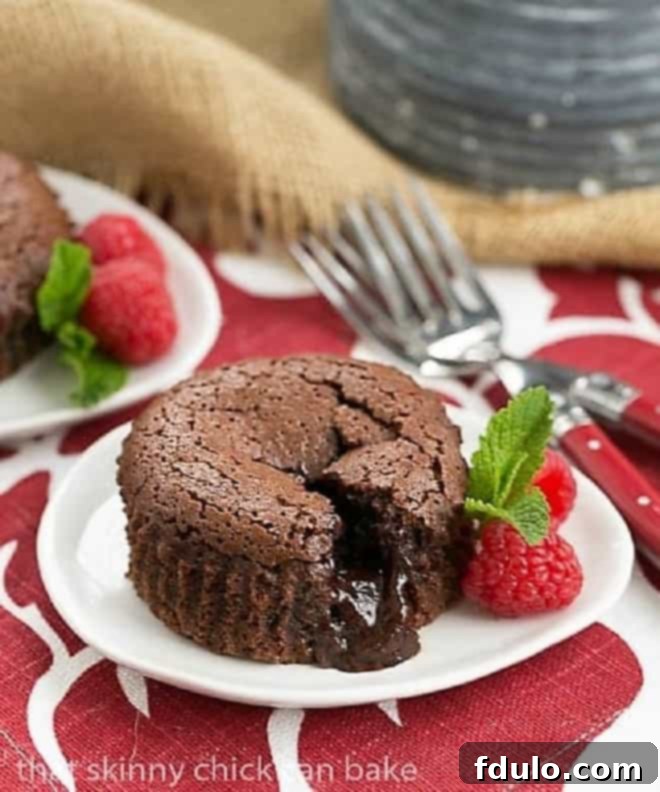
Troubleshooting Common Molten Lava Cake Challenges
Even with the best recipes, baking can sometimes present challenges. Here are solutions to common issues you might encounter when making molten lava cakes:
- Cakes Too Runny or Too Firm: This almost always comes down to baking time and oven temperature. If your cakes are too runny, your oven might be running cooler than indicated, or they simply need another minute or two. If they’re too firm, your oven might be too hot, or they were left in too long. Use an oven thermometer to verify your oven’s accuracy and trust the visual cues (firm edges, slightly jiggly center) more than a rigid timer.
- Cakes Sticking to the Pan: Inadequate greasing is the culprit here. Ensure your muffin liners or ramekins are thoroughly coated with non-stick spray, and for ramekins, consider the parchment paper disc at the bottom for an extra layer of protection.
- Cakes Collapsing: This can happen if the cakes are underbaked and the structure isn’t set enough to support itself once removed from the tin, or if they are removed too quickly after baking. Allow the cakes to rest in the muffin tin for the recommended 5 minutes to firm up slightly before attempting to invert them.
Elevate Your Lava Cakes: Variations and Serving Suggestions
While classic chocolate lava cakes are perfection, there’s always room for a little customization to suit your palate or occasion.
- Chocolate Choice: Experiment with different types of chocolate! Use dark chocolate for a more intense, less sweet flavor, or milk chocolate for a creamier, milder profile. White chocolate lava cakes are also a delightful alternative.
- Flavor Boosters: Add a teaspoon of espresso powder to deepen the chocolate flavor, a splash of liqueur (like Grand Marnier, Kahlúa, or raspberry liqueur) for an adult twist, or a hint of orange or peppermint extract for seasonal flair. Citrus zest (orange or lime) can also brighten the profile.
- Creative Toppings: Beyond fresh raspberries and mint, consider a dusting of powdered sugar, a dollop of freshly whipped cream, a scoop of vanilla bean ice cream (the warm cake against cold ice cream is divine!), a drizzle of caramel sauce, or a sprinkle of toasted nuts.
- Mini Lava Cakes: For bite-sized indulgence, use mini muffin tins and adjust baking time accordingly (typically 6-8 minutes).
Frequently Asked Questions About Chocolate Lava Cakes
What Is a Lava Cake?
The original molten lava cakes are credited to acclaimed chef Jean-Georges Vongerichten. These individual desserts are crafted using a rich, brownie-like batter, rather than a typical cake batter. The magic happens during baking: the edges cook just enough to form a tender cake structure, while the core remains wonderfully liquid and warm, creating a “lava” effect when cut into.
Why Are These Called Lava Cakes?
These exquisite individual chocolate cakes earn their distinctive name from their unique characteristic: when sliced open, their thick, fudgy, warm centers beautifully ooze out, strikingly resembling lava flowing from a volcano. This dramatic presentation is a key part of their charm.
Is It Safe to Eat a Lava Cake?
While the center of a molten lava cake is warm, it typically doesn’t reach the temperature (160°F or 71°C) at which salmonella bacteria are reliably killed. Therefore, it’s generally recommended to exercise caution when serving these cakes to very young children, the elderly, or individuals with compromised immune systems. As mentioned earlier, using pasteurized eggs can be a good preventative measure for added safety.
How Do You Garnish and Serve Lava Cakes?
PRO-Tip: After baking, it’s crucial to allow these cakes to cool for a few minutes in their tins before attempting to invert them onto serving plates. This brief cooling period allows the delicate edges to firm up sufficiently, preventing the “lava” from prematurely oozing out before your fork has a chance to reveal it. Once cooled slightly, carefully remove the paper liners (if used) and transfer each cake to an individual dessert plate. Classic garnishes include a fresh sprig of mint and a scattering of sweet raspberries, which offer a delightful color and tart contrast to the rich chocolate. For an extra touch of decadence, a generous dollop of whipped cream or a dusting of powdered sugar would also be marvelous.
How Do You Reheat Lava Cakes?
Leftover lava cakes can be gently reheated in the microwave. Be aware that during reheating, some of the molten center may cook further and solidify slightly. However, rest assured, they will still be incredibly tasty and satisfy your chocolate cravings!
Can I Make Lava Cakes Ahead of Time?
Absolutely! One of the best features of this recipe is its make-ahead potential. You can prepare the batter and fill your ramekins or muffin cups, then cover them tightly with plastic wrap and refrigerate for up to 24 hours. When you’re ready to bake, simply let them sit at room temperature for about 20-30 minutes before baking as directed. This makes them an ideal dessert for entertaining, as you can do most of the work in advance.
Molten Chocolate Lava Cakes Recipe
Molten Chocolate Lava Cakes Recipe
20 minutes
10 minutes
5 minutes
20 minutes
8
Decadent individual chocolate cakes with a fudgy, molten lava center!!!
Ingredients
- 1 cup butter
- 1 ⅓ cups chocolate chips or chopped semisweet chocolate
- 5 eggs
- ½ cup sugar
- Pinch of salt
- 4 teaspoons flour
- Fresh raspberries and mint to garnish, optional
Instructions
- Preheat oven to 450 degrees F (230 degrees C).
- Line 8 cups of a muffin tin* with extra-large paper liners. Coat them thoroughly with non-stick cooking spray (like Pam) to ensure easy release.
- Gently melt the butter and chocolate together. You can do this in a large heat-safe bowl in the microwave, using 30-second increments and stirring after each, until the chocolate is fully melted and the mixture is smooth. Alternatively, use a double boiler on the stovetop.
- In a separate medium bowl, use a hand mixer to beat the eggs, sugar, and pinch of salt until the sugar is completely dissolved and the mixture is light and well combined.
- Gradually beat the egg mixture into the melted chocolate, then gently fold in the flour until just combined. Be careful not to overmix.
- Divide the luscious batter evenly among the prepared muffin cups.
- Bake for 8 to 10 minutes, or until the batter puffs up, the edges look firm and set, but the centers remain soft and slightly jiggly (less than the size of a quarter).
- Let the cakes stand in the muffin tin for 5 minutes. This crucial step allows the cakes to firm up slightly. Then, carefully move each cake to a dessert plate, gently remove the paper wrappers, and garnish with fresh berries and mint if desired. Serve immediately and enjoy the molten goodness!
Notes
*The muffin tin should ideally be able to accommodate ½ cup of batter per cup. If your standard muffin tin cups are smaller, you can double up your muffin papers in each cup and add ½ cup of batter. As an alternative, using ½-cup capacity ramekins with paper liners works perfectly and offers a classic presentation.
This recipe has been thoughtfully adapted from Pam Anderson’s “Perfect Recipes for Having People Over,” a testament to its reliability and deliciousness.
Recommended Products
As an Amazon Associate and member of other affiliate programs, I earn from qualifying purchases.
- KitchenAid 9-Speed Digital Hand Mixer
Nutrition Information:
Yield:
8
Serving Size:
1
Amount Per Serving:
Calories: 418Total Fat: 36gSaturated Fat: 22gTrans Fat: 1gUnsaturated Fat: 12gCholesterol: 177mgSodium: 247mgCarbohydrates: 23gFiber: 2gSugar: 19gProtein: 6g
Thatskinnychickcanbake.com occasionally offers nutritional information for recipes contained on this site. This information is provided as a courtesy and is an estimate only. This information comes from online calculators. Although thatskinnychickcanbake.com attempts to provide accurate nutritional information, these figures are only estimates.
Varying factors such as product types or brands purchased can change the nutritional information in any given recipe. Also, many recipes on thatskinnychickcanbake.com recommend toppings, which may or may not be listed as optional and nutritional information for these added toppings is not listed. Other factors may change the nutritional information such as when the salt amount is listed “to taste,” it is not calculated into the recipe as the amount will vary. Also, different online calculators can provide different results.
To obtain the most accurate representation of the nutritional information in any given recipe, you should calculate the nutritional information with the actual ingredients used in your recipe. You are solely responsible for ensuring that any nutritional information obtained is accurate.
HOW MUCH DID YOU LOVE THIS RECIPE?
Please leave a comment on the blog or share a photo on Pinterest
Explore More Decadent Chocolate Desserts
- Hot Chocolate Custard from Texanerin
- Raspberry Molten Lava Cakes from Pastry Chef Online
- White Chocolate Lava Cakes
- Chocolate Lava Cookies
- Chocolate Pudding Cake
- Chocolate Mug Cake
- Plus, all my Best Chocolate Recipes
Stay in touch through social media @ Instagram, Facebook, and Pinterest. Don’t forget to tag me when you try one of my recipes! And if you love the results, please give it a 5-star rating in the recipe card.
