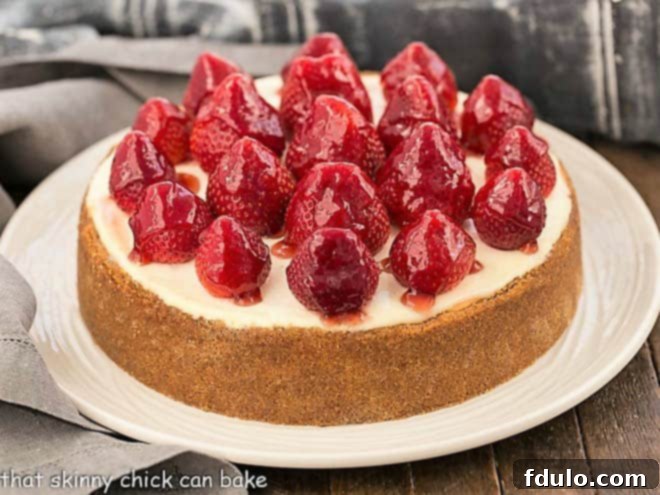
Irresistible Strawberry Topped Cheesecake: Your Ultimate Guide to a Show-Stopping Dessert
Prepare to impress with this exquisite Strawberry Topped Cheesecake, a dessert so divine it consistently earns rave reviews from everyone who tastes it! When the market overflows with luscious, ripe strawberries, it’s the perfect time to create this culinary masterpiece that promises an unforgettable experience.
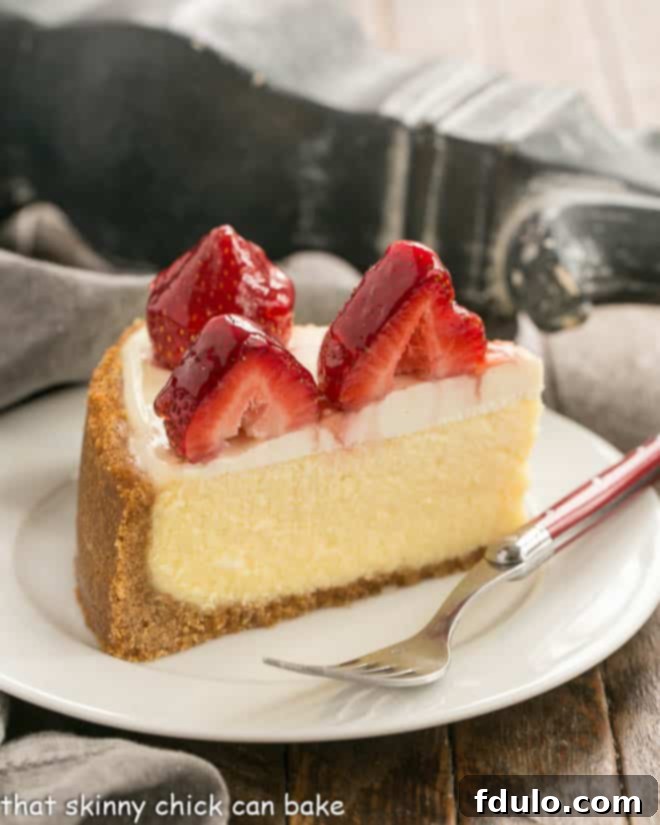
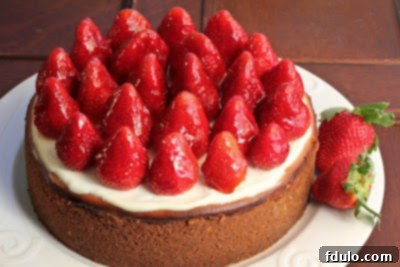
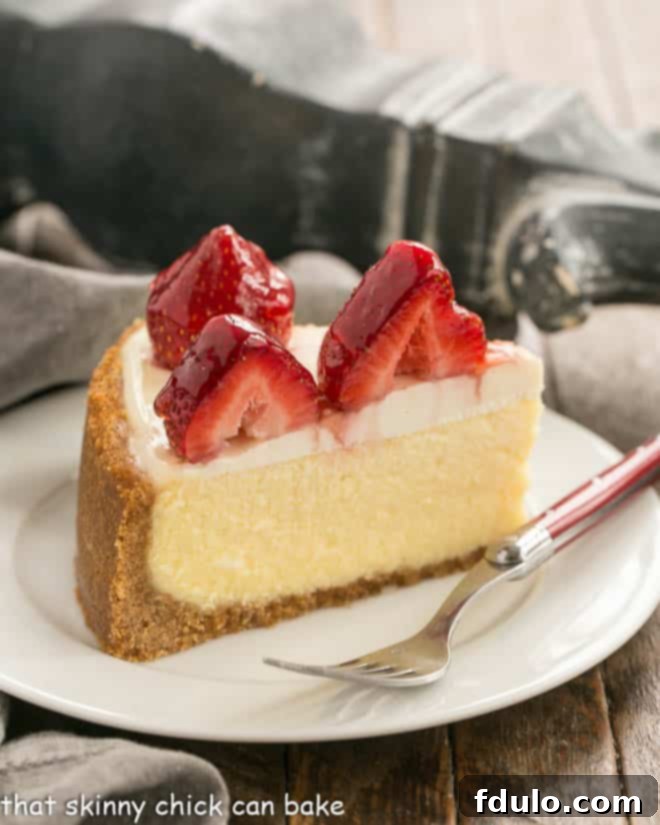
Imagine a perfectly buttery, golden graham cracker crust, hugging a remarkably creamy vanilla cheesecake filling. This decadent base is then crowned with a vibrant layer of fresh, fragrant, and beautifully glazed strawberries, creating a dessert that is as visually stunning as it is delicious. If you’re seeking a dessert that truly stands out and leaves a lasting impression, this detailed strawberry cheesecake recipe is your secret weapon.
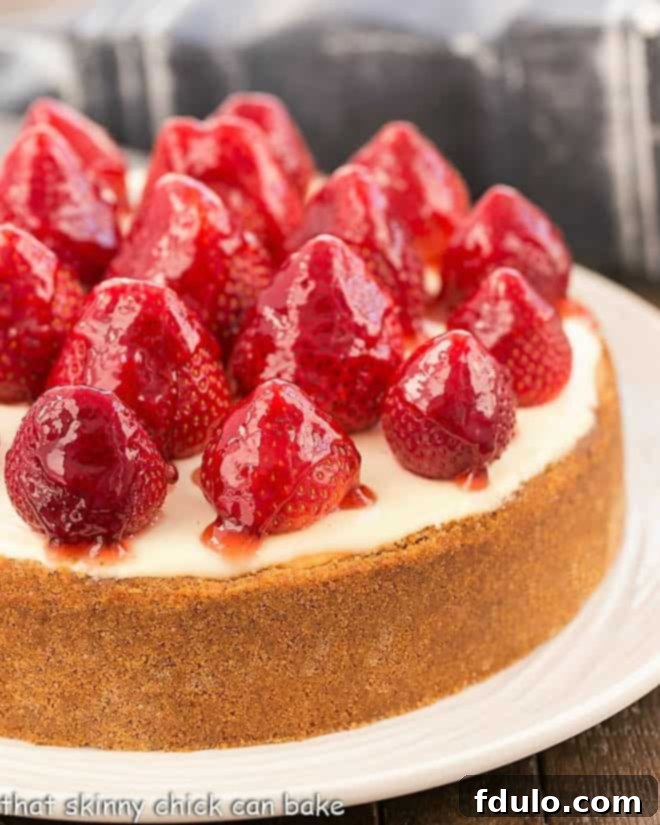
Why This Strawberry Cheesecake Will Be Your New Go-To Dessert
This isn’t just any cheesecake; it’s a dessert with a history of delighting palates and stealing the show. The story of this exceptional homemade strawberry cheesecake began years ago, captivating guests at various gatherings and earning its place as a cherished recipe. Here’s why you absolutely must make this cheesecake:
- A Proven Crowd-Pleaser: I first encountered this incredible strawberry cheesecake at a teacher’s luncheon when my youngest child was in high school. Its rich flavor and elegant presentation immediately sparked curiosity, with multiple teachers asking for the recipe. You can bet I was eager to get my hands on it! Since then, it has graced tables at a baby shower and, most recently, a dinner party at our home. The reactions are always the same: literal “swoons” and the ultimate compliment – guests asking for a slice to take home. One diner even declared it the “best cheesecake I’ve ever tasted,” a testament to its unparalleled deliciousness.
- A Feast for the Eyes: This dessert is an absolute show-stopper, making it perfect for any special occasion or when you simply want to add a touch of elegance to your meal. When you make it, especially with peak-season, beautiful, ripe strawberries, prepare for jaws to drop. The vibrant red of the berries against the creamy white of the cheesecake creates a striking contrast that is undeniably alluring. The classic combination of cheesecake and strawberries is not just unbeatable in flavor, but also in visual appeal.
- Versatile for All Occasions: Whether it’s a festive holiday gathering, a casual family dinner, a birthday celebration, or a romantic evening, this cheesecake fits seamlessly into any event. Its timeless appeal and sophisticated flavor profile ensure it will be the highlight of your dessert table, leaving guests wanting more.
- Easier Than You Think: While it looks incredibly impressive, this easy strawberry cheesecake recipe is surprisingly straightforward to make, especially with the expert tips we’re about to share. You don’t need to be a professional baker to achieve bakery-quality results.
Essential Expert Tips for the Perfect Strawberry Cheesecake
Achieving a truly show-stopping strawberry cheesecake isn’t just about following the recipe; it’s about understanding the subtle techniques that elevate it from good to extraordinary. These carefully honed tips are designed to ensure your cheesecake is flawlessly creamy, perfectly set, and utterly delicious.
- The Golden Rule of Room Temperature Ingredients: One of the most crucial elements for a luscious, ultra-creamy cheesecake filling is to ensure all your ingredients, especially the cream cheese and eggs, are at room temperature. Cold ingredients can lead to a lumpy batter and overmixing, which can negatively impact the final texture. For cream cheese, take it out of the refrigerator at least an hour or two before you plan to start mixing. For eggs, placing them in a bowl of warm water for 10-15 minutes can speed up the process if you’re short on time. This simple step ensures a smooth, homogeneous batter that bakes evenly.
- Mixing Method Matters: Paddle Over Whisk: When it comes to blending your cheesecake batter, opt for the paddle attachment on your stand mixer, not the whisk attachment. The paddle gently combines the ingredients without incorporating too much air. Excess air can cause your cheesecake to puff up significantly during baking and then crack as it cools, resulting in a lighter, less dense filling than desired for a classic, rich cheesecake. When adding eggs, incorporate them one at a time, mixing only until just combined to further prevent over-aeration.
- Understanding the Water Bath (and Why It’s Optional Here): Many cheesecake recipes recommend baking in a water bath (bain-marie) to maintain a consistent, moist baking environment. This technique is known for helping to prevent cracks and ensuring an incredibly smooth texture. While a water bath is beneficial, it’s not strictly essential for this particular strawberry cheesecake recipe because it features a generous sour cream topping. Any potential cracks that might form will be beautifully covered by this delicious layer, so you can skip it without sacrificing presentation.
- Water Bath Precaution (If You Choose to Use One): If you do decide to use a water bath for added peace of mind or to ensure the creamiest possible texture, always wrap the base of your springform pan in a double layer of heavy-duty aluminum foil. This is vital to prevent water from seeping into the pan and making your crust soggy.
- Testing for Doneness: Beyond the Toothpick: Unlike a layer cake, a cheesecake isn’t ready when a toothpick comes out clean. Instead, look for the top to be mostly set but still have a slight jiggle in the very center, perhaps a 1-2 inch circle. This gentle wobble indicates that the cheesecake is cooked through but not overbaked, as it will continue to cook slightly from residual heat after being removed from the oven. Overbaking is a common cause of cracks and a dry texture.
- Oven Variations and Calibration: Be aware that oven temperatures can vary significantly. What takes 55 minutes in one oven might take an extra 20 minutes in another, even if both are supposedly set to the same temperature. It’s always a good idea to know your oven or even invest in an oven thermometer to ensure accuracy. The baking times provided in recipes are guidelines; always trust your visual cues for doneness.
- The Secret to Optimal Flavor: Serving Temperature: Besides room temperature ingredients and proper mixing, the third key tip for an absolutely delicious cheesecake is to bring it out of the refrigerator at least an hour before serving. Cheesecake, especially a rich and creamy one like this, truly tastes better when it’s not ice-cold. Allowing it to warm slightly to room temperature softens its texture and allows its complex flavors to fully develop and shine. However, remember the FDA guidelines recommend that perishable foods should not remain at room temperature longer than 2 hours, so be sure to tuck any leftovers back into the refrigerator promptly after serving.
- Patience is a Virtue: Chilling Time: Once baked and cooled, this cheesecake requires an overnight chill in the refrigerator. This crucial step allows the cheesecake to fully set, develop its rich flavor, and achieve that signature dense, creamy texture. Do not rush this step!
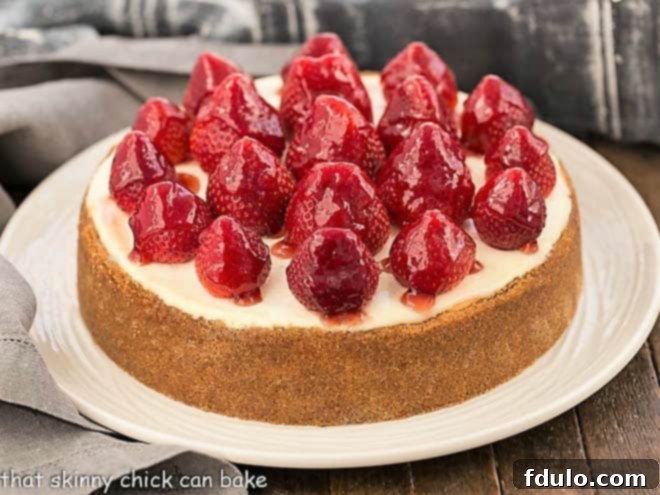
Frequently Asked Questions About Strawberry Topped Cheesecake
Selecting peak-quality strawberries is absolutely crucial for the best tasting and most visually appealing results. Make this cheesecake when local or imported strawberries are at their seasonal best. Look for berries that are bright red all over, without any white or green patches near the stem, which indicates they were picked too early. Avoid any berries with bruises, soft spots, or mold. The leaves should be green and fresh, not brown or wilted. You should also be able to detect a sweet, fragrant aroma when you’re near the display at the market; a strong smell indicates superior flavor. Larger berries are often preferred for topping whole, but smaller ones are just as delicious.
While a water bath is a popular technique for baking cheesecakes to create a moist environment that helps prevent cracking and promotes an even, creamy texture, it’s considered optional for this recipe. This is primarily because of the delightful sour cream layer that goes over the cheesecake after its initial bake, followed by the fresh strawberry topping. Both of these layers will beautifully cover any minor cracks that might form during the baking process. Therefore, you can confidently bake this creamy vanilla cheesecake without the extra step of a water bath, simplifying the process without compromising the final presentation.
Absolutely! While strawberries are classic and undeniably delicious, this cheesecake base is versatile enough to be paired with other berries. Blackberries, raspberries, or blueberries would all make excellent choices, offering their own unique flavor profiles and beautiful colors. When substituting, you might consider varying the type of jelly used for glazing to match or complement the color and flavor of your chosen berries. For instance, raspberry jelly pairs wonderfully with raspberries, and a simple apricot glaze could work with blueberries. However, be cautious with fruits like peaches or many stone fruits, as they tend to exude too much juice, which can make the topping soggy and compromise the cheesecake’s texture. Stick to berries for the best results!
Yes, you can prepare the glazed strawberries a few hours in advance. Hull the strawberries and arrange them on the cheesecake. Gently melt your chosen jelly (red currant or raspberry works best) and let it cool to lukewarm. Brush this glaze over the berries for a beautiful sheen. This can be done up to 6 hours before serving. If you prepare it too far in advance, the berries might start to weep juice, so it’s best to glaze closer to serving time.
To maintain its freshness and flavor, store any leftover strawberry topped cheesecake in an airtight container in the refrigerator. This will help prevent it from absorbing other odors and keep the strawberries vibrant. It typically stays fresh for 3-4 days. For longer storage, you can slice the cheesecake, wrap individual slices tightly in plastic wrap, then in foil, and freeze them for up to 1 month. Thaw in the refrigerator overnight before serving.
Delve Deeper: More Decadent Cheesecake Recipes You’ll Love
If you’ve enjoyed mastering this strawberry cheesecake recipe, you’ll be thrilled to explore other incredible cheesecake variations that promise equally delightful results. Expand your baking repertoire with these fantastic options:
- Pink Lemonade Cheesecake Parfaits from Cravings of a Lunatic
- Berry Cake with Lemon Curd
- Caramel Cheesecake
- Ganache Topped Cheesecake Bars
- White Chocolate and Raspberry Cheesecake
- Apple Crisp Cheesecake
- For more invaluable guidance and innovative creations, check out additional Cheesecake Tips and Recipes.
- Explore a wide array of Best Dessert Recipes for every craving and occasion.
Stay connected and share your culinary creations with me on social media! Find me @ Instagram, Facebook, and Pinterest. Don’t forget to tag me when you try one of my delicious recipes! If you love the results as much as I do, please consider giving it a 5-star rating in the recipe card below.
Strawberry Topped Cheesecake Recipe
30 minutes
1 hour 5 minutes
1 hour 35 minutes
16 servings
A truly creamy, decadent cheesecake beautifully crowned with fresh, glazed strawberries – the perfect dessert for any occasion.
Ingredients
For the Graham Cracker Crust:
- 20 whole graham crackers (approximately 10 ounces), broken into pieces
- ¾ cup (1 ½ sticks) cold butter, diced
- ½ cup packed light brown sugar
For the Rich Vanilla Cheesecake Filling:
- 4 (8-ounce) packages cream cheese, softened to room temperature
- 1 ¾ cups granulated sugar
- 3 tablespoons fresh lemon juice
- 1 tablespoon pure vanilla extract
- Pinch of fine salt
- 3 tablespoons all-purpose flour
- 5 large eggs, at room temperature
For the Luxurious Sour Cream Topping & Strawberry Glaze:
- 2 cups sour cream
- 3 tablespoons granulated sugar
- ½ teaspoon pure vanilla extract
- Fresh strawberries, hulled (I recommend about 32 ounces for a generous topping)
- 1 jar (approximately 10-12 ounces) red currant jelly or raspberry jelly (you will not need the whole jar)
Instructions
- Prepare for Baking: Preheat your oven to 350°F (175°C).
- Make the Crust: In a food processor, combine the broken graham crackers, diced cold butter, and brown sugar. Pulse until the mixture forms fine crumbs that just begin to stick together when pressed.
- Form the Crust: Press the graham cracker mixture evenly onto the bottom and most of the way up the sides (about 2 inches high) of a 10-inch springform pan with 3-inch sides.
- Pre-bake the Crust: Bake the crust for 10 minutes. Remove from oven and let it cool on a wire rack while you prepare the filling. Keep the oven on.
- Prepare the Filling Base: Using the paddle attachment of a stand mixer, beat the room temperature cream cheese, 1 ¾ cups sugar, fresh lemon juice, 1 tablespoon vanilla, and a pinch of salt together on medium-low speed until the mixture is very smooth and completely lump-free. Scrape down the sides of the bowl as needed to ensure everything is well combined.
- Add Flour and Eggs: Gently mix in the 3 tablespoons of flour until just combined. Then, add the eggs one at a time, mixing only until each egg is just incorporated before adding the next. Overmixing at this stage can incorporate too much air, which can lead to cracks. Scrape down the sides of the bowl as needed.
- Bake the Cheesecake: Pour the smooth cheesecake batter into the pre-baked and cooled crust. Bake for about 55 minutes. The center of the cheesecake should appear mostly set with a slight jiggle in the very middle (a 1-2 inch circle). The top will likely be puffed and slightly browned in spots.
- Cool and Prepare Topping: Remove the cheesecake from the oven and let it cool on a wire rack for 10 minutes while you prepare the sour cream topping. Keep the oven on.
- Apply Sour Cream Topping: In a small bowl, mix together the 2 cups of sour cream, 3 tablespoons of sugar, and ½ teaspoon of vanilla extract until smooth. Carefully spread this mixture over the top of the partially cooled cheesecake, stopping just short of the edges of the pan.
- Final Bake: Return the cheesecake to the oven and bake for an additional 5 minutes. After this short bake, carefully run a thin knife around the perimeter of the cheesecake (between the cheesecake and the springform pan) to prevent cracking as it cools.
- Chill Thoroughly: Allow the cheesecake to cool completely on a wire rack at room temperature. Once cooled, cover the cheesecake loosely with plastic wrap and refrigerate overnight (at least 8 hours) to allow it to fully set and for flavors to meld beautifully.
- Add Strawberry Topping Before Serving: Before serving, carefully release the sides of the springform pan. Arrange the hulled whole strawberries, pointed sides up, decoratively over the top of the chilled cheesecake.
- Glaze the Strawberries: Gently melt the red currant or raspberry jelly in a microwave-safe bowl (about 30-60 seconds, stirring halfway). Allow it to cool slightly to lukewarm. Using a pastry brush, gently brush the melted jelly over the arranged strawberries to create a beautiful, glossy glaze. The berries can be glazed up to 6 hours before serving. If desired, serve with additional glaze on the side.
Notes
This phenomenal Strawberry Topped Cheesecake recipe is an adaptation inspired by classic techniques from Bon Appétit, ensuring a consistently delicious and impressive result.
Watch the video above for a visual guide on how to create this incredible strawberry cheesecake.
Recommended Products for Perfect Cheesecake Baking
As an Amazon Associate and member of other affiliate programs, I earn from qualifying purchases, which helps support this blog.
- Silicone Spatula
- KitchenAid KSM150PSER Artisan Tilt-Head Stand Mixer with Pouring Shield, 5-Quart, Empire Red
- 10-inch Springform Pan
Nutrition Information:
Yield:
16
Serving Size:
1 slice
Amount Per Serving:
Calories: 566
Total Fat: 37g
Saturated Fat: 21g
Trans Fat: 1g
Unsaturated Fat: 12g
Cholesterol: 155mg
Sodium: 374mg
Carbohydrates: 52g
Fiber: 1g
Sugar: 39g
Protein: 8g
HOW MUCH DID YOU LOVE THIS RECIPE?
Please leave a comment on the blog or share a photo on Pinterest
