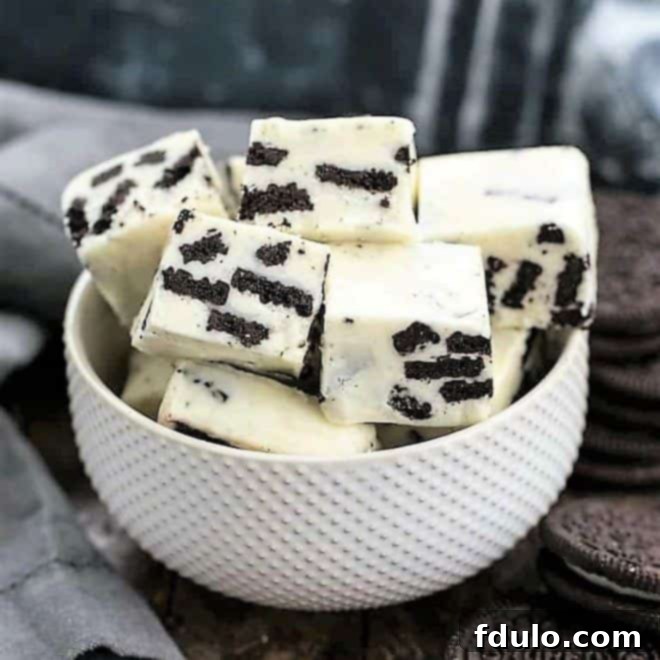
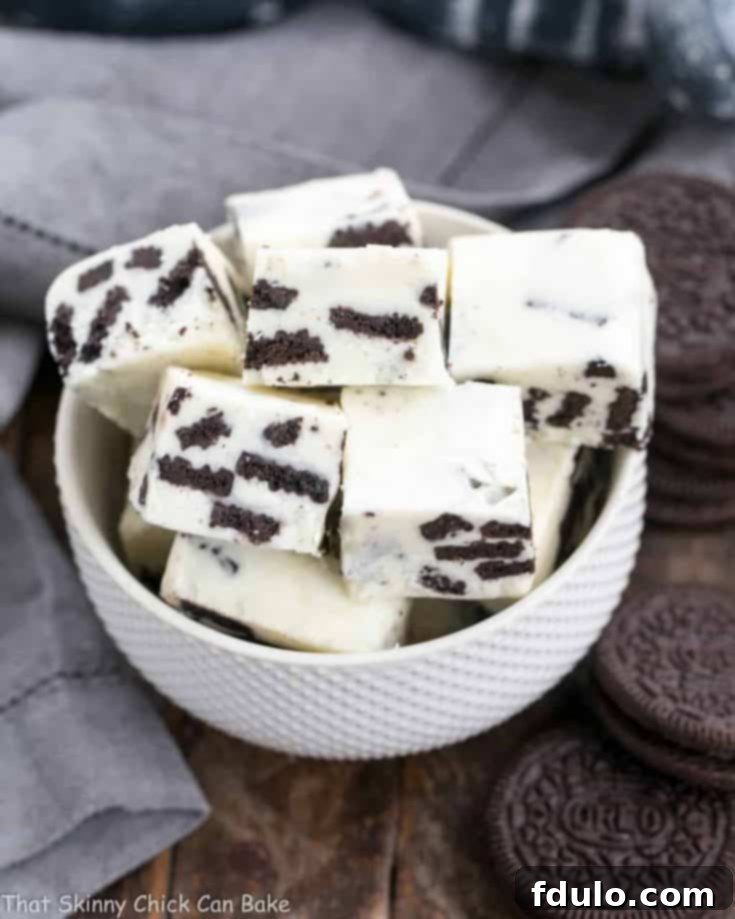
Indulge your sweet tooth with this incredible Oreo White Chocolate Fudge, also affectionately known as Cookies and Cream Fudge! This recipe takes a beloved classic, the “No-Fail Fudge” method, and elevates it to new heights of deliciousness with the creamy sweetness of white chocolate and the delightful crunch of crushed Oreo cookies. It’s an effortlessly simple yet utterly irresistible confection that white chocolate enthusiasts and cookie lovers alike will find absolutely divine.
Whether you’re searching for the perfect homemade treat to share during the holidays, a delightful gift for friends and family, or simply a quick and easy dessert to satisfy a craving, this White Oreo Fudge is your answer. Its rich, velvety texture and iconic flavor profile make it a standout on any dessert platter, perfectly complementing more traditional confections like classic Chocolate Fudge. Get ready to impress with minimal effort and maximum flavor!
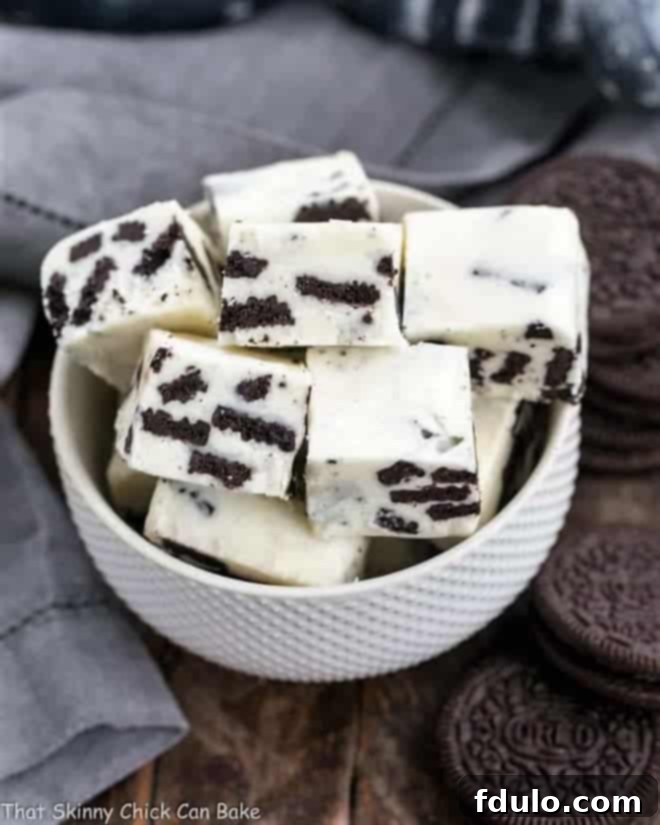
Why You Must Make This Irresistible Oreo Fudge
Around here, my kitchen is known for a few signature sweets. Favorites include my Classic English Toffee, delightful Chewy Gingersnaps, and of course, my perfectly smooth chocolate fudge. While the base for that chocolate fudge is a widely known “no-fail” recipe often found on marshmallow creme jars, I’ve refined it over the years with a few crucial tricks that ensure flawless results every single time. This White Chocolate Oreo Fudge builds on that reliable foundation, bringing a fresh and exciting twist to a classic.
Here’s why this particular Cookies and Cream Fudge recipe deserves a spot in your baking repertoire:
- Effortless Elegance: This recipe is a brilliant variation of the renowned no-fail fudge. Instead of semi-sweet chocolate, we incorporate rich white chocolate, paired with generous chunks of crushed Oreo cookies. The result is a visually stunning and incredibly delicious treat that looks much more complicated to make than it actually is.
- A Family Favorite, Guaranteed: My family absolutely raved about this easy Cookies and Cream Fudge from the very first bite. The combination of sweet white chocolate and crunchy, chocolatey Oreos is universally appealing. I’m confident that this delightful confection will quickly become a cherished favorite in your household as well, disappearing from the plate almost as fast as you can make it!
- Perfect for Any Occasion: Whether you’re looking for an impressive holiday hostess gift, a thoughtful homemade present, or a beautiful addition to a festive sweets tray for friends and neighbors, this fudge fits the bill. Its irresistible flavor and charming appearance make it ideal for celebrations, potlucks, or simply as a special everyday indulgence.
- The “No-Fail” Promise: As the name suggests, this recipe is designed for success. The inclusion of marshmallow creme is the secret weapon that ensures a consistently smooth, creamy texture without the dreaded graininess often associated with homemade fudge. Even novice candy makers can achieve perfect results with confidence.
Key Ingredients for Perfect Oreo White Chocolate Fudge
Crafting exceptional fudge starts with selecting quality ingredients. While the list is simple, understanding the role of each component is vital for achieving that desirable creamy texture and rich flavor. Here’s a closer look at what you’ll need:
- Butter: Essential for richness and flavor. Use unsalted butter for better control over the final saltiness. A good quality butter will contribute significantly to the overall taste and creaminess of your fudge.
- Granulated Sugar: The primary sweetener and structural base of the fudge. It caramelizes slightly during cooking, developing depth of flavor.
- Heavy Cream: This is where the luxurious creaminess comes from. Opt for heavy cream with at least 36% butterfat content. Do not substitute with lighter creams or milk, as they lack the necessary fat content to create the desired rich, smooth consistency.
- Premium White Chocolate: The star of our white chocolate fudge! For the absolute best results, I highly recommend using high-quality white chocolate bars, such as Ghirardelli. Chop them finely to ensure they melt smoothly and evenly into the hot mixture. While white chocolate chips can be used as an alternative, be aware that many brands contain stabilizers that can sometimes prevent them from melting as smoothly as bar chocolate. Choose a reputable brand if using chips. Ensure you are using true white chocolate, not almond bark or confectionery coating, which lack cocoa butter and won’t deliver the same delicious flavor or texture.
- Marshmallow Creme (7-ounce jar): This is the secret ingredient behind the “no-fail” aspect of this fudge. Marshmallow creme, like the popular Jet-Puffed brand, contains gelatin and other stabilizers that are crucial for preventing the sugar from recrystallizing, which often leads to grainy fudge. It guarantees a consistently smooth and wonderfully creamy texture every single time.
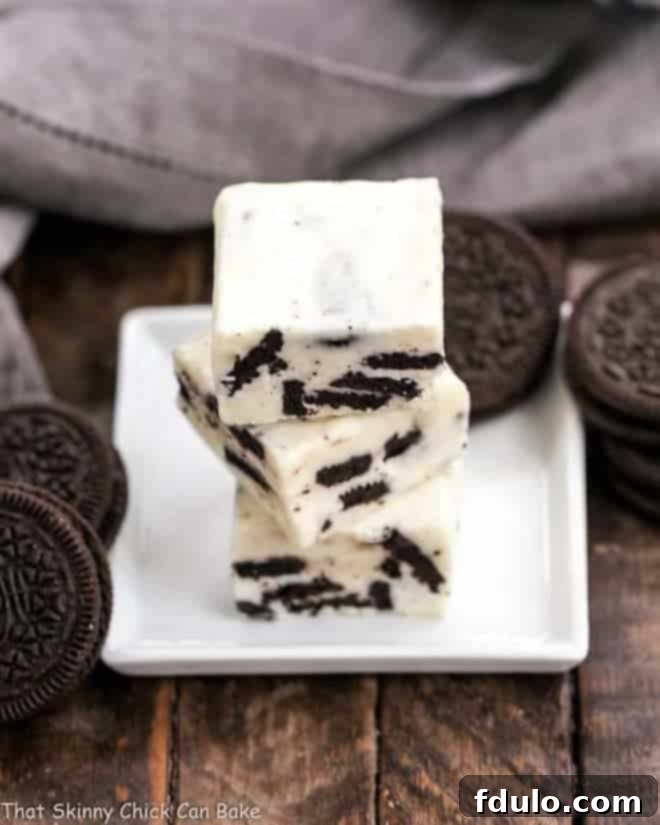
- Oreo Cookies: The iconic cookies and cream element! You’ll want to chop these into bite-sized pieces rather than crushing them too finely. This allows for delightful textural contrast, giving you distinct pockets of cookie crunch within the smooth fudge. Feel free to use double-stuffed Oreos for an extra creamy cookie experience, or even a flavored variety if you’re feeling adventurous (though classic Oreos are highly recommended for the best balance).
Expert Tips for Flawless Cookies and Cream Fudge
While this Oreo White Chocolate Fudge recipe is designed to be incredibly simple and “no-fail,” a few expert tips can elevate your results from good to absolutely perfect. Pay close attention to these techniques, especially if you’re new to candy making.
The Indispensable Candy Thermometer
- Precision is Key: Many traditional fudge recipes instruct you to boil the sugary mixture for a certain amount of time, often around 5 minutes. However, this method can be ambiguous. When exactly does the “5 minutes” begin? When it starts bubbling, or when it reaches a full, rolling boil? This uncertainty is where many fudge attempts go awry.
- Invest in Accuracy: To eliminate guesswork and guarantee perfect fudge every single time, a reliable candy thermometer is your best friend. With this tool, you simply boil the mixture until it reaches precisely 234°F (112°C), which is the “soft ball” stage in candy making. This precise temperature ensures the sugar crystals are perfectly dissolved and the mixture has the right consistency for setting into creamy fudge.
- Beyond Fudge: A candy thermometer isn’t just for fudge! It’s an invaluable kitchen tool that will empower you to confidently make other delightful confections like my famous English Toffee and soft, chewy caramels. It’s also essential for achieving the perfect crispiness when frying chicken or other deep-fried delights, ensuring proper cooking without burning.
Preventing Sugar Crystallization: The Science of Smooth Fudge
- The Lid Trick: As your sugar and cream mixture begins to boil, occasionally placing a lid on the saucepan for about a minute is a clever trick. This creates steam that washes down any sugar crystals clinging to the sides of the pot. These stray crystals, if not melted, can act as “seeds” for recrystallization, leading to grainy fudge. However, don’t leave the lid on for too long, as you need to monitor the temperature carefully with your thermometer.
- The Marshmallow Creme Miracle: If you’re accustomed to old-fashioned fudge recipes without “processed” ingredients, adding marshmallow creme might seem unusual. However, it plays a vital scientific role! The specific composition of marshmallow creme (including corn syrup and gelatin) acts as an interfering agent, preventing the dissolved sugar from re-forming into large, gritty crystals as the fudge cools. This is the absolute key to achieving that incredibly smooth, creamy, and truly “no-fail” texture that sets this fudge apart. Without it, you risk a crumbly or sandy consistency.
Pan Preparation and Setting
- Non-Stick Foil for Easy Release: To make removing your beautiful fudge from the pan an absolute breeze, line your 8×8-inch baking pan with non-stick foil, leaving an overhang on the sides. This creates handles for lifting the cooled fudge out in one piece, ready for cutting. It also significantly simplifies cleanup! If you don’t have non-stick foil, regular foil sprayed thoroughly with cooking spray will work.
- Quick Work After Boiling: Once the fudge mixture reaches 234°F and is removed from the heat, work quickly to incorporate the white chocolate and marshmallow creme. Stir vigorously until everything is completely melted and smoothly combined. Then, swiftly fold in your chopped Oreos and transfer the mixture to the prepared pan. Speed is important here, as the fudge will begin to set as it cools.
- Smooth and Chill: Use an offset spatula or the back of a spoon to gently smooth the top of the fudge in the pan. Avoid overworking it. Allow it to cool completely at room temperature before covering and chilling it in the refrigerator for at least 2-4 hours, or preferably overnight. Proper chilling ensures a firm, sliceable fudge.
- Perfect Cuts: Once thoroughly chilled, lift the fudge out of the pan using the foil handles. Place it on a cutting board. For clean, sharp squares, use a large, sharp chef’s knife. You can warm the knife slightly under hot water and wipe it dry between cuts to prevent sticking and achieve pristine edges.
A Brief History of Fudge
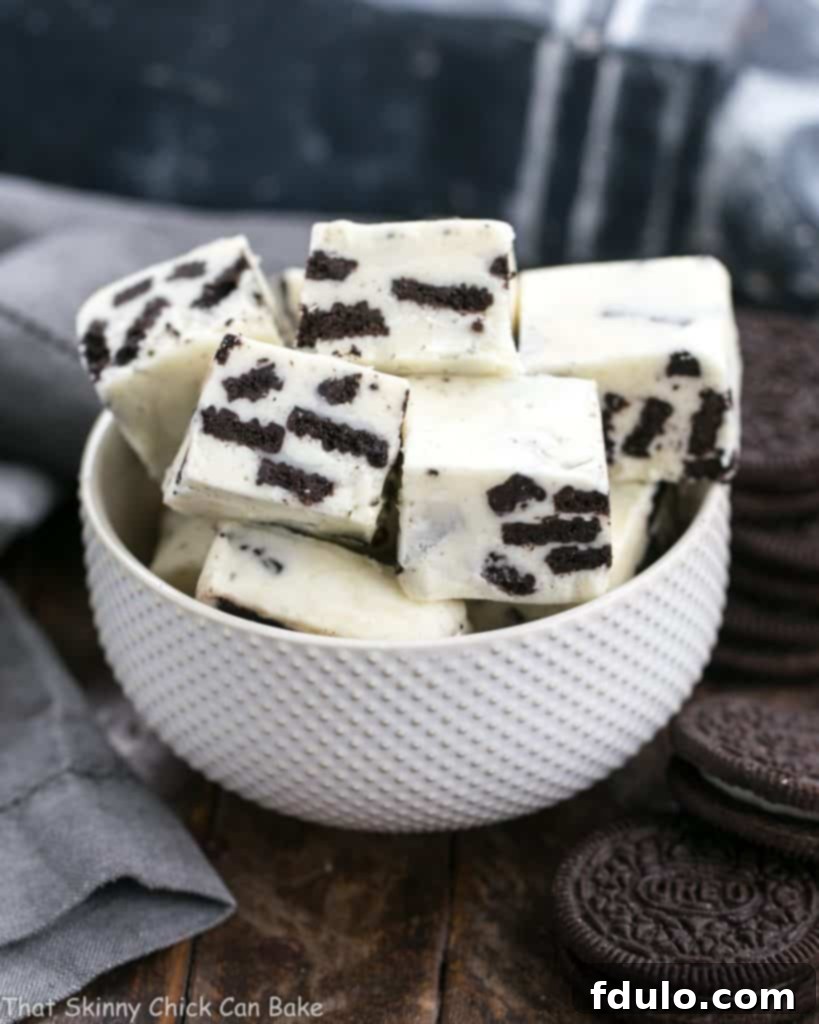
While fudge might seem like an American classic, its exact origins are a bit fuzzy, much like its texture! The first documented batch of fudge is often attributed to a Baltimore, Maryland, student in 1886. She reportedly wrote a letter detailing a batch of “fudge” that had gone “fudged up” from a caramel recipe. This happy accident resulted in a confection that was softer and less chewy than caramel, leading to its unique name and rapid popularity. Fudge quickly spread through women’s colleges across the United States, often shared via handwritten recipes, becoming a staple for homemade treats and confectionery sales.
Over the decades, countless variations emerged, with chocolate remaining the most traditional. However, the versatility of fudge allowed for innovations, leading to delicious creations like peanut butter fudge, maple nut fudge, and, of course, the vibrant world of white chocolate fudge. The “no-fail” method, utilizing marshmallow creme, gained popularity in the mid-20th century, making fudge accessible to even more home cooks by simplifying the complex process of sugar crystallization.
Creative Variations and Customizations
One of the best things about this Oreo White Chocolate Fudge is its adaptability. Once you master the basic “no-fail” technique, you can easily experiment with different flavors and mix-ins to create your own unique fudge creations. Here are a few ideas to get you started:
- Different Cookies: While Oreos are classic, don’t be afraid to switch them up! Try golden Oreos, Nutter Butters, graham crackers, shortbread cookies, or even speculoos cookies for a different flavor profile. Just chop them into similar bite-sized pieces.
- Add Nuts: Toasted pecans, walnuts, or almonds would add another layer of crunch and nutty flavor, complementing the white chocolate beautifully. Fold them in alongside the Oreos.
- Sprinkles for Festivities: For holiday-themed fudge, stir in some festive sprinkles with the Oreos. Red and green for Christmas, pastels for Easter, or red, white, and blue for patriotic celebrations.
- Extracts for Flavor: A teaspoon of peppermint extract could transform this into a delightful mint Oreo fudge. Almond extract or a touch of vanilla bean paste can also enhance the overall flavor profile. Add extracts when you add the white chocolate and marshmallow creme.
- Drizzle and Decorate: Once the fudge is set, melt a small amount of dark chocolate and drizzle it over the top for a beautiful contrast. You could also sprinkle a few whole mini Oreos or extra crushed cookies on top before chilling for a decorative finish.
Serving and Gifting Your Homemade Fudge
This Oreo White Chocolate Fudge is a treat that’s perfect for a multitude of occasions. Here are some ideas for serving and gifting:
- Holiday Dessert Platters: A vibrant addition to any holiday cookie or dessert tray. Its white color stands out beautifully amongst darker chocolate treats.
- Gourmet Gift Boxes: Cut into squares, arrange in pretty boxes or tins, and tie with a festive ribbon. Homemade fudge makes an incredibly thoughtful and appreciated gift for teachers, neighbors, co-workers, or as a host/hostess gift.
- Coffee or Tea Companion: Pair a small square of fudge with a warm cup of coffee, tea, or even a glass of milk for a delightful afternoon indulgence.
- Birthday or Special Occasion Treat: While often associated with holidays, this fudge is a crowd-pleaser year-round. Bring it to a potluck or serve it as a simple, elegant dessert after dinner.
- Ice Cream Topping: Roughly chop chilled fudge and sprinkle it over vanilla ice cream for an ultimate cookies and cream sundae experience.
Troubleshooting Common Fudge Problems
Even with a “no-fail” recipe, sometimes things can go slightly awry. Here’s a quick guide to common fudge issues and how to prevent or fix them:
- Grainy Fudge: This is the most common problem and almost always due to sugar crystallization. Ensure all sugar crystals on the sides of the pan are washed down (the lid trick helps!), and avoid stirring the mixture vigorously once it begins to boil and before it reaches temperature. The marshmallow creme is your primary defense against this.
- Fudge Too Soft or Doesn’t Set: This usually means the fudge wasn’t cooked to a high enough temperature. If your candy thermometer wasn’t accurate or you removed the mixture from heat too soon, it won’t reach the “soft ball” stage required for setting. Unfortunately, it’s hard to fix once it’s cooled, but ensure your thermometer is calibrated next time.
- Fudge Too Hard or Crumbly: Conversely, if your fudge is too hard, it was likely cooked to too high a temperature. Overcooking causes too much moisture to evaporate, resulting in a firm, crumbly texture. Again, an accurate candy thermometer is crucial to hit that precise 234°F.
- Oil Separating: Sometimes, you might see a layer of oil on top. This can happen if the fudge cools too slowly or if the ingredients weren’t fully emulsified. Ensure you stir thoroughly after adding the white chocolate and marshmallow creme, and chill promptly.
Frequently Asked Questions About Oreo White Chocolate Fudge
“No-Fail Fudge” refers to a category of easy fudge recipes that ingeniously incorporate marshmallow creme or marshmallow fluff. This key ingredient contains properties that prevent the sugar from recrystallizing as the fudge cools, ensuring a consistently smooth, creamy, and wonderfully soft texture every time, even for novice candy makers. It’s designed to minimize common fudge-making pitfalls.
No, it is highly recommended that you do not use almond bark or other confectionery coatings as a substitute for real white chocolate. Almond bark is a product made with vegetable fats and artificial flavorings; it does not contain cocoa butter, which is essential to the rich flavor and smooth melt of genuine white chocolate. Using almond bark will result in a fudge that lacks the authentic taste and luxurious texture you expect from a premium white chocolate fudge.
To maintain its freshness and creamy texture, store your fudge in an airtight container at room temperature for up to a week. For longer storage, you can keep it in the refrigerator for up to 2-3 weeks. If refrigerating, allow it to come to room temperature for about 15-20 minutes before serving for the best flavor and texture.
Yes, fudge freezes beautifully! Wrap individual squares or small blocks tightly in plastic wrap, then place them in an airtight freezer-safe container or bag. It can be frozen for up to 3 months. Thaw frozen fudge in the refrigerator overnight, then bring it to room temperature before serving.
For perfectly neat squares, ensure your fudge is thoroughly chilled. Use a large, sharp knife, warming it under hot water and drying it between each cut. This prevents the fudge from sticking to the blade and gives you clean, professional-looking edges.
Discover More Delicious Recipes
If you loved this Oreo White Chocolate Fudge, you might enjoy exploring some of my other popular creations and collections. These recipes are perfect for expanding your dessert repertoire or finding inspiration for your next culinary adventure:
- Raspberry and Chocolate Sparkling Rose Cocktail from Creative Culinary – A sophisticated treat.
- 30+ Amazing Valentine’s Day Recipes – Find the perfect romantic dessert or sweet gesture.
- White Chocolate Popcorn – Another easy and addictive white chocolate snack.
- Double Decker Oreo Fudge – For those who can’t get enough Oreo goodness!
- For even more delightful ideas, make sure to check out my Delectable Desserts and Holiday and Seasonal Recipes Pin Boards on Pinterest. You’ll find a wealth of inspiration for every occasion, including more Valentine’s Day treats!
Stay connected and share your culinary creations with me on social media! Find me @ Instagram, Facebook, and Pinterest. Don’t forget to tag me when you whip up one of my recipes! Your feedback is invaluable, and if you love the results, please consider leaving a 5-star rating in the recipe card below – it truly helps!
The Recipe:
Oreo White Chocolate Fudge Recipe
5 minutes
7 minutes
12 minutes
64 squares
Oreo White Chocolate Fudge AKA Cookies and Cream Fudge takes the classic No-Fail Fudge recipe in a new delicious direction!
Ingredients
- ½ cup butter (1 stick)
- ½ cup heavy cream
- 1 cup sugar
- 14 ounces white chocolate, chopped
- 1 jar marshmallow creme (7 ounces)
- 20 Oreos, chopped into bite sized pieces
Instructions
- Line an 8 x 8-inch baking pan with non-stick foil. Set aside.
- Melt the butter in a medium saucepan. Add sugar and heavy cream and stir to combine. Heat until it’s almost ready to boil, then put the lid on for about a minute to help the sugar melt.
- Remove the lid, stir and insert a candy thermometer. Let boil, stirring occasionally until the thermometer reaches 234º.
- Remove from heat and mix in the chopped white chocolate and marshmallow creme, stirring until chocolate is melted and marshmallow cream is incorporated.
- Quickly add chopped Oreos, then carefully scrape the hot mixture into your prepared pan.
- Smooth the top with an offset spatula, then let cool to room temperature. Place in refrigerator, covered to chill before cutting.
- Cut into squares to serve.
Notes
If you can’t find white chocolate bars, you can use white chocolate chips. Do not use almond bark as the results won’t be as tasty.
Recommended Products
As an Amazon Associate and member of other affiliate programs, I earn from qualifying purchases.
- Deep Frying Thermometer
- Nonstick Foil
- 8 x 8-inch Baking Pan
Nutrition Information:
Yield: 64
Serving Size: 1
Amount Per Serving:
Calories: 85
Total Fat: 5g
Saturated Fat: 3g
Trans Fat: 0g
Unsaturated Fat: 2g
Cholesterol: 7mg
Sodium: 35mg
Carbohydrates: 10g
Fiber: 0g
Sugar: 9g
Protein: 1g
HOW MUCH DID YOU LOVE THIS RECIPE?
Please leave a comment on the blog or share a photo on Pinterest
