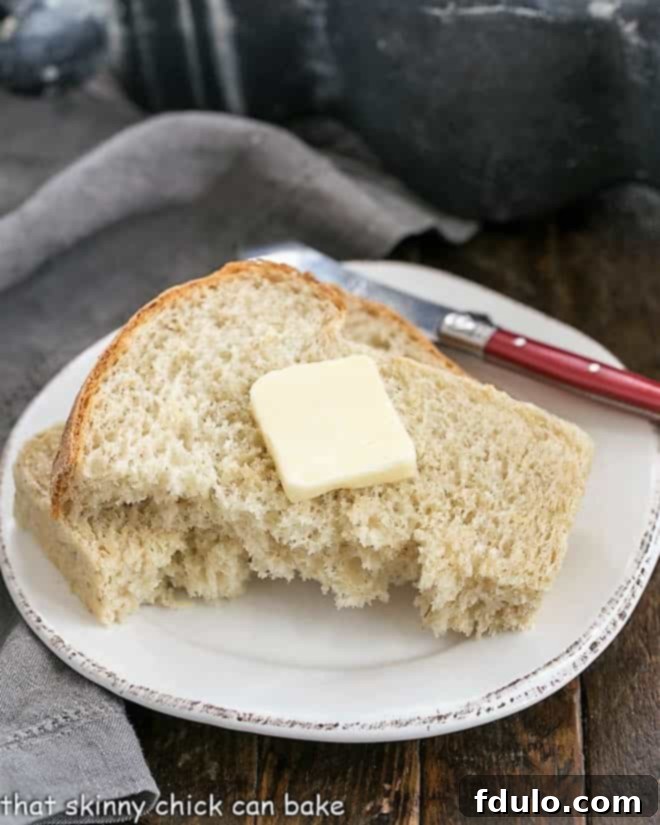
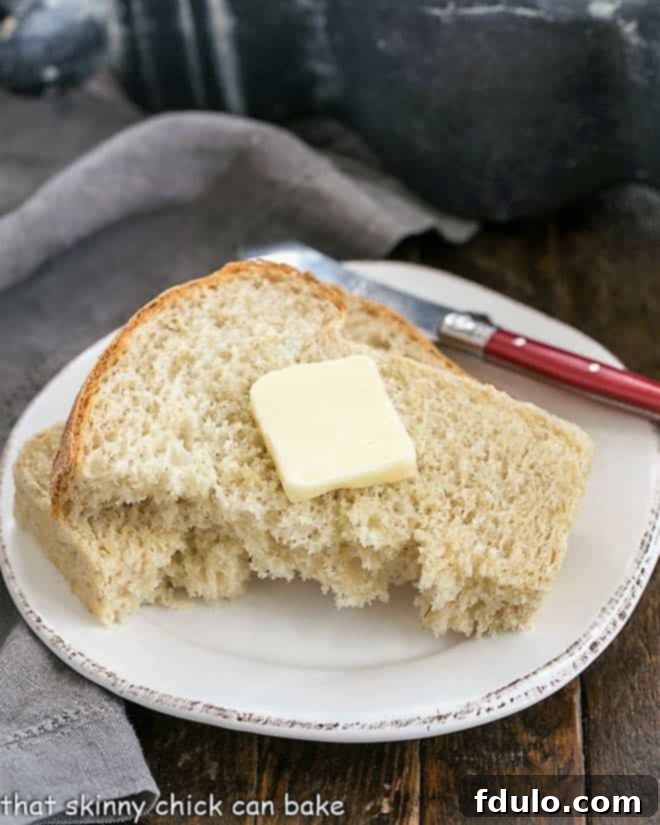
Few aromas evoke a sense of home and comfort quite like a freshly baked loaf of bread. This Classic Oatmeal Bread recipe transports me straight back to childhood, conjuring vivid memories of my mom pulling a warm loaf from the oven. The simple joy of slathering cold, creamy butter onto a still-steaming slice of this hearty oat bread is an experience that truly awakens the inner child. Prepare to fill your kitchen with an irresistible scent and your heart with nostalgic warmth with this incredibly comforting and utterly delicious homemade yeast bread recipe.
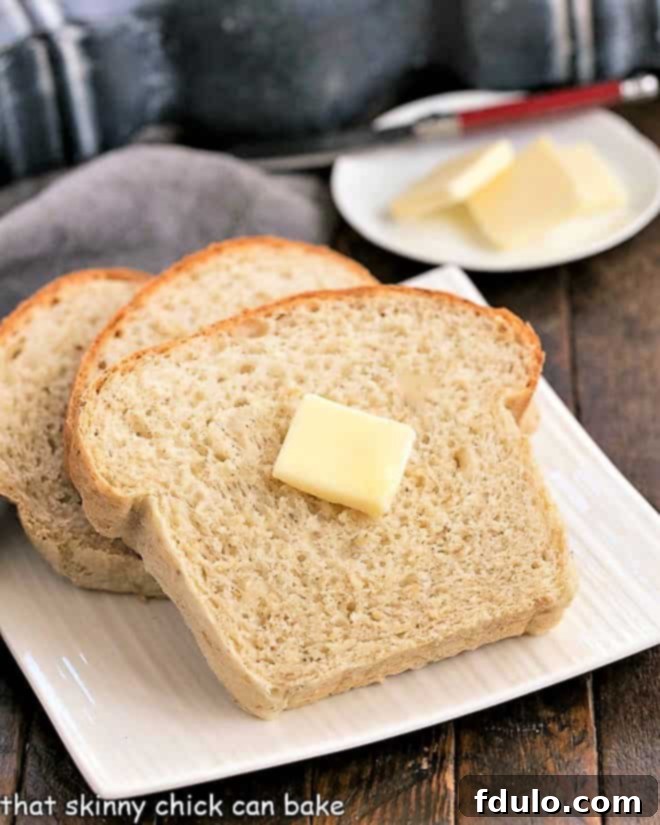
Why This Classic Oatmeal Bread Recipe Belongs in Your Kitchen
There’s a profound satisfaction that comes from baking bread from scratch, and this particular oatmeal bread recipe delivers on all fronts. It’s more than just food; it’s an experience, a tradition, and a simple pleasure everyone deserves. Here’s why this recipe stands out:
- Authored by a Baking Maestro: This cherished recipe is an adaptation from one of the culinary world’s most respected bakers, Nick Malgieri. His expertise and meticulous instructions guarantee exceptional results, making it accessible even for novice bread makers. Trust in Malgieri’s guidance, and you’ll be rewarded with a perfect loaf every time.
- The Unrivaled Joy of Homemade: Nothing compares to the experience of sharing a warm, fragrant loaf of homemade bread with loved ones. The scent filling your home, the anticipation of that first bite, and the shared pleasure around the table create lasting memories. This bread isn’t just a meal; it’s an invitation to gather and savor.
- A Symphony of Flavor and Texture: This isn’t just any plain loaf. The subtle inclusion of brown sugar infuses this yeast bread with a delightful, mellow sweetness that perfectly complements the hearty, wholesome texture provided by the oats. It’s soft, tender, and incredibly satisfying, striking a perfect balance between rustic and refined.
My earliest memories of breadmaking revolve around my mother’s legendary oatmeal bread. While the precise details of her secret recipe remain a mystery, the sensation of eating it, fresh from the oven, adorned with generous dollops of cool, creamy butter, is etched in my mind. That striking contrast of hot bread and cold butter—perhaps that was her true secret! It’s a combination I still adore to this day. When I decided to recreate that cherished taste, I instinctively turned to a trusted baking authority, Nick Malgieri, for inspiration. His methodical approach to baking is exactly what I needed to perfect this classic.
Malgieri’s seminal work, How to Bake, has been an indispensable resource in my kitchen, guiding me through masterpieces like my favorite cheesecake and apple pie, and now, this ultimate oatmeal bread recipe. As a budding baker, his unparalleled attention to detail and clear, comprehensive instructions were priceless. Over the years, I’ve experimented with various oatmeal bread recipes, but none have captured the delicate balance of softness, sweetness, and tender crumb quite like this one. It truly is the definitive oat bread.
Essential Ingredients for Your Perfect Oat Bread
Crafting this delightful Classic Oatmeal Bread begins with selecting the right ingredients. While it’s a relatively basic yeast bread recipe, each component plays a crucial role in achieving that perfect taste and texture.
- Rolled Oats: Opt for old-fashioned rolled oats, not quick oats. Old-fashioned oats retain more of their texture, providing a pleasant chewiness and hearty structure to the bread. Quick oats, being more finely processed, tend to break down too much, potentially resulting in a gummy texture.
- Active Dry Yeast: You’ll need one envelope of active dry yeast. I highly recommend using a reputable brand like Red Star Yeast, known for its consistent quality and reliability. Ensure your yeast is fresh and within its expiration date for optimal activation.
- All-purpose, Unbleached Flour: For the best results, use an unbleached all-purpose flour. Brands like King Arthur are excellent choices, as they provide a consistent protein content crucial for developing the right gluten structure in your bread, contributing to its soft and tender crumb.
- Table Salt: Never be tempted to omit salt from your bread recipe. Salt is a fundamental flavor enhancer, bringing out the subtle sweetness of the brown sugar and the nutty notes of the oats. Without it, your bread will taste bland and flat. Moreover, salt plays a vital role in controlling yeast activity and strengthening the gluten network.
Mastering Your Homemade Oatmeal Bread: Expert Tips
Baking bread is a delightful blend of science and art. These expert tips will help you navigate the process with confidence, ensuring your Classic Oatmeal Bread turns out perfectly every time.
- PRO-Tip: The Science of Yeast Activation: Yeast is a living organism, and its activity is highly sensitive to temperature. If your water is too hot (above 120ºF/49ºC), you risk killing the yeast, preventing your dough from rising. If it’s too cold, the yeast won’t activate properly, leading to a sluggish or non-existent rise. Always use a reliable kitchen thermometer to ensure your warm water is between 110ºF (43ºC) and 120ºF (49ºC) – the sweet spot for yeast activation.
- Check Your Yeast’s Vitality: Before you even start, always check the expiration date on your yeast packet. Expired yeast will not activate, leading to a dense, unrisen loaf. If in doubt, perform a quick proofing test by dissolving a small amount of yeast in warm water with a pinch of sugar; if it doesn’t foam within 5-10 minutes, it’s time for a fresh batch.
- Kneading for Perfection with a Stand Mixer: A stand mixer fitted with a dough hook is an invaluable tool for bread making, making the kneading process effortless. However, it’s crucial to monitor your mixer. Extended kneading can cause the motor to overheat, potentially damaging your appliance and affecting the dough. If the mixer feels excessively hot, turn it off immediately and allow it to cool down. You may need to finish kneading by hand, ensuring the dough reaches the desired smooth and elastic consistency.
- The Ideal Environment for Rising (Proofing): For a consistent and beautiful rise, your dough needs a warm, draft-free environment. After kneading, place the dough in a greased bowl, flipping it once or twice to coat all surfaces, then cover it snugly with greased plastic wrap.
- PRO-Tip: Temperature Control for Optimal Rise: An ideal temperature for proofing is typically between 80-85ºF (27-30ºC). You can create this by placing the covered bowl in a slightly warm, turned-off oven with just the oven light on, or in a warm spot in your kitchen away from drafts. Forcing the dough to rise in an environment that is too hot (e.g., direct sunlight or an oven set too high) can lead to an over-proofed dough with a coarse texture and an unpleasant yeasty flavor. Patience is key!
- Shaping Your Loaf Like a Pro: Proper shaping is crucial for a well-structured loaf. After the first rise, gently deflate the dough on a lightly floured surface. Flatten it into a rectangle, slightly longer than your loaf pan. Fold the shorter sides inward so the dough is just shy of the pan’s length, then roll it tightly from one long side to the other to form a smooth, uniform cylinder. This technique helps create an even crumb and prevents large air pockets. If the dough seems reluctant to seal, a tiny dab of water along the seam will help it adhere.
- Customizing Your Oat Bread: While I adore this bread plain with butter, feel free to get creative! Incorporate a handful of raisins, dried cranberries, chopped dried apricots, or even a sprinkle of chopped walnuts or pecans into the dough during the final stages of kneading. For a delightful twist, sprinkle the flattened dough with a cinnamon-sugar mixture before rolling and shaping it into a loaf to create a delectable cinnamon oatmeal bread.
- The Simple Pleasure: Despite the endless possibilities for customization, there’s an undeniable charm in enjoying this bread in its purest form. For me, nothing beats a warm slice, simple and rustic, with a generous smear of good quality, salted butter.
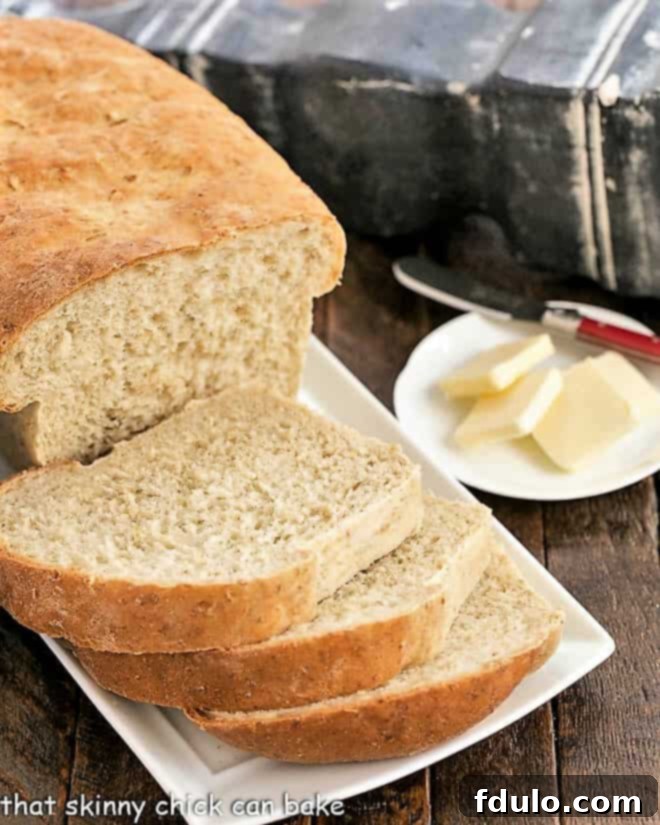
Frequently Asked Questions About Classic Oatmeal Bread
While no bread is a “superfood,” oatmeal bread certainly offers a nutritional advantage over highly refined white bread. Oats are a fantastic source of dietary fiber, particularly soluble fiber, which is known for its heart-healthy benefits and ability to help regulate blood sugar levels. They also contribute essential minerals like magnesium, iron, and zinc, along with important B vitamins like B1 (thiamine). So, while it’s a more nutritious choice than standard white bread, it’s still best enjoyed as part of a balanced diet.
There are a couple of effective methods. If your dough has been properly kneaded and is slightly sticky, sprinkling oats directly onto the surface before the second rise or just before baking might be sufficient for them to adhere. For a more secure coating and a prettier crust, lightly brush the top of the shaped loaf with water or milk. Water will create a crispier crust, while milk (due to its sugar content) will result in a slightly darker, glossier crust. Once brushed, sprinkle generously with rolled oats for a beautiful, textured finish.
Absolutely! The oats impart a wonderfully mild, earthy, and nutty flavor that beautifully complements the slight sweetness from the brown sugar. It’s not an overwhelming “oatmeal” taste, but rather a subtle depth that distinguishes it from plain white or whole wheat breads. This nutty undertone is a key part of what makes this bread so comforting and satisfying.
To keep your freshly baked oatmeal bread at its best, store it at room temperature in an airtight plastic bag or container for up to 2 days. For longer preservation, freezing is an excellent option. Ensure the loaf is completely cooled to room temperature before freezing to prevent ice crystals from forming (which causes freezer burn). Wrap the loaf tightly in plastic wrap, then an additional layer of aluminum foil or place it in a freezer-safe bag. It will keep well in the freezer for 2-3 months. To enjoy, simply thaw at room temperature or gently warm slices in a toaster or oven.
Explore More Delicious Bread Recipes
If you’ve enjoyed baking and savoring this Classic Oatmeal Bread, we invite you to delve deeper into the world of homemade bread. Here are some other fantastic recipes from our kitchen and fellow bakers that you’re sure to love:
- Basic White Bread from Magnolia Days – A fundamental recipe for every home baker.
- Grandmom’s Dinner Rolls from One Sweet Mess – Soft and fluffy, perfect for any meal.
- Rosemary Olive Oil Bread from Hip Foodie Mom – A fragrant and savory delight.
- Homemade Potato Bread – Incredibly tender and rich in flavor.
- No-Knead Bread Recipe – Effortless baking for impressive results.
- Cinnamon Twist Bread – A sweet, swirled treat perfect for breakfast or dessert.
- Plus, discover many more of the Best Bread Recipes in our comprehensive collection!
Stay connected and share your baking journey with us! Follow @thatskinnychickcanbake on Instagram, Facebook, and Pinterest. Don’t forget to tag me when you try one of my delicious recipes! If you’re delighted with your results, please consider leaving a 5-star rating in the recipe card below – your feedback means the world to me!
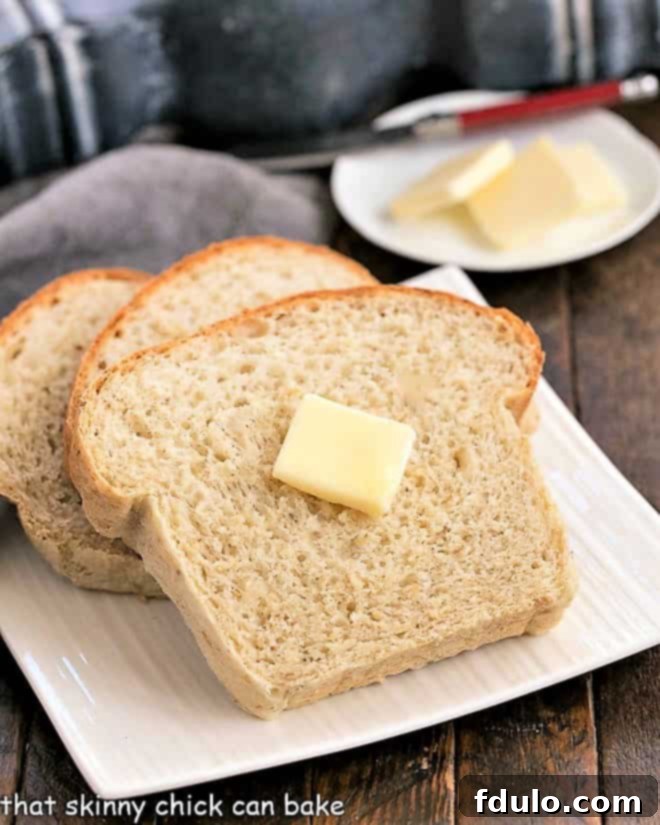
Classic Oatmeal Bread
20 minutes
40 minutes
1 hour
16 servings
A truly marvelous oatmeal bread, lovingly adapted from Nick Malgieri’s renowned “How to Bake” cookbook. This recipe yields a soft, subtly sweet, and wonderfully hearty loaf, perfect for any occasion.
Ingredients
- 1 cup old-fashioned rolled oats (ensure not quick oats)
- 1 cup boiling water
- ½ cup warm water (approx. 110ºF / 43ºC)
- 2 ¼ teaspoons active dry yeast (one standard envelope)
- 2 ½ cups unbleached all-purpose flour
- 2 tablespoons light brown sugar, packed
- 1 teaspoon fine table salt
- 2 tablespoons unsalted butter, cut into about 12 small pieces, plus extra for greasing the bowl and loaf pan
Instructions
- Begin by thoroughly greasing an 8 ½ x 4 ¼ inch loaf pan with butter. Set it aside.
- In a medium heatproof bowl, pour the boiling water over the rolled oats. Stir well to combine, then set aside to cool completely to room temperature. This step allows the oats to soften and absorb moisture.
- In a small bowl, combine the warm water and yeast. Stir gently to dissolve the yeast, then let it sit for 5-10 minutes until foamy. This indicates the yeast is active.
- In the bowl of a stand mixer, combine the flour, brown sugar, and salt. Stir these dry ingredients together briefly to ensure even distribution.
- Attach the dough hook to your stand mixer. Add the cooled oatmeal mixture, the activated yeast mixture, and the butter pieces to the flour mixture. Knead the dough on low speed for about 5 minutes, or until it becomes smooth, elastic, and pulls away cleanly from the sides of the bowl.
- Transfer the kneaded dough to a lightly greased large bowl. Flip the dough a couple of times to coat all sides with butter. Cover the bowl tightly with greased plastic wrap. Allow the dough to rise in a warm, draft-free place (ideally 80-85ºF / 27-30ºC) until it has doubled in bulk, which typically takes about one hour.
- Once risen, gently remove the dough from the bowl and place it on a lightly floured work surface. Using the palm of your hand, gently deflate the dough to release the air.
- Shape the dough into a rectangle that is slightly longer than the length of your prepared loaf pan. Fold the shorter sides of the rectangle inward so the dough’s length is just a bit less than that of the pan. Then, tightly roll the dough from one long side to the other, forming a uniform cylinder.
- The dough should naturally stick to itself to seal the seam. If it doesn’t, you may dab a very small amount of water along the seam to help it adhere firmly.
- Carefully place the cylinder of dough, seam side down, into the prepared loaf pan.
- Cover the loaf pan with greased plastic wrap and let the dough rise again in a warm, draft-free spot until it has doubled in size, which will take approximately an hour.
- About 20 minutes before the end of the second rise, preheat your oven to 375ºF (190ºC).
- Once the dough has doubled, carefully remove the plastic wrap from the risen loaf and place the pan into the preheated oven.
- Immediately decrease the oven temperature to 350ºF (175ºC). Bake for 30-40 minutes, or until the loaf is a rich golden brown, sounds hollow when tapped on the bottom, and/or its internal temperature reaches 210ºF (99ºC) with an instant-read thermometer.
- Remove the baked loaf from the pan immediately and transfer it to a wire cooling rack. Allow it to cool completely before slicing to ensure the best texture and flavor.
Notes
This recipe yields one generously sized, tender, and incredibly flavorful loaf of Classic Oatmeal Bread.
Recommended Baking Tools
As an Amazon Associate and member of other affiliate programs, I earn from qualifying purchases, helping support this site at no extra cost to you.
- KitchenAid Artisan Stand Mixer, 5-Quart
- Roul’Pat Silicone Counter Mat
- Stainless Steel Loaf Pan
Nutrition Information:
Yield:
16
Serving Size:
1 slice
Amount Per Serving:
Calories: 101Total Fat: 2gSaturated Fat: 1gTrans Fat: 0gUnsaturated Fat: 1gCholesterol: 4mgSodium: 146mgCarbohydrates: 18gFiber: 1gSugar: 1gProtein: 3g
HOW MUCH DID YOU LOVE THIS RECIPE?
Please leave a comment on the blog or share a photo on Pinterest
