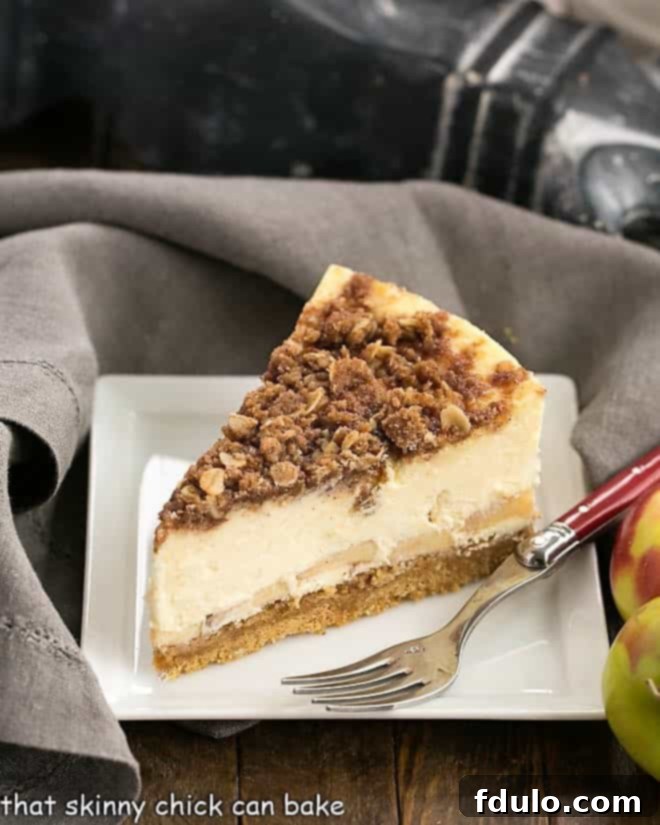
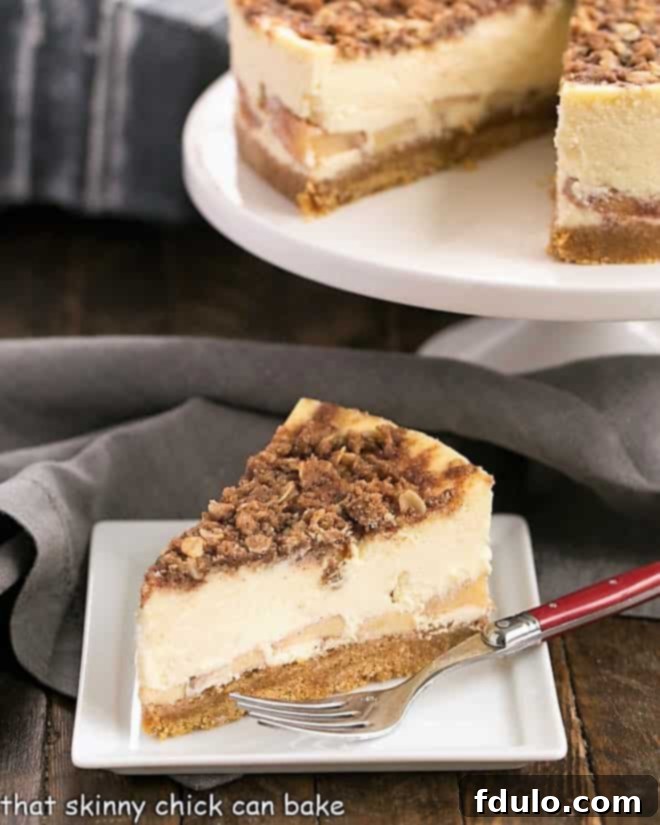
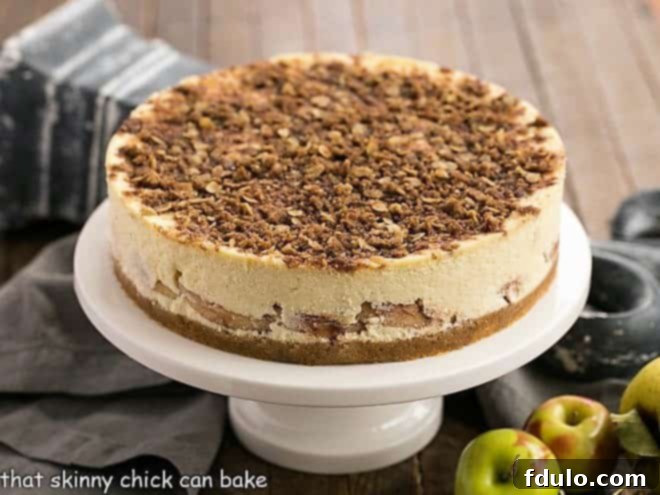
Experience the ultimate fusion of two beloved desserts with this incredible Apple Crisp Cheesecake! This show-stopping treat effortlessly marries the creamy richness of cheesecake with the comforting, spiced fruitiness of an apple crisp, all topped with a delightful oat streusel. At our recent holiday gathering, this dessert was such a resounding success that two guests eagerly requested extra slices to take home – a true testament to its irresistible charm and flavor. Get ready to impress your family and friends with a dessert that’s not just delicious, but truly unforgettable.
Our home was filled with laughter and cheer as we hosted twenty of our cherished neighbors for a festive holiday appetizer party. While each couple contributed a savory dish, I couldn’t resist adding a couple of homemade desserts to the spread. This autumnal Apple Crisp Cheesecake quickly became the star, perfectly complementing my rich la bete noire, a decadent flourless chocolate cake. Both were absolute hits, but the apple crisp cheesecake received particularly enthusiastic praise, solidifying its place as a new seasonal favorite.

Why This Apple Crisp Cheesecake is an Absolute Must-Make
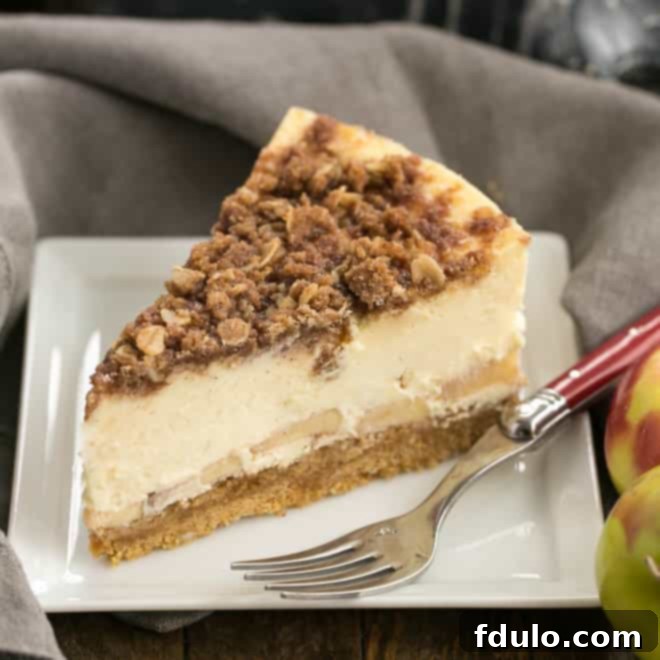
From the moment my knife effortlessly glided through this magnificent creation, revealing its perfectly set layers, I knew this apple crisp cheesecake was a winner. It’s more than just a dessert; it’s an experience that brings together the best of fall flavors and classic indulgence. Here’s why this recipe deserves a permanent spot in your baking repertoire:
- **Unparalleled Texture and Flavor:** The cheesecake layer is incredibly creamy and smooth, offering a luxurious contrast to the perfectly cooked, cinnamon-spiced apples nestled beneath. Every bite is a harmonious blend of velvety, tender, and subtly tangy notes.
- **Streusel Fanatic Approved:** As someone who adores a good streusel, I can confidently say the oat crumb topping on this cheesecake is pure perfection. It adds a delightful crunch and buttery sweetness that elevates the entire dessert, making it truly irresistible.
- **The Ideal Seasonal Dessert:** This cheesecake is the quintessential dessert for fall gatherings, Thanksgiving feasts, or any occasion when you crave comforting, warm flavors. Its inviting aroma and beautiful presentation make it a centerpiece worth celebrating.
- **A Crowd-Pleaser Guaranteed:** This recipe consistently earns rave reviews from everyone who tries it. Its unique combination of classic flavors in a fresh format makes it appealing to both cheesecake lovers and apple crisp enthusiasts alike, ensuring there’s something for everyone to adore.
- **Combines Two Favorites into One:** Why choose between apple crisp and cheesecake when you can have both? This recipe brilliantly merges the best elements of each, offering a truly unique and deeply satisfying dessert experience that stands out from the ordinary.
And speaking of party guests, it’s worth noting that my husband and I have been residents of this wonderful neighborhood for nearly three decades. Over the years, I’ve come to know everyone’s favorite indulgences. The resident cheesecake connoisseur and the biggest chocoholic (who usually rivals my husband for that title!) were both in attendance. Their requests for extra slices weren’t just polite gestures; they were genuine compliments that spoke volumes about the dessert’s deliciousness. Even if they hadn’t asked, I would have insisted they take some home!

Mastering the Art of Cheesecake: Expert Tips for Success
Cheesecakes are a labor of love, and over the years, I’ve gathered a wealth of knowledge and developed several techniques to ensure a perfectly smooth, creamy, and crack-free dessert every time. These insights, combined with specific considerations for this apple crisp cheesecake, will guide you towards baking perfection. For an even deeper dive into cheesecake mastery, I highly recommend exploring my comprehensive guide on How to Make a Cheesecake.
- PRO-Tip: Room Temperature Ingredients are Key: This is arguably the most crucial tip for any cheesecake recipe. Ensure all your cold ingredients, especially cream cheese and eggs, are at room temperature. This allows them to blend smoothly and evenly, preventing lumps and ensuring a beautifully satiny texture in your final cheesecake. Cold ingredients will result in a lumpy batter and a less uniform bake.
- Speed Up the Egg Warming Process: If you’re short on time and your eggs are straight from the refrigerator, simply place them in a bowl of very warm (but not boiling) water for about 10-15 minutes. The goal is to remove the chill, not to cook them. This gentle warming helps them incorporate seamlessly into the batter.
- PRO-Tip: Use a Paddle Attachment for Mixing: When preparing the cheesecake filling, always opt for the paddle attachment on your stand mixer (or use a hand mixer on low speed). Avoid the whisk attachment, which incorporates too much air into the batter. Excessive air can lead to cracks on the surface of your cheesecake as it bakes and then cools. The paddle attachment gently combines the ingredients, ensuring a dense, creamy, and smooth consistency.
- Embrace the Water Bath (Bain-Marie) for Even Baking: Baking your cheesecake in a bain-marie, or water bath, is a secret weapon against cracks. The water bath provides a gentle, consistent heat around the cheesecake, preventing the edges from baking faster than the center. It also creates a steamy environment, which helps keep the cheesecake moist and minimizes the risk of cracking on the surface. While not always strictly necessary, especially with a topping, it’s a best practice for a flawless finish.
- PRO-Tip: Protect Your Crust with Heavy-Duty Foil: When using a water bath with a springform pan, it’s essential to meticulously wrap the bottom and sides of the pan with several layers of heavy-duty aluminum foil. This creates a barrier, preventing any water from seeping into the pan and turning your delicate graham cracker crust soggy. A soggy crust can ruin the entire texture of your cheesecake.
- Patience is a Virtue: Chill Your Cheesecake Overnight: For the best texture, flavor, and ease of slicing, chill your apple crisp cheesecake overnight (at least 8 hours) before serving. This allows the cheesecake to firm up completely, enhancing its creamy consistency and ensuring clean, beautiful slices. Resist the urge to cut into it too soon!
- Choosing the Right Apples Matters: For this particular apple crisp cheesecake, selecting the correct apple variety is crucial for perfect results. I recommend using an apple like Golden Delicious, which softens beautifully during baking without turning to mush. Avoid very firm apples like Granny Smiths, which might remain too crunchy even after the cheesecake is fully baked. The goal is to have tender, flavorful apples that complement the creamy cheesecake layer, ensuring neither element is under or overcooked. Golden Delicious apples will soften more quickly than denser baking apples, preventing your cheesecake from being overbaked while waiting for the apples to become tender.
This amazing apple crisp cheesecake is an absolute must-add to your fall baking list. Its rich flavors and comforting profile make it an ideal dessert for autumn celebrations. However, its delicious indulgence is truly welcome any time of year you desire a truly special treat!

Frequently Asked Questions About Apple Crisp Cheesecake
What Apples are Best for Baking this Cheesecake?
While many apple varieties are excellent for baking, the best choice often depends on the specific recipe. For pies, a mix of apples can provide a complex flavor profile. However, for this apple crisp cheesecake, the key is to ensure the apples are perfectly cooked and tender by the time the cheesecake is done. This is why a softer apple like Golden Delicious works wonderfully. It breaks down slightly, creating a smooth, spiced apple layer without being undercooked or too firm. Firmer apples might require a pre-cook step, which we aim to avoid here for simplicity.
Can You Make this Cheesecake Without a Water Bath?
A water bath (bain-marie) is a traditional technique used to help cheesecakes bake at an even, gentle temperature, which minimizes the risk of cracking on the surface and adds moisture to the baking environment. While it’s highly recommended for a perfectly smooth and crack-free top, it’s not strictly imperative for this specific recipe. Since this apple crisp cheesecake features a delicious oat streusel topping, any minor cracks that might form will be completely covered. So, if you’re looking for a slightly simpler process, you can omit the water bath, though the texture might be marginally different.
How Do You Store an Apple Crisp Cheesecake?
Proper storage is essential to maintain the freshness and quality of your apple crisp cheesecake. Once completely cooled, cover the cheesecake tightly with plastic wrap or place it in an airtight container. It can then be stored in the refrigerator for 3-4 days. For longer storage, cheesecake freezes exceptionally well. Wrap individual slices or the whole cheesecake (after chilling) tightly in plastic wrap, then a layer of aluminum foil, ensuring it’s completely airtight to prevent freezer burn. It can be frozen for up to 3 months. To defrost, transfer it to the refrigerator and allow it to thaw slowly overnight. Be aware that the streusel topping may lose some of its crispness upon defrosting due to condensation, but the flavor will remain excellent.
Can I Prepare Parts of this Cheesecake Ahead of Time?
Absolutely! This is a great dessert for meal prepping or preparing in stages. You can make the graham cracker crust a day in advance and store it covered in the springform pan in the refrigerator. The spiced apple filling can also be prepared ahead of time and kept refrigerated in an airtight container for up to 2 days. The streusel topping can be made and stored in the refrigerator for a few days, or even frozen for longer. As for the entire cheesecake, as mentioned above, it benefits greatly from an overnight chill, so baking it the day before your event is highly recommended.
Explore More Irresistible Cheesecake & Apple Recipes
If you’ve fallen in love with the creamy indulgence of cheesecake or the comforting sweetness of apples, you’re in for a treat! Here are some other fantastic recipes from our kitchen and trusted sources that you might enjoy:
- The Best Oreo Cheesecake from Life, Love, and Sugar – A dream for chocolate cookie enthusiasts.
- Hot Fudge Brownie Cheesecake – A decadent combination of rich brownie and creamy cheesecake.
- Samoa Cheesecake – Inspired by the classic cookie, featuring coconut and caramel.
- Boston Cream Pie Cheesecake – A delightful take on the classic dessert in cheesecake form.
- Plus, discover all my Favorite Apple Recipes for more apple-inspired delights.
- Browse even more incredible Dessert Recipes to satisfy every craving.
Stay connected and share your culinary creations with us! Follow me on Instagram, Facebook, and Pinterest. Don’t forget to tag me when you try one of my delicious recipes! If you adore the results, please consider leaving a 5-star rating in the recipe card below – your feedback truly helps others discover these wonderful treats.

Apple Crisp Cheesecake
30 minutes
1 hour 10 minutes
1 hour 40 minutes
10 servings
When two delicious desserts collide: Apple Crisp plus Cheesecake! A super creamy cheesecake crossed with apple crisp makes for a rich, unforgettable dessert.
Ingredients
Crust:
- 2 cups graham cracker crumbs
- 1/4 cup sugar
- 7 tablespoons unsalted butter (I used salted)
Cheesecake Filling:
- 3 (8-ounce) packages cream cheese, at room temperature
- 1 cup sugar
- 1 cup sour cream
- 2 1/2 teaspoons vanilla extract
- 3 eggs, at room temperature
- 3 cups apple, peeled, cored and sliced 1/4-inch thin (I used Golden Delicious)
- 1 teaspoon cinnamon
- 1/2 teaspoon salt (I used a scant 1/4 teaspoon, but I think a pinch would suffice)
- 2 tablespoons sugar
Oat Streusel Topping:
- 1/4 cup all-purpose flour
- 1/4 cup old-fashioned oats
- 1/4 cup brown sugar
- 1 teaspoon cinnamon
- 2 tablespoons butter, at room temperature
Instructions
- Preheat oven to 350 degrees F (175 degrees C).
- Line a 9-inch springform pan with parchment paper on the bottom and wrap the bottom and sides of the pan with heavy-duty aluminum foil to prevent water from seeping in if using a water bath. Set aside.
- To make the crust, in a large bowl, mix together your graham cracker crumbs, 1/4 cup sugar, and melted butter until well combined. Press the crust mixture firmly and evenly into the bottom of the prepared springform pan. Set aside.
- In a stand mixer fitted with the paddle attachment, add your softened cream cheese and mix on medium speed until completely smooth and free of lumps.
- Gradually add 1 cup sugar to the cream cheese mixture and continue mixing until just combined, scraping down the sides of the bowl as needed.
- Next, add in your sour cream and vanilla extract, mixing until fully incorporated. Add your eggs, one at a time, mixing only until each egg is just incorporated before adding the next. Do not overmix once the eggs are added.
- In a separate large bowl, combine the sliced apples, 1 teaspoon cinnamon, 1/2 teaspoon salt, and 2 tablespoons sugar. Toss gently to coat the apples evenly.
- Layer the seasoned apples on top of the graham cracker crust in the springform pan, spreading them out to cover the crust evenly. Carefully pour the cheesecake filling over the top of the apple layer. Set aside.
- To prepare the streusel topping, in a medium bowl, combine the 1/4 cup all-purpose flour, 1/4 cup old-fashioned oats, 1/4 cup brown sugar, 1 teaspoon cinnamon, and 2 tablespoons room temperature butter. Use your fingertips or a pastry blender to mix until pea-sized crumbs form. Evenly sprinkle this crumb topping over the cheesecake filling.
- Place your foil-wrapped springform pan into a larger roasting pan. Carefully fill the roasting pan with hot water, reaching halfway up the sides of the springform pan. Transfer to the preheated oven and bake for 1 hour and 10 minutes, or until the edges are set and the center of the cheesecake is just slightly jiggly.
- Turn off the oven heat and crack the oven door open slightly. Allow the cheesecake to cool in the oven for 1 hour. Remove the cheesecake from the oven and the water bath, then let it cool completely on a wire rack at room temperature. Once cooled, cover the cheesecake and refrigerate for a minimum of 8 hours, or preferably overnight, before serving for the best texture and flavor.
Notes
Recipe adapted from Allison Miller’s new cookbook, “Untraditional Desserts.” Recipe reprinted with permission of Page Street Publishing Company.
Recommended Products
As an Amazon Associate and member of other affiliate programs, I earn from qualifying purchases.
- Heavy Duty Aluminum Foil
- 9-inch springform pan
- KitchenAid KSM150PSER Artisan Tilt-Head Stand Mixer with Pouring Shield, 5-Quart, Empire Red
Nutrition Information:
Yield:
10
Serving Size:
1
Amount Per Serving:
Calories: 406
Total Fat: 19g
Saturated Fat: 10g
Trans Fat: 0g
Unsaturated Fat: 7g
Cholesterol: 100mg
Sodium: 165mg
Carbohydrates: 56g
Fiber: 2g
Sugar: 41g
Protein: 5g
HOW MUCH DID YOU LOVE THIS RECIPE?
Please leave a comment on the blog or share a photo on Pinterest
