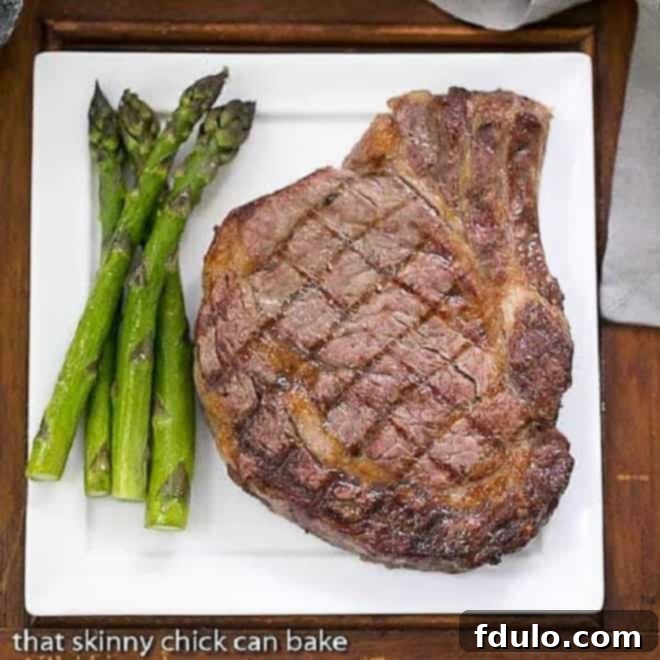
Welcome, grill masters and aspiring outdoor chefs! Few culinary experiences rival the sheer delight of a perfectly grilled steak. The succulent aroma, the tender texture, and the rich, savory flavors are an absolute treat for any discerning palate. If you’ve ever wondered how to achieve that restaurant-quality sear and ideal internal doneness right in your backyard, you’ve come to the right place. We’re here to share proven techniques and invaluable tips that will transform your grilling game and consistently deliver mouth-watering results.
Grilling steak isn’t just about throwing meat on a hot grate; it’s an art, a science, and a passion. Over the years, we’ve honed our skills to consistently create steaks that are tender, juicy, and bursting with flavor. Whether you’re planning a casual family dinner or hosting a special gathering, these methods will equip you to impress everyone with your newfound grilling prowess. Forget dry, overcooked cuts or undercooked surprises – with our comprehensive guide, you’ll learn the secrets to grilling a perfect steak every single time. Prepare to become the grill master you’ve always aspired to be!
Why You’ll Love Mastering the Art of Grilling Perfect Steak
There’s an undeniable satisfaction that comes with serving a steak cooked exactly to perfection. Beyond the culinary delight, mastering steak grilling offers several compelling benefits:
- Economical Excellence: High-quality steaks represent a significant investment. Learning to grill them flawlessly ensures you maximize that investment, preventing the disappointment and waste of an overcooked or improperly prepared cut.
- Become a Grilling Authority: This comprehensive method isn’t just a recipe; it’s a pathway to becoming a confident and skilled grill master. You’ll understand the nuances of heat, timing, and technique, making you the go-to person for exceptional grilled meats.
- Elevate Special Occasions: A perfectly grilled steak instantly elevates any meal, making it ideal for celebrating milestones, entertaining guests, or simply transforming an ordinary evening into something extraordinary.
- Unforgettable Flavor: Our tips focus on enhancing the steak’s natural flavor, achieving that irresistible crust, and locking in juicy tenderness that store-bought or restaurant steaks often fail to deliver consistently.
- Versatility for All Cuts: While we highlight specific cuts, the principles you’ll learn are universally applicable, allowing you to confidently grill various types of steaks to perfection.
How to Grill Steak Like a Pro: A Comprehensive Guide
Achieving a perfectly grilled steak begins long before it ever touches the grates. From selecting the right cut to the final resting period, every step plays a crucial role in the outcome. Follow these detailed guidelines to unlock the secrets of tender, flavorful steaks.
1. Choosing the Best Steak: Quality Matters
The foundation of a great grilled steak is the beef itself. Don’t compromise on quality if your budget allows. Look for cuts with good marbling – those tiny flecks of fat distributed throughout the meat. Marbling is essential for both tenderness and flavor, as the fat renders during cooking, keeping the steak moist and adding richness.
- Beef Grades: In the U.S., beef is graded by the USDA.
- Prime: This is the highest grade, with abundant marbling, offering exceptional tenderness and juiciness. If you can afford it, this is the top choice for an unforgettable steak.
- Choice: A very high-quality grade, widely available, with good marbling. Most of our tips are optimized for Choice beef, providing excellent results.
- Select: The leanest grade with minimal marbling. While more economical, it can result in less flavorful and less tender steaks when grilled, so it’s generally not recommended for grilling without additional fat or marination.
- Recommended Cuts for Grilling: While individual preference varies, certain cuts truly shine on the grill.
- Rib-Eye Steaks: Often considered the king of steaks for grilling, rib-eyes are well-marbled, incredibly flavorful, and tender. They’re perfect for a rich, juicy experience.
- New York Strip: Known for its robust beefy flavor and firm texture, the New York Strip (or strip loin) is a fantastic grilling option. It has a good balance of lean meat and marbling.
- Beef Tenderloin (Filet Mignon): Exceptionally tender but very lean. While delicious, its low-fat content makes it more prone to drying out on the grill. To combat this, consider wrapping it in bacon or applying a light coating of olive oil to add crucial fat and moisture.
- Porterhouse/T-Bone: These cuts offer the best of both worlds, featuring a New York Strip on one side of the bone and a tenderloin on the other. They are substantial and flavorful.
- Sirloin: A more economical choice, sirloin can be great for grilling, especially top sirloin, which offers good flavor and moderate tenderness.
2. Essential Steak Preparation Steps
Proper preparation is paramount for a perfectly grilled steak. Don’t skip these crucial steps:
- PRO-Tip: Season Early for Maximum Flavor. Salt your beef generously 30 minutes to even a full day before cooking. This process, known as “dry brining,” allows the salt to draw moisture from the steak, dissolve into that moisture, and then reabsorb back into the meat, tenderizing it and enhancing flavor throughout. Pat your steaks dry with paper towels before salting for best results, then leave them uncovered in the refrigerator.
- Bring Steaks to Room Temperature: About 30-60 minutes before grilling, remove your steaks from the refrigerator. Grilling a cold steak can lead to uneven cooking, where the outside cooks too quickly while the inside remains undercooked. Allowing them to come closer to room temperature ensures more even heat penetration.
- Final Seasoning: Just before grilling, rub your steaks with garlic halves (optional but highly recommended for an extra layer of flavor) and season with freshly ground black pepper. Additional salt isn’t usually needed if you dry-brined, but taste is subjective.
3. Setting Up Your Grill for Success
The right grill setup is critical for achieving that perfect crust and even cooking.
- Charcoal vs. Gas:
- Charcoal Grill: If available, charcoal adds a wonderfully complex, smoky flavor that’s hard to replicate with gas. Aim for a very hot fire, ideally 450-500ºF (232-260ºC). Arrange your coals to create two zones: a direct high-heat zone for searing and an indirect lower-heat zone for finishing.
- Gas Grill: Gas grills offer more precise temperature control. Preheat your grill to high heat, ensuring it reaches 450-500ºF (232-260ºC). Like charcoal, aim to create two zones: turn one or two burners to high for direct heat and leave others off or on low for indirect heat.
- Clean Grates: Always start with clean grill grates. Food sticks less, and you get better sear marks. Use a sturdy grill brush to remove any leftover residue.
- Lubricate Grates: Lightly oil your grates (using a high smoke point oil like grapeseed or avocado oil on a paper towel) just before placing the steaks to prevent sticking.
4. The Grilling Process: Searing and Finishing
This is where the magic happens! Proper technique ensures a beautiful crust and juicy interior.
- Searing: Place your seasoned steaks directly over the hottest part of the grill. Sear for approximately 2-4 minutes per side. This step develops a rich, flavorful crust through the Maillard reaction.
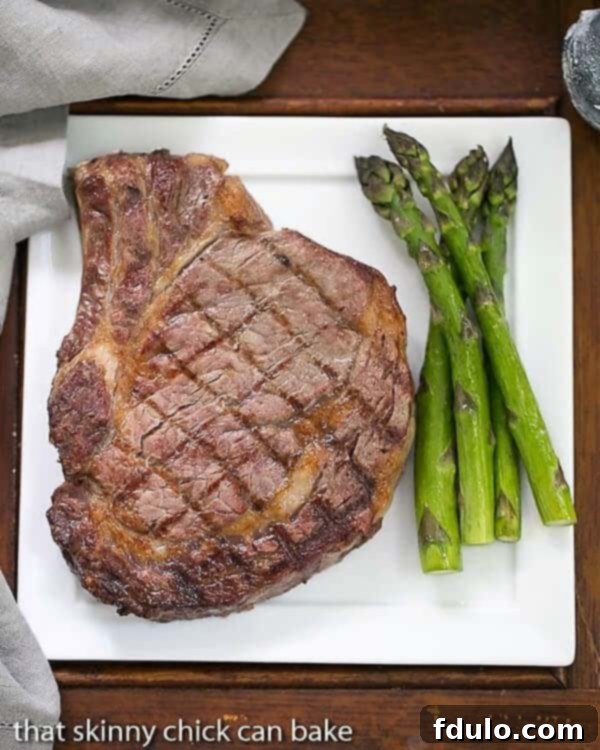
- Achieving Perfect Grill Marks (Cross-Hatch): For those coveted cross-hatch marks, place the steak on the grill, cook for 1½-2 minutes, then rotate it 45 degrees without flipping. Continue cooking for another 1½-2 minutes before flipping the steak to the other side. Repeat the rotation process on the second side. This method ensures even searing and visually appealing marks.
- Minimal Movement: Resist the urge to constantly move or flip your steaks. Excessive handling interferes with the searing process. Aim for only 2-4 movements in total (including the rotations for grill marks).
- Move to Indirect Heat (for thicker cuts): If you’re grilling very thick steaks (1.5 inches or more) or desire a lower doneness level, move them to the indirect heat zone after searing. Close the lid and continue cooking until they reach your desired internal temperature. This allows the steak to cook through gently without burning the exterior.
- Use a Meat Thermometer: While the hand test (discussed below) can be useful, a reliable instant-read meat thermometer is your best friend for absolute precision. Insert it into the thickest part of the steak, away from the bone, to check doneness.
5. The Crucial Resting Period
This is arguably the most overlooked yet vital step for a juicy steak.
- Rest Your Steaks: Once your steak reaches the desired internal temperature (or just shy of it, as explained below), remove it from the grill and place it on a cutting board, loosely tented with foil. Allow it to rest for at least 5-10 minutes before slicing or serving.
- Why Rest? Resting allows the juices, which have been pushed to the center of the steak by the heat, to redistribute evenly throughout the meat. If you cut into a steak immediately, those precious juices will simply spill out, leaving you with a drier, less flavorful result.
How to Tell When Steak is Done: Achieving Your Perfect Doneness
Everyone has a preferred steak doneness, from rare to well-done. Knowing how to hit that sweet spot consistently is key to a satisfying meal. While personal preference dictates the final temperature, understanding the methods to gauge doneness will empower you in the kitchen.
The Hand Test for Steak Doneness
The “hand trick” is a traditional, tactile method used by many experienced chefs to estimate steak doneness without a thermometer. While it requires practice, it can become a useful tool:
To use this technique, touch the fleshy part of your palm beneath your thumb. Then, compare that feeling to the firmness of your steak:
- Rare: Gently touch your thumb and forefinger together. Press the fleshy part below your thumb. This soft, yielding feeling indicates a rare steak.
- Medium-Rare: Touch your thumb and middle finger together. The slightly firmer resistance below your thumb corresponds to a medium-rare steak.
- Medium: Touch your thumb and ring finger together. The area below your thumb will feel noticeably firmer, like a medium steak.
- Well-Done: Touch your thumb and pinky finger together. The firmest point, with very little give, will mimic a well-done steak.
While an excellent skill to develop, this method is best honed through experience. For beginners or those seeking precise results, a reliable meat thermometer remains the most accurate tool.
How Long to Grill a Steak: Temperature and Timing
Precision is key when grilling. While grill times can vary based on thickness and heat, internal temperature is the most reliable indicator of doneness. Use an instant-read meat thermometer for accuracy. Remember that the steak’s temperature will continue to rise a few degrees after it’s removed from the grill, a phenomenon known as “carry-over cooking.”
Here are the target internal temperatures for various levels of steak doneness, measured after a 10-minute resting period, as recommended by culinary experts like Certified Angus Beef:
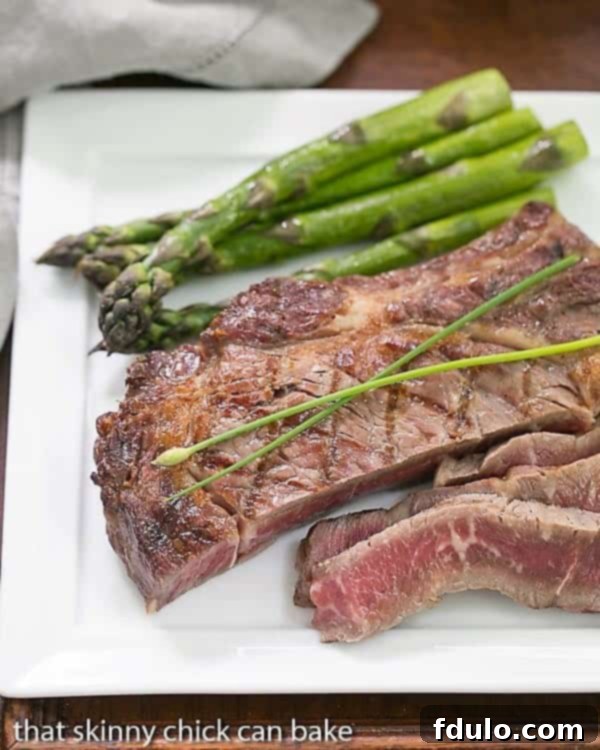
- Rare: Cool red center – 125ºF (52ºC)
- Medium-Rare: Warm red center – 135ºF (57ºC)
- Medium: Warm pink center – 145ºF (63ºC)
- Medium-Well: Slightly pink center – 150ºF (66ºC)
- Well: Little or no pink – 160ºF (71ºC)
PRO-Tip: Account for Carry-Over Cooking. To achieve your desired final temperature, always pull your steak off the grill when it is approximately 5-10ºF (3-6ºC) below the target temperature listed above. For instance, if you’re aiming for medium-rare (135ºF), remove the steak when it reaches 125-130ºF. During the essential 5-10 minute resting period, the internal temperature of your beef will naturally rise to its perfect final doneness.
Frequently Asked Questions About Grilling Steak
How Long Does it Take to Grill the Perfect Steak?
The grilling time for a perfect steak is not a one-size-fits-all answer, as several variables influence the cooking duration. Firstly, the heat of your grill plays a significant role. A gas grill often provides more consistent heat control than a charcoal grill, but both can experience temperature fluctuations due to flare-ups or changing air currents. Paying close attention to your grill’s temperature is crucial.
Secondly, the initial temperature of your beef when it goes on the grill makes a considerable difference. We strongly recommend bringing steaks out of the refrigerator 30-60 minutes before grilling to allow them to come closer to room temperature. A cold steak will take longer to cook and may cook less evenly, leading to a steak that’s overdone on the outside and underdone in the center.
Finally, the thickness of your steak is a primary determinant of cooking time. A thinner steak (e.g., 1 inch) will cook much faster than a thick-cut steak (e.g., 1.5-2 inches). Therefore, while general guidelines exist, it’s imperative to use an instant-read meat thermometer to monitor your steaks as they cook to achieve the best and most consistent results for your desired doneness.
How Do You Cook Steak on a Charcoal Grill?
To cook steak on a charcoal grill, begin by lighting your charcoal and allowing it to heat up until it’s glowing red and covered with a light layer of ash, reaching an internal grill temperature of approximately 450°-500°F (232-260°C). Once hot, move some of the coals to one side of the grill, creating both a direct high-heat zone and an indirect lower-heat zone. Start by searing your seasoned steak directly over the hot coals for about 3 minutes per side to develop a beautiful crust. After searing, move the steaks to the indirect heat zone, close the lid, and continue grilling until they reach your desired degree of doneness, as measured with a meat thermometer. Remember to allow for carry-over cooking by removing the steaks a few degrees before their target temperature.
How do you Cook Steak on a Gas Grill?
Cooking steak on a gas grill also benefits from creating two heat zones. Preheat your gas grill with all burners on high until it reaches 450°-500°F (232-260°C). Then, turn off one or two burners to create an indirect heat zone, while keeping the others on high for direct heat. Sear your seasoned steaks over the direct high heat for 3-4 minutes per side, just as you would on a charcoal grill, to achieve a rich, caramelized crust. Once seared, move the steaks to the indirect heat zone, close the lid, and finish grilling. Monitor the internal temperature with a meat thermometer, pulling the steaks off the grill when they are 5-10°F below your desired final doneness, and then allow them to rest.
Expand Your Grilling Horizons: Related Recipes
If the weather isn’t cooperating for outdoor grilling, don’t worry! You can still achieve fantastic steak results indoors. Try this excellent recipe for Pan-Seared Steak from our friends at 15 Spatulas.
Looking for more beefy inspiration? Explore these delicious recipes:
- Grilled Steak with Garlic Herb Butter
- Savory Italian Pesto Burger
- Easy Grilled Flank Steak with Soy, Garlic, and Ginger
- Zesty Flank Steak with Chimichurri Sauce
- Flavorful Grilled Flank Steak Fajitas
- Discover more incredible Beef Recipes for every occasion.
Connect with us on social media for more recipes and culinary inspiration! Find us @ Instagram, Facebook, and Pinterest. We’d love to see your creations—don’t forget to tag us when you try one of our recipes! If you’re delighted with the results, please consider leaving a 5-star rating and review below.
Perfect Rib Eye Steaks
5 minutes
8 minutes
13 minutes
1 serving
An easy recipe for perfectly grilled rib eye steaks, yielding tender and flavorful results every time.
Average Rating: 5 stars (Based on 8 reviews)
Ingredients
- One 1½ inch thick, 8-ounce rib eye steak per person, ideally Prime or the best quality you can afford
- Kosher salt, for seasoning
- Freshly ground black pepper, to taste
- 2 garlic cloves, cut in half (optional, for rubbing)
Instructions for Grilling Rib Eye Steaks
- Prepare Steaks for Dry Brining: A couple of hours or ideally the night before grilling, pat the steaks thoroughly dry with a paper towel. Sprinkle each side with about ½ teaspoon of kosher salt. Place them uncovered on a wire rack set over a baking sheet in the refrigerator to dry brine.
- Bring to Room Temperature & Final Seasoning: One hour prior to grilling, remove the steaks from the refrigerator to allow them to come to room temperature. If using, rub each side with a cut garlic half, then season generously with freshly ground black pepper. (Additional salt is usually not needed if dry brined).
- Preheat Grill & Initial Sear: Preheat your grill to high heat (450-500ºF). Place the steaks directly over the hot coals (for charcoal) or high flame (for gas), with the lid open, and grill for about 3-4 minutes per side for rare doneness.
- Achieve Cross-Hatch Grill Marks: For classic cross-hatch sear marks, turn the steak 45º (one eighth turn) at the 1½-2 minute mark on the first side. Grill for another 1½-2 minutes before flipping. Repeat this 45º rotation on the second side.
- Check Doneness & Remove: Continue grilling on the second side for a total of 3-4 minutes. Use an instant-read thermometer to check the internal temperature. Remove the steak from the grill when it reaches 120ºF for rare or 125ºF for medium-rare. Remember there will be carry-over cooking, and the temperature will rise during the resting period.
- Rest Before Serving: Transfer the grilled steaks to a cutting board, loosely tent with foil, and let them rest for at least 5 minutes (preferably 10) before slicing and serving. This allows the juices to redistribute, ensuring a tender and moist steak.
Notes on Grilling Times & Doneness
Grilling times are estimates and will vary significantly based on your grill’s actual heat, the initial temperature of your steak, and its thickness. For the most accurate and consistent results, always use an instant-read meat thermometer.
It is crucial to remember that your meat will continue to cook after it is removed from the grill (carry-over cooking). To achieve your desired final doneness, pull your steak off the grill when its internal temperature is approximately 10°F below the target temperature for that doneness level. Cover it loosely and let it rest for 10 minutes before serving. This resting period is vital for the redistribution of juices, ensuring a tender and moist steak.
Recommended Products for Perfect Grilling
As an Amazon Associate and member of other affiliate programs, I earn from qualifying purchases, at no extra cost to you.
- High-Quality Santoku Knife
- Durable OXO Cutting Board
- Thermapen Instant Read Thermometer
Nutrition Information:
Yield:
1
Serving Size:
1 steak
Amount Per Serving:
Calories: 629Total Fat: 43gSaturated Fat: 19gTrans Fat: 0gUnsaturated Fat: 23gCholesterol: 177mgSodium: 447mgCarbohydrates: 3gFiber: 1gSugar: 0gProtein: 57g
This nutritional information is an estimate provided as a courtesy and is derived from online calculators. While we strive for accuracy, these figures are approximate. Factors such as specific product brands, variations in ingredients, and optional toppings may alter the actual nutritional content. For the most precise nutritional data, we recommend calculating it based on the exact ingredients you use in your recipe. You are solely responsible for verifying the accuracy of any nutritional information obtained.
HOW MUCH DID YOU LOVE THIS RECIPE?
Please leave a comment on the blog or share a photo on Pinterest!
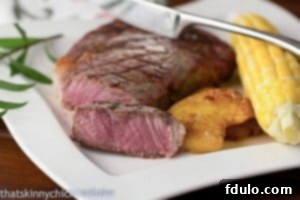
Photo courtesy of the original contributor, circa 2012
Mastering the art of grilling a perfect steak is a truly rewarding endeavor. By carefully selecting your cut, meticulously preparing it, understanding your grill’s heat zones, and using a reliable meat thermometer, you’ll consistently achieve succulent, flavorful results that will delight everyone at your table. Remember that practice makes perfect, so don’t be afraid to experiment and fine-tune these techniques to match your personal preferences. Enjoy the journey to becoming a true grill connoisseur!
