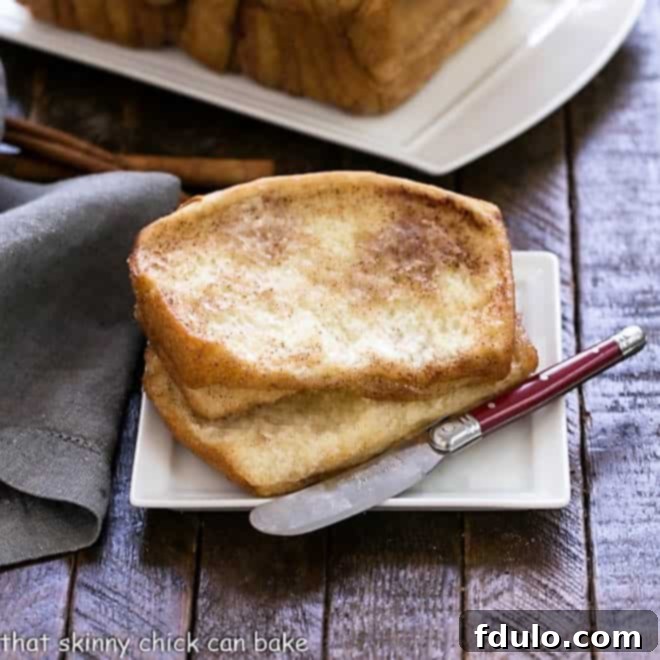
For a truly extraordinary breakfast or brunch delight that promises warmth and comfort with every bite, look no further than this incredible Cinnamon Pull-Apart Bread. Imagine cinnamon and sugar meticulously baked into every tender crevice, creating a mosaic of sweet, buttery layers. Each loaf emerges from the oven as a unique masterpiece, offering a delightful surprise as you gently pull apart the individual sections. Prepare for an experience that’s both fun to make and absolutely irresistible to eat!
I recently had the distinct pleasure of sharing a similar Pull-Apart Coffeecake with a cherished group of girlfriends. It was a crisp September morning, back in the heart of the pandemic, so we embraced the autumn air by setting up our chairs on the sun-drenched driveway, maintaining a safe and comfortable distance. As one friend savored her buttered slice, a contented smile spread across her face. “This is exactly why we come to Liz’s house!” she declared, perfectly encapsulating the joy of homemade treats and good company.
Moments later, laughter erupted as Izzy, our spirited black lab, seized an opportunity, snatching a second slice right from her hands! The ensuing chaos only added to the memorable morning, prompting another friend to quip, “It’s doggone good!” – a compliment that, while unexpected, certainly resonated with the bread’s undeniable appeal. I’m confident that once you try this recipe, you’ll wholeheartedly agree that this homemade cinnamon bread is a true delight.
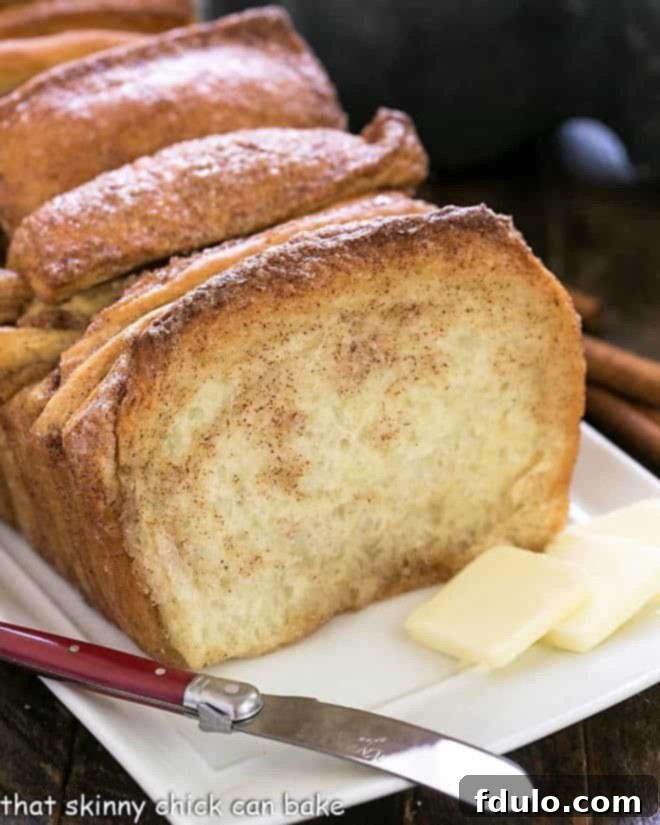
Why This Cinnamon Pull-Apart Bread Belongs in Your Recipe Collection
There’s a special kind of magic in pull-apart breads – whether it’s the rich, braided beauty of challah, the delicate flakiness of crescent rolls, or the classic elegance of Parker House rolls. This Cinnamon Pull-Apart Bread embodies that same enchanting quality, offering a delightful twist on a traditional sweet treat. Here’s why this recipe is an absolute must-try:
- Effortless Enjoyment and Sharing: Forget the knives! The very essence of pull-apart bread is its convivial nature. It’s designed for sharing, allowing everyone to easily pull off their own soft, buttery piece with a fork or their fingers. This makes it a fantastic, no-fuss option for family breakfasts, casual brunches, children’s parties, or even a cozy afternoon snack with friends. Its interactive appeal ensures it’s always a conversation starter.
- A Unique and Engaging Baking Experience: This isn’t just another cinnamon roll recipe. The method of meticulously layering cinnamon-sugar coated dough creates a visually stunning loaf that’s as satisfying to assemble as it is to eat. The anticipation of revealing those distinct, swirling layers of flavor after baking, and the intoxicating aroma that fills your kitchen, is part of the charm. Each bite promises a harmonious blend of tender bread and sweet, aromatic spice.
- Inspired by a Culinary Masterpiece: My journey with pull-apart bread began years ago when I first encountered Flo Braker’s exquisite lemon version. I put my own spin on it, swapping lemon zest for vibrant orange zest, and it quickly became a household favorite. My husband, a notoriously tough critic, was instantly captivated, proving its undeniable appeal. This cinnamon adaptation builds on that beloved foundation, bringing the universally comforting spice we all adore to this unique, irresistible format. It truly marries classic flavors with an innovative presentation.
- The Ultimate Comfort Food for Cinnamon Lovers: If your family adores the warm, comforting embrace of cinnamon bread and cinnamon rolls as much as mine does, then this recipe will be an instant hit. It delivers all the beloved flavors and aromas of classic cinnamon pastries, but in an exciting, interactive, and utterly delicious form that promises to be a memorable treat they’ll ask for again and again. It’s a sweet breakfast bread that doubles as a delightful dessert.
Mastering the Art of Cinnamon Pull-Apart Bread: Essential Tips for Success
Imagine starting your morning with a steaming cup of coffee and a fragrant slice of this homemade pull-apart bread, still warm from the oven. It’s a simple luxury that brightens any day. I’ve baked this delightful bread countless times, for my husband, for knitting friends, and even for new parents across the street, always to rave reviews. Bill, for instance, was absolutely delighted, savoring it every morning until it was gone—a significant upgrade from his usual cold cereal!
My first foray into baking this cinnamon bread dates back to 2013, when I sent a loaf off with my son, Nick, to share with his college roommates. I’m sure it was a welcome improvement from their typical breakfast of coffee and cold pizza – or whatever culinary adventures 20-year-olds manage to concoct! As Nick reassuringly tells me, “I haven’t gotten food poisoning yet.” Though he did once recount a rather memorable incident involving undercooked chicken, prompting a collective “Yikes!” This experience, however, will be far more pleasant. Here are my top tips to ensure your homemade pull-apart loaf turns out perfectly every time:
1. The Importance of Active Yeast: Your Bread’s Foundation
PRO-Tip: Before you even begin mixing, verify the vitality of your yeast. An expired or inactive yeast will lead to dense, flat bread, and nobody wants that disappointment after putting in all the effort! Always check the expiration date on the package. If you’re at all unsure, or if the package has been open for a while, perform a quick activation test.
To test: gently warm about 1/4 cup of water to a lukewarm temperature (between 105-115°F / 40-46°C). Water that’s too hot will kill the yeast, while water that’s too cold won’t activate it properly. Mix your yeast with a pinch of sugar into this lukewarm water. Stir gently and let it sit for 5-10 minutes. If the mixture becomes foamy and bubbly, with a distinct yeasty aroma, your yeast is alive and ready to work its magic! You can then proceed to use this activated yeast mixture in your recipe. Remember to subtract the amount of water you used for the test from the total liquid required in your recipe to maintain the correct dough consistency.
2. Mise en Place: Gathering Your Ingredients and Tools
Reading through the entire recipe before you start is crucial. This helps you anticipate each step and ensures you have all necessary ingredients and equipment on hand. For example, if whole milk isn’t available, 2% milk will work, though whole milk contributes more richness and a slightly softer crumb. For an even richer texture, you can add a small amount of heavy cream (about a tablespoon) to your 2% milk. Also, ensure your eggs are at room temperature; they incorporate more easily into dough, leading to a smoother, more consistent texture, and better rise.
Have a ruler nearby – it’s an indispensable tool for achieving the precise dough dimensions needed for perfectly uniform layers. PRO-Tip: I find that a plastic (washable) ruler and a pizza cutter are my secret weapons for slicing the dough. The pizza cutter glides through effortlessly, creating clean, straight cuts that are essential for neat, layered bread.
3. Dough Mixing: Achieving the Right Consistency
While you can certainly mix this dough by hand, it can be quite sticky, especially in the initial stages. For ease and efficiency, I highly recommend using a stand mixer fitted with a paddle attachment. This will save your arms and ensure the dough is thoroughly mixed to a smooth, elastic consistency. Mix on a low speed to avoid overworking the gluten, gradually adding flour until the dough just comes together, remaining slightly tacky but not overly sticky. The dough should pull away from the sides of the bowl but still cling to the bottom slightly.
4. The Art of Proofing: Patience is Key for a Light Loaf
Proofing, or allowing the dough to rise, is a critical step for light and airy bread. This recipe requires two distinct proofing stages. The first occurs after you’ve mixed the dough, letting it double in bulk in a warm, draft-free place. The second rise happens after you’ve rolled out, filled, cut, and assembled the dough slices into the loaf pan.
PRO-Tip: If your oven has a “proof” setting (typically around 85°F / 29°C), it’s ideal. If not, a warm spot in your kitchen, perhaps near a sunny window or with just the oven light on, will suffice. Resist the temptation to speed up the process by using a much warmer location; excessively high temperatures can kill the yeast or cause the dough to over-proof too quickly, resulting in an inferior texture (often dry and crumbly) and sometimes an off-flavor. Patience is truly a virtue here – allow the dough to rise naturally until it has visibly doubled in size, which usually takes about 45-60 minutes for each stage, depending on your environment.
5. Assembling and Baking: From Layers to Golden Perfection
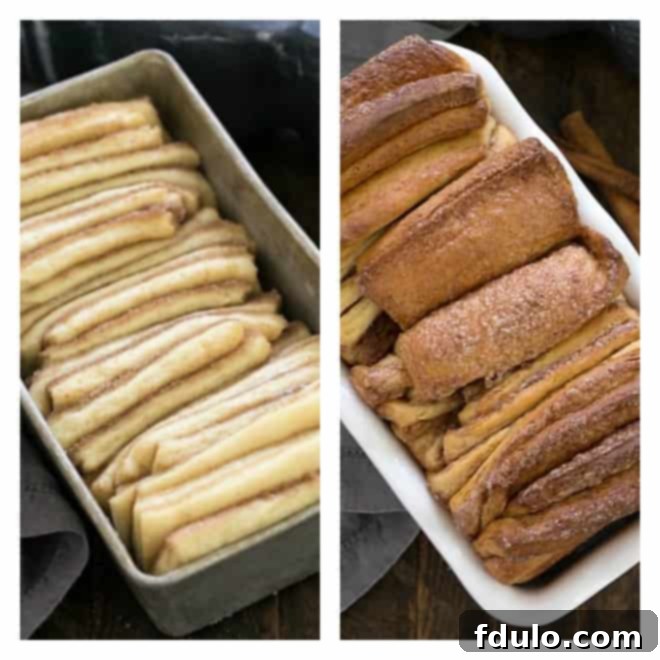
When assembling, ensure the cinnamon-sugar mixture is spread as evenly as possible over your rolled-out dough rectangle before stacking the strips. This guarantees a consistent burst of flavor in every bite. Don’t worry if a few slices look “wonky” or bake up slightly higher than others; that’s the charming, rustic nature of homemade pull-apart bread! The delicious taste and soft texture will more than make up for any minor aesthetic imperfections. Bake until the top is beautifully golden brown, a sign that the bread is cooked through and the sugars have caramelized to perfection, creating a wonderfully crusty exterior.
After baking, allow the bread to cool in the pan for about 10-15 minutes before carefully removing it to a wire rack. This initial cooling period helps the bread set, making it easier to handle and preventing it from collapsing, while still allowing for air circulation to prevent sogginess. Fully cooling on a rack ensures the perfect texture.
Delicious Variations and Serving Suggestions
While the classic cinnamon flavor of this pull-apart bread is utterly divine, don’t hesitate to experiment with variations to suit your taste or occasion. For a citrusy twist, revisit the original inspiration by adding finely grated lemon or orange zest directly into the sugar-cinnamon mixture, or even adding a teaspoon of citrus extract to the dough itself. You could also introduce other warm spices like a pinch of ground cardamom, nutmeg, or allspice for a different aromatic profile. For added texture and richness, consider sprinkling chopped nuts such as pecans or walnuts, or even mini chocolate chips, between the layers. A simple cream cheese glaze, or a drizzle of powdered sugar glaze (made with powdered sugar and a splash of milk or orange juice), can elevate it further.
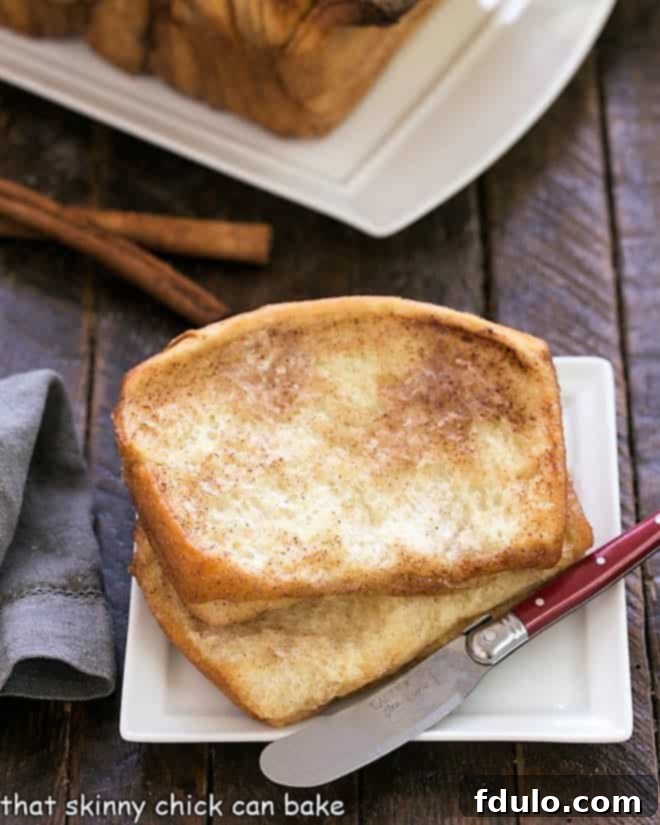
Serving this bread warm is key to maximizing its tender texture and irresistible aroma. It’s truly exceptional on its own, but pairs wonderfully with a piping hot cup of coffee or tea. It also makes an outstanding centerpiece for a holiday brunch, a comforting treat for an afternoon tea, or a delightful dessert served à la mode with a scoop of vanilla bean ice cream. Don’t forget, it’s perfect for a quick breakfast on the go, making those busy mornings a little sweeter.
Storage and Reheating Tips
To keep your Cinnamon Pull-Apart Bread fresh and delicious, store it in an airtight container or a large resealable bag at room temperature for up to 2-3 days. This helps maintain its softness and prevents it from drying out. For longer storage, this bread freezes beautifully. Wrap the completely cooled loaf tightly in plastic wrap, then in a layer of aluminum foil, and place it in a freezer-safe bag. It can be frozen for up to 1-2 months.
To enjoy it again, thaw the frozen loaf at room temperature for several hours or overnight. For that irresistible “fresh out of the oven” experience, gently reheat the thawed bread in a preheated oven at 300°F (150°C) for about 10-15 minutes, or until warmed through. This will refresh the crust and re-melt the buttery cinnamon-sugar layers, making it taste just as good as the day it was baked.
More Irresistible Bread Recipes to Try
If you’ve enjoyed baking this Cinnamon Pull-Apart Bread, you’ll love exploring other delightful bread recipes. Expand your baking repertoire and discover new family favorites with these fantastic options:
- Pandoro by Karen at Karen’s Kitchen Stories
- Classic Cinnamon Rolls
- Orange Pull Apart Coffee Cake
- Classic Oatmeal Bread
- Potato Bread Recipe
- Discover more fantastic Yeast Bread Recipes
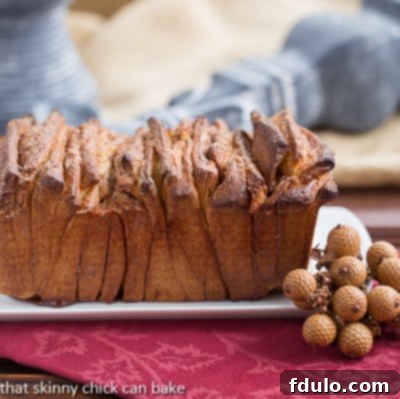
This delightful Pull-Apart Coffee Cake recipe was originally published in December 2013, with photos and text updated in 2020 to provide even more helpful insights and beautiful imagery, ensuring you have the best possible baking experience.
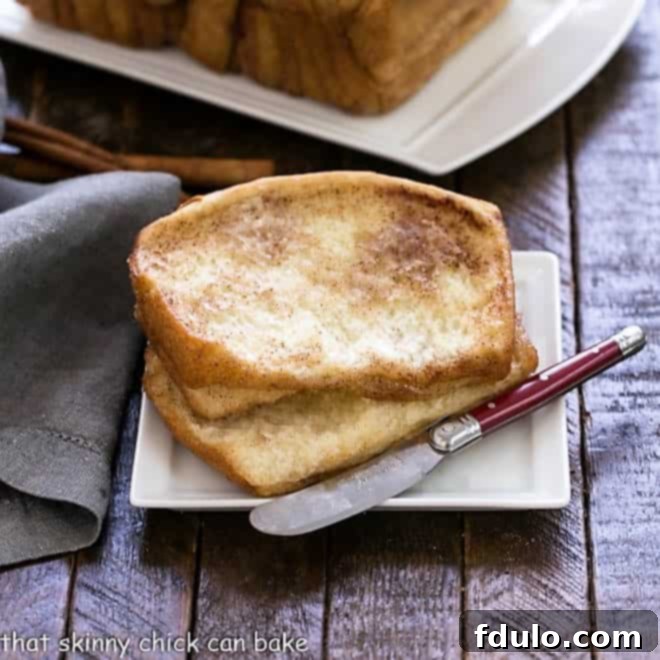
Cinnamon Pull-Apart Coffee Cake
40 minutes
40 minutes
1 hour 20 minutes
8 servings
A fun, pull-apart yeast bread infused with the comforting flavor of cinnamon, perfect for any time of day!
Ingredients
- 2 3/4 cups all-purpose flour, divided
- 1/4 cup granulated sugar
- 2 1/4 teaspoons instant yeast (one envelope, recommended: Red Star Platinum Yeast for best results)
- 1/2 teaspoon salt
- 1/3 cup whole milk
- 1/4 cup unsalted butter
- 1/4 cup water
- 1 1/2 teaspoons vanilla extract
- 2 large eggs, at room temperature
- 3/4 cup granulated sugar (for filling)
- 2 teaspoons ground cinnamon (for filling)
- 1/4 cup melted unsalted butter (for filling)
- A few gratings of fresh nutmeg, optional (for filling)
Instructions
- Prepare the Loaf Pan: Lightly grease a standard loaf pan (approximately 8 1/2 x 4 inches) and set aside.
- Combine Dry Ingredients: In the bowl of a stand mixer fitted with a paddle attachment, combine 2 cups of the all-purpose flour with 1/4 cup sugar, instant yeast, and salt. Mix briefly on low speed to combine thoroughly.
- Warm Liquid Mixture: In a microwave-safe bowl or small saucepan, gently heat the milk and 1/4 cup butter until the butter is just melted. Add the 1/4 cup water and allow the mixture to cool until it is just warm to the touch (about 120ºF / 49ºC). Stir in the vanilla extract.
- Mix Dough: Pour the warm milk mixture into the dry ingredients in the mixer bowl. Mix on low speed until the flour is just moistened. Add the eggs, one at a time, beating until each is fully incorporated and the mixture is smooth. Stop the mixer, scrape down the sides of the bowl, then add 1/2 cup of the remaining flour. Mix on low speed until the dough is smooth, approximately one minute. Add 2 more tablespoons of flour and mix again until the dough is smooth and soft, about another minute. The dough should be slightly sticky but manageable.
- First Rise (Proofing): Lightly flour a clean work surface. Turn out the dough and knead gently for about a minute. If the dough is too sticky, add up to another 2 tablespoons of flour, a little at a time, until it’s easier to handle. Place the dough in a lightly greased bowl, cover with plastic wrap or a clean kitchen towel, and place in a warm, draft-free spot until it has doubled in bulk, which typically takes about an hour.
- Prepare the Filling: While the dough is rising, mix the 3/4 cup sugar, 2 teaspoons cinnamon, and optional fresh nutmeg together in a small bowl. Set aside. (Alternatively, and for even distribution, you can brush the rolled-out dough with the 1/4 cup melted butter first, then evenly sprinkle with the cinnamon-sugar mixture, gently patting it down to help it adhere.)
- Roll and Cut Dough for Layers: Once the dough has doubled, gently punch it down to release the air. Transfer the dough to a lightly floured surface and roll it out into a large rectangle, approximately 20 x 12 inches. If you chose the alternative filling method, spread the melted butter evenly over the entire surface of the dough, then generously sprinkle with the cinnamon-sugar mixture.
- Stack the Dough Strips: Using a sharp knife or a pizza cutter and a ruler for accuracy, cut the dough into five equal strips, each measuring about 12 x 4 inches. Carefully stack these five strips on top of each other, ensuring the cinnamon-sugar side of each strip is facing up, creating a tall, neat stack of dough.
- Assemble into Loaf Pan: Next, cut this stacked dough into six equal rectangles, each approximately two inches wide. Carefully place each of these smaller stacks into the prepared loaf pan, arranging them vertically with the cut sides facing up. If any cinnamon-sugar mixture spills during this process, sprinkle it over the top of the assembled loaf for extra flavor.
- Second Rise (Proofing): Cover the loaf pan loosely with plastic wrap or a clean kitchen towel and let it rise in a warm, draft-free spot until it has nearly doubled in bulk, typically about 45 minutes. The dough should look visibly puffy and fill the pan significantly.
- Bake the Bread: While the dough is on its second rise, preheat your oven to 350ºF (175ºC). Bake the pull-apart bread for 30-40 minutes. Baking time may vary depending on your oven; look for a beautiful golden-brown top and a fragrant aroma, indicating it’s fully cooked through.
- Cool and Serve: Once baked, remove the loaf from the oven and let it cool in the pan on a wire rack for about 10-15 minutes. This allows the bread to set properly and makes it easier to handle. Then, carefully remove the bread from the pan and transfer it directly to the wire rack to finish cooling. Serve warm and enjoy pulling apart the delicious, cinnamony layers!
Notes
This recipe is adapted from a technique by Flo Braker. Please note that the “Total Time” listed above does not include the essential dough proofing times, which are crucial for the bread’s light and airy texture. Allow approximately 1 hour for the first rise and 45 minutes for the second rise.
Recommended Products
As an Amazon Associate and member of other affiliate programs, I earn from qualifying purchases.
- 7 qt Pro Line KitchenAid Mixer
- Roul’Pat silicone counter sized silicone mat
- Stainless Steel Loaf Pan
Nutrition Information:
Yield:
8
Serving Size:
1
Amount Per Serving:
Calories: 388
Total Fat: 14g
Saturated Fat: 8g
Trans Fat: 0g
Unsaturated Fat: 4g
Cholesterol: 78mg
Sodium: 248mg
Carbohydrates: 60g
Fiber: 2g
Sugar: 26g
Protein: 7g
HOW MUCH DID YOU LOVE THIS RECIPE?
Please leave a comment on the blog or share a photo on Pinterest
