Homemade Vanilla Granola with Dried Fruit: Your Ultimate Guide to a Perfect Breakfast
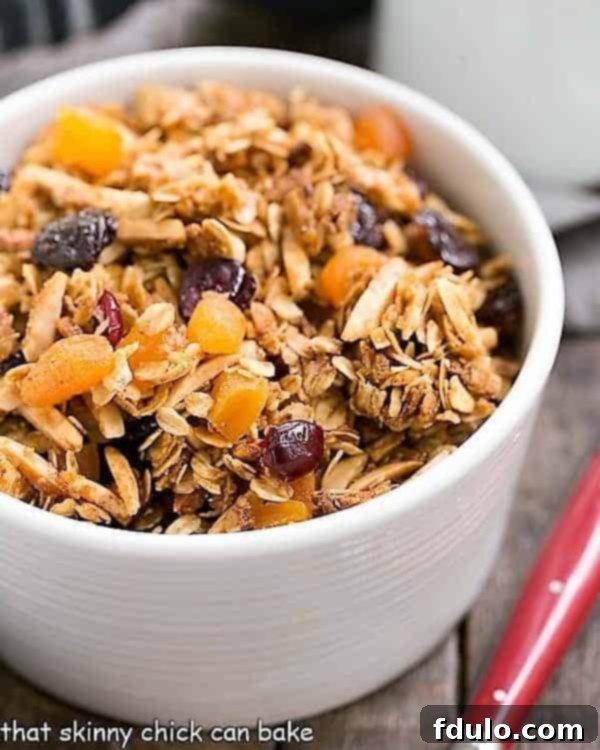
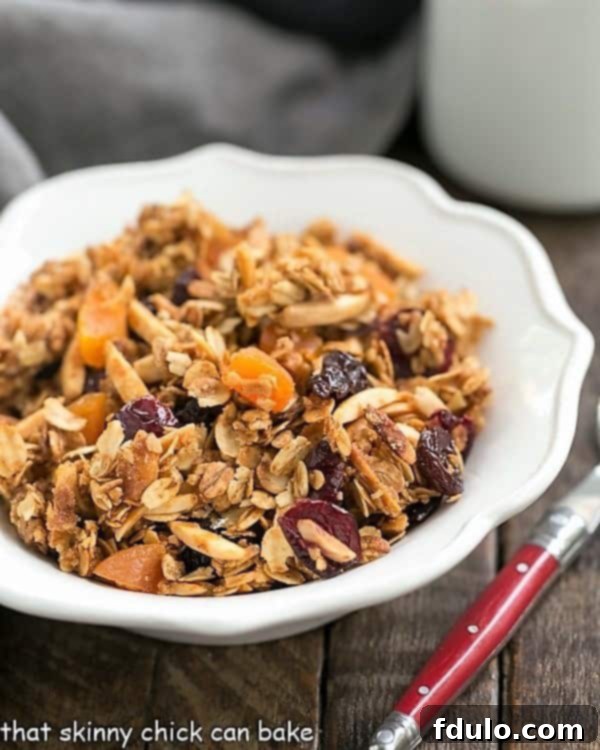
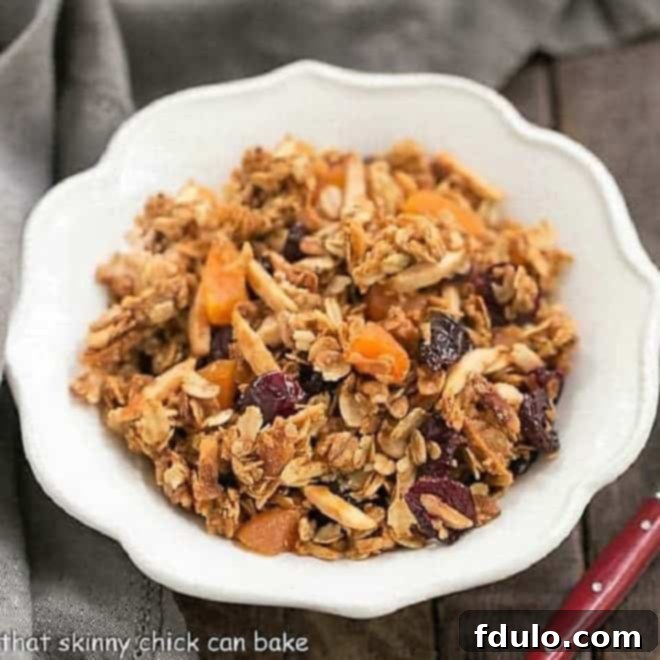
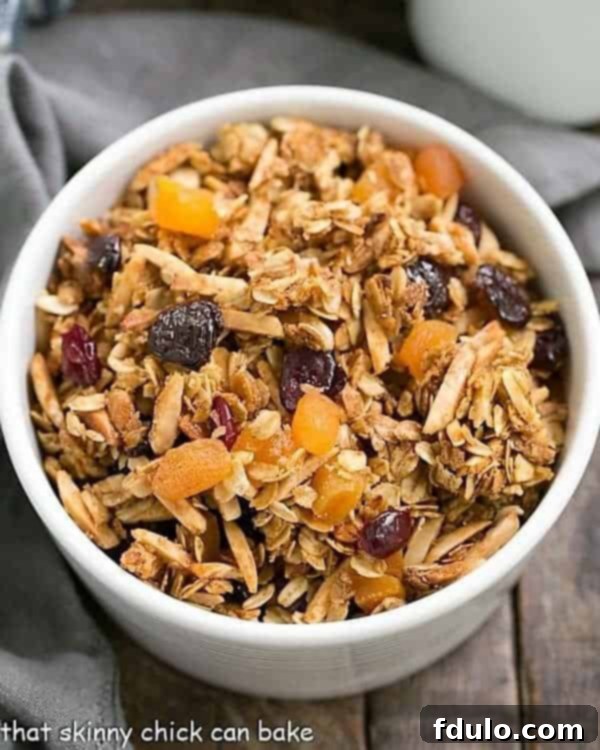
Imagine starting your day with a bowl of crunchy, flavorful granola, perfectly sweetened and bursting with the aromatic essence of vanilla and the chewiness of your favorite dried fruits. This isn’t just any breakfast; it’s a homemade masterpiece. Our Vanilla Granola with Dried Fruit recipe is not only incredibly delicious, whether doused with milk, layered atop creamy yogurt, or savored by the handful, but it also elevates your breakfast experience far beyond anything you’d find in a grocery store. Forget bland, overly processed options; this recipe is a game-changer.
Crafting your own granola means you’re in complete control. You can tweak every element to suit your taste, from the selection of nuts to your preferred blend of dried fruits. It’s a simple yet rewarding process that yields a healthy, satisfying, and utterly irresistible treat. Get ready to discover your new favorite breakfast staple!

Why This Homemade Vanilla Granola Will Become Your Go-To Recipe
There are countless reasons to swap your store-bought granola for a homemade batch, and this Vanilla Granola with Dried Fruit recipe is a shining example. It’s more than just a recipe; it’s an invitation to a healthier, more flavorful, and customizable breakfast experience. Here’s why you absolutely must make it:
- Unparalleled Flavor & Aroma: Unlike many commercial granolas that can taste artificial or overly sweet, this recipe is crafted with a balanced blend of honey and sugar, complemented by a generous splash of real vanilla extract. The result is a deeply aromatic and naturally delicious breakfast treat that fills your kitchen with an inviting scent as it bakes. The rich vanilla notes perfectly meld with the hearty oats and sweet dried fruits, creating a flavor profile that is both comforting and exciting.
- Healthier Choice, Controlled Ingredients: When you make granola at home, you know exactly what goes into it. This recipe prioritizes wholesome ingredients like old-fashioned oats, healthy fats from nuts and oil, and natural sweeteners. You can adjust the sugar content to your liking, avoiding the excessive amounts often found in store-bought varieties. It’s packed with fiber, whole grains, and healthy fats, making it a truly nutritious start to your day.
- Highly Customizable: This recipe serves as a fantastic base, allowing for endless variations. Don’t like slivered almonds? Swap them for pecans or walnuts. Prefer a different dried fruit mix? Go for it! The adaptability means you can create your perfect granola every time, catering to your specific tastes, dietary needs, or even seasonal ingredient availability. This personal touch is something you simply can’t get from a package.
- Excellent Shelf Life & Convenience: Once prepared, this homemade vanilla granola keeps remarkably well. Stored in an airtight container at room temperature, it stays fresh for weeks, making it an ideal meal-prep staple. For even longer storage, you can freeze it for months, ensuring you always have a healthy, delicious breakfast or snack ready to go whenever a craving strikes. Its longevity makes it incredibly convenient for busy schedules.
- Thoughtful & Economical Gift: Beyond personal consumption, this out-of-this-world granola recipe makes a fantastic homemade gift. Beautifully packaged, it’s a thoughtful present for hostesses, neighbors, friends, or holiday exchanges. Not only is it a delicious gesture, but making granola at home is often significantly more cost-effective than repeatedly purchasing premium store-bought brands, offering both quality and value.
Ingredient Notes: Crafting Your Perfect Vanilla Granola
The beauty of homemade granola lies in its simplicity and the quality of its ingredients. Each component plays a crucial role in achieving that ideal texture and flavor. Here’s a closer look at what you’ll need and some tips for best results:
- Kitchen Staples: You’ll rely on everyday pantry items like Granulated Sugar, Brown Sugar, Salt, Ground Cinnamon, and Vegetable Oil. These form the essential base, providing sweetness, seasoning, warmth, and that desirable crispness. Ensure your spices are fresh for maximum flavor impact.
- Old-Fashioned Rolled Oats: This is the backbone of your granola. Opt for old-fashioned (also known as rolled) oats because their sturdier structure holds up beautifully during baking, resulting in a satisfyingly chewy, yet crispy, granola. Avoid quick-cooking or instant oats, as they tend to become mushy and lose their distinct texture. For those with dietary restrictions, ensure you use certified gluten-free rolled oats if needed.
- Slivered Almonds (or Your Favorite Nuts): Almonds provide a delightful crunch and a mild, buttery flavor that complements the vanilla perfectly. Slivered almonds are ideal as they toast evenly. However, feel free to personalize! Walnuts, pecans, cashews, or even pistachios can be fantastic alternatives. You can also mix in various seeds like pumpkin seeds (pepitas), sunflower seeds, chia seeds, or flax seeds for added nutrition and texture.
- Honey: This natural sweetener contributes not only to the granola’s rich flavor but also acts as a binding agent, helping to create those coveted clusters. While any good quality honey will work, using local honey is a popular choice for those who believe it may help with seasonal allergies. Its distinct flavor also adds depth that refined sugars alone cannot achieve.
- Vanilla Extract: The star flavor! Always use high-quality, pure vanilla extract – never imitation vanilla. Real vanilla extract offers a complex, deep, and truly aromatic profile that imitation versions simply cannot replicate. Brands like Nielsen-Massey are highly regarded for their exceptional quality. The difference in taste is significant and truly makes this granola shine.
- Dried Fruit: This is where you can truly let your preferences guide you. Our suggestion includes a vibrant mix of Dried Cherries, Cranberries, and Diced Apricots, offering a wonderful balance of tartness and sweetness. Other excellent choices include raisins, golden raisins, dried blueberries, chopped dates, or even exotic options like diced mango or pineapple. Ensure your dried fruits are bite-sized or chopped small for even distribution and easier eating. Remember to add them *after* baking to prevent them from burning and becoming too hard.
How to Make the Best Homemade Vanilla Granola
Making granola from scratch might seem daunting, but it’s surprisingly simple and incredibly rewarding. I still remember when my blogger friend, Lori from All That Splatters, first shared this fabulous recipe. Years ago, a girlfriend wanted to learn how to make granola from scratch. I pulled out a few of my favorite recipes, and she joined me for a cooking demonstration. After trying a few, she settled on Lori’s honey vanilla granola as her top choice. She was genuinely amazed at how quickly and easily it came together!
We spent the afternoon laughing, stirring, and, of course, a lot of “quality control” sampling. Before we knew it, in less than an hour of active preparation and baking time, we had two glorious trays of warm, fragrant granola cooling on the rack. The success was undeniable. I promise you, this homemade version is infinitely superior to any lackluster, mass-produced store-bought granola you’ve ever tasted. It’s fresher, more flavorful, and has that perfect customizable crunch. Here’s a straightforward guide to making your own:
- Prepare Your Baking Sheets: Begin by preheating your oven to 300ºF (150ºC). This lower temperature allows for a more even bake without scorching. Prepare two rimmed baking sheets by lining them with non-stick foil or parchment paper. Alternatively, you can lightly spray them with cooking spray. This crucial step prevents sticking and makes for easy cleanup. Set them aside while you prepare the mixture.
- Combine Dry Ingredients: In a large mixing bowl, combine the old-fashioned oats, slivered almonds (or your chosen nuts), brown sugar, salt, and ground cinnamon. Use a large spoon or your hands to toss everything together thoroughly, ensuring all the dry ingredients are well distributed. This step ensures an even flavor in every bite.
- Prepare Wet Ingredients: In a small saucepan, combine the vegetable oil, honey, and granulated sugar. Place the saucepan over medium-low heat and bring the mixture to a gentle simmer, stirring occasionally until the sugar is dissolved and the ingredients are well combined. Be careful not to boil aggressively. Once simmering, remove the saucepan from the heat immediately. Stir in the vanilla extract at this stage; adding it off the heat preserves its delicate flavor and aroma.
- Combine Wet and Dry: Pour the warm wet mixture evenly over the dry oat and nut mixture in the large bowl. Using a sturdy spatula or spoon, stir everything until all the oats and nuts are thoroughly coated with the sweet, vanilla-infused syrup. Ensure there are no dry spots remaining; this even coating is key to a crispy, delicious granola.
- Bake to Perfection: Divide the granola mixture evenly between the two prepared baking sheets. Spread it out into a thin, even layer. Bake for approximately 30 minutes, remembering to stir the granola every 10 minutes. This regular stirring is vital for promoting even browning and preventing the edges from burning while the center remains undercooked. Watch for a beautiful golden-brown color.
- Add Dried Fruit and Cool: Once the granola is golden brown and fragrant, remove the baking sheets from the oven. Immediately, while the granola is still warm, sprinkle in your chosen dried fruit and gently mix it through. Transfer the granola to a wire rack and allow it to cool completely to room temperature. This cooling process is essential for achieving that desirable crisp and crunchy texture. Once cooled, store your homemade vanilla granola in an airtight container. It can be kept at room temperature for several weeks or frozen for longer storage. Enjoy!
Expert Recipe Tips for Homemade Granola Success
Making granola is a straightforward process, but a few expert tips can elevate your homemade batch from good to absolutely phenomenal. Follow these pointers to achieve perfectly crunchy, flavorful granola every time:
- Embrace Customization: Homemade granola is incredibly adaptable, which is its greatest strength. Don’t like dried apricots? No problem! Use dried cranberries, blueberries, or even chopped dates instead. Prefer pecans over almonds? Go right ahead. Allergic to nuts? Simply leave them out entirely or substitute with seeds like sunflower or pumpkin seeds for a nut-free version. This recipe is a canvas for your culinary creativity.
- Achieve Glorious Granola Clumps: If you love those satisfying clusters of granola, here’s the trick: when you spread the oat mixture onto the baking sheets, press it down firmly with your hands or the back of a spatula. Don’t break it up too much during the initial baking phase. After the first stir, try to disturb it less or gently press it back together. Letting it cool completely without too much disturbance is also key to forming those coveted chunks.
- Ensure Even Browning: For consistently golden and crispy granola, stirring is non-negotiable. Make sure you stir your granola 2-3 times during the baking process, typically every 10 minutes. This prevents hot spots and ensures all the oats and nuts brown evenly, leading to a uniform crunch.
- Rotate and Redistribute: Ovens often have hotter spots, particularly around the edges. When you stir, pay attention to the granola around the perimeter of the pan, which tends to brown more quickly. Relocate some of this browner granola towards the middle of the pan and bring the less browned portions to the edges. This simple trick prevents any part from getting too dark or burnt.
- Cool Completely for Crispness: Patience is a virtue when it comes to granola. It might feel done when it comes out of the oven, but it will only become truly crispy once it has cooled completely. Let it sit undisturbed on the baking sheets on a wire rack until it reaches room temperature. Rushing this step can result in soft or chewy granola instead of the desired crunch.
- Proper Storage is Key: Once completely cooled, transfer your homemade granola to an airtight container. This helps maintain its freshness and crisp texture. Store it at room temperature for up to a month. For extended freshness, this granola cereal can also be stored in the freezer for 3-4 months. Just thaw it overnight in the refrigerator or on the counter before enjoying.
- Consider Additional Flavor Boosts: For an extra layer of flavor, consider adding a pinch of freshly grated nutmeg, a touch of ground ginger, or even some orange zest to the dry mixture. If you love coconut, add shredded unsweetened coconut during the last 10 minutes of baking to prevent it from burning.
Frequently Asked Questions About Homemade Granola
Absolutely! This is one of the best aspects of making homemade granola. The recipe is incredibly versatile and can be adapted to use your favorite dried fruit and nuts. For instance, I’m not a big fan of raisins, so I typically omit them. Instead, I often include a generous mix of almonds and pistachios in my homemade granola recipes for their unique crunch and flavor. You can also experiment with other nuts like walnuts, pecans, or cashews. For dried fruits, consider dried blueberries, chopped dates, or even exotic options like diced mango or pineapple. Shredded coconut is another yummy addition, but remember to add it towards the end of the baking time (last 10-15 minutes) to prevent it from burning. By tweaking what you add to your batch, you can truly make the best granola recipe tailored specifically for your palate!
Homemade granola boasts a surprisingly long shelf life, especially when stored correctly. To maintain its freshness and crispness, always keep it in an airtight container. At room temperature, it will stay fresh for about a month. For longer storage, you can freeze granola for 3-4 months without compromising its quality. To enjoy frozen granola, simply defrost it overnight on the counter or in the refrigerator. It will be ready to eat by morning, making it a perfect make-ahead option for busy weeks.
Granola is incredibly versatile and can be enjoyed in many delicious ways! My personal favorite is a classic breakfast bowl with sliced bananas and a splash of milk. You can also create a delightful breakfast parfait by layering yogurt, your homemade granola, and fresh berries (strawberries, blueberries, raspberries) in a bowl or a tall glass. Beyond breakfast, granola makes a fantastic crunchy topping for ice cream sundaes, fruit crisps, or even baked apples. It’s also a perfect grab-and-go snack on its own, a great addition to a trail mix, or sprinkled over smoothie bowls for added texture and nutrition.
Homemade granola makes a wonderful, thoughtful gift! To package it beautifully, I recommend purchasing clear cellophane bags from craft stores like Michaels or JoAnn Fabrics, or specialty stores like The Container Store. Fill each bag with your delicious granola, leaving some space at the top. Securely close each bag with a festive ribbon – choose colors and patterns that match the occasion. For an extra personal touch, attach a small, handwritten gift tag with a sweet message or even the recipe itself. This simple presentation makes a humble gift feel very special and is always appreciated.
Yes, absolutely! To make this granola gluten-free, simply ensure you are using certified gluten-free old-fashioned rolled oats. Most grocery stores carry them. For a vegan version, the only substitution needed is the honey. You can easily replace the honey with an equal amount of maple syrup, agave nectar, or brown rice syrup. These alternatives will still provide the necessary sweetness and binding properties while keeping the recipe entirely plant-based. Remember to check all other ingredients (like sugar) if you are strictly vegan, but most common varieties are suitable.
Explore More Delicious Recipes
If you loved this Vanilla Granola, you might enjoy these other delightful recipes perfect for breakfast or a wholesome snack:
- Chunky Maple Coconut Granola
- Pistachio Coconut Granola
- Maple Coconut Granola
- Homemade Vanilla Extract is another fun edible gift idea!
- Plus, discover more Easy Breakfast Recipes to brighten your mornings.
Stay in touch and share your creations! Find me on social media @ Instagram, Facebook, and Pinterest. Don’t forget to tag me when you try one of my recipes! If you love the results, please consider giving it a 5-star rating in the recipe card below – your feedback means a lot!

Vanilla Granola with Dried Fruit
20 minutes
30 minutes
50 minutes
16 servings
A delectable homemade granola recipe sweetened with honey and flavored with vanilla extract, perfect for breakfast or a healthy snack.
Ingredients
- 4 cups old-fashioned oatmeal
- 2 cups slivered almonds
- ½ cup brown sugar
- Scant ½ teaspoon salt
- ½ teaspoon ground cinnamon
- 6 tablespoons vegetable oil (¼ cup plus 2 tablespoons)
- ¼ cup honey
- 2 tablespoons sugar
- 1 tablespoon vanilla extract
- 1 ½ cups dried fruit (I used dried cherries, cranberries and diced apricots)
Instructions
- Preheat oven to 300ºF (150ºC).
- Cover two rimmed baking sheets with aluminum foil (or spray with nonstick vegetable oil spray or line with parchment paper). Set aside.
- Mix the oats, almonds, brown sugar, salt, and cinnamon in a large bowl.
- Combine the oil, honey, and sugar in a saucepan and bring to a gentle simmer, stirring occasionally. Remove from heat and add vanilla extract.
- Pour the wet mixture over the oat mixture and stir until well combined and all ingredients are evenly coated.
- Divide the mixture evenly between the two baking sheets. Spread it into a thin layer and press down gently. Bake for about 30 minutes, stirring every 10 minutes to ensure even browning.
- Remove from oven when golden brown. Immediately mix in the dried fruit. Cool completely on a wire rack before storing. Store at room temperature or freeze in an airtight container.
Yield: Approximately 8 cups
Notes
You can substitute any of your favorite dried fruits and nuts to customize this recipe.
Adapted from All That Splatters.
Recommended Products
As an Amazon Associate and member of other affiliate programs, I earn from qualifying purchases.
- Nonstick Foil
- Black Spatula
- USA Pan Bakeware Half Sheet Pan
Nutrition Information:
Yield:
16
Serving Size:
1
Amount Per Serving:
Calories: 245Total Fat: 12gSaturated Fat: 1gTrans Fat: 0gUnsaturated Fat: 10gCholesterol: 0mgSodium: 74mgCarbohydrates: 32gFiber: 4gSugar: 21gProtein: 5g
HOW MUCH DID YOU LOVE THIS RECIPE?
Please leave a comment on the blog or share a photo on Pinterest

