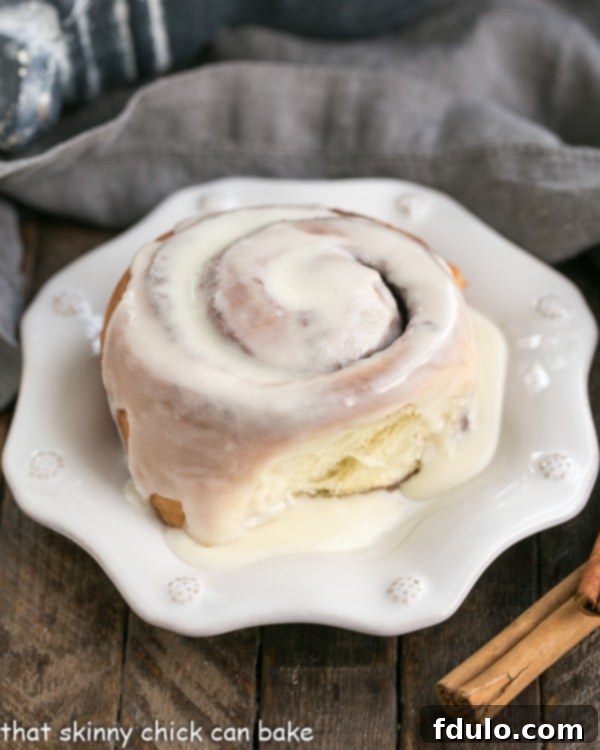
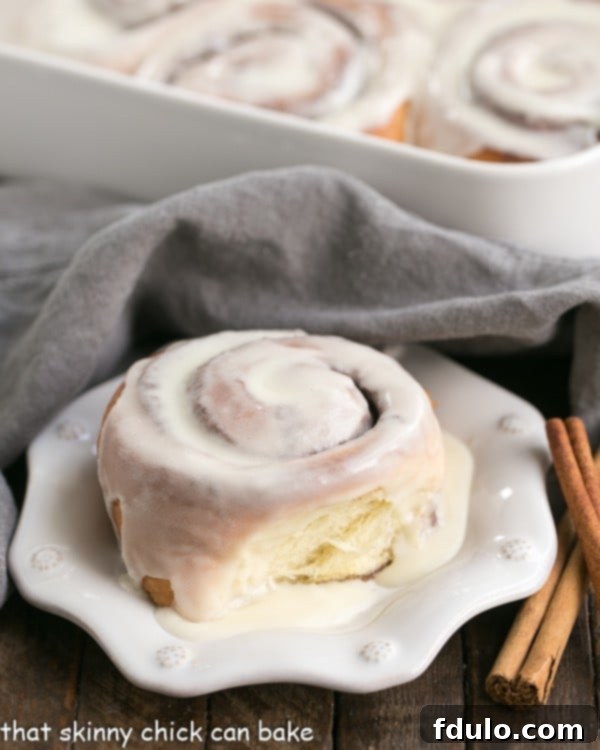
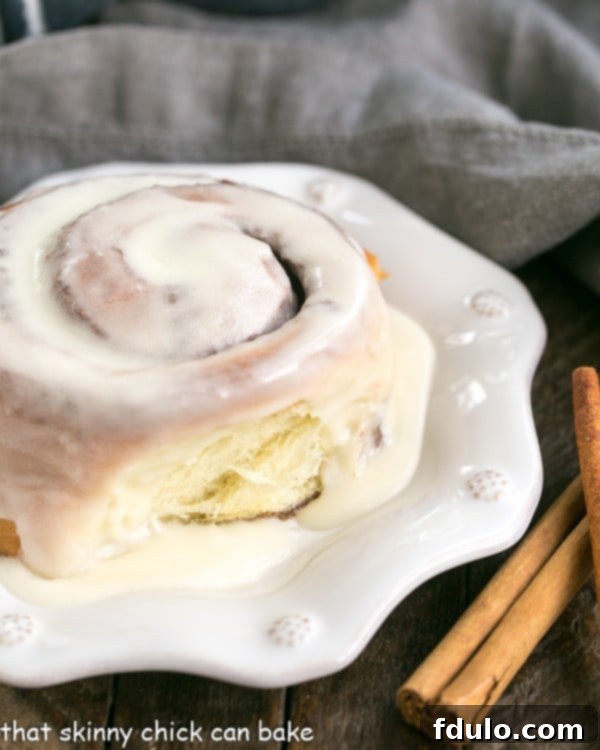
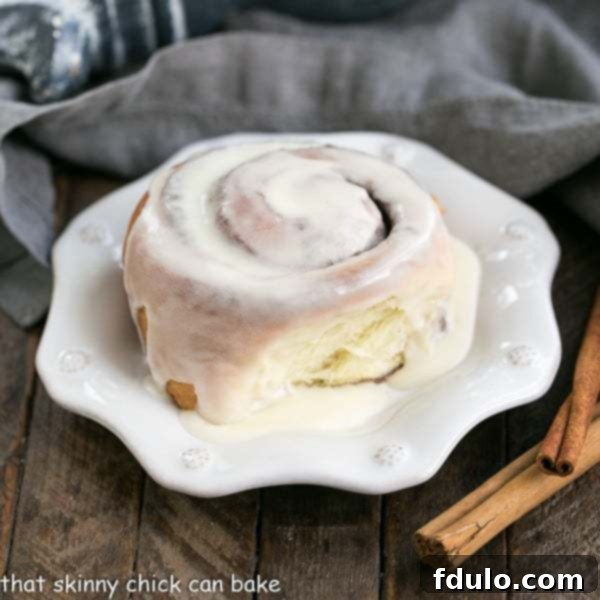
Few treats evoke the warmth and comfort of home quite like a batch of freshly baked cinnamon rolls. These decadent Glazed Cinnamon Buns are more than just a breakfast item; they are a cherished experience, perfect for creating memorable moments at Easter brunch, Mother’s Day, or any occasion that calls for something truly special. Get ready to indulge in the ultimate homemade delight!
There’s an undeniable magic in the aroma of cinnamon and sweet yeast dough baking in the oven. This exquisite Homemade Cinnamon Buns Recipe promises not just a delicious treat but also a joyful experience for the whole family. Each soft, fluffy roll, generously swirled with cinnamon sugar and crowned with a luscious glaze, is guaranteed to be a hit at any gathering.

The Irresistible Allure of Homemade Glazed Cinnamon Buns
Step into a world where every bite is a celebration. Our Glazed Cinnamon Buns are designed to be incredibly tender, generously spiced, and finished with a smooth, sweet glaze that melts in your mouth. Forget dry, store-bought imitations; this recipe will guide you to baking bakery-quality cinnamon rolls right in your own kitchen.
Why You Must Bake These Ultimate Cinnamon Rolls
For many, cinnamon rolls hold a special place in their hearts and on their breakfast tables. My family, in particular, has always been devoted to these sweet pastries. From the days of keeping a secret stash of frozen store-bought rolls to occasionally opting for the convenience of canned versions, nothing ever truly compared to the pure joy of homemade.
- Unmatched Freshness and Flavor: Store-bought options, while convenient, simply cannot replicate the complex flavors and delicate texture of rolls made from scratch. Fresh yeast, real butter, and aromatic cinnamon combine to create a depth of flavor that is truly in a league of its own.
- The Therapeutic Joy of Baking: There’s something incredibly satisfying and calming about the process of making yeast dough. From kneading to watching it rise, baking these buns offers a wonderful sensory experience that culminates in a truly rewarding treat. It’s a fantastic way to unwind and create something delicious with your own hands.
- Aromatic Bliss: The moment these cinnamon buns start baking, your kitchen will be filled with an intoxicating aroma that instantly brings warmth and cheer. This scent alone is enough to bring smiles and anticipation to everyone in the house.
- A Guaranteed Crowd-Pleaser: Whether it’s a bustling holiday brunch, a relaxed weekend breakfast, or simply a spontaneous craving, these glazed cinnamon buns are always a monumental hit. The silence that falls over the room as everyone savors their rolls is the highest form of praise a baker can receive.
- Perfect for Any Occasion: While often associated with holidays like Easter or Mother’s Day, these versatile buns are ideal for any gathering. They elevate a simple coffee break, impress guests at a potluck, or make a cozy evening at home feel extra special.
Mastering the Art: Essential Recipe Tips for Perfect Cinnamon Rolls
Baking with yeast can seem daunting, but with a few expert tips, you’ll achieve perfectly soft, fluffy, and beautifully swirled cinnamon buns every time. Pay attention to these details for success:
- Room Temperature Ingredients are Non-Negotiable: Always ensure your butter, eggs, and milk are at room temperature. This allows them to incorporate smoothly into the dough, creating a more cohesive and evenly textured result. Cold ingredients can shock the yeast and prevent proper activation, leading to a denser crumb.
- Avoid Excessive Flour: When kneading or rolling out your dough, resist the urge to add too much flour to your work surface or to the dough itself. An overly floured dough will become tough and dry, losing its signature tenderness. Use just enough flour to prevent sticking. The dough should be slightly tacky, not sticky, after kneading.
- Yeast Activation Temperature is Crucial: The water or milk used to activate your yeast must be just right. Too hot (above 115°F or 46°C) and it will kill the yeast; too cold (below 105°F or 40°C) and the yeast won’t activate properly. Aim for 105-115°F (40-46°C)—warm to the touch, like a baby’s bath. If your yeast doesn’t get foamy after 5-10 minutes, it’s likely expired or the temperature was off, and you should start again.
- Understand Dough Consistency: Your dough is perfectly mixed when it begins to pull away cleanly from the sides of the mixing bowl. As Taste of Home suggests, it should feel tacky but not sticky when touched. This indicates proper hydration and gluten development.
- Roll Dough Tightly for Beautiful Swirls: When shaping your rolls, ensure you roll the dough into a tight cylinder. This not only helps the buns maintain their structural integrity during baking but also creates those iconic, visually appealing cinnamon swirls that everyone loves. A loose roll can result in gaps or an uneven shape.
- Optimal Rising Temperature: Allow your rolls to rise in a warm, draft-free environment, ideally around 85°F (29°C). While a slightly higher temperature might seem to speed things up, forcing a rise at excessive temperatures can negatively impact the final texture and flavor. The crumb may become denser, the bread can lack its full flavor development, and in some cases, it might even acquire a slightly sour taste. Patience is key for a light, airy result.
- Precision Cutting: For clean, even buns, use a very sharp, un-serrated knife. Alternatively, a length of unflavored dental floss can work wonders. Slide the floss under the dough log, cross the ends over the top, and pull firmly to slice through without crushing the delicate layers.
- Verify Doneness with a Thermometer: If you’re unsure whether your cinnamon buns are fully baked, an instant-read thermometer is your best friend. Insert it into the center of a bun; if the internal temperature reads between 190-200°F (88-93°C), they are perfectly done, ensuring a thoroughly cooked interior without being overbaked.

Ingredient Notes: Crafting These Magnificent Cinnamon Rolls
This remarkable recipe, originally from Food Network Magazine, yields six truly massive rolls. It’s a recipe designed for indulgence, with just enough glaze to transport you to a state of sugary bliss after breakfast. My family absolutely raves about these humongous, glorious gems!
- Kitchen Staples: You’ll need pantry basics like granulated sugar, unsalted butter, egg yolk, all-purpose flour, fine sea salt, and ground cinnamon. Using high-quality versions of these common ingredients makes a noticeable difference.
- Whole Milk: Opt for whole milk (full-fat) as its higher fat content contributes significantly to a richer, more tender dough. The fats interfere with gluten development just enough to keep the crumb incredibly soft and moist.
- Instant Dry Yeast (Red Star Platinum Yeast recommended): Instant yeast is preferred here because it can be mixed directly with dry ingredients and doesn’t require separate proofing. Red Star Platinum Yeast is a popular choice known for its reliability and ability to produce consistent, strong rises.
- Vanilla Extract: Always reach for pure vanilla extract over imitation. A high-quality brand like Nielsen-Massey will infuse your dough and glaze with an authentic, rich vanilla flavor that elevates the entire experience.
- Powdered Milk (Dry Milk): This ingredient might seem unconventional, but it plays a crucial role. Powdered milk adds extra sweetness and protein to the dough, which aids in its rise and contributes to a softer, more luxurious texture. It also helps the bread retain moisture, keeping the buns fresh longer.
- Heavy Cream (36% Butterfat): For the glaze, heavy cream with at least 36% butterfat is essential. Its richness creates a wonderfully smooth, creamy, and decadent glaze that perfectly complements the warm rolls.
- Powdered Sugar (Confectioners’ Sugar): For the silkiest, lump-free glaze, it is imperative to sift your powdered sugar before mixing. This removes any small lumps and ensures a smooth, pourable consistency.
How to Make Homemade Glazed Cinnamon Buns: Step-by-Step Instructions
Follow these detailed steps to create truly unforgettable Glazed Cinnamon Buns. Take your time, and enjoy the process!
- Prepare the Yeast Mixture: Gently warm the whole milk in a medium saucepan over low heat until it reaches approximately 100°F (38°C). Be careful not to overheat, as this can kill the yeast. (Alternatively, you can microwave it in 20-second intervals, checking the temperature each time.) Remove the warmed milk from the heat.
- Activate the Yeast: Carefully sprinkle the instant dry yeast and a quarter teaspoon of sugar over the warm milk. Do not stir. Allow this mixture to sit undisturbed for about 5 minutes until it becomes visibly foamy. This foam indicates that the yeast is active and ready to work its magic.
- Combine Wet Ingredients: Into the foamy yeast mixture, whisk in the melted butter, egg yolk, and the pure vanilla extract until well combined and smooth.
- Prepare Dry Ingredients: In the bowl of a stand mixer, whisk together the all-purpose flour, the remaining quarter cup of sugar, dry milk powder, and salt. (Some recipes also suggest a pinch of nutmeg for added warmth, which you can include here if desired).
- Form and Knead the Dough: Create a well in the center of your dry ingredients. Pour in the yeast and wet ingredient mixture. Using the dough hook attachment, mix on low speed until the ingredients are just combined and form a thick, slightly sticky dough. Increase the speed to medium and knead the dough for approximately 6 minutes. Continue kneading until the dough gathers around the hook, becoming smooth, elastic, and less sticky, though still tacky to the touch. If the dough is excessively sticky, you may add up to 2 tablespoons more flour, one tablespoon at a time.
- First Rise: Remove the kneaded dough from the mixer and shape it into a smooth ball. Lightly butter a large bowl (the mixer bowl can be used if buttered) or spray it with cooking spray. Place the dough ball into the buttered bowl, turning it once to coat lightly. Cover the bowl tightly with plastic wrap and let it rise in a warm, draft-free place until it has doubled in size, which typically takes about 1 hour and 15 minutes.
- Shape the Dough: Once doubled, gently punch down the risen dough to release the air. On a lightly floured work surface, roll the dough into a 12-by-14-inch rectangle, ensuring the longer 14-inch side is facing you.
- Add the Filling: Evenly spread the softened butter over the entire surface of the dough, leaving a half-inch border clean on the long edge furthest from you. In a small bowl, mix the half-cup of sugar with the ground cinnamon. Generously sprinkle this fragrant cinnamon-sugar mixture over the buttered dough, making sure it’s evenly distributed.
- Roll and Seal: Lightly brush the unbuttered far edge of the dough with a little water. This acts as a sealant. Starting from the long edge closest to you, carefully and tightly roll the dough away from you into a cylinder. Once rolled, firmly press along the moistened far edge to securely seal the seam.
- Cut the Buns: Using a very sharp knife or unflavored dental floss, cut the dough cylinder into 6 to 9 equal-sized buns. Aim for consistent sizes for even baking.
- Second Rise: Generously butter a 9-by-13-inch baking pan. Arrange the cut cinnamon buns in the prepared pan, placing them cut-side down and leaving ample space between each roll to allow for expansion during the second rise. Cover the pan loosely with plastic wrap and let the buns rise again in a warm spot until they have doubled in size, usually about 40 minutes.
- Preheat Oven: While the buns are on their second rise, preheat your oven to 325°F (160°C).
- Bake to Golden Perfection: Bake the cinnamon buns in the preheated oven for approximately 35 minutes, or until they are golden brown on top and cooked through. If using a thermometer, they should register 190-200°F (88-93°C) internally.
- Prepare the Glaze: While the buns are baking or cooling slightly, sift the confectioners’ (powdered) sugar into a medium bowl to remove any lumps. Whisk in the heavy cream and melted butter until the glaze is smooth and creamy. Add the vanilla extract and whisk again until fully incorporated.
- Glaze and Serve: Once baked, remove the buns from the oven and let them cool in the pan for about 15 minutes. This allows them to set slightly. Transfer the still-warm buns to a wire rack. Generously spoon or drizzle the prepared glaze over the tops of the buns while they are still warm (but not piping hot, as the glaze will melt too quickly). Serve immediately and enjoy!

Frequently Asked Questions About Glazed Cinnamon Buns
Here are answers to some common questions about making and enjoying these delightful cinnamon buns:
Why Did my Buns Rise Unevenly?
Uneven rising can occur for a few reasons. One common cause is rolling the dough too tightly in some sections and too loosely in others, leading to varied density. Another factor can be placing the buns too close together in the baking pan, which restricts their individual growth. Ensure they have enough room to expand freely. Additionally, uneven heat distribution in your rising spot or oven can contribute to this issue.
Can These Buns Be Iced with Cream Cheese Frosting Instead?
Absolutely! While the provided glaze is wonderfully sweet and creamy, a tangy cream cheese frosting is always a delicious and highly popular alternative. To make cream cheese frosting, beat softened cream cheese with softened butter, then gradually add powdered sugar and a touch of vanilla extract until smooth and fluffy. It offers a delightful contrast to the sweetness of the buns.
Can I Prepare Cinnamon Buns Ahead of Time?
Yes, these cinnamon buns are excellent for making ahead! You have a few options:
- Overnight Proofing (Refrigerator Method): After placing the cut buns in the buttered baking pan for their second rise, cover them tightly with plastic wrap and refrigerate overnight (up to 12-18 hours). In the morning, take them out and let them come to room temperature for 30-60 minutes while your oven preheats, then bake as directed.
- Freezing Unbaked Buns: After the second rise, you can flash-freeze the individual unbaked buns on a baking sheet until solid. Transfer them to a freezer-safe bag or container and freeze for up to 1 month. When ready to bake, place frozen buns in a buttered pan, let them thaw and rise in a warm place for several hours (4-6 hours), then bake.
- Freezing Baked Buns: Fully baked and cooled buns (without glaze) can be wrapped tightly in plastic wrap and then foil, and frozen for up to 2-3 months. Thaw at room temperature, then reheat gently in the oven or microwave and glaze before serving.
How Do I Store Leftover Cinnamon Buns?
Leftover glazed cinnamon buns are best stored in an airtight container at room temperature for 1-2 days. For longer storage, you can refrigerate them for up to 3-4 days. While refrigeration can sometimes make yeast breads a bit drier, gently reheating them usually restores their tenderness.
What’s the Best Way to Reheat Cinnamon Buns?
To enjoy leftover buns as if they were freshly baked, moisten them slightly (a sprinkle of water or a damp paper towel) and reheat in the microwave for 15-30 seconds, or in a preheated oven at 300°F (150°C) for 5-10 minutes. This will bring back their soft texture and warm aroma.
My Dough Didn’t Rise. What Went Wrong?
Several factors can cause dough not to rise:
- Inactive Yeast: The most common reason. Ensure your yeast is fresh and active. If your yeast mixture didn’t get foamy in step 2, your yeast might be expired or inactive.
- Incorrect Water/Milk Temperature: Water that’s too hot will kill the yeast, while water that’s too cold won’t activate it. Aim for 105-115°F (40-46°C).
- Old Flour: While less common, very old or improperly stored flour can sometimes affect yeast activity.
- Cold Environment: Yeast needs warmth to thrive. Ensure your rising area is warm and free from drafts.
More Delicious Brunch Recipes You May Also Like:
If you’re a fan of delightful breakfast and brunch treats, explore these other fantastic recipes that are sure to become family favorites:
- Homemade Orange Rolls
- Cinnamon Zucchini Muffins
- Classic Cinnamon Rolls
- Cinnamon Bubble Roll
- Cinnamon Sticky Buns
- Discover more delightful Brunch Recipes
