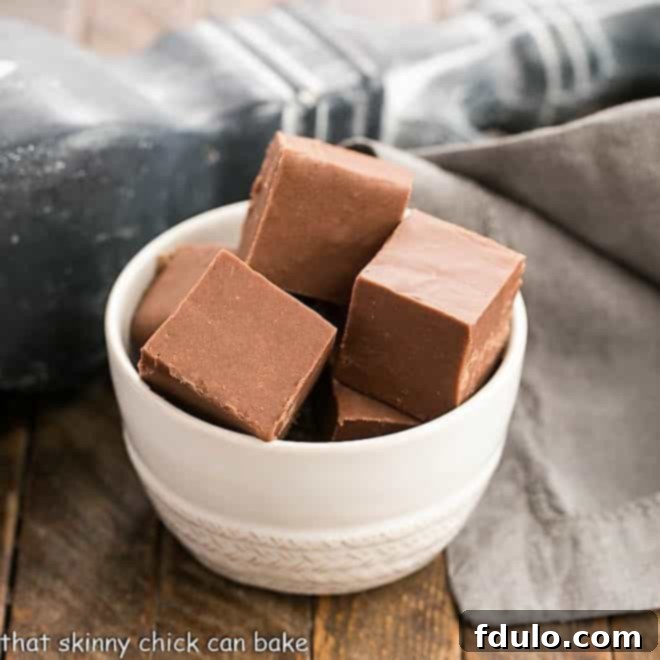
The Ultimate No-Fail Chocolate Fudge Recipe: Perfectly Creamy Every Time
Experience the magic of homemade confectionery with our celebrated No-Fail Chocolate Fudge recipe. For years, this incredibly easy fudge recipe has been a cherished holiday tradition, gracing countless tables and delighting family and friends with its impossibly smooth, melt-in-your-mouth texture. Forget grainy, disappointing batches; this foolproof recipe, inspired by the classic marshmallow creme jar instructions, guarantees a luxurious, rich chocolate fudge that consistently earns more rave reviews than I can count! Whether you’re a seasoned candy maker or a beginner looking for a reliable recipe, prepare to create the most delicious and effortlessly perfect chocolate fudge imaginable.

Why This No-Fail Chocolate Fudge Will Be Your New Favorite
There are countless reasons why this particular chocolate fudge recipe has become a perennial favorite and a must-make for so many. Its unique qualities elevate it far beyond a typical sweet treat, making it a true centerpiece for any occasion, especially during the festive holiday season.
- A Cherished Holiday Staple & Guaranteed Crowd-Pleaser: This isn’t just a recipe; it’s a legacy! Also known as Fantasy Fudge, this creation is an absolute essential for Christmas and other festive gatherings. I’ve personally received more compliments than I can count, from grateful neighbors eager for more, to enthusiastic basketball coaches who’ve stopped me in the parking lot to declare it the best fudge they’d ever tasted! Its irresistible charm makes it an ideal edible gift or a show-stopping addition to any dessert platter, leaving everyone asking for the recipe.
- Unmatched Creaminess, Guaranteed: The secret to this recipe’s legendary smoothness lies in one key ingredient: marshmallow creme. Unlike many traditional homemade fudge recipes that can turn out disappointingly grainy due to sugar crystallization, the addition of marshmallow creme acts as a natural stabilizer. It actively prevents those undesirable sugar crystals from forming, ensuring every single bite is luxuriously soft, velvety, and melts beautifully in your mouth. This is the fundamental difference between a good fudge and an utterly phenomenal, consistently smooth one.
- Rich, Decadent Flavor That Captivates: Prepare for an explosion of deep, robust chocolate flavor. This fudge is intensely satisfying, with a perfectly balanced sweetness that highlights the chocolate without being cloyingly sweet. It’s so incredibly rich and delicious that my family often insists on “cleaning” the pot with spoons before I even get a chance to wash it – a cherished tradition born from its irresistible appeal! This makes it a perfect indulgent treat for any chocolate lover.
- Effortless & Reliably Foolproof: While candy making can sometimes seem intimidating, this particular recipe truly lives up to its “no-fail” promise. With clear, simple steps and a few crucial, easy-to-follow tips, you’ll achieve perfect results every single time. It’s designed to build confidence in the kitchen and consistently deliver deliciousness, making it remarkably accessible to cooks of all skill levels, even those new to candy making.

Essential Ingredients for Your Perfect Chocolate Fudge
Crafting this incredible No-Fail Chocolate Fudge requires just a handful of common ingredients, many of which you likely already have in your pantry. Using quality ingredients is key to achieving that signature smooth texture and rich flavor that sets this creamy fudge apart.
- Granulated Sugar: The foundation of our fudge, regular granulated white sugar provides the necessary sweetness and structure. It’s crucial for the sugar to fully dissolve during the cooking process to prevent a grainy texture in the final product.
- Butter (Salted Recommended): For the richest flavor and best texture, real butter is non-negotiable. I always opt for salted butter, as a touch of salt beautifully enhances the overall sweetness and depth of the chocolate in dessert recipes, creating a more complex and satisfying taste. Margarine simply won’t yield the same luxurious taste or creamy consistency that genuine butter provides.
- Evaporated Milk: This isn’t just regular milk! Evaporated milk is a shelf-stable canned milk product where about 60% of the water has been removed. Its concentrated form provides a richer, creamier base for the fudge, contributing significantly to its smooth consistency and helping achieve the perfect candy-making temperature more effectively and reliably than fresh milk.
- Semisweet Chocolate (Chips or Bars): The star of the show! While good quality semisweet chocolate chips work well and are convenient, chocolate bars (such as Ghirardelli) are often preferred as they contain fewer stabilizers and melt more smoothly and uniformly. This results in an even silkier fudge. If you choose to use chocolate chips, opting for a reputable brand and chopping them finely yourself can significantly aid in faster, more even melting, ensuring a lump-free finish.
- Marshmallow Creme (Jet-Puffed Brand): This is the unsung hero that truly makes this recipe “no-fail.” Marshmallow creme, especially the Jet-Puffed brand I consistently use, contains stabilizers that specifically prevent sugar crystals from forming. This is paramount in candy making, as these crystals are the culprits behind grainy fudge. Its inclusion guarantees your fudge remains wonderfully smooth and never gritty, offering a scientific advantage over old-fashioned recipes.
- Pure Vanilla Extract: Don’t skimp on this essential flavoring! Real vanilla extract adds an indispensable layer of aromatic depth, warmth, and complexity that perfectly complements the rich chocolate flavor. Always check the label to ensure you’re using pure vanilla extract, not artificial flavoring, for the absolute best and most authentic taste in your fudge.
Step-by-Step Guide to Making Silky Smooth Chocolate Fudge
Creating flawless No-Fail Chocolate Fudge is incredibly straightforward when you follow these precise instructions. Each step is designed to ensure a consistently smooth, creamy, and delicious result, perfect for your holiday platters or as a special treat.


Mastering Fudge Making: Expert Tips for Foolproof Results
Achieving perfectly smooth, creamy chocolate fudge every single time is simpler than you think with these professional insights and techniques. Even with a “no-fail” recipe, a few expert tips can elevate your homemade fudge from great to absolutely exceptional, ensuring you produce a consistently delicious product.
- Preparation is Paramount – Prep Your Pan in Advance: Before you even begin cooking, ensure your pan is fully prepared. The best method is to line an 8×8-inch pan with non-stick foil, leaving enough overhang on the sides to create “slings.” This makes it incredibly easy to lift the cooled, firm fudge out of the pan and onto a cutting board for precise, clean slicing. If non-stick foil isn’t available, regular aluminum foil liberally sprayed with a non-stick cooking spray (like Pam) works just as well. This simple step prevents sticking and facilitates easy removal.
- “Mise en Place” – Have All Ingredients Measured and Ready: Candy making moves quickly, and you won’t have time to measure once the cooking starts! Measure out all your ingredients—sugar, butter, evaporated milk, chocolate, marshmallow creme, and vanilla—and have them ready and within arm’s reach of your stovetop. Once your sugar mixture reaches the target temperature, you’ll need to incorporate the final ingredients without any delay. This organized approach is key to success.
- Quality Ingredients Yield Superior Flavor and Texture: Do not compromise on the core components. Always use real butter for its rich flavor and superior, luxurious texture. For the chocolate, opt for reputable brand-name chocolate chips or, even better, high-quality chocolate bars (such as Ghirardelli semisweet chocolate). Better quality chocolate means a richer, smoother, and ultimately more delicious fudge. The difference is truly noticeable.
- Pre-Chop Your Chocolate for Optimal Melting: If you’re using chocolate chips, take a moment to chop them into smaller, more uniform pieces before adding them to the hot mixture. Chocolate chips are specifically designed to hold their shape (great for cookies!), which can make them slower and more challenging to melt evenly in fudge. Chopping them ensures they melt more quickly and smoothly, contributing to a silky, lump-free fudge.
- Invest in a Heavy-Bottomed Saucepan: A sturdy, heavy-bottomed saucepan is your most valuable tool when making fudge. Its thick base helps to distribute heat more evenly across the bottom of the pan, significantly minimizing the risk of scorching your sugar mixture. It also provides better heat retention, which is crucial for maintaining a consistent temperature throughout the cooking process.
- Choose the Right Size Pan to Prevent Overflows: Ensure your saucepan is adequately large enough to comfortably hold all the ingredients, especially as the mixture boils, without the risk of boiling over. A pot that’s too small can lead to messy spills, uneven cooking, and potential hazards from hot sugar.
- Stir Safely with the Right Utensil: Always use a long-handled silicone spatula or a sturdy wooden spoon for stirring your fudge mixture. Metal spoons can conduct heat very efficiently, becoming dangerously hot and uncomfortable to handle during the constant stirring required for fudge. Safety first!
- Precision with a Candy Thermometer is Non-Negotiable: For consistently perfect results every single time, an accurate candy thermometer is your most valuable and reliable tool. Achieving precisely 234°F (112°C) is absolutely crucial for the correct texture of fudge, preventing both grainy fudge (if under-cooked) and overly hard, crumbly fudge (if over-cooked). Do not guess; trust your thermometer implicitly.
- Resist the Urge to Double the Recipe: While tempting to make a larger batch, fudge recipes—especially those involving precise candy-making temperatures—are quite sensitive to proportions and cooking times. Doubling the recipe significantly increases the likelihood of an uneven cook, making it much harder to reach the correct temperature consistently, and thus leading to a failed batch. Stick to one batch at a time for optimal success.
- Address Sugar Crystals Promptly: If, during the boiling process, you notice any sugar crystals clinging to the sides of your saucepan above the mixture, quickly place a lid on the pot for approximately 15-30 seconds. The steam created will condense inside the pot and wash down these sugar crystals, helping them dissolve back into the mixture and preventing graininess in your finished fudge. Alternatively, you can use a wet pastry brush to gently wipe down the sides of the pan.
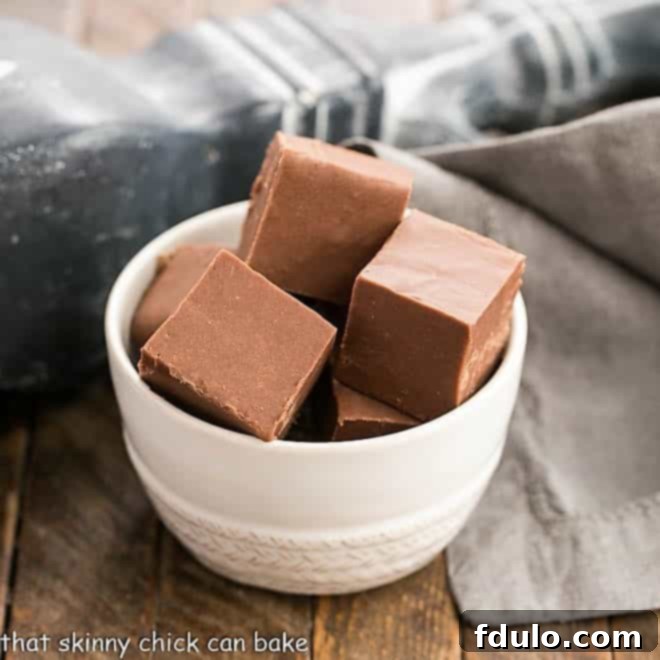
Frequently Asked Questions About No-Fail Chocolate Fudge
Many classic fudge recipes, like the old-fashioned Fanny Farmer Fudge, rely solely on precise temperature control and vigorous beating to prevent sugar crystallization, making them notoriously tricky to master. What makes *this* recipe truly foolproof is the inclusion of marshmallow creme. Marshmallow creme acts as an interfering agent, similar to corn syrup, by adding glucose and dextrin molecules that physically get in the way of sucrose crystals forming large, undesirable aggregates. This virtually guarantees a smooth, creamy texture without the inherent risk of graininess often associated with homemade fudge.
A candy thermometer is absolutely essential for achieving consistent results in fudge making. Fudge requires the sugar mixture to reach a specific temperature – 234°F (112°C), which is just below the soft-ball stage (ranging from 235-240°F). Reaching this exact temperature ensures the precise amount of water has evaporated from the mixture, leading to the perfect set and the desired creamy texture. If the temperature is too low, your fudge won’t set properly; if it’s too high, it will become hard and crumbly. While you *can* test for the soft-ball stage by dropping a small amount into cold water to see if it forms a soft, flexible ball, a reliable candy thermometer offers unparalleled precision and peace of mind.
For the silkiest, most decadent fudge, high-quality semisweet chocolate is highly recommended. While chocolate chips are convenient, they are often formulated with stabilizers to help them maintain their shape when baked (which is great for cookies, but less ideal for melting smoothly into fudge). This can sometimes lead to a slightly less uniform texture in your fudge. For truly superior results, opt for a good quality semisweet chocolate bar (such as Ghirardelli), chopped into small, even pieces. If you choose to use chocolate chips, selecting a premium brand and taking the extra step to chop them finely yourself will significantly aid in faster and smoother melting, helping you achieve that desirable, perfectly creamy consistency.
Once you pour the fudge mixture into your prepared pan, it typically needs 1 to 2 hours to set at room temperature. The exact time can vary slightly depending on the ambient temperature and humidity levels in your kitchen. It’s important to allow the fudge to cool and firm up undisturbed. Once the fudge has completely cooled and firmed, be sure to cover the pan tightly with foil or plastic wrap. This crucial step prevents the top layer from drying out and helps maintain its wonderful softness and fresh texture.
One of the great advantages of this easy fudge recipe is its excellent shelf life! At room temperature, stored properly in an airtight container, your homemade chocolate fudge will remain fresh and delicious for 1 to 2 weeks. For extended freshness, you can store it in an airtight container in the refrigerator for 2 to 3 weeks. This fudge also freezes beautifully for up to 3 months. To freeze, wrap individual pieces or the entire block tightly in plastic wrap, then place them in a freezer-safe, airtight container. Thaw at room temperature before serving for the best texture and flavor.
Fudge texture is primarily determined by the accuracy of your temperature control during the cooking phase. If your fudge turns out too hard, it likely cooked to too high a temperature, causing too much moisture to evaporate. Conversely, if it’s too soft or fails to set properly, it may not have reached the required 234°F (112°C) to sufficiently evaporate the water content. This highlights why a candy thermometer is an invaluable tool. Unfortunately, once fudge is made, it’s quite difficult to perfectly correct its texture. For hard fudge, you might attempt a gentle salvage by reheating it in a double boiler with a tablespoon of milk or cream, stirring until softened, then re-pouring. For soft fudge, there is generally no effective remedy; ensuring precise temperature for your next batch is the key to success!
You May Also Love These Fudge & Holiday Recipes:
- Easy White Chocolate Cranberry Fudge from Life, Love and Sugar
- Creamy Chocolate Marshmallow Fudge
- Decadent Layered Chocolate Peanut Butter Fudge
- Spiced Pumpkin Fudge
- Plus, explore all my Best Holiday Recipes for more festive inspiration!
Stay connected and share your culinary adventures with me on social media @ Instagram, Facebook, and Pinterest. Don’t forget to tag me when you try one of my recipes! And if you love the results and enjoyed this No-Fail Chocolate Fudge, please consider giving it a 5-star rating in the recipe card below.
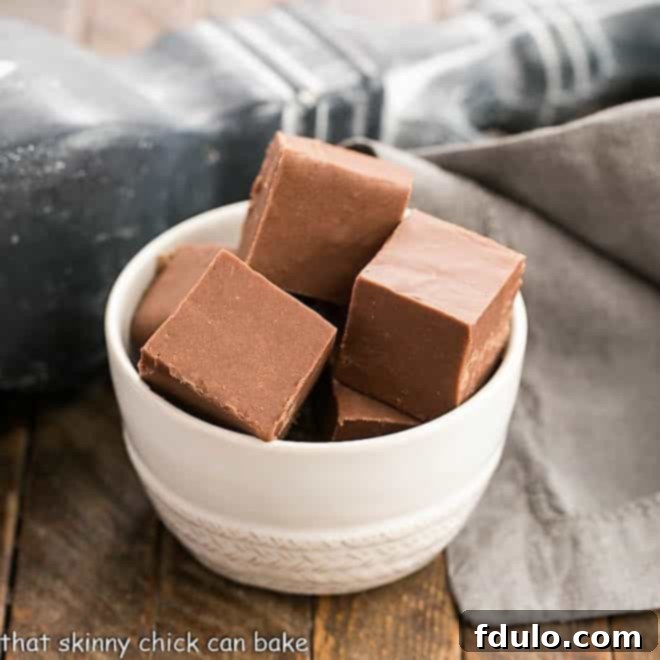
The Recipe:
No Fail Chocolate Fudge
5 minutes
10 minutes
2 hours
2 hours 15 minutes
64 squares of fudge
Experience silky smooth fudge every single time with this incredible No-Fail Chocolate Fudge! This beloved recipe, famously found on the back of the Kraft Marshmallow Creme jar, is perfected with key techniques to ensure a creamy, decadent texture that never disappoints. It’s the ultimate easy fudge recipe for holidays, gifting, or simply satisfying your sweet cravings with consistently perfect results.
Ingredients
- 3 cups white sugar
- ¾ cup butter
- ⅔ cup evaporated milk
- 1 12-ounce package semisweet chocolate chips or 12 ounces chopped, semi-sweet chocolate
- 1 7-ounce jar Kraft marshmallow creme
- 1 teaspoon vanilla
Instructions
- Line an 8 x 8-inch-inch pan with non-stick foil, leaving an overhang on all sides to create a “sling” for easy removal. Set it aside.
- In a large, heavy-bottomed saucepan, combine the sugar, butter, and evaporated milk. Bring the mixture to a full rolling boil over medium heat, stirring constantly to prevent scorching.
- Continue to cook, stirring, until your candy thermometer accurately reaches 234°F (112°C). This crucial step should take approximately 4-5 minutes once the boil begins. Immediately remove the saucepan from the heat.
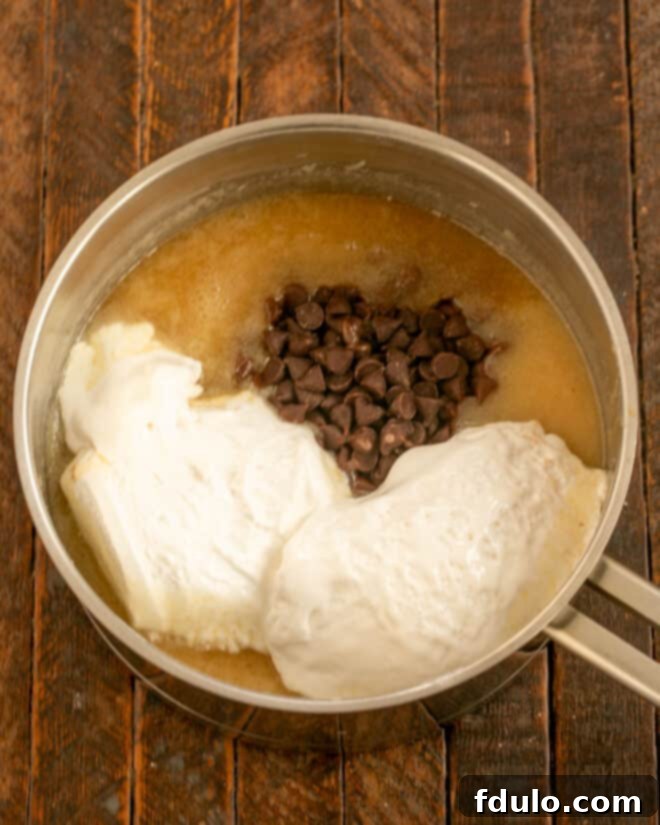
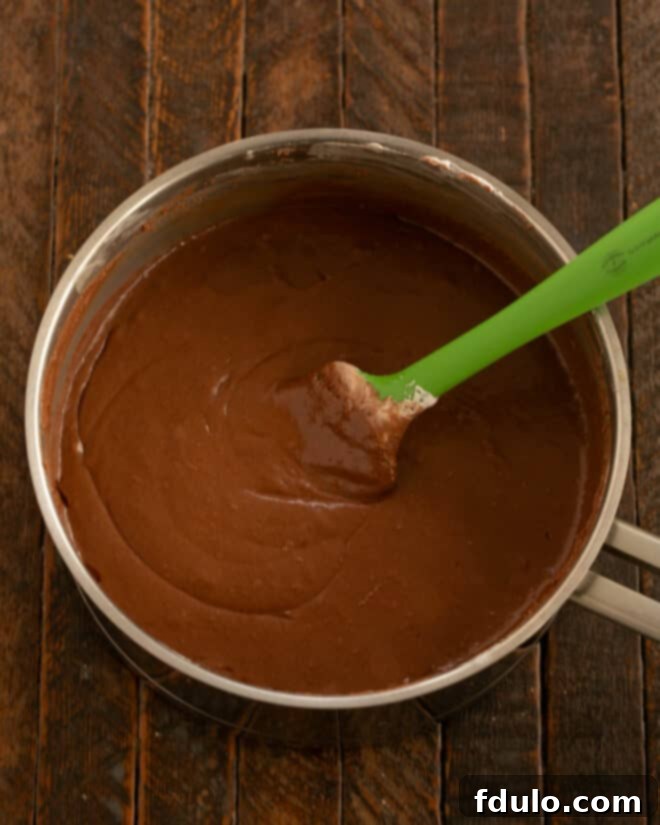
- Quickly add the chocolate chips (or chopped chocolate), marshmallow creme, and vanilla extract to the hot mixture. Stir vigorously and continuously until all ingredients are completely melted and the fudge is smooth and glossy.
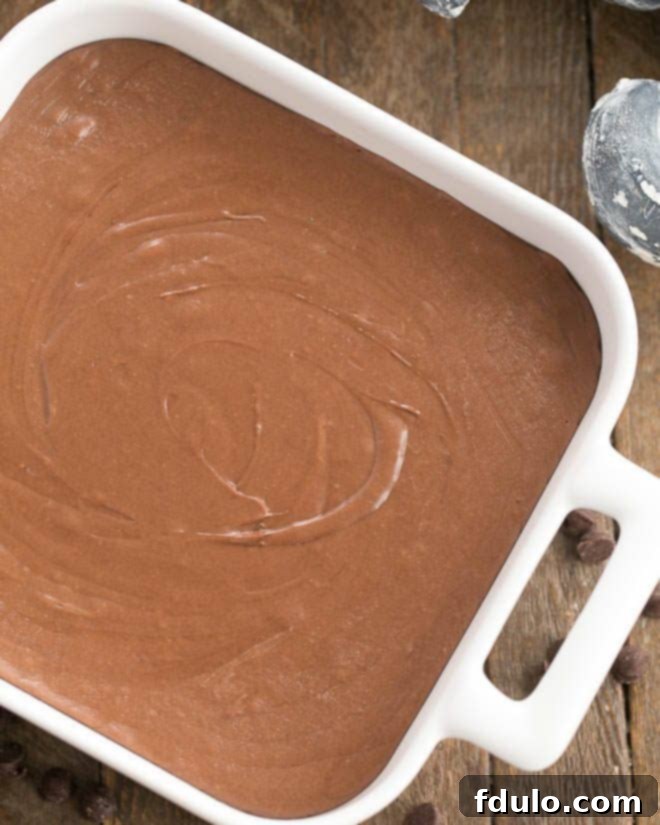
- Promptly pour the smooth fudge mixture into your prepared pan. Use an offset spatula to spread it evenly across the pan.
- Allow the fudge to cool completely at room temperature until it is firm to the touch. Once cooled, use the foil overhangs to lift the fudge from the pan, transfer to a cutting board, and cut into 1-inch squares.
Notes
For the most consistent and best results, always use an accurate candy thermometer.
Ensure you use real butter and opt for brand-name chocolate chips or high-quality chocolate bars (Ghirardelli is a great choice). If you’re using chocolate chips, chopping them into smaller pieces will help them melt more easily and ensure a smoother fudge.
If you observe any sugar crystals adhering to the sides of the pan while the fudge mixture is boiling, simply place a lid on the pot for about 15-30 seconds. The steam created will condense and wash these sugar crystals back into the mixture, helping to prevent graininess. Alternatively, you can use a wet pastry brush to gently wipe down the sides of the pan.
Nutrition Information:
Yield:
64
Serving Size:
1 square
Amount Per Serving:
Calories: 120Total Fat: 6gSaturated Fat: 3gTrans Fat: 0gUnsaturated Fat: 2gCholesterol: 6mgSodium: 24mgCarbohydrates: 19gFiber: 1gSugar: 17gProtein: 1g
HOW MUCH DID YOU LOVE THIS RECIPE?
Please leave a comment on the blog or share a photo on Pinterest
