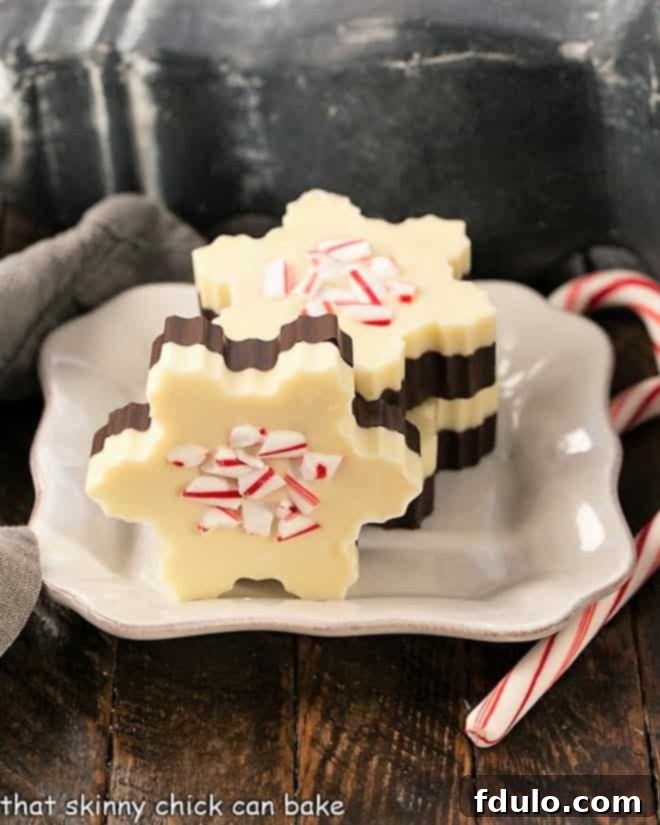
Transform your festive season with these enchanting **Peppermint Bark Snowflakes**! Impress your friends and family with a holiday treat that looks stunningly intricate but is incredibly simple to create. Forget ordinary candy; these beautiful, minty chocolate confections molded into delicate snowflake shapes are destined to become a cherished part of your holiday traditions, evoking gasps of delight and making everyone wonder about your secret baking prowess.
This exquisite **Peppermint Bark Recipe** is not only a joy to make but also serves as an effortless and thoughtful hostess gift. Imagine wrapping a few of these delightful snowflakes in cellophane, tied with a vibrant holiday ribbon – a personal touch that speaks volumes and spreads seasonal cheer. They are perfect for neighbor gifts, party favors, or simply as a special treat for your own household during the most wonderful time of the year. This unique approach elevates the classic peppermint bark, turning a beloved staple into a work of edible art that’s sure to be remembered.
Why These Peppermint Bark Snowflakes Are a Holiday Must-Make
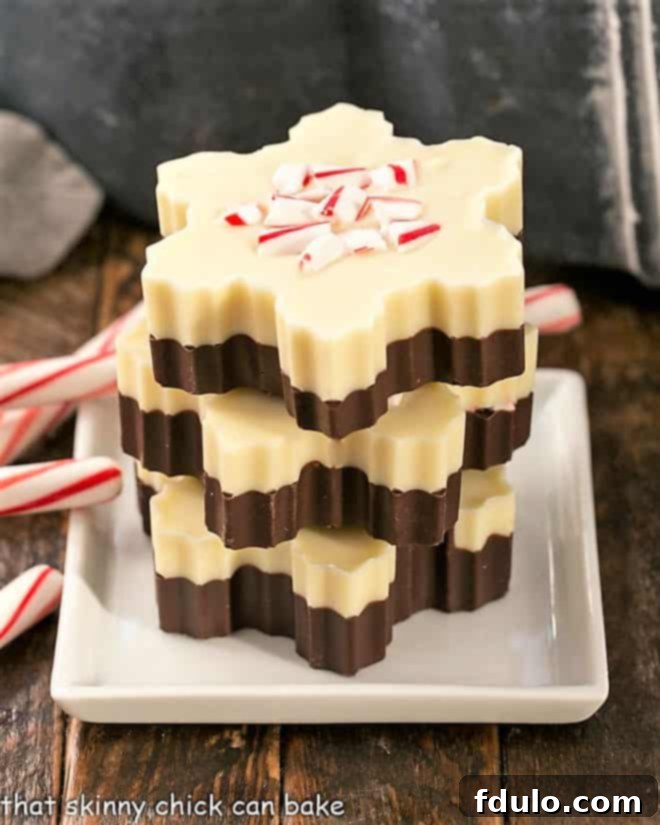
As the holiday season draws near, the aroma of peppermint and chocolate fills the air, signaling that it’s time for classic seasonal treats. While traditional peppermint bark is always a hit, elevating it with a festive shape transforms it into something truly magical. These Peppermint Bark Snowflakes are not just another dessert; they are an experience, a delightful fusion of flavor and visual appeal that embodies the spirit of Christmas. Here’s why this recipe deserves a prime spot in your holiday baking repertoire:
- **A Beloved Holiday Tradition Reinvented:** Peppermint bark has long been a staple during the Christmas season, a treat many look forward to sharing with loved ones and neighbors. This snowflake version takes that cherished tradition and injects it with a fresh, captivating twist, making it even more special and memorable. It’s a fantastic way to continue a tradition while adding your unique touch.
- **Effortless Elegance:** Despite their impressive appearance, these peppermint bark snowflakes are incredibly simple to create. The process is straightforward: melt premium dark and/or white chocolate, infuse it with vibrant peppermint extract, and generously fold in crunchy crushed candy canes. The hard part is already done by the mold, making this a virtually foolproof recipe perfect for even novice bakers.
- **Unforgettable Festive Presentation:** The snowflake shape adds an undeniable touch of winter wonderland charm, instantly making these treats extra festive and visually appealing. They stand out on any dessert platter, catch the eye as a thoughtful gift, and bring an extra layer of joy to holiday gatherings. They are a conversation starter and a true testament to the beauty of homemade holiday treats.
- **A Nod to Inspiration:** This particular adaptation was inspired by captivating images seen on platforms like Pinterest, notably Mari from Once Upon a Plate, whose perfect execution of these snowy delights spurred this recipe. Further inspiration came from Baked by Rachel, prompting an update to our own beloved recipe from 2011. It’s a testament to how creative ideas can evolve and inspire, leading to even better, more beautiful results.
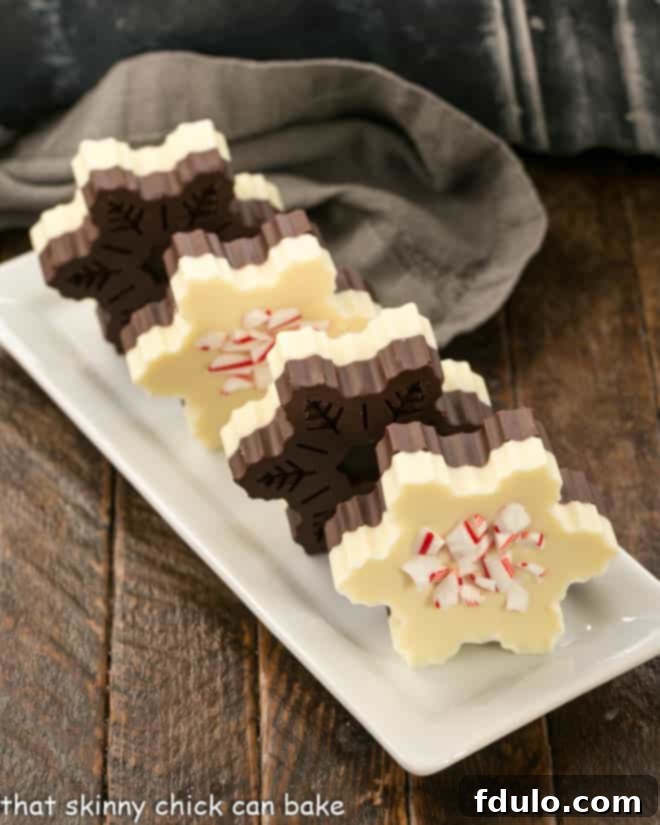
PRO-Tip for Perfect Snowflakes: For optimal enjoyment and a more refined presentation, I highly recommend making thinner layers of bark, yielding around 12 snowflakes instead of the 6 thicker ones pictured in some examples. While the thicker snowflakes are undeniably beautiful, their substantial size can be a bit unwieldy to eat. Thinner layers offer a more delicate bite and allow the distinct chocolate and peppermint flavors to meld perfectly. Snowflake molds are widely available, often found in dollar bins during the holiday season or conveniently online through retailers like Amazon, making this elegant upgrade easily accessible.
Essential Ingredients for Flawless Peppermint Bark Snowflakes
Crafting the perfect peppermint bark relies on a few key ingredients, each playing a crucial role in achieving that coveted balance of rich chocolate, cool mint, and delightful crunch. Choosing high-quality ingredients can significantly elevate the final taste and texture of your snowflakes. Here’s a closer look at what you’ll need and some tips for best results:
- **Kitchen Staples – Vegetable Oil:** A small amount of vegetable oil is essential for ensuring your chocolate melts smoothly and evenly, preventing it from becoming too thick or seizing. It also helps in achieving a glossy finish and a clean release from the molds. Opt for a neutral-flavored oil like canola or sunflower.
- **Premium White Chocolate:** For the best flavor and melting consistency, I highly recommend using high-quality white chocolate bars, such as Ghirardelli. Chopping the bars into smaller, uniform pieces before melting is key. This promotes more even heating, reducing the risk of scorching and ensuring a silky-smooth texture. Avoid white chocolate chips if possible, as they often contain stabilizers that hinder smooth melting.
- **Rich Semisweet Chocolate:** Just like with white chocolate, the quality of your semisweet chocolate makes a noticeable difference. Ghirardelli bars, finely chopped, are an excellent choice. The depth of flavor in good quality semisweet chocolate beautifully complements the refreshing peppermint and adds a luxurious richness to the bark.
- **Potent Peppermint Extract:** This is where the signature minty flavor comes from! Peppermint extract is incredibly potent, so a little goes a long way. Start with the smaller recommended amount (e.g., ¼ teaspoon for each chocolate layer) and taste-test if you’re unsure. You can always add a tiny bit more, but you can’t take it away! Ensure you’re using *peppermint* extract, not mint extract, as their flavors differ.
- **Crunchy Candy Canes:** The visual appeal and delightful crunch of crushed candy canes are indispensable for peppermint bark. Aim to crush them into ¼-inch pieces. A useful tip is to place the candy canes in a freezer bag and gently tap them with a rolling pin or the flat side of a meat tenderizer. After crushing, sift out any very fine dust using a sieve; focusing on the small, distinct pieces will provide the best texture and prevent the bark from becoming powdery or clumpy.
Crafting Your Layered Peppermint Bark Snowflakes: A Simple Guide
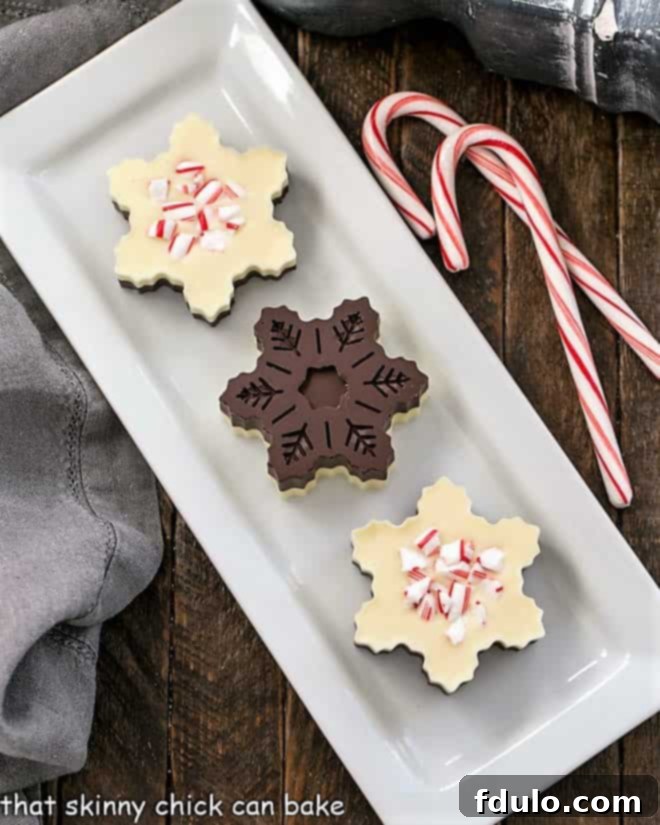
Making these layered peppermint bark snowflakes is a straightforward and rewarding process, perfect for a cozy afternoon of holiday crafting. This recipe is an adaptation of my classic white chocolate peppermint bark, enhanced with a festive two-tone design. We’ll be creating half a batch of mint-flavored dark chocolate bark and half a batch of white chocolate bark, without adding candy cane bits directly into the chocolate itself, allowing them to remain a vibrant topping. The exact yield of your snowflakes will depend on the size and depth of your molds, but the festive result of this layered bark is always stunning!
- **Prepare Your First Layer:** Begin by placing your silicone snowflake molds onto a sturdy baking sheet for easy transfer later. Gently melt the semisweet chocolate along with half of the vegetable oil in a microwave-safe bowl, heating in short bursts (30-second intervals) and stirring frequently until completely smooth and glossy. Stir in half of the peppermint extract, ensuring it’s well combined. Pour this mint-flavored dark chocolate into the bottom of each snowflake mold, creating an even layer. Immediately sprinkle a generous amount of your crushed candy cane pieces over the dark chocolate layer before it sets.
- **Set the Foundation:** Carefully transfer the baking sheet with the molds to the refrigerator. Chill for about 10-15 minutes, or until the dark chocolate layer is firm to the touch. This crucial step prevents the layers from bleeding into each other and ensures clean, distinct lines.
- **Introduce the White Chocolate Layer:** While the dark chocolate layer is chilling, prepare your white chocolate. In a separate microwave-safe bowl, gently melt the white chocolate with the remaining vegetable oil using the same short-burst method, stirring until perfectly smooth. Mix in the remaining peppermint extract. Once the dark chocolate is firm, retrieve the molds from the refrigerator. Pour the melted white chocolate over the chilled dark chocolate layer, filling the molds to your desired depth.
- **Final Touches and Chill:** Once the white chocolate layer is poured, gently tap the baking sheet a few times on the counter to help even out the chocolate and release any trapped air bubbles. Immediately sprinkle the tops with more crushed candy cane bits, ensuring they adhere nicely before the chocolate begins to set. Return the molds to the refrigerator and chill for at least 30-60 minutes, or until the entire bark is completely firm and easily releases from the molds. Once firm, carefully pop the beautiful peppermint bark snowflakes out of their molds. They are now ready to be enjoyed or packaged as delightful gifts!
Expert Tips for Perfect Peppermint Bark Snowflakes Every Time
Achieving picture-perfect peppermint bark snowflakes is easy with a few insider tips. Whether you’re a seasoned baker or just starting, these suggestions will help you create a batch that’s both beautiful and delicious, ensuring your holiday treats are a resounding success.
- **Yield Guidance:** This specific recipe is designed to produce approximately six generously thick peppermint bark snowflakes. However, the ultimate yield can vary based on the size and depth of your chosen molds. Adjust quantities if you desire more or fewer pieces.
- **Thinner is Better:** For a more pleasant eating experience and to maximize your yield, I highly recommend creating thinner layers of bark than those often depicted in promotional photos. Thinner snowflakes are not only easier to bite into but also allow the flavors to harmonize more delicately. If you prefer thinner snowflakes, consider dividing the full recipe’s melted chocolate between two sets of molds or using shallower molds to achieve this effect.
- **PRO-Tip: Uniform Chocolate Distribution:** To ensure each snowflake receives a similar amount of chocolate and boasts a consistent thickness, utilize a cookie disher or a small ice cream scoop. This tool provides precise portion control, making your layers even and your snowflakes uniform.
- **Seamless Refrigerator Transfer:** Silicone molds, while flexible and excellent for release, can be wobbly when full. Always place your molds on a sturdy half-sheet baking pan before filling them with chocolate. This simple step makes transferring them to and from the refrigerator incredibly easy and mess-free, preventing spills and mishaps.
- **Even Layers, Every Time:** After pouring each layer of melted chocolate into the molds, give the baking sheet a gentle “shimmy.” Lightly shaking the pan back and forth helps the chocolate settle evenly into all crevices of the snowflake design and creates a smooth, flat surface before it begins to set.
- **Chill Thoroughly Between Layers:** Patience is a virtue when layering chocolate bark. Ensure that each layer is thoroughly chilled and firm to the touch before adding the next. This prevents the colors from swirling unintentionally and allows for crisp, distinct layers that look professional and appealing.
- **Timely Topping Application:** Sprinkle the crushed candy cane pieces over the chocolate layers immediately after pouring, while the chocolate is still wet and pliable. This ensures the candy canes adhere perfectly to the surface, preventing them from falling off once the bark hardens.
- **Elegant Gifting Solution:** For a charming and impressive hostess gift or holiday favor, simply wrap a few of your finished peppermint bark snowflakes in clear cellophane bags. Tie them with a festive ribbon – perhaps red, green, or silver – for a professional and heartfelt presentation that friends and hosts will adore.
Frequently Asked Questions About Peppermint Bark Snowflakes
The term “bark” in confectionery refers to confections made by spreading melted chocolate or candy thinly and allowing it to cool and harden into an irregular, rustic slab. This often results in a jagged, uneven edge, reminiscent of tree bark. Peppermint bark, specifically, gets its name from this characteristic thin, often broken, appearance, adorned with festive crushed peppermint candies.
At its core, peppermint bark is a wonderfully simple yet decadent confection. It typically consists of high-quality dark chocolate, white chocolate, or often, distinct layers of both. The essential flavor comes from peppermint extract or flavoring, which is infused into the chocolate, and it’s generously studded or topped with crushed candy canes, providing both a refreshing minty crunch and a vibrant festive color.
When stored correctly, peppermint bark has an impressive shelf life. To keep it at its best, place it in an airtight container in a cool, dry place away from direct sunlight or strong odors. Under these conditions, it can remain fresh and delicious for up to 6 months. Once the container has been opened, it’s generally best to consume the bark within 2 weeks to enjoy its optimal texture and flavor, as exposure to air can cause it to lose its crispness and vibrant mint flavor.
Absolutely! While peppermint is traditional, you can easily customize your bark. Try substituting peppermint extract with almond, orange, or even raspberry extract for a different flavor profile. Instead of candy canes, you could use crushed pretzels for a sweet and salty crunch, toasted nuts, or even other small holiday candies for a unique twist. The possibilities are endless!
For the best results, use high-quality baking chocolate or couverture chocolate, which melts smoothly and has a high cocoa butter content. Brands like Ghirardelli, Lindt, or Callebaut are excellent choices. Avoid using chocolate chips if possible, as they contain stabilizers that can make them difficult to melt into a smooth, pourable consistency for bark. If you must use chips, add a teaspoon of vegetable oil per 8 ounces of chocolate to aid in melting.
Chocolate seizing is usually caused by even a tiny drop of water or excessive heat. When melting chocolate, ensure all your bowls and utensils are completely dry. Melt chocolate gently using a double boiler or in a microwave at short intervals (30 seconds), stirring frequently. If your chocolate does seize, sometimes you can rescue it by stirring in a teaspoon of vegetable oil or melted shortening, a bit at a time, until it smooths out, though the texture might be slightly altered.
Explore More Holiday Sweet Treats You’ll Love
If you’ve enjoyed crafting and tasting these delightful Peppermint Bark Snowflakes, you’re in for a treat! The world of holiday desserts is vast and wonderful, offering endless possibilities for festive indulgence. Here are some other fantastic recipes featuring mint, chocolate, and seasonal cheer that are sure to become new favorites:
- Thin Mint Cheesecake Brownie Cake from Inside BruCrew Life – A decadent dessert combining the best of brownie, cheesecake, and mint.
- Mint Chocolate Fudge from Wine and Glue – Rich, creamy fudge with a refreshing minty kick, perfect for gifting.
- Pretty Peppermint Bark from Love from the Oven – A classic take on peppermint bark, offering simplicity and elegance.
- Swirled Peppermint Bark – A visually stunning variation that combines dark and white chocolate in beautiful swirls.
- Grasshopper Pie – A retro, no-bake dessert featuring a refreshing mint and chocolate flavor.
- White Chocolate Candy Cane Cookies – Chewy cookies studded with white chocolate and crushed candy canes.
- Peppermint Patty Candy – Recreate the classic chocolate-covered mint patties at home.
- Discover even more delightful options in our collection of the Best Dessert Recipes.
Stay in touch and share your culinary creations with our vibrant community! Find us on social media @ Instagram, Facebook, and Pinterest. Don’t forget to tag me when you try one of my recipes – I absolutely love seeing your delicious results! And if you’re thrilled with how your Peppermint Bark Snowflakes turn out, please consider leaving a 5-star rating in the recipe card below. Your feedback helps other home bakers discover and enjoy these recipes too!
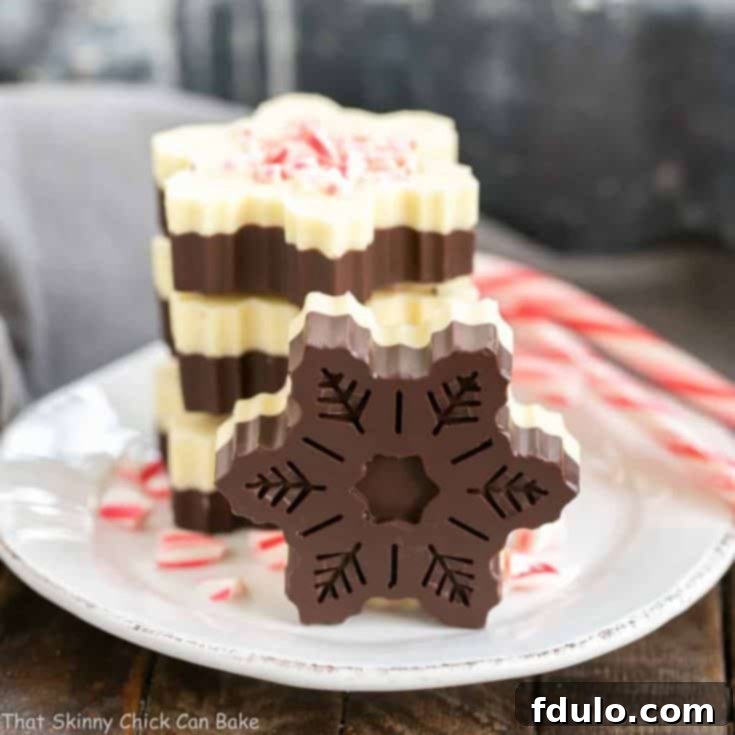
Peppermint Bark Snowflakes
20 minutes
20 minutes
6
Peppermint bark snowflakes for the holidays
Ingredients
- 8 ounces white chocolate, chopped
- 8 ounces semisweet chocolate, chopped
- 2 teaspoons vegetable oil, divided
- ½-1 teaspoon peppermint extract, divided
- 6 candy canes, crushed into ¼-inch pieces (remove dust)
Instructions
- Place your mold on a baking sheet.
- Gently melt the semisweet chocolate and 1 teaspoon vegetable oil in a large microwave-safe bowl, stopping and stirring at 30-second intervals until melted and smooth. Add ¼-½ teaspoon of peppermint extract.
- Pour into your silicone molds (my layers were slightly under a half-inch deep). Gently shake the pan back and forth to level the chocolate.
- Sprinkle with some candy cane bits.
- Refrigerate while making the white chocolate layer.
- Melt the white chocolate and 1 teaspoon vegetable oil as you did the dark chocolate and add extract.
- Pour white chocolate over dark chocolate (about the same depth), gently shake the pan to level the white chocolate, and sprinkle the tops with candy cane bits before the chocolate hardens.
- Chill, then remove from molds to serve.
Notes
Recommended Products
As an Amazon Associate and member of other affiliate programs, I earn from qualifying purchases.
- Measuring Spoons
- Silicone Spatulas
- OXO Good Grips Medium Cookie Scoop
- OXO Good Grips 11-Inch Better Balloon Whisk
- Set of Glass Mixing Bowls
- Silicone Snowflake Molds
Nutrition Information:
Yield:
6
Serving Size:
1
Amount Per Serving:
Calories: 474Total Fat: 25gSaturated Fat: 14gTrans Fat: 0gUnsaturated Fat: 9gCholesterol: 8mgSodium: 45mgCarbohydrates: 65gFiber: 2gSugar: 55gProtein: 4g
HOW MUCH DID YOU LOVE THIS RECIPE?
Please leave a comment on the blog or share a photo on Pinterest
