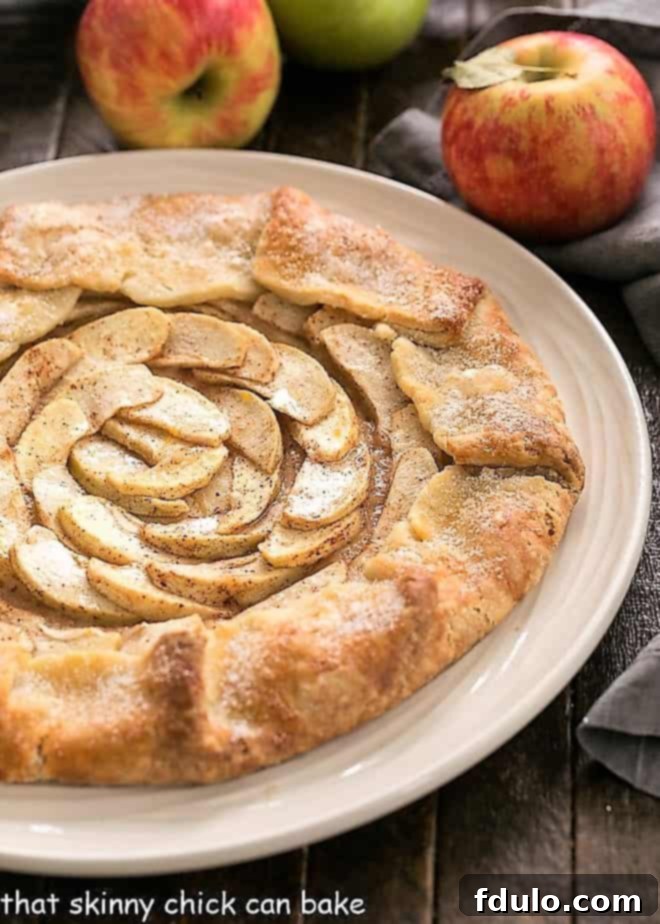
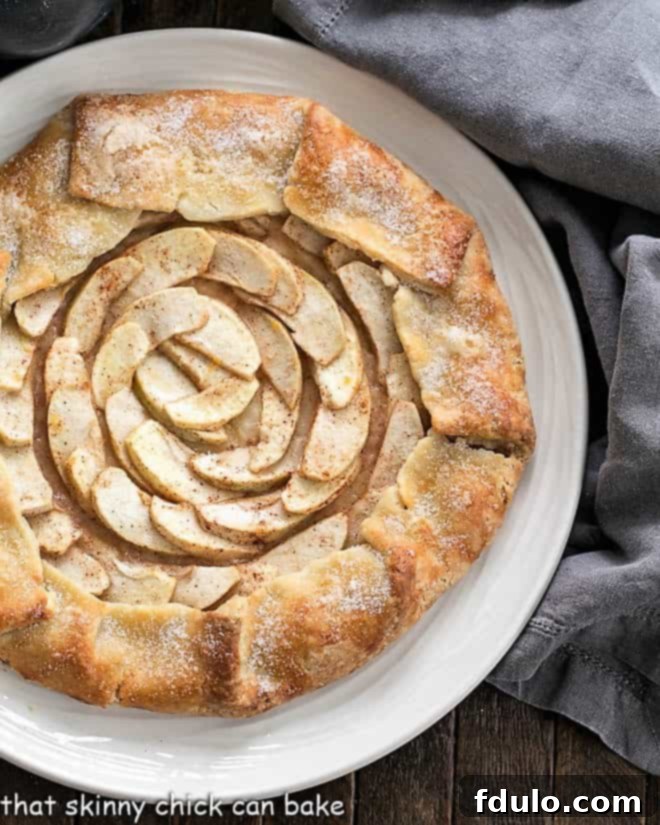
Indulge in the rustic charm and irresistible flavors of this homemade Apple Galette. This exquisite dessert presents a beautiful, impressive alternative to traditional apple pie, proving far simpler to create without sacrificing any of the comforting taste. With its single, tender crust and a generous filling of cinnamon-spiced apples, this easy-to-follow Apple Tart Recipe is versatile enough for a casual weeknight treat yet elegant enough to grace any special occasion. It’s truly a dessert that wins over hearts, as one dinner guest once remarked, “It’s unusual to find a crust as delicious as the filling.” Prepare to be smitten!
Why This Rustic Apple Galette is a Must-Bake
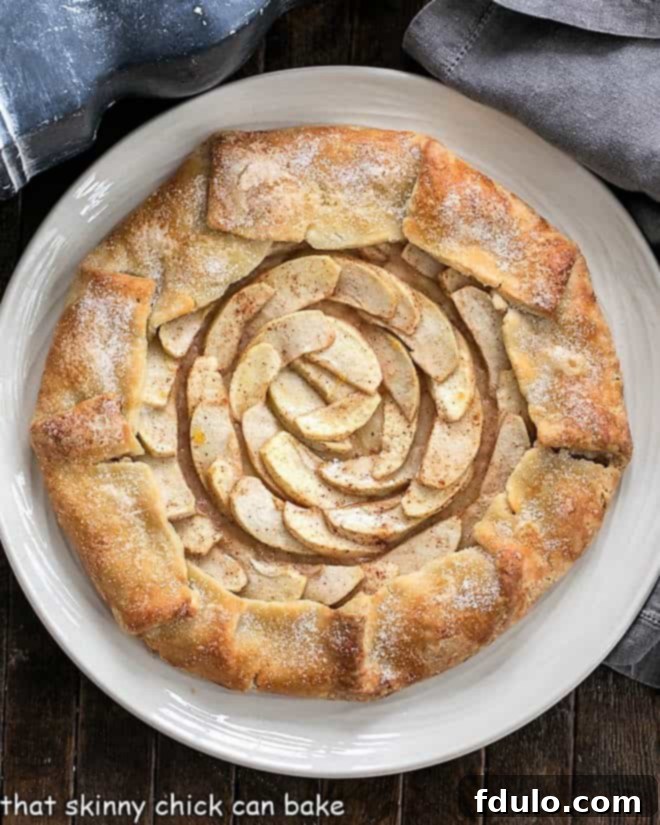
There are countless reasons to fall in love with making an Apple Galette, especially when you need a dessert that delivers on both flavor and presentation with minimal fuss. This free-form tart is not just a treat for the taste buds; it’s a testament to simple elegance in baking, making it a perfect choice for any baker, from novice to expert. Whether you’re hosting a gathering, celebrating a holiday, or simply craving a delicious homemade dessert, this Rustic Apple Tart stands out.
- Effortless Elegance: This rustic apple tart offers all the beloved flavors of a classic apple pie but with significantly less effort. Forget the painstaking process of crafting a perfect double-crusted pie; the beauty of a galette lies in its charmingly imperfect, free-form nature. A single crust, gently folded over a vibrant apple filling, creates a stunning visual that looks far more complicated than it actually is. It’s an ideal solution for those who love the idea of homemade desserts but are short on time or intimidated by complex pastry work.
- Remarkable Versatility: Once you discover the joy of baking your first galette, you’ll be inspired to explore countless variations. While apples shine in this recipe, the galette concept is incredibly adaptable to various fruits, both sweet and savory fillings. It’s a fantastic foundation for seasonal produce, from berries in summer to pears in winter. This versatility makes it a go-to recipe for any time of year.
- Picture-Perfect Presentation: Despite its simplicity, an Apple Galette makes an absolutely beautiful presentation. A little extra care in arranging the apple slices into concentric circles transforms this humble tart into a showstopper. Guests will marvel at your baking prowess and inevitably ask for the recipe, making you feel like a master baker. The golden, flaky crust combined with the caramelized, cinnamon-spiced apples creates an inviting aroma and an even more enticing visual that promises pure delight.
- Perfect for Any Occasion: Whether it’s a casual family dinner or a festive holiday feast, this easy apple dessert fits right in. It’s comforting and hearty enough for cooler months but light and fresh enough for warmer evenings, especially when served with a scoop of vanilla bean ice cream. Its approachable nature means you can whip it up for unexpected company or as a planned centerpiece dessert.
Key Ingredients for a Flawless Apple Galette
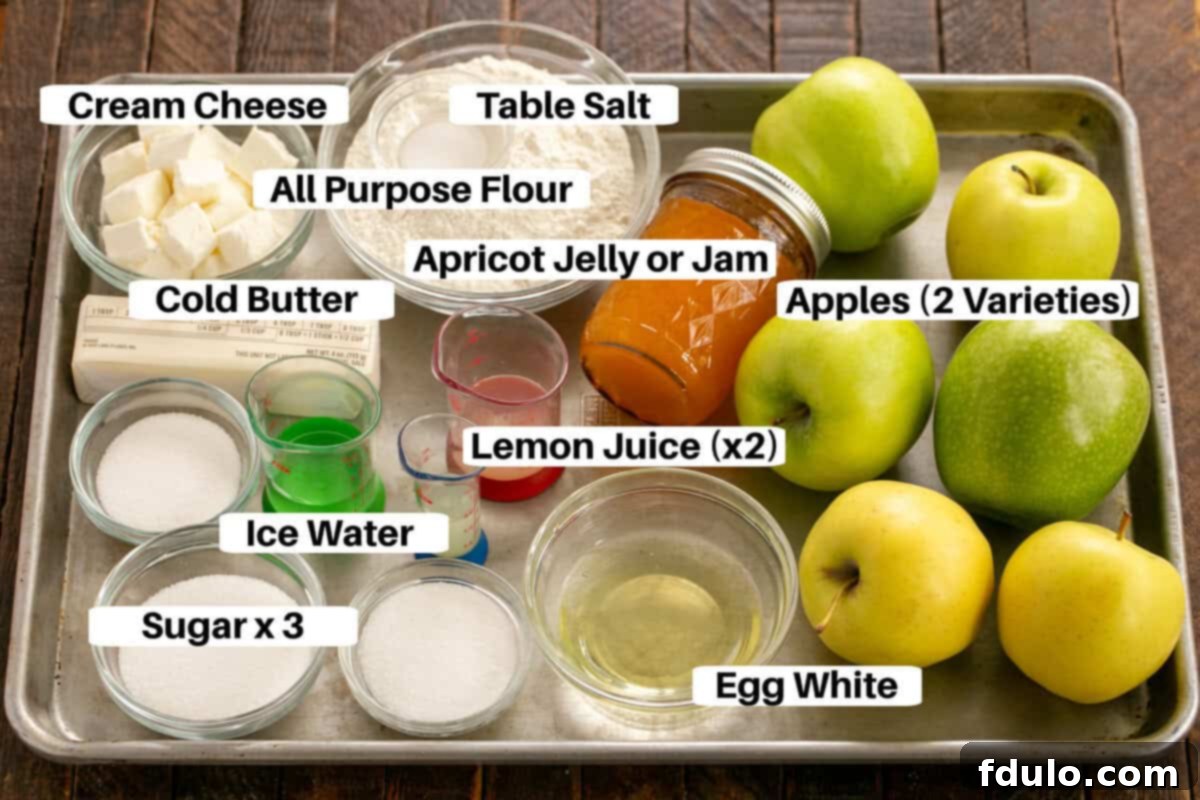
Crafting the perfect homemade apple galette starts with understanding the role of each ingredient. Quality ingredients, thoughtfully prepared, are the secret to a truly outstanding dessert. Here’s what you’ll need and why each component is essential for achieving that flaky crust and flavorful apple filling:
- Kitchen Staples: Flour, Sugar, Salt, Cinnamon, Ice Water – These foundational ingredients are the backbone of both the crust and the filling. All-purpose flour provides the structure for the flaky pastry, while sugar adds sweetness. A touch of salt enhances all the flavors, balancing the sweetness, and cinnamon infuses the apples with warm, inviting spice. Ice water is crucial for the crust, helping to keep the butter and cream cheese cold, which is key to a tender, flaky texture.
- Cold Butter: When making pie crusts or galettes, cold butter is non-negotiable. Cut into small pieces, the cold butter creates pockets of steam as it bakes, resulting in the desired flaky layers. If the butter is too warm, it will fully incorporate into the flour, leading to a tough crust rather than a tender one.
- Cold Cream Cheese: A unique addition to this galette crust, cold cream cheese contributes extra richness, a subtle tang, and remarkable flexibility to the dough. This makes the dough much easier to roll out without tearing and yields an exceptionally tender, almost melt-in-your-mouth crust. Like butter, keeping it cold is paramount.
- Fresh Lemon Juice: Used in both the crust and the apple filling, lemon juice plays a dual role. In the crust, it adds a touch of acidity that brightens the flavor. For the apples, it prevents browning, adds a zesty counterpoint to the sweetness of the fruit, and enhances the overall fresh apple flavor. Always opt for freshly squeezed lemon juice for the best results.
- Fresh Baking Apples: The choice of apples is critical for a successful apple galette. For baking, select firm, crisp varieties that hold their shape well and offer a good balance of sweet and tart flavors. Using a combination of two different varieties, such as Granny Smith for tartness and Honeycrisp or Golden Delicious for sweetness and texture, will create a more complex and flavorful filling.
- Egg White (for crust glaze): A light brush of egg white on the exposed crust before baking helps achieve a beautiful golden-brown sheen and a slightly crispy texture. It also acts as a binder for the sugar sprinkled on top, creating a lovely sparkling finish.
- Apricot Jelly or Jam (for fruit glaze): While optional, a warm apricot jelly or jam, brushed over the baked apples, provides a gorgeous, glossy finish. This not only makes the fruit look more appealing but also adds a subtle layer of sweetness and a touch of fruitiness, elevating the entire dessert.
Embracing the Rustic Charm of a French Apple Tart
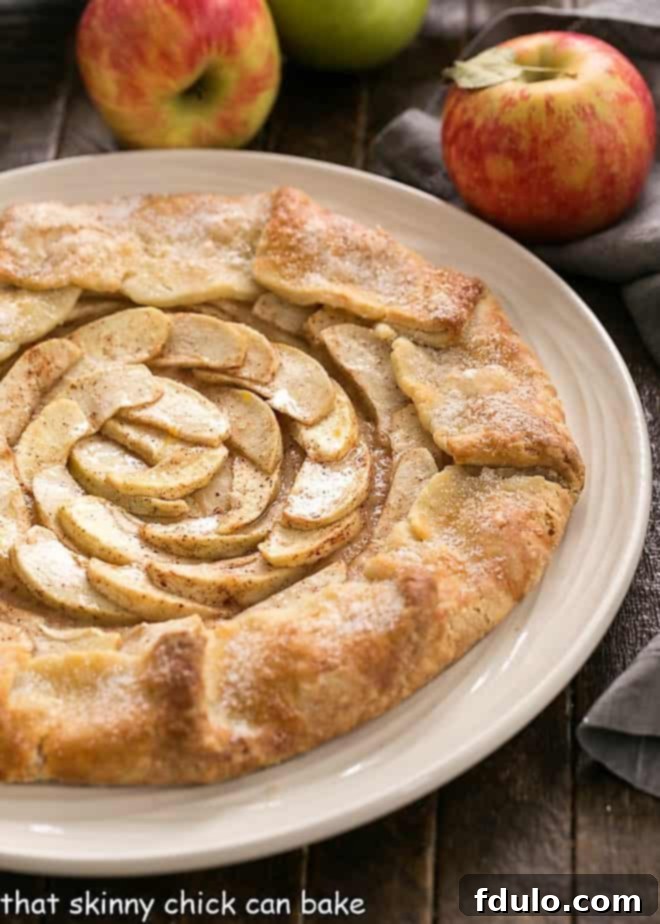
The term “galette” itself conjures images of rustic French pastry, and this Apple Galette perfectly embodies that charming, free-spirited baking style. Unlike its more structured cousin, the pie, a galette celebrates a more relaxed approach, where the beauty lies in its artfully imperfect folds and exposed fruit. This French-inspired dessert brings a touch of European elegance to your table without any of the intimidation typically associated with French patisserie. It’s a dreamy dessert, especially fitting for autumn gatherings as apples are at their peak. However, with apples readily available year-round, a fruit galette is a delightful treat to enjoy any time, bringing warmth and comfort regardless of the season. Imagine serving this golden, fragrant tart, perhaps alongside a savory meal, then watching as everyone, despite their sated appetites, finds room for a slice of this irresistible creation, especially when paired with a scoop of creamy vanilla ice cream.
Step-by-Step Guide: Crafting Your Perfect Apple Galette
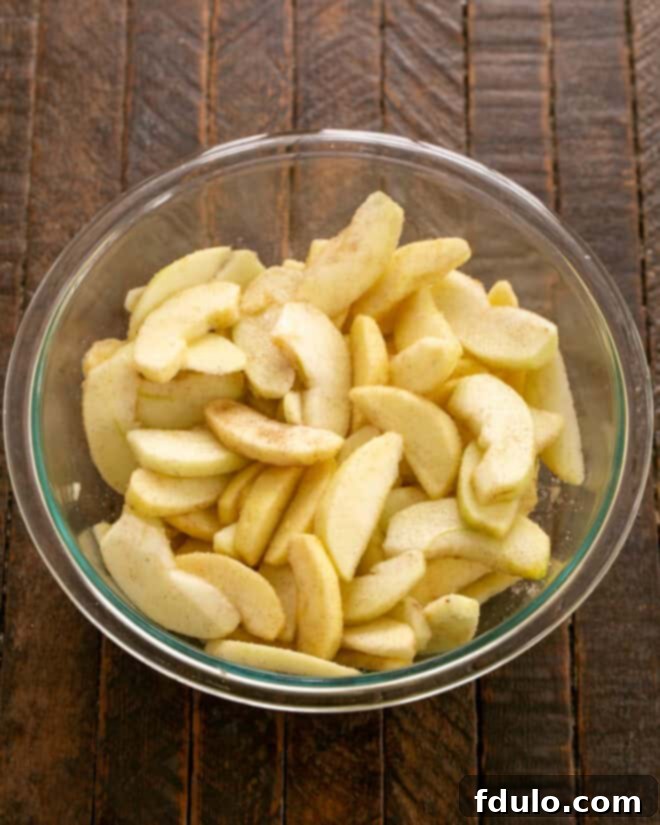
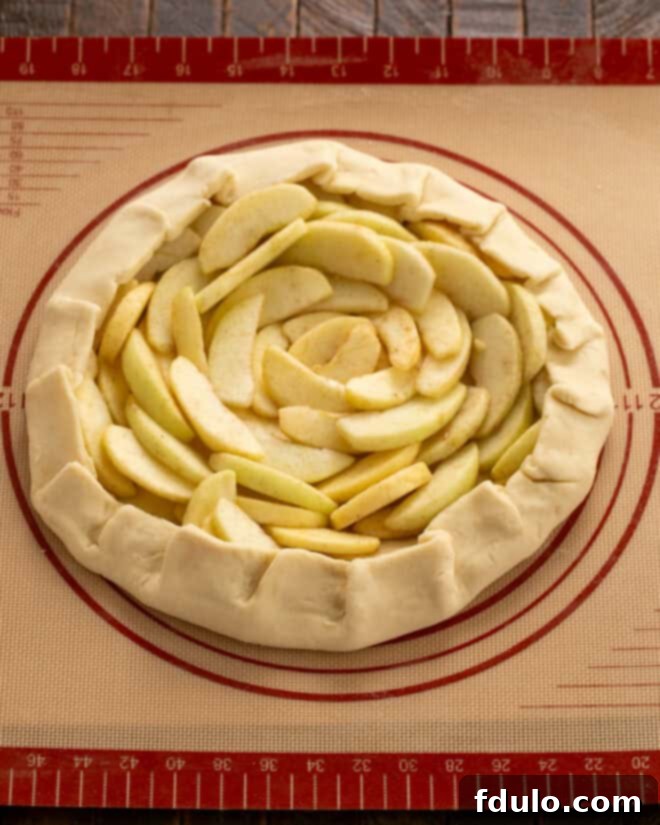
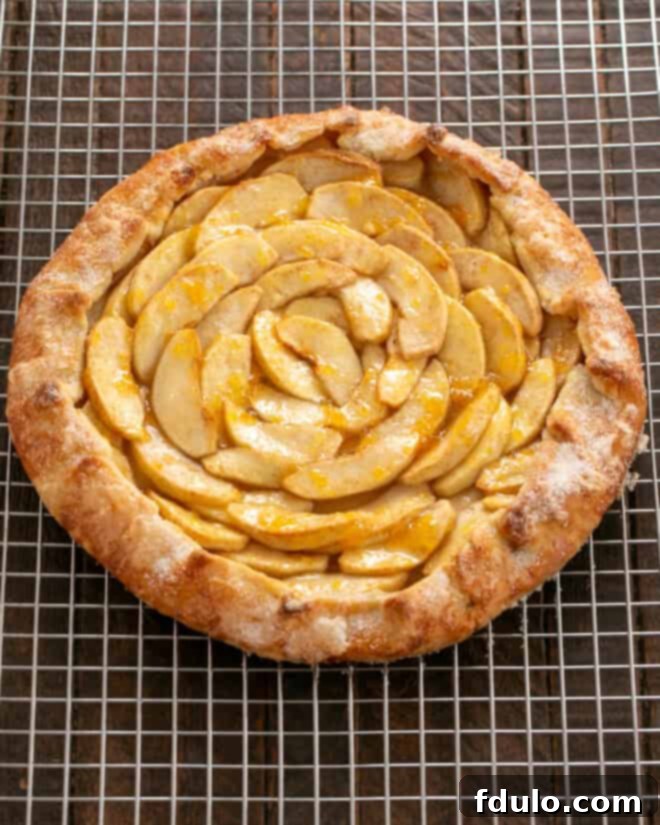
Creating this delicious Apple Galette is a straightforward and rewarding process. To guide you every step of the way, we’ve provided a visual roadmap with detailed images that illustrate each stage of the recipe. From preparing the dough to arranging the apples and baking to golden perfection, these step-by-step visuals will help you visualize the transformation of simple ingredients into a stunning dessert. Follow along to make your baking experience as enjoyable and successful as possible.
Expert Tips for Your Best Apple Galette
Achieving a truly exceptional Apple Galette involves a few key techniques and considerations. These expert tips will help you elevate your baking, ensuring a perfectly flaky crust, a flavorful filling, and a stunning presentation every time you bake this easy apple tart recipe.
- Choose Your Apples Wisely: The type of apple you use dramatically impacts the flavor and texture of your galette. I highly recommend using a blend of two or more baking apple varieties to achieve a deeper, more complex flavor profile. For instance, the crisp tartness of Granny Smith apples beautifully complements the sweet-tart notes of Honeycrisp. Other excellent pairings include Golden Delicious with Fuji, or Braeburn with Pink Lady. These combinations ensure your apples remain distinct yet blend harmoniously.
- Embrace the Cold for the Crust: The secret to an irresistibly flaky galette crust lies in keeping your ingredients as cold as possible. This includes the butter, cream cheese, and even the water you use. Cold fats create tiny pockets within the dough that expand during baking, forming those desirable flaky layers. If your butter or cream cheese begins to soften, pop the dough back into the refrigerator or freezer for a few minutes before continuing.
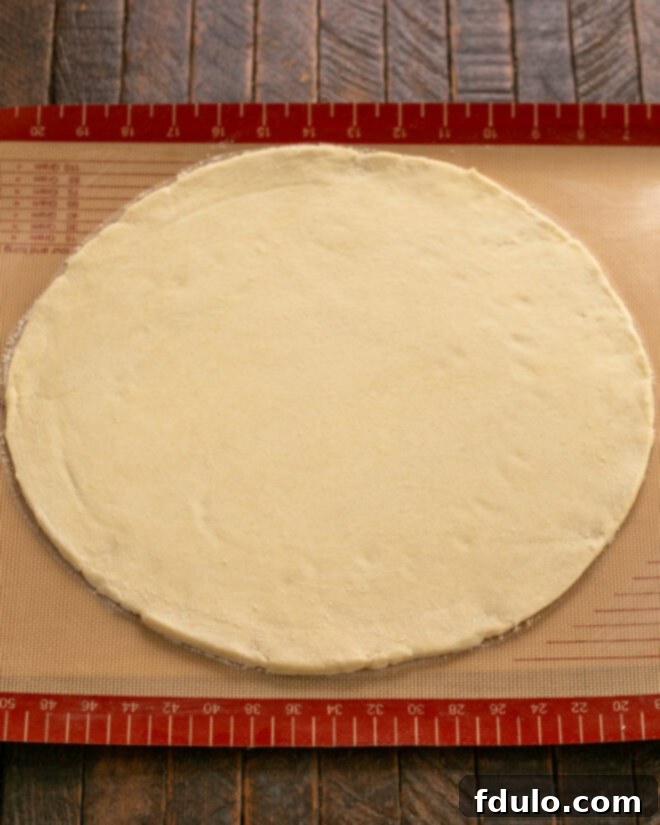
- PRO-Tip: Shaping and Filling with Precision: For a beautifully uniform galette, use a large mixing bowl or a plate as a guide to cut a perfectly round 15-inch disk of dough. Once your dough is rolled out, gently score a circle about 3 inches from the edge of the pastry. This mark serves as your guide for where to start layering your apple slices, ensuring you leave enough dough around the perimeter for folding.
- Artful Apple Arrangement: Begin arranging your apples in the center with 3-4 slices, then work your way outwards, creating concentric circles. Overlap the slices slightly and try to place the thicker sides facing out. This method not only looks stunning but also helps the apples cook evenly. Remember to leave a clear border of about 2-3 inches around the edge of the dough. This untouched perimeter is essential for pleating and folding over the apple filling to create the classic galette edge.
- Finding the Perfect Filling-to-Crust Ratio: While some recipes call for a large quantity of apples, I prefer a slightly less dense filling, allowing for neater concentric circles and a balanced bite of apple and crust. However, feel free to add an extra apple if you prefer a higher fruit-to-pastry ratio. The beauty of a galette is its forgiving nature, so adjust to your personal preference.
- The Golden Finishing Touch: For an exquisite golden crust and a delightful crunch, brush the exposed dough border generously with a lightly beaten egg white. Immediately after, sprinkle granulated sugar over the egg-washed crust. This creates a beautiful caramelized edge that is both visually appealing and incredibly delicious.
- PRO-Tip: The Apricot Glaze Secret: This step is not always in traditional recipes, but it’s a game-changer! After the galette has baked and cooled slightly, gently warm a couple of tablespoons of apricot jelly or jam and brush it over the cooked apples. This simple glaze adds a beautiful, professional-looking sheen to the fruit and a subtle, complementary fruity flavor. It truly elevates the dessert’s appearance.
- Serving Suggestions for Pure Indulgence: To complete the experience, serve each warm slice of apple galette with a generous scoop of your favorite ice cream. Classic vanilla bean is always a winner, but caramel swirl or even a cinnamon-spiced ice cream can add another layer of decadence. A dollop of freshly whipped cream is also a fantastic option for a lighter touch.
- Don’t Overwork the Dough: Handling the dough as little as possible is crucial for a tender crust. Overworking the dough develops the gluten too much, leading to a tough rather than flaky texture. Mix until just combined and handle gently.
- Parchment Paper is Your Friend: Rolling the dough between two sheets of parchment paper makes it incredibly easy to transfer to your baking sheet and prevents sticking. It also allows you to roll the dough thinner and more evenly.

Frequently Asked Questions About Apple Galettes
Curious about the ins and outs of making and enjoying an Apple Galette? Here are some common questions and detailed answers to help you master this delightful dessert.
A galette is a French term referring to a rustic, free-form tart that typically features a single pastry crust folded casually over a fruit or savory filling. Unlike a traditional pie baked in a dish, a galette is baked directly on a baking sheet, allowing its edges to be folded freehand, creating a charmingly imperfect, “rustic” look. While fruit fillings like apples, berries, or peaches are most common for sweet galettes, there are also delicious savory variations, often filled with vegetables and cheese. One of the most famous French galettes is the Galette des Rois, a puff pastry tart filled with frangipane, traditionally enjoyed during Epiphany. My personal favorites include fruit-filled options like a Peach Raspberry Galette and a Peach Blueberry Galette, but this Apple Galette truly holds a special place. For another simple apple delight, don’t miss this Boozy Apple Crisp from Creative Culinary.
Pronouncing French culinary terms can sometimes be a bit tricky for English speakers. The most common English pronunciation for galette is /ɡælˈet/, which sounds like “gah-LET.” Think of it as “GUL’ et” – emphasizing the second syllable. Don’t worry too much about perfection; what matters most is the deliciousness of the dessert itself!
Absolutely! The convenience of making a galette ahead of time is one of its many advantages, especially when entertaining. You can bake the apple galette completely and let it cool. It can be served at room temperature, which is often preferred to allow the flavors to fully meld. If you prefer it warm, simply pop it into a 350-degree Fahrenheit oven for about 5-10 minutes before serving. This gentle reheating will bring back its warmth and aroma without overcooking the fruit. For the best experience, top each slice with a scoop of vanilla ice cream just before serving.
Proper storage ensures your apple galette stays fresh and delicious. A freshly baked galette can be stored at room temperature, loosely covered, for one to two days. If your kitchen is particularly warm or humid, especially during summer months, it’s best to transfer it to the refrigerator after the first day. Always bring it back to room temperature (or gently rewarm) before serving to enjoy its full flavor and texture. For longer storage, a galette freezes beautifully for up to 2-3 months. To freeze, first place the uncovered galette on a baking sheet and freeze until firm (about 1-2 hours). Once solid, transfer it to a cardboard round, wrap it tightly in plastic wrap, and then in aluminum foil. To serve, defrost it overnight in the refrigerator, then warm gently in the oven before enjoying.
Since a galette is free-form and not baked in a traditional pie dish, you’ll need a flat baking surface. A standard half-sheet pan (13×18 inches) lined with parchment paper or a silicone baking mat (like a Silpat) is ideal. The parchment paper or silicone mat prevents sticking, makes cleanup a breeze, and allows for easy transfer of the galette both before and after baking. A dark-colored baking sheet will conduct heat more efficiently, potentially leading to a crisper bottom crust.
Preventing a soggy bottom crust is key for any fruit tart. There are a few tricks: Firstly, ensure your dough is rolled to an even thickness and that you don’t overfill the galette. Secondly, a light dusting of flour, cornstarch, or even breadcrumbs (or crushed cookies) on the bottom of the crust before adding the apples can absorb excess moisture released by the fruit during baking. Finally, ensure your oven is preheated to the correct temperature; a hot oven helps the crust set quickly. Baking on a lower rack can also help ensure the bottom crust gets enough heat to crisp up.
Explore More Delicious Recipes You’ll Adore:
If you loved the simplicity and flavor of this Apple Galette, you’ll be thrilled to discover more delightful dessert creations. Expand your baking repertoire with these fantastic recipes, ranging from more fruit galettes to other indulgent pies and tarts:
- Fresh Strawberry Galette from The View from Great Island – A vibrant and juicy seasonal treat.
- Maple Glazed Apple Galette – A warm and sweet twist on the classic apple flavor.
- Berry Galette – A colorful medley of fresh berries nestled in a flaky crust.
- Peach Galette – Sweet, succulent peaches create a perfect summer dessert.
- Discover more delectable Pie and Tart Recipes – A wide array of baked delights for every occasion.

Join our vibrant community! Stay connected through social media @ Instagram, Facebook, and Pinterest. Don’t forget to tag me when you try one of my recipes – I love seeing your creations! If you’re thrilled with the results, please consider giving this recipe a 5-star rating in the recipe card below. Your feedback helps other home bakers discover wonderful recipes!
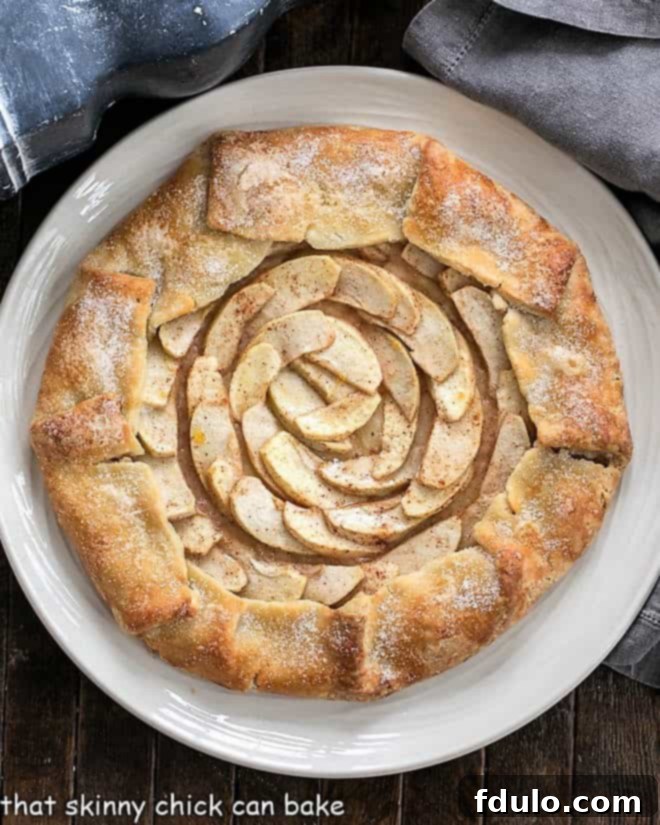
Rustic Apple Galette
30 minutes
1 hour
1 hour 30 minutes
8 servings
A scrumptious rustic apple dessert featuring a tender, easy-to-roll-out crust and a beautiful spiral of perfectly spiced cinnamon apples. This homemade apple galette is simpler than pie but just as impressive!
Ingredients
For the Flaky Crust:
- 1 ¼ cups all-purpose flour
- 2 tablespoons granulated sugar
- ¼ teaspoon salt
- 8 tablespoons cold unsalted butter (1 stick), cut into ½-inch pieces
- 4 ounces cold cream cheese, cut into ½-inch pieces
- 2 teaspoons fresh lemon juice
- 1-2 tablespoons ice water (you may need closer to 2 tablespoons)
For the Apple Filling:
- 4 medium apples (about 2 ½ pounds), peeled, cored, and cut into ¼-inch slices (a mix of 3 Granny Smith and 3 Golden Delicious works wonderfully)
- 2 tablespoons fresh lemon juice
- ¼ cup granulated sugar
- ¼ teaspoon ground cinnamon
For the Glaze and Finish:
- 1 large egg white, lightly beaten
- 2 tablespoons granulated sugar (for sprinkling on crust)
- Apricot jelly or jam, optional, for a beautiful fruit glaze
Instructions
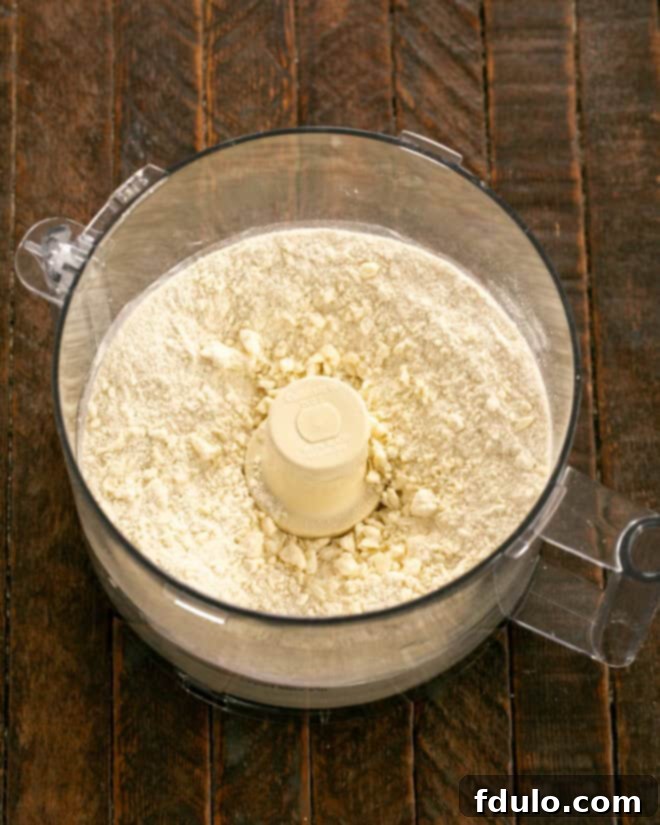
- Prepare the Dough: In a food processor, pulse together flour, sugar, and salt until combined. Add the cold butter and cold cream cheese pieces, then pulse about 10 times until the mixture resembles coarse cornmeal with some pea-sized butter bits.
- Add Liquid: Sprinkle the lemon juice and 1 tablespoon of ice water over the mixture. Pulse a few times to disperse the liquid. Pinch a small amount of the dough; if it holds together, it’s ready. If not, add the remaining tablespoon of ice water and pulse until just combined. Be careful not to overmix.
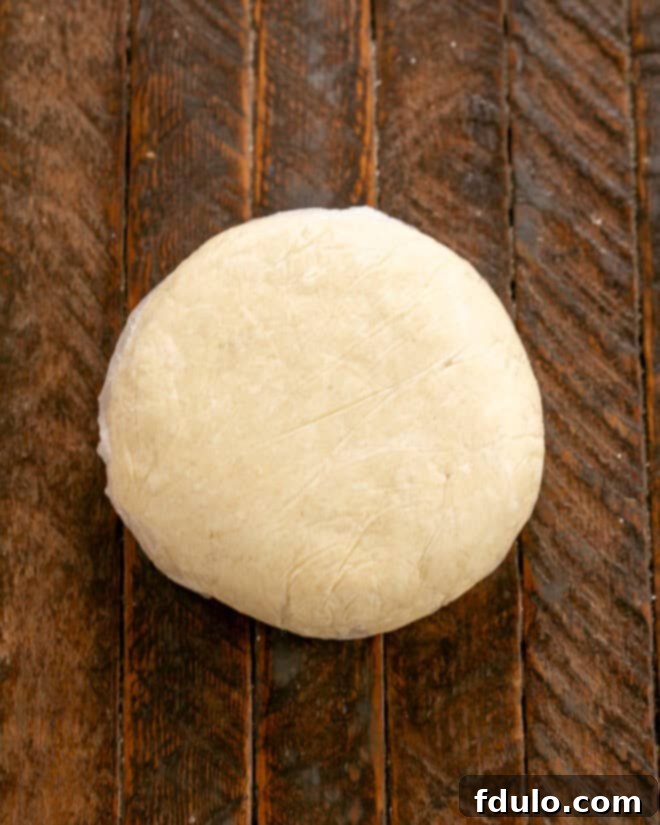
- Chill the Dough: Turn the dough out onto a clean countertop and gently press it into a ball. Flatten it into a 6-inch disk, wrap it tightly in plastic wrap, and refrigerate for at least 30 minutes (or up to 2 days) to firm up.
- Preheat Oven & Prepare Work Surface: Preheat your oven to 375°F (190°C). Remove the chilled dough from the refrigerator.
- Roll the Dough: Roll the dough into a 15-inch circle between two sheets of parchment paper. Remove the top parchment sheet and carefully transfer the dough (still on its bottom parchment paper) to a large baking sheet.
- Prepare and Arrange Apples: In a medium bowl, toss the sliced apples with 2 tablespoons lemon juice, ¼ cup sugar, and cinnamon until evenly coated. Arrange the apple slices overlapping in semicircles on the dough, starting about 3 inches in from the edge. Place the thicker sides of the apples facing outwards for a fuller look.
- Fold the Crust: Gently fold the outer dough border up over the apple filling, pleating the dough as needed to fit the circular shape. Use cupped hands to lightly press the folded dough against the apples, ensuring it adheres and holds the filling in place.
- First Bake & Glaze: Bake the galette for 30 minutes. After 30 minutes, remove it from the oven. Brush the exposed crust (the folded-over edges) with the lightly beaten egg white and generously sprinkle the remaining 2 tablespoons of sugar over the entire tart, including the apples.
- Continue Baking: Return the galette to the oven and bake for another 30 minutes, or until the crust is golden brown and the apples are tender and lightly caramelized.
- Cool: Let the galette cool on the baking sheet for about 10 minutes, then carefully slide the galette (still on the parchment paper) onto a wire cooling rack to cool further.
- Apply Optional Glaze: If desired, gently warm some apricot jelly or jam and brush it over the warm apples. This adds a beautiful sheen and extra fruity flavor.
- Serve: Use a large spatula to carefully transfer the baked galette from the parchment paper to a serving plate. Serve slices warm or at room temperature, ideally with a scoop of vanilla ice cream or a dollop of whipped cream.
Notes
This recipe for rustic Apple Galette is adapted from a trusted source, Cook’s Illustrated, known for its precise and reliable baking methods. Enjoy this delightful and surprisingly easy dessert!
Recommended Products
As an Amazon Associate and member of other affiliate programs, I earn from qualifying purchases.
- Silicone Pastry Brush
- Reynolds Pre-Cut Parchment Paper Sheets
- USA Pan Bakeware Half Sheet Pan
Nutrition Information:
Yield:
8
Serving Size:
1 slice
Approximate Amount Per Serving:
Calories: 321Total Fat: 17gSaturated Fat: 10gTrans Fat: 0gUnsaturated Fat: 5gCholesterol: 45mgSodium: 212mgCarbohydrates: 41gFiber: 3gSugar: 23gProtein: 4g
HOW MUCH DID YOU LOVE THIS RECIPE?
Please leave a comment on the blog or share a photo on Pinterest
