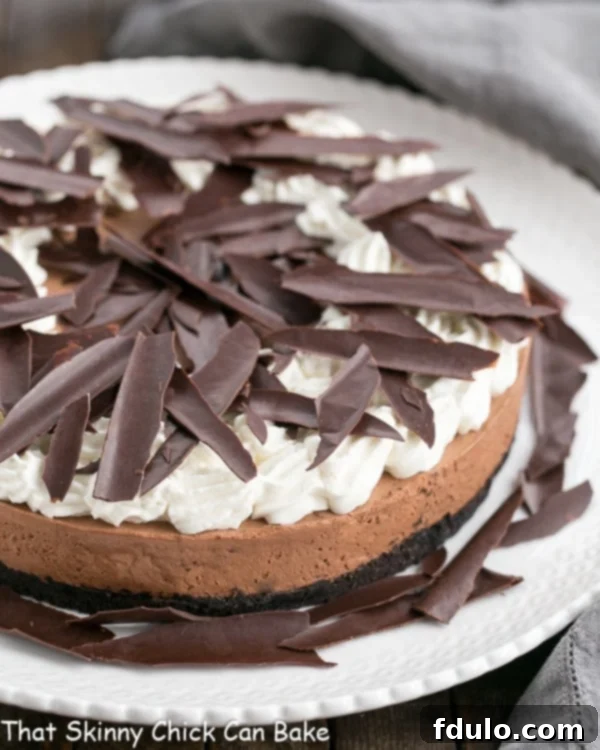
Indulge in pure chocolate bliss with this sensational Easy Chocolate Mousse Tart – a no-bake, egg-free dessert that redefines decadent simplicity. Crafted with just a handful of ingredients, primarily luscious heavy cream and rich chocolate, this recipe promises an exquisite dessert experience without any fuss. Perfect for impressing guests or satisfying your deepest chocolate cravings, this tart is as delightful to make as it is to devour.
Prepare to be enchanted by a dessert that is both stunning in its presentation and remarkably straightforward in its creation. Our No-Bake Chocolate Mousse Tart features a creamy, airy chocolate mousse nestled in a crisp cookie crust, crowned with a simple yet elegant chocolate garnish. Forget complicated techniques; this recipe proves that extraordinary flavor and impressive aesthetics can go hand-in-hand with minimal effort. It’s the ultimate treat for any occasion, promising a luxurious chocolate experience that everyone can enjoy, especially those avoiding raw eggs.

Why This Chocolate Mousse Tart Will Be Your New Favorite
This isn’t just another dessert; it’s a culinary revelation that simplifies elegance. Here’s why this particular Chocolate Mousse Tart stands out and deserves a spot in your recipe collection:
- A Trusted Classic, Reimagined: This recipe is a delightful adaptation from a revered issue of Fine Cooking magazine, ensuring a foundation of culinary excellence. We’ve taken a classic concept and refined it for the modern home baker, making it even more accessible without sacrificing any of its original charm or flavor.
- Remarkably Egg-Free: Many traditional chocolate mousses rely on raw eggs to achieve their signature silky texture. However, this recipe offers a safe and equally luxurious alternative. By masterfully combining just chocolate and cream, we achieve an incredibly smooth, melt-in-your-mouth mousse that’s perfect for everyone, including those with egg sensitivities or who prefer to avoid raw egg consumption. The result is a lighter, yet equally rich, experience.
- Pure, Unadulterated Chocolate Bliss: The beauty of this mousse lies in its simplicity. With minimal ingredients—primarily high-quality chocolate and heavy cream—the true essence of chocolate shines through. This focused ingredient list allows for an intensely rich and exquisite chocolate flavor that isn’t masked by other components. It’s a pure expression of chocolate, elevated by the creamy texture of whipped cream, creating a sophisticated dessert that’s both comforting and gourmet.
- Effortless Elegance with No-Bake Convenience: Skip the oven and the stress! This no-bake tart is ideal for busy schedules or hot summer days when you want a show-stopping dessert without turning up the heat. The simple construction, from the press-in cookie crust to the perfectly chilled mousse, makes this a surprisingly easy yet incredibly impressive treat.

Mastering Your Chocolate Mousse Tart: Essential Expert Tips
Achieving a perfect chocolate mousse tart is simpler than you might think, especially with these expert tips designed to guide you through each stage of the process, ensuring a flawless result every time.
- The Secret to a Perfect Crust: Salted Butter: While it might seem counterintuitive, using salted butter in your cookie crust is a game-changer. The subtle hint of salt doesn’t make the crust taste salty; instead, it cleverly enhances the deep chocolate flavor of the cookies, adding a layer of complexity and depth that elevates the entire tart. It’s a small detail that makes a big difference.
- Whipping Cream to Stiff Peaks: A Foundation of Fluffiness: The texture of your mousse heavily relies on properly whipped cream. When we say “stiff peaks,” we mean that when you lift your beaters or whisk from the cream, the peaks formed by the cream should hold their shape firmly, pointing upwards without slumping or collapsing back into the bowl. This stable, airy base is crucial for achieving the light and voluminous texture characteristic of a perfect mousse. Avoid under-whipping, as it will result in a runny mousse, but also be careful not to overwhip.
- Rescuing Overwhipped Cream: Don’t panic if you accidentally overwhip your cream and it starts to look clumpy or grainy. It’s salvageable! Simply add a tablespoon or two of fresh, unwhipped heavy cream to the bowl. Gently and slowly mix it in by hand with a spatula, or use your electric mixer on the lowest speed for a few seconds. Continue adding small amounts of cream until the mixture returns to a smooth, luscious consistency. This trick can save your dessert!
- The Art of Folding for an Airy Mousse: Folding is a gentle mixing technique essential for incorporating the light whipped cream into the heavier chocolate mixture without deflating the air you’ve worked so hard to incorporate. To fold correctly, use a rubber spatula. Start by cutting down through the middle of the two components that need to be combined. Once your spatula reaches the bottom of the bowl, scrape along that lower part and bring the mixture up along one side, gently turning it over. Rotate the bowl slightly and repeat this process, cutting, scraping, and turning, over and over. The goal is to combine the mixtures thoroughly until no streaks of one ingredient are visible, all while preserving the maximum amount of air. Resist the urge to rush or stir vigorously, as this will deflate the cream and lead to a dense mousse. Patience is key for an irresistibly light texture.
Elevate Your Presentation: How to Garnish with Chocolate Shards
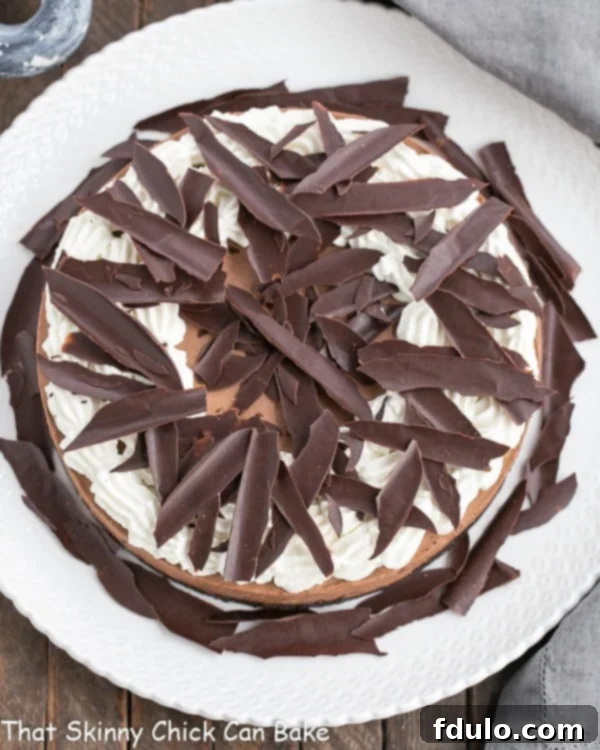
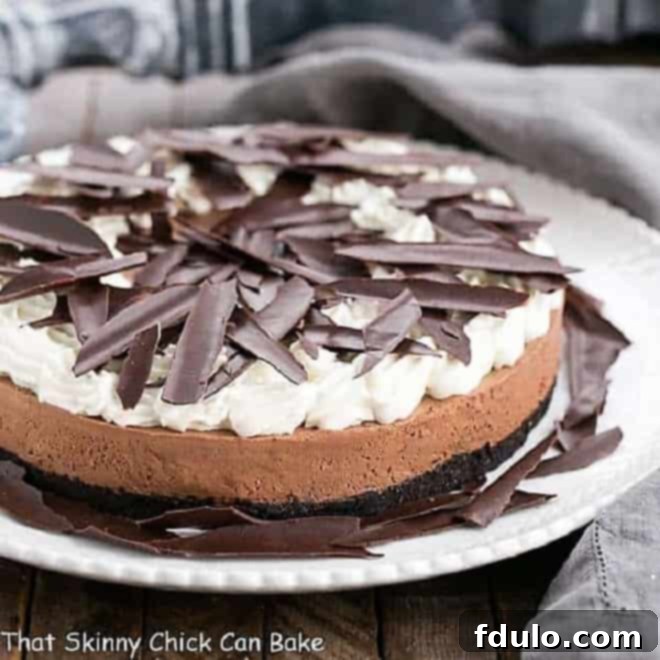
While classic chocolate curls are always lovely, this time we’re taking a different approach to garnish this chocolate mousse tart with elegant chocolate shards. And let me tell you, this method is significantly easier and yields an equally, if not more, sophisticated result! These striking shards instantly elevate the visual appeal of any dessert, transforming a simple tart into a professional-looking masterpiece.
Although this was my initial venture into crafting chocolate shards, and I’m still perfecting the art of scattering them with effortless grace, they undeniably kicked this dessert’s presentation up a notch or two. The process is remarkably straightforward: you simply melt about 4 ounces of your favorite chocolate. Once melted and smooth, spread it thinly and evenly over a sheet of waxed paper. Place another sheet of waxed paper directly on top, gently pressing it down to ensure good contact. Then, carefully roll up the layered wax paper with the chocolate inside. Chill this roll in the refrigerator until the chocolate is firm. When you unroll the wax paper, the chocolate will naturally break into beautiful, irregular shards, ready to adorn your tart. It’s that simple to create a truly impressive topping! For a more detailed guide, you can refer to this recipe for chocolate shards.
Frequently Asked Questions About Chocolate Mousse Tarts
Curious about chocolate mousse or this delectable tart? Here are answers to some common questions that will deepen your understanding and enhance your baking experience.
Mousse is a culinary term derived from the French word for “froth” or “foam.” In the culinary world, a mousse refers to any dish, whether sweet or savory, that is characterized by its light, airy, and rich texture. This distinctive consistency is typically achieved by incorporating air through ingredients like whipped cream, beaten egg whites, or sometimes even pureed ingredients folded into a base. The air bubbles create a delightful melt-in-your-mouth experience, making mousse a beloved delicacy worldwide.
Absolutely! While many classic mousse recipes traditionally incorporate beaten raw egg whites for their signature lightness and structure, it is entirely possible to create a delicious and fluffy mousse using alternative methods. This particular recipe is a prime example, relying on carefully whipped heavy cream to provide the airy, rich consistency. This makes it a fantastic option for those who prefer to avoid raw eggs due to dietary restrictions, allergies, or health concerns, ensuring a safe and equally delightful dessert experience.
The chocolate mousse filling itself, like many traditional mousses, is naturally gluten-free as it is primarily made from chocolate and cream. However, the crust in this specific recipe, which calls for Nabisco Famous Wafers, does contain gluten. If you require a gluten-free version of this tart, simply substitute the chocolate wafer cookies with a gluten-free alternative. Many brands offer gluten-free chocolate sandwich cookies or graham crackers that can be crushed and used to create a wonderful gluten-free crust. Always double-check ingredient labels to ensure they are certified gluten-free.
Chocolate mousse is a luxurious and highly cherished dessert that perfectly blends the rich, deep flavors of chocolate with a remarkably light and airy texture. It’s typically crafted from melted chocolate or high-quality cocoa powder combined with a leavening agent like whipped egg whites, whipped heavy cream, or a combination of both. The key to its appeal is the delicate balance between intense chocolate flavor and its ethereal, cloud-like consistency. Served chilled, chocolate mousse is a sophisticated and satisfying treat, often enjoyed on its own or as part of a more elaborate dessert.
Exploring More Decadent Chocolate Desserts
If this Chocolate Mousse Tart has ignited your passion for all things chocolate, you’ll love exploring these other irresistible recipes that celebrate the rich, comforting flavors of cocoa:
- Kahlua Coffee Poke Cake from Belly Full
- Layered Mousse Cake
- Chocolate Mousse Torte
- Layered Chocolate Meringue Cake
- Chocolate Mousse Cake with Ladyfingers
- More Chocolate Dessert Recipes
Stay connected and share your culinary creations with us! Follow us on social media @ Instagram, Facebook, and Pinterest. We’d love to see your delicious results, so don’t forget to tag us when you try one of our recipes! And if you absolutely adore this Easy Chocolate Mousse Tart, please show your appreciation by giving it a 5-star rating in the recipe card below. Your feedback helps other dessert lovers discover this amazing treat!

Easy Chocolate Mousse Tart Recipe
40 minutes
40 minutes
12 servings
A no-bake chocolate mousse tart adapted from Fine Cooking. This egg-free recipe is remarkably simple and delivers a decadent, rich chocolate experience.
Average Rating: 4.8 out of 5 stars based on 63 reviews.
Ingredients
- 6 tablespoons salted butter, melted; more for the pan
- 8 ounces chocolate wafer cookies, ground into crumbs (Nabisco Famous Wafers or a gluten-free alternative)
- 2 tablespoons sugar
- 9 ounces semisweet chocolate, chopped (choose a high-quality chocolate for best flavor)
- 2 teaspoons pure vanilla extract, divided
- A pinch of salt
- 3 ¼ cups heavy cream, divided (ensure it’s well-chilled)
- ½ cup powdered sugar
Instructions
- Begin by preparing your pan. Lightly butter a 9-inch springform pan. This helps prevent sticking and ensures a clean release. Set the prepared pan aside.
- In a medium bowl, combine the melted butter, chocolate cookie crumbs, and granulated sugar. Mix until the crumbs are evenly moistened. Press this mixture firmly and evenly over the bottom of the prepared springform pan to form a compact crust. Refrigerate the crust for at least 30 minutes to firm up while you prepare the mousse.
- For the mousse filling, combine the chopped semisweet chocolate, 1 teaspoon of vanilla extract, and a pinch of salt in a large, heat-proof bowl. In a microwave-safe measuring cup, heat ¾ cup of heavy cream until it’s almost boiling (small bubbles will form around the edges).
- Pour the hot cream over the chocolate mixture. Let it sit undisturbed for 1 minute to allow the chocolate to melt. Then, whisk gently until the mixture is completely smooth and glossy. Cover the chocolate mixture and refrigerate for about 30 minutes to allow it to cool down to room temperature, ensuring it won’t melt the whipped cream in the next step.
- In a separate medium bowl, beat 1-½ cups of the remaining heavy cream with an electric mixer until stiff peaks form. This means the cream will hold its shape firmly when the beaters are lifted. Whisk the cooled chocolate mixture briefly to loosen it up. Then, gently fold a large dollop (about a quarter) of the whipped cream into the chocolate mixture to lighten it. Once lightened, carefully fold the entire chocolate mixture into the remaining whipped cream using a rubber spatula until no streaks of white or brown are left, being careful not to deflate the mixture.
- Scrape the fluffy chocolate mousse into the chilled crust in the springform pan. Gently spread the mousse evenly to the edges, smoothing the top with an offset spatula for a neat finish. Cover the tart with plastic wrap and refrigerate for at least 6 hours, or ideally overnight, to allow the mousse to set completely.
- Before serving, prepare the topping. In a medium bowl, beat the last 1 cup of heavy cream with the powdered sugar and the remaining 1 teaspoon of vanilla until medium-stiff peaks form. To release the tart, run a thin, sharp knife carefully around the inside edge of the springform pan, then gently remove the side of the pan.
- Slide a thin spatula or knife under the crust to loosen it from the bottom of the pan. Then, use a large, flat spatula to carefully transfer the entire tart to your chosen serving plate.
- Mound or pipe the freshly whipped cream over the set chocolate mousse. For an elegant finish, top with homemade chocolate curls, decorative chocolate shards, or delicate chocolate shavings. To serve slices neatly, use a hot, dry knife (dip it into very hot water, then wipe it completely dry before each cut).
- Any leftover Chocolate Mousse Tart should be stored promptly in an airtight container in the refrigerator for up to 3-4 days.
Notes
For an especially impressive presentation that’s surprisingly easy, garnish your tart with elegant chocolate shards!
Video: How to Make Chocolate Shards
Recommended Products
As an Amazon Associate and member of other affiliate programs, I earn from qualifying purchases.
- Pyrex Measuring Cups
- KitchenAid 9-Speed Digital Hand Mixer
- 9-inch springform pan
Nutrition Information:
Yield:
12
Serving Size:
1
Amount Per Serving:
Calories: 494Total Fat: 39gSaturated Fat: 23gTrans Fat: 1gUnsaturated Fat: 13gCholesterol: 88mgSodium: 194mgCarbohydrates: 37gFiber: 2gSugar: 28gProtein: 4g
HOW MUCH DID YOU LOVE THIS RECIPE?
Please leave a comment on the blog or share a photo on Pinterest
