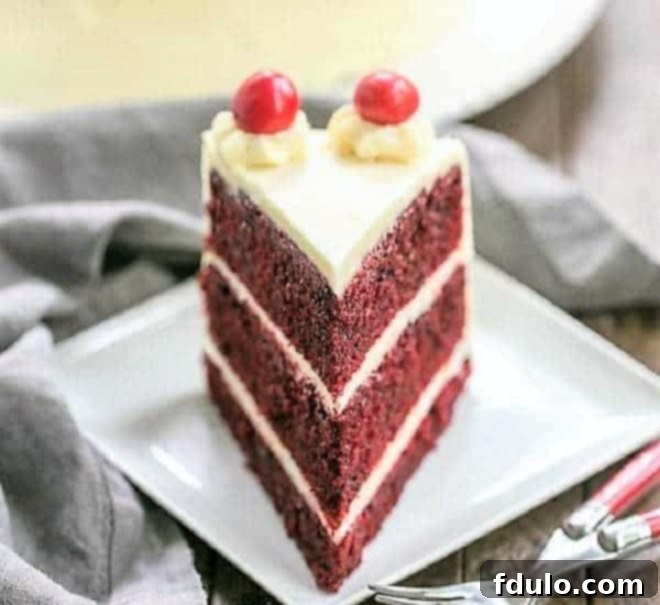
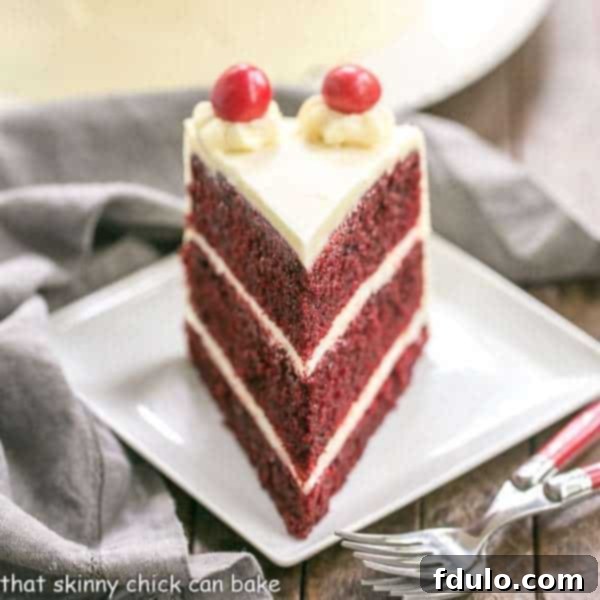
Prepare to impress your guests with this magnificent creation: a triple-layered masterpiece featuring the iconic **Red Velvet Cake** generously adorned with a silky, rich **White Chocolate Cream Cheese Frosting**. This cake isn’t just a dessert; it’s an experience, a showstopper that promises an unforgettable taste and stunning presentation.
Discover the ultimate **Best Red Velvet Cake recipe** – a tender, moist, and wonderfully flavorful confection featuring three distinct layers, each separated by the dreamiest, most decadent frosting you’ll ever taste. Whether you’re planning a grand birthday celebration, a romantic Valentine’s Day gesture, a festive Christmas treat, or simply craving the unparalleled comfort of red velvet, this recipe is your golden ticket to baking perfection. Its vibrant hue and exquisite flavor make it a truly special dessert for any occasion.

Why You Must Make This Spectacular Red Velvet Cake
This isn’t just another cake recipe; it’s a culinary journey designed to deliver maximum delight and visual appeal. Here’s why this particular Red Velvet Cake with White Chocolate Cream Cheese Frosting stands head and shoulders above the rest:
- Breathtaking Presentation: The majestic three-layer structure makes for an absolutely gorgeous centerpiece at any gathering. Its vibrant red contrasting with the pristine white frosting creates a truly striking visual that will have everyone reaching for a slice.
- Unmatched Moistness and Tenderness: The secret lies in the buttermilk, a key ingredient that reacts with the cocoa and baking soda to create an incredibly tender crumb and ensures each bite is exceptionally moist and soft. You’ll never experience a dry cake with this recipe.
- Irresistible White Chocolate Cream Cheese Frosting: Elevating the classic cream cheese frosting, our version is enhanced with the delicate sweetness of white chocolate. This addition provides a subtle depth of flavor and an extra layer of creamy decadence, making it utterly irresistible and perfectly complementing the cake’s mild chocolate notes.
- A Tried-and-True Favorite: This recipe has been perfected over countless celebrations, consistently delivering rave reviews and requests for more. It’s reliable, delicious, and guaranteed to impress even the most discerning palates.
My daughter, Katie, has always had a clear preference when it comes to her birthday desserts. While she occasionally ventures into Tres Leches, Funfetti Cake, or Cheesecake territory, her heart often returns to the classic Red Velvet. This year, for her 25th birthday, a grand three-layer red velvet cake wasn’t just a choice; it was an absolute necessity to mark the milestone with appropriate grandeur and deliciousness.
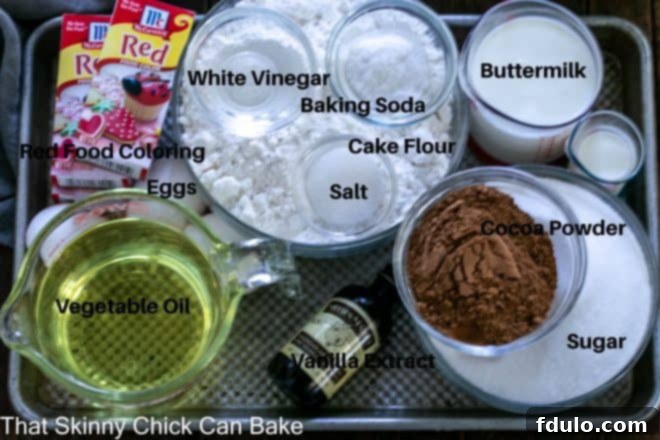
Essential Ingredient Notes for Your Perfect Red Velvet Cake
Crafting the perfect Red Velvet Cake requires attention to detail, especially when it comes to your ingredients. Here are some key insights to ensure your cake turns out flawlessly:
- Buttermilk: The Key to Tenderness: Buttermilk is more than just a liquid; it’s a tenderizing agent. Its acidity reacts with baking soda to create a delicate, moist crumb. If you don’t have buttermilk on hand, don’t fret! You can easily make your own by pouring 1 cup of whole or 2% milk into a measuring cup, then stirring in 1 tablespoon of lemon juice or white vinegar. Let it sit for 5-10 minutes until it slightly curdles, then stir again before using. This homemade version works wonderfully.
- Cake Flour: For the Lightest Texture: Cake flour contains a lower protein content than all-purpose flour, which results in a softer, more tender cake. It’s ideal for achieving that signature velvety texture. Should you find yourself without cake flour, a simple substitution can be made: for every cup of cake flour required, measure out one cup of all-purpose flour, then remove two tablespoons of it. Replace those two tablespoons with two tablespoons of cornstarch, then whisk well to combine before adding to your batter. This mimics the properties of cake flour beautifully.
- Neutral Oil: For Moisture Without Flavor Interference: Using a neutral-flavored oil, such as canola or vegetable oil, is crucial for Red Velvet Cake. Unlike butter, oil ensures a consistently moist cake and does not interfere with the cake’s subtle cocoa and vanilla notes. It also helps to keep the cake tender for longer.
- White Chocolate in the Frosting: A Touch of Elegance: My unique twist on the traditional cream cheese frosting involves incorporating melted white chocolate. This addition adds an exquisite layer of creaminess and a delicate sweetness that perfectly complements the cake’s flavor profile. If white chocolate isn’t to your taste, or if you prefer a more classic approach, the frosting can certainly be made without it, yielding a deliciously tangy cream cheese frosting all the same.
The subtle chocolate flavor, derived from just a hint of cocoa powder in a traditional Red Velvet Cake, is exactly what my daughter loves. The strategic addition of white chocolate to the frosting simply elevates it, adding a layer of sophisticated sweetness without overpowering the cake’s distinct character.
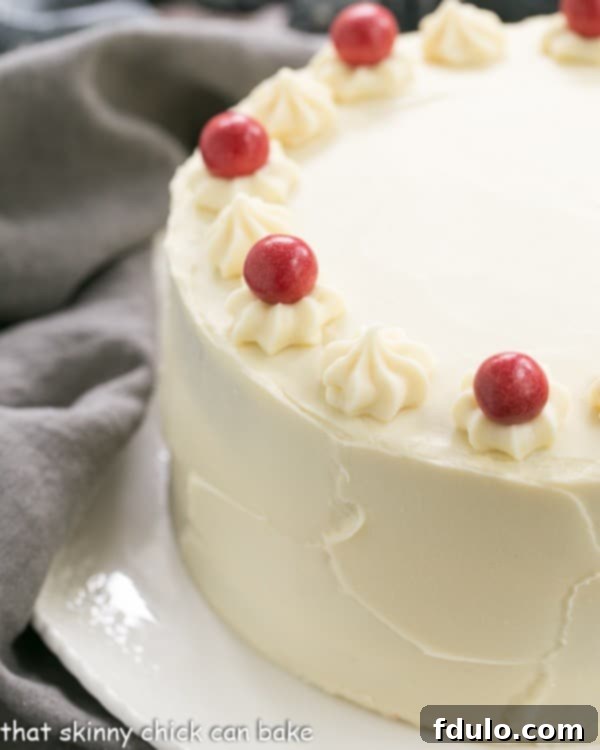
Unveiling the Ultimate: The BEST Red Velvet Cake Recipe
This isn’t merely a recipe; it’s a legend in the making. Over the years, I’ve baked countless Red Velvet cakes and cupcakes, and this particular formula consistently garners enthusiastic praise and an abundance of recipe requests. In fact, this recipe once played an unexpected, heroic role right here in Indianapolis, saving a basement from what could have been devastating flood damage!
You might wonder, “How could a cake possibly save a basement?” Well, my jet-setting friends, who are frequently out of the country (or at least out of state) on various lecture tours – they’re the couple we serendipitously bumped into in Venice! – have a daughter who absolutely adores red velvet cupcakes. My friend often keeps a secret stash of these frozen treats in her basement freezer for her daughter to enjoy. One day, Julie, their daughter, popped over to her parents’ house, hoping to find a delightful frozen treat waiting for her. Instead, she discovered something far more critical. The hot water heater had sprung a significant leak, and thanks to her timely discovery while searching for her beloved red velvet cupcakes, major structural damage was averted. So, you see, a Red Velvet Cake can be extraordinarily useful, not just incredibly tasty! Everyone needs a stash; you certainly won’t regret having one ready.
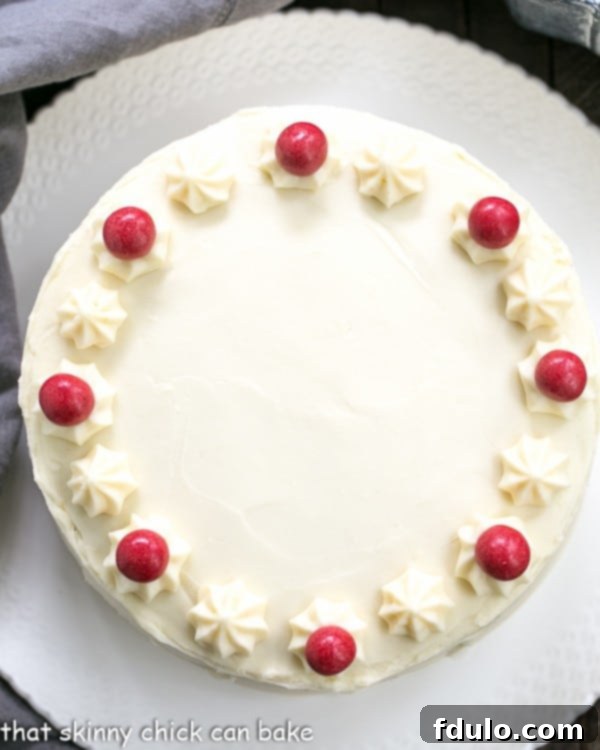
Crafting Your Masterpiece: How to Make a Flawless Red Velvet Cake
Creating an authentic Red Velvet Cake involves a specific balance of ingredients and techniques. At its heart, a true Red Velvet cake is defined by four crucial components: cocoa powder, a vibrant red food coloring, vinegar, and buttermilk. As my husband, a dedicated chocoholic, will readily confirm, a Red Velvet Cake is distinctly *not* a chocolate cake. While it contains cocoa powder, the amount is significantly less than what you’d find in a traditional chocolate cake. This results in a rich, moist cake with an incredibly fine, velvety texture, traditionally crowned with a tangy cream cheese frosting. Follow these steps to achieve perfection:
- Prepare the Cake Batter: Begin by carefully mixing your dry ingredients (flour, cocoa, salt) and wet ingredients separately before combining them. This ensures even distribution and prevents overmixing. The key to a tender cake is to mix just until combined.
- Bake with Precision: Divide your beautifully colored batter evenly among three well-greased, parchment-lined cake pans. For perfectly uniform layers, consider weighing the batter in each pan or carefully eyeing the depth. Baking in three thinner layers ensures even cooking and a moist result.
- Cool Completely: Patience is a virtue here. Allow your baked cake layers to cool completely on wire racks before even thinking about frosting them. Attempting to frost warm cakes will lead to a melted, runny mess as the frosting slides right off.
- Prepare for Frosting: Once the cakes are cool, place your first layer on your chosen cake stand or serving plate. For a neat finish, tuck strips of parchment paper around the perimeter of the cake. This barrier will catch any excess frosting, keeping your cake stand pristine.
- Stack and Frost Generously: With your base layer ready, add a generous portion of the exquisite White Chocolate Cream Cheese Frosting across its surface, spreading it evenly to the edges. Gently place the next cake layer on top, repeating the process. Finally, position the third layer, ready for its crowning glory.
- Finish with Flair: Using an offset spatula, artfully frost the exterior of the entire cake, creating a smooth, elegant finish. If desired, garnish with chocolate shavings, sprinkles, or fresh berries to add an extra touch of beauty and flavor.
Expert Baking and Frosting Tips for a Flawless Red Velvet Cake
- PRO-Tip: Room Temperature Ingredients Are a Must: For optimal emulsion and a smooth, consistent batter, ensure all your cold ingredients, such as eggs and buttermilk, are at room temperature. Take them out of the refrigerator 1-2 hours before you plan to start baking. This allows them to combine more easily and evenly, creating a superior texture.
- Cream Cheese Frosting Exception: Unconventionally, for this specific White Chocolate Cream Cheese Frosting recipe, it’s best to use *cold* cream cheese. This helps achieve a firmer, more stable frosting texture, especially when combining it with room-temperature butter and melted white chocolate.
- Incorporate Eggs One at a Time: When adding eggs to your creamed butter and sugar mixture, do so one at a time. Beat well after each addition. This allows each egg to fully emulsify into the mixture, creating a stronger structure and a thicker, more cohesive batter.
- PRO-Tip: Alternate Wet and Dry Ingredients: When combining your wet and dry ingredients, alternate additions. Start with a third of the dry ingredients, then half of the wet, then another third of the dry, the remaining half of the wet, and finally the last third of the dry. This technique prevents the batter from becoming too thick or too saturated at once, ensuring a smooth, uniform consistency without overworking the gluten. Overbeating can result in a tough, dense cake.
- Achieve Perfectly Even Cake Layers: For a professional-looking cake, perfectly even layers are desirable. You can achieve this by weighing your cake pans and dividing the batter so that each pan holds the exact same weight. Alternatively, you can insert toothpicks into the batter of each pan to compare depths, or simply eyeball them with care.
- Recognizing Doneness by Aroma: As your cake nears completion in the oven, you’ll be greeted by a delightful, sweet aroma of baked cake wafting through your kitchen. This is your cue to peek through the oven door and prepare to test for doneness.
- Testing for Doneness with a Toothpick: To confirm your cake is fully baked, gently insert a clean toothpick into the center of one of the cake layers. If the toothpick comes out clean or with only a few moist crumbs attached, your cake is done. If there is wet batter, continue baking for a few more minutes and retest.
- The “Spring Back” Test: Another reliable method is to lightly tap the center of the cake with your forefinger. If the cake springs back resilience, it’s done. If an indentation remains, give it a few more minutes in the oven.
- Cool Before Inverting: Allow your freshly baked cakes to cool in their pans on cooling racks for 10-20 minutes. This helps them firm up slightly before you attempt to invert them. Once inverted, carefully peel off the parchment paper and let them cool completely on the racks.
- The Golden Rule of Frosting: Never frost a warm cake! Warm cake will melt your beautiful frosting, turning it into a runny mess and creating a sticky, unappealing result. Ensure your layers are completely, utterly cool.
- Prepping Ahead: If you’re baking in advance, wrap cooled cake layers tightly in plastic wrap and freeze them. They will stay fresh for several weeks. When ready to frost, defrost the layers in the refrigerator overnight before bringing them to room temperature.
Frequently Asked Questions About Red Velvet Cake
Originating during the Great Depression, when cocoa was more readily available than chocolate, Red Velvet Cake is a unique hybrid often described as a cross between a rich Devil’s Food Cake and a light Velvet Cake. Historically, a natural chemical reaction between the acidic ingredients in the batter (like buttermilk and vinegar) and the anthocyanin in early, non-Dutch-processed cocoa powder would give the cake a reddish-brown hue, leading to its distinctive name.
While the original versions relied on the subtle red tint from cocoa reacting with acidic ingredients, the deep, vibrant red color we associate with modern Red Velvet Cakes is primarily achieved through the addition of red food coloring. Some traditional recipes or natural alternatives might use beet juice for coloring, but a significant amount of food coloring is typically used to achieve the iconic, striking hue.
Despite containing cocoa powder, Red Velvet Cake does not taste predominantly like chocolate. Its flavor profile is wonderfully unique and complex. The primary taste is a delicate balance of vanilla with a subtle, whispered hint of cocoa, rounded out by the tanginess of buttermilk and vinegar. This creates a distinctive, mellow flavor that is much lighter than a chocolate cake and is beautifully complemented by cream cheese frosting.
While you can make a cake using the same ingredients, it won’t have the iconic deep red color. The cake might have a brownish-red tint from the cocoa’s reaction with acids, but it won’t be as visually striking. For a truly “red” velvet experience, food coloring is generally required.
Because it contains cream cheese frosting, Red Velvet Cake should be stored in the refrigerator. Cover it loosely with plastic wrap or place it in an airtight cake carrier to prevent it from drying out. It will stay fresh for up to 3-4 days. For best flavor and texture, allow slices to come to room temperature for about 20-30 minutes before serving.
You May Also Like: More Red Velvet Inspirations
If you’re captivated by the magic of Red Velvet, explore these other delightful recipes that celebrate its unique flavor:
- Red Velvet Poke Cake from Brown Eyed Baker
- Red Velvet Cookie Pie from Taste and Tell
- Swirled Red Velvet Cheesecake Brownies
- Cheesecake Filled Red Velvet Cake
- Red Velvet Thumbprints
- Red Velvet Cookies with White Chocolate Chips
- Red Velvet Fudge
- Plus, explore more of the Best Cake Recipes on our site!
Stay connected with us and share your culinary creations! Find us on social media @ Instagram, Facebook, and Pinterest. Don’t forget to tag me when you try one of my recipes! If you love the delicious results, please consider giving it a 5-star rating in the recipe card below – your feedback means the world to us!
Red Velvet Cake with White Chocolate Cream Cheese Frosting
40 minutes
45 minutes
1 hour 25 minutes
16 servings
The PERFECT Red Velvet Cake adapted from The Confetti Cookbook – a truly moist and tender classic with an elevated White Chocolate Cream Cheese Frosting.
Ingredients
For the Cake:
- 3 ½ cups cake flour
- ½ cup unsweetened cocoa powder
- 1 ½ teaspoon salt
- 2 cups canola oil
- 2 ¼ cups sugar
- 3 large eggs
- 3 ounces red food coloring (for vibrant color)
- 1 ½ teaspoons vanilla extract
- 1 ¼ cups buttermilk
- 2 teaspoons baking soda
- 2 ½ teaspoons white vinegar
For the White Chocolate Cream Cheese Frosting:
- 16 ounces cream cheese, cold
- 12 tablespoons unsalted butter, at room temperature
- 1 tablespoon plus 1 teaspoon vanilla extract
- 8 ounces good quality white chocolate, gently melted in the microwave and slightly cooled
- 6 cups powdered sugar, sifted (for smoothness)
Instructions
- Prepare Pans: Preheat your oven to 350ºF (175ºC). Grease three 9-inch round cake pans with butter or cooking spray. Line the bottoms with parchment paper circles, then grease the top of the parchment as well. Set aside.
- Combine Dry Ingredients: In a medium bowl, whisk together the cake flour, cocoa powder, and salt until thoroughly combined.
- Cream Oil and Sugar: In the bowl of an electric mixer fitted with the paddle attachment, beat the canola oil and sugar on medium speed until well blended and lightened in color, about 2-3 minutes.
- Add Eggs and Coloring: Beat in the eggs, one at a time, ensuring each is fully incorporated before adding the next. Reduce mixer speed to low, then carefully add the red food coloring and vanilla extract, mixing until the color is uniform.
- Alternate Wet and Dry: With the mixer on low, gradually add the flour mixture alternating with the buttermilk. Begin by adding about half of the flour mixture, mix briefly, then half of the buttermilk, mix, then the remaining flour, mix, and finally the rest of the buttermilk. Mix just until combined. Be careful not to overmix the batter. Scrape down the sides of the bowl as needed.
- Activate Leavening: In a small dish, combine the baking soda and white vinegar. Stir gently until it fizzes. Immediately add this mixture to the cake batter with the mixer running on low. Beat for just 10 seconds to incorporate.
- Divide Batter: Divide the cake batter evenly among the three prepared 9-inch cake pans. For precise layers, you can weigh the batter in each pan.
- Bake: Bake for 40-45 minutes, or until a cake tester inserted into the center of a cake comes out clean or with only a few moist crumbs.
- Cool Cakes: Allow the cakes to cool in their pans on wire racks for about 10-20 minutes. Then, invert them onto the racks, carefully peel off the parchment paper, and let them cool completely before frosting.
- Prepare Frosting Base: For the frosting, in an electric mixer, beat the cold cream cheese, room temperature butter, and vanilla extract until just blended and smooth.
- Add White Chocolate & Sugar: Mix in the slightly cooled melted white chocolate. Gradually add the sifted powdered sugar, about 2 cups at a time, beating on low speed until the frosting is smooth, creamy, and reaches your desired consistency. Increase speed to medium-high and beat for 1-2 minutes until light and fluffy.
- Assemble & Garnish: Once the cake layers are completely cool, stack and frost the cake as desired. Garnish with additional white chocolate shavings, sprinkles, or fresh berries for an extra touch. Enjoy!
Nutrition Information (estimated):
Yield:
16 servings
Serving Size:
1 slice
Amount Per Serving:
Calories: 904Total Fat: 52gSaturated Fat: 16gTrans Fat: 0gUnsaturated Fat: 33gCholesterol: 90mgSodium: 577mgCarbohydrates: 105gFiber: 1gSugar: 79gProtein: 7g
HOW MUCH DID YOU LOVE THIS RECIPE?
Please leave a comment on the blog or share a photo on Pinterest

