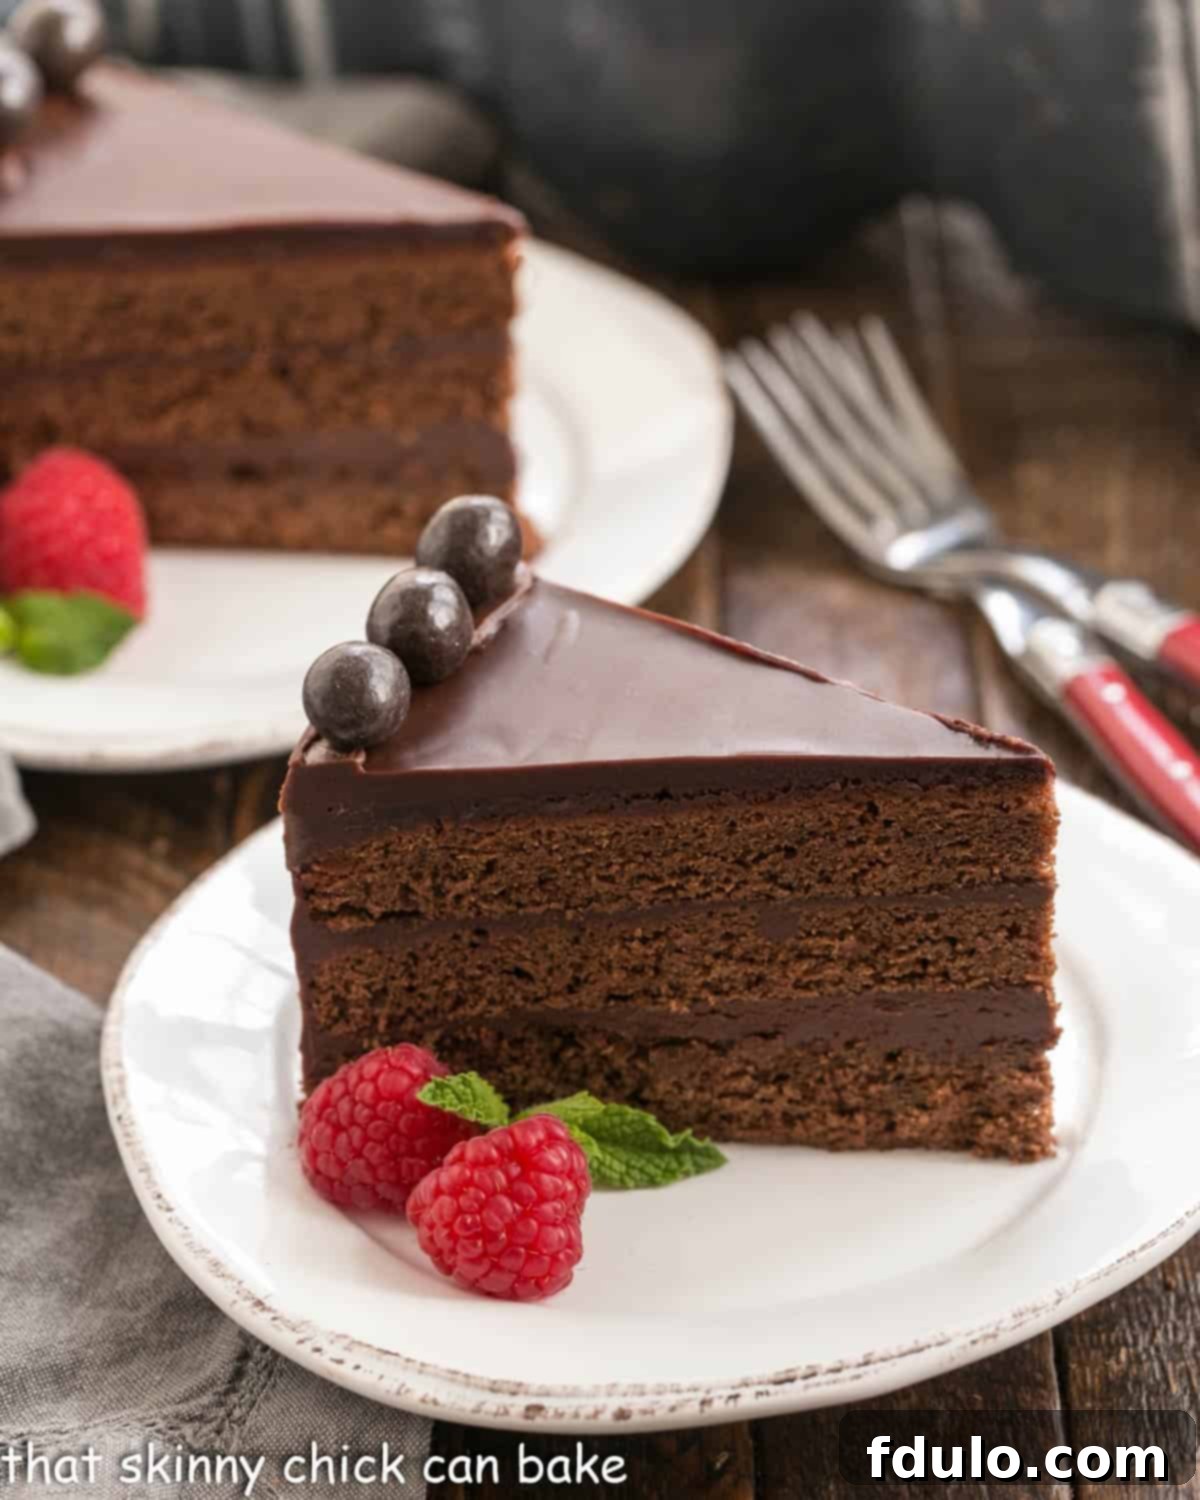
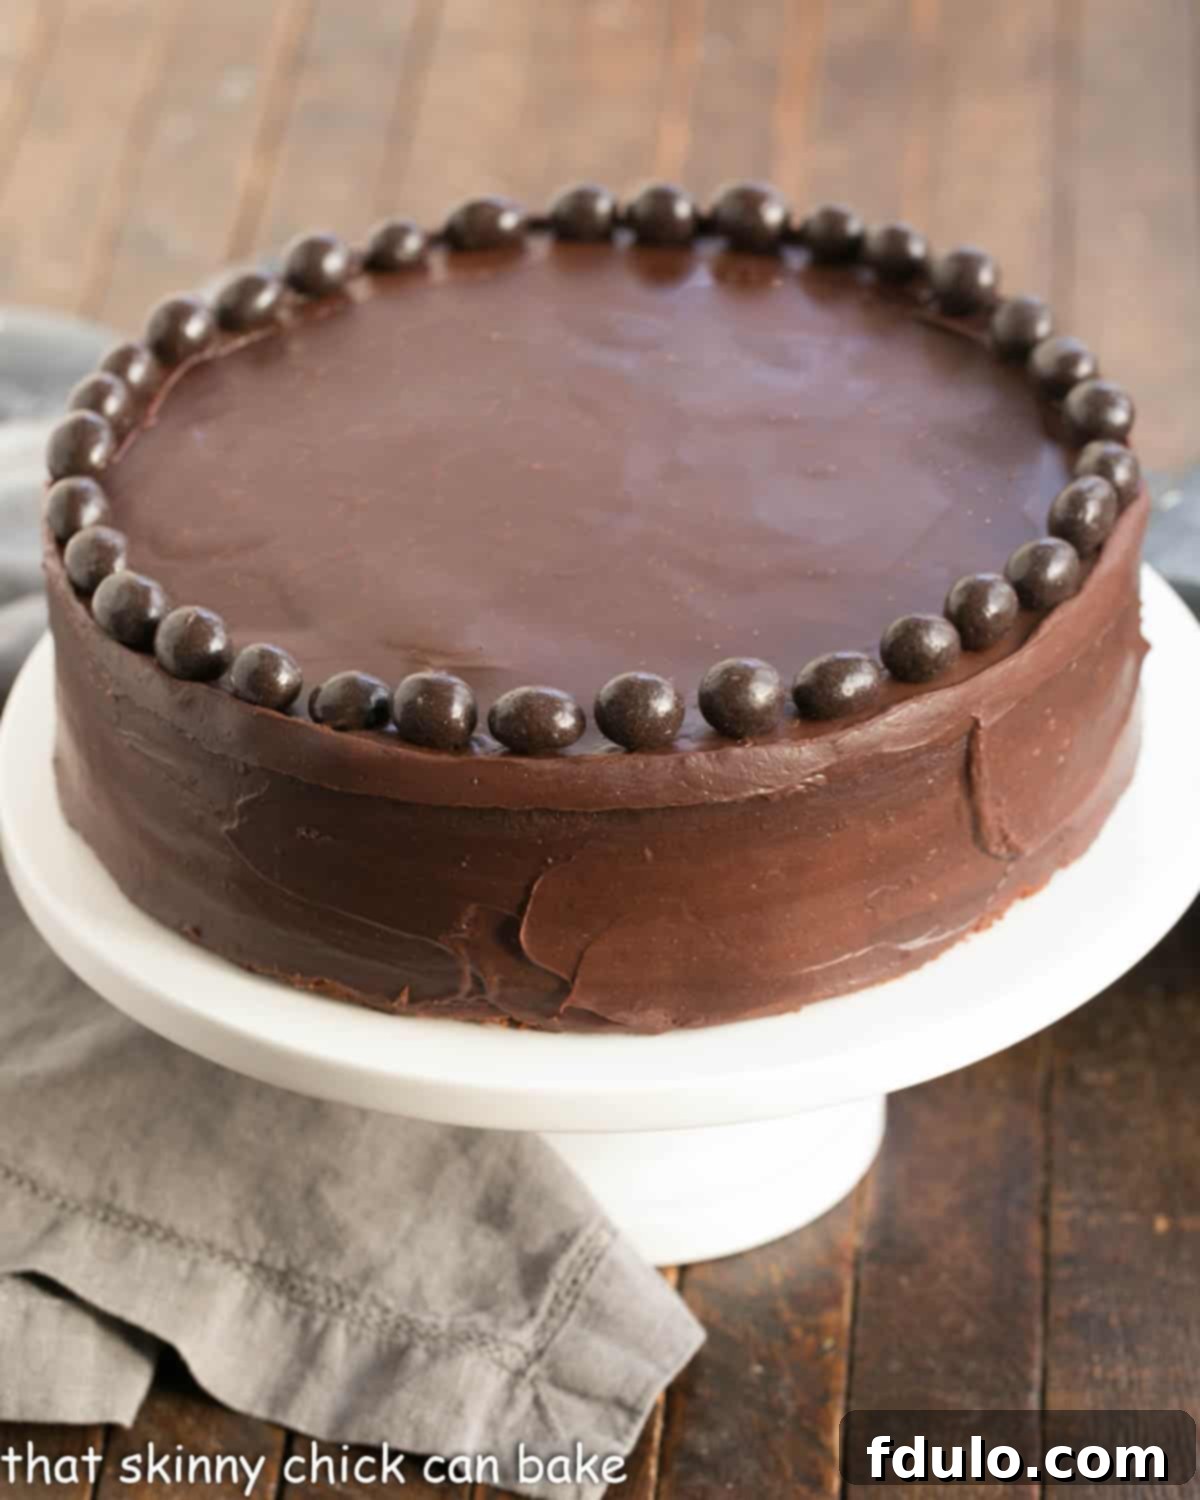
Prepare to indulge in a truly spectacular dessert: this exquisite, three-layer Mocha Brownie Cake. Crafted from a recipe by Marcel Desaulniers, a renowned authority on decadent chocolate creations, this cake promises an unforgettable experience for any chocoholic.
This magnificent Mocha Cake is not just a cake; it’s an architectural marvel of flavor and texture. Each rich, tender layer of brownie-like cake is beautifully interspersed and generously enrobed with a luxurious chocolate ganache frosting, creating delightful breaks of pure, melt-in-your-mouth bliss between every bite. The subtle infusion of coffee elevates the chocolate, creating a depth of flavor that is simply irresistible.

Why You Must Make This Decadent Mocha Brownie Cake
If you’re searching for the ultimate chocolate dessert, look no further. This Mocha Brownie Cake stands out for several compelling reasons, making it a must-try for any baking enthusiast or chocolate connoisseur:
- Authored by a Chocolate Master: This recipe comes directly from Marcel Desaulniers, a name synonymous with extraordinary chocolate desserts. His genius is evident in creations like his famous Death by Chocolate Cake. When it comes to understanding and manipulating chocolate to its fullest potential, Marcel Desaulniers is unparalleled. His recipes are not just instructions; they are blueprints for culinary perfection, ensuring a consistently delightful result that few others can match.
- Superior Frosting-to-Cake Ratio: Unlike many standard two-layer cakes, this recipe features three lavish layers. This structural choice isn’t just for aesthetics; it significantly increases the beloved ratio of creamy, rich ganache to moist, fudgy cake in every single bite. More layers mean more opportunities for that luscious frosting to shine, providing a balanced and intensely satisfying experience that truly elevates the cake.
- The Magic of Mocha: The subtle yet impactful addition of coffee is a game-changer. It doesn’t overpower the chocolate but rather acts as a flavor enhancer, deepening and intensifying the cocoa notes to an extraordinary degree. This coffee element is cleverly incorporated into the luxurious ganache, infusing the entire cake with a sophisticated, delicate mocha flavor that lingers pleasantly on the palate. It’s the secret touch that transforms a great chocolate cake into an utterly unforgettable one.
- An Experience for the Senses: Beyond taste, this cake offers a feast for the eyes and a delightful aroma. The dark, glossy ganache against the deep brown cake layers, combined with the rich fragrance of chocolate and coffee, creates a sensory experience that begins long before the first forkful.

Expert Baking and Assembly Tips for Your Mocha Brownie Cake
Creating a cake of this caliber requires a few insider tricks, especially when aiming for that flawless, bakery-worthy presentation. My own chocoholic family, including a visiting mother-in-law and brother-in-law, couldn’t stop raving about this particular creation, a testament to its irresistible charm. Here are some invaluable tips to guide you through the process:
- Choosing the Right Pan for the Base: The foundation of this spectacular cake is a single, thick brownie-like layer. It’s crucial to bake it in a 9-inch cake pan with a depth of at least 3 inches. If, like me, your standard cake pans aren’t quite deep enough, a 9-inch springform pan is an excellent alternative. Its removable sides not only accommodate the depth but also significantly ease the process of removing the delicate cake base without damage, making it a top recommendation for baking this particular recipe.
- The Art of Slicing into Three Layers: This technique is where the magic of a three-layer cake from a single baked slab truly comes alive. After baking and chilling the cake, you will carefully slice it horizontally into three relatively even layers. This can feel daunting, but a simple pro-tip makes it achievable for even novice bakers.
- PRO-Tip for Precision Slicing: To ensure perfectly even layers, use toothpicks as a guide. Insert a first set of toothpicks around the perimeter of the cake, slightly below an imaginary line that marks one-third of the way up the cake. Then, insert a second set just below the two-thirds mark. These toothpicks will serve as visual and physical guides for your knife.
- Slicing Technique: With a long, serrated knife, begin sawing gently around the cake, using the lower set of toothpicks as your initial guide. Work your way around the entire cake, cutting about an inch or so deep. Then, with a second pass, go deeper, following the groove you’ve created. Repeat this gradual process until the first layer is completely separated. Use the next set of toothpicks as your guide and repeat the process for the second slice, yielding three beautiful, distinct layers.
- Assembling with Ganache for a Professional Finish: Marcel Desaulniers himself recommends utilizing the springform pan as a mold during assembly. This ingenious method helps keep the layers perfectly stacked and aligned as each is generously topped with ganache.
- The Role of Chilling: A brief chilling period after adding each layer of ganache is essential. This step allows the ganache to firm up slightly, preventing the layers from sliding and ensuring a stable, well-structured cake. This patient approach contributes significantly to that sought-after bakery-worthy profile.
- Ganache Consistency: You want your ganache to be at a consistency where it’s thick enough to coat but still pourable. It should be able to spread smoothly to the edges without running off. If it’s too thin, chill it a bit longer; if too thick, warm it gently.
- Serving and Texture: While this cake slices neatly when thoroughly chilled (which also aids in transport and clean cuts), its texture and flavor are truly at their peak when served at room temperature. Allowing it to sit out for about 30-60 minutes before serving will soften the ganache and cake, enhancing its decadent qualities.
Mastering these techniques will ensure your Mocha Brownie Cake not only tastes divine but also looks absolutely stunning. I have a strong feeling this exquisite creation will become a frequently requested favorite in your household.
Frequently Asked Questions About Mocha Brownie Cake
Originally, “mocha” referred to a specific, high-quality variety of coffee bean grown in Arabia, which was historically shipped from the ancient Yemeni port city of Al Moka (or Mocha). Today, the term has evolved significantly. In culinary contexts, it commonly describes a delightful flavor combination of chocolate and coffee. This can manifest in a hot beverage, such as a caffè mocha (espresso, steamed milk, and chocolate), or in various desserts and baked goods like this indulgent Mocha Brownie Cake, where the coffee element enhances the chocolate without dominating it, creating a harmonious and rich taste experience.
Ganache is a luxurious and versatile glaze, icing, or filling widely used in patisserie. It is traditionally made by melting chocolate (often semisweet or bittersweet, though milk or white chocolate can also be used) with hot heavy cream. The ratio of chocolate to cream can be adjusted to achieve different consistencies—a higher chocolate content yields a firmer ganache suitable for truffles or firm fillings, while more cream results in a pourable glaze or soft frosting. The mixture is then stirred until smooth and glossy, creating a decadent, deeply flavored component that adds richness and elegance to any dessert.
There are two primary methods for constructing a three-layer cake, each with its own advantages. The most common approach involves baking three individual cake layers in separate pans, which are then stacked and frosted. The second method, employed in this specific Mocha Brownie Cake recipe, requires baking one thick, single cake layer. Once cooled, this thick layer is then carefully sliced horizontally into three even, distinct layers. This technique can result in a more uniform crumb across all layers and is often preferred for cakes that are denser or have a brownie-like texture. For detailed guidance on how to precisely slice a single cake into three even layers using toothpicks as guides, please refer to the “Expert Baking and Assembly Tips” section above.
Discover More Decadent Chocolate Desserts You May Also Like:
Chocolate cakes and chocolate chip cookies hold a special place in my family’s heart, and indeed, in the hearts of many! This blog is a treasure trove of inspiration for all your chocolate cravings. Here are a few more irresistible recipes to explore:
- La Bete Noire: A deeply intense and sophisticated chocolate cake, often translated as “The Black Beast,” promising an experience for true dark chocolate lovers.
- Triple Layer Chocolate Cake: Another stunning multi-layered masterpiece, perfect for celebrations or when you simply desire an abundance of chocolate.
- Fudgy Chocolate Sheet Cake with Cocoa Icing: This recipe is an absolute crowd-pleaser, delivering rich, fudgy goodness in an easy-to-serve format—ideal for parties, potlucks, or any large gathering.
- Short on Time? If a triple-layer cake feels too ambitious for your schedule, this Simple Chocolate Cake Recipe offers equally delicious results with less fuss, proving that exceptional taste doesn’t always require extensive effort.
- Explore My Full Collection: For an extensive array of delightful baked goods, be sure to check out my comprehensive Recipe Index, especially the section dedicated to my Best Homemade Cake Recipes. You’re guaranteed to find your next favorite dessert!
Stay connected and share your baking adventures with me through social media! You can find me @ Instagram, Facebook, and Pinterest. Don’t forget to tag me when you whip up one of my recipes! If you adore the results, I’d be incredibly grateful if you could take a moment to give it a 5-star rating in the recipe card below. Your feedback helps others discover these wonderful treats!

Mocha Brownie Cake Recipe
45 minutes
50 minutes
1 hour 35 minutes
10 servings
A decadent triple-layer chocolate cake generously iced with a rich, coffee-infused chocolate ganache, perfect for special occasions.
Rating: 5 out of 5 stars (Based on 52 reviews)
Recent Reviews:
- Anonymous (September 1, 2024): ★★★★★
- Anonymous (January 16, 2024): ★★★★★
- Anonymous (December 24, 2023): ★★★★★
- Stephanie Haines (January 29, 2022): ★★★★★ – “Hi Liz, I’m really impressed by reading your article! I have also been a great fan of your 3 layers Mocha Brownie Cake recipe. Hopefully, This will be very tasty as well as healthy. However, I feel like providing a 10-star rating but unfortunately, there is no scope to provide more than 5-star. Thank you.”
- Healthy (January 16, 2022): ★★★★★ – “The delicious balance between the chocolate and coffee flavor are deep and decadent. Cures all chocolate cravings!”
- Wilhelmina (January 11, 2022): ★★★★★ – “My perfect chocolate dessert! This was a total dream. Wish there were more stars to give! Holy moly, this is good!”
- Joy (January 10, 2022): ★★★★★ – “The family loved this cake. It was a bit of work to make, but perfect for special occasions.”
Ingredients
For the Cake:
- ¾ cup all-purpose flour
- ¾ teaspoon baking powder
- ¼ teaspoon salt
- 4 ½ ounces semisweet chocolate, chopped
- 2 ½ ounces unsweetened chocolate, chopped
- ¾ stick (3 ounces or 6 tablespoons) unsalted butter
- 5 large eggs, at room temperature
- 1 cup granulated sugar
- 1 teaspoon pure vanilla extract
- 3 tablespoons sour cream
For the Mocha Ganache:
- 1 ¼ cups whipping cream
- 3 tablespoons unsalted butter
- 3 tablespoons granulated sugar
- 12 ounces semisweet chocolate, chopped
- ¼ cup hot, strong brewed coffee
Instructions
- Preheat your oven to 325 degrees F (160 degrees C). Position an oven rack in the center. Prepare a 9-inch cake pan (preferably 3 inches deep) or a 9-inch springform pan by generously spraying it with a baking spray containing flour, such as Baker’s Joy. Set aside.
- In a small bowl, whisk together the flour, baking powder, and salt until well combined. Set this dry mixture aside.
- Combine both the semisweet and unsweetened chopped chocolates with 3 ounces of unsalted butter in a microwave-safe bowl. Microwave in 30-second intervals, stirring thoroughly after each interval, until the chocolate and butter are fully melted and the mixture is smooth and blended. Remove from heat and allow to cool slightly.
- In the bowl of a stand mixer fitted with the whisk attachment, combine the eggs, 1 cup of sugar, and vanilla extract. Mix on high speed for 4 to 5 minutes, or until the egg mixture becomes noticeably thickened and has doubled in volume, achieving a light, airy consistency.
- Reduce the mixer speed to medium and slowly add the slightly cooled melted chocolate mixture to the egg mixture. Mix for about 15 seconds, just until combined.
- Remove the bowl from the mixer. Using a rubber spatula, gently fold in the dry ingredients (flour, baking powder, and salt) until just incorporated. Be careful not to overmix. Finally, gently fold in the sour cream until the batter is smooth.
- Pour the prepared cake batter into the greased and floured pan, spreading the surface evenly with the spatula. Bake for 45 to 50 minutes, or until a toothpick inserted into the center of the cake comes out clean.
- Transfer the baked cake to a wire cooling rack and let it cool in the pan for 20 minutes. After 20 minutes, carefully remove the cake from the pan. Transfer it to the refrigerator, uncovered, and chill for at least 1 hour. This chilling step is crucial for firming up the cake, making it much easier to slice.
- Prepare the Mocha Ganache: In a medium saucepan, combine the whipping cream, 3 tablespoons of unsalted butter, and 3 tablespoons of sugar. Heat over medium-high heat, stirring frequently, until the sugar is completely dissolved and the mixture reaches a full boil.
- Place the 12 ounces of chopped semisweet chocolate in a large, heatproof bowl. Pour the boiling cream mixture and the hot brewed coffee over the chocolate. Let it stand undisturbed for 5 minutes to allow the chocolate to melt. Then, stir gently with a whisk or spatula until the ganache is completely smooth and glossy.
- The ganache must cool thoroughly before use. You can allow it to cool at room temperature for about an hour or so, or you can refrigerate it to speed up the process. The ganache will thicken significantly as it cools.
- For layering, you want the ganache to be at a consistency where it has just begun to thicken but is still pourable, rather than requiring spreading with a spatula. It should be thick enough to hold its shape between layers but flowable enough to coat evenly.
- Assemble the Cake: Remove the chilled cake from the refrigerator. Using a long, serrated knife and following the toothpick guidelines (as detailed in the “Expert Baking Tips” above), carefully cut the cake horizontally into three even slices.
- Place the top layer of the sliced cake, cut side down, back into the 9-inch springform pan with the sides closed. Pour approximately 1 cup of the cooled ganache over this layer, spreading it evenly to the edges with a rubber spatula. Refrigerate the cake, uncovered, until the ganache is set, about 15 minutes.
- Gently place the center cake layer on top of the set ganache, pressing it down lightly to ensure good contact. Pour another cup of ganache over this layer, spreading it to the edges. Refrigerate again until set.
- Finally, position the last cake layer (the bottom layer from when it was baked), cut side down, on top of the second ganache layer. Press down firmly but carefully to ensure it’s properly positioned and adhered.
- Refrigerate the assembled cake for at least an hour to allow all layers and ganache fillings to set completely. Cover any remaining ganache with plastic wrap and keep it at room temperature for the final frosting.
- Once the cake is thoroughly chilled and firm, run a thin knife carefully around the inside edges of the springform pan to loosen the cake. Release and remove the sides of the springform pan.
- If the reserved ganache is too firm, gently rewarm it slightly until it’s pourable again. Pour the remaining ganache over the top of the cake, allowing some to drip decoratively down the sides. Use an offset spatula to smooth the ganache over the top and sides, ensuring complete coverage and a professional finish.
- Allow the finished cake to set in the refrigerator for a final chill, or at room temperature if serving immediately (for best texture).
Notes
To achieve perfectly even slices when cutting your baked cake into three layers, remember the toothpick guiding method: place toothpicks around the perimeter at approximately one-third and two-thirds of the way up the cake sides. This provides visual and physical guides for your knife, as detailed in the “Expert Baking and Assembly Tips” section.
Always ensure your baking powder is fresh and active. Unlike baking soda, baking powder has a shorter shelf life and can lose its potency relatively quickly, impacting the rise and texture of your cake. Test it by adding a teaspoon to a small bowl of hot water; if it bubbles vigorously, it’s good to go!
For the best flavor and texture, allow the cake to come to room temperature for about 30-60 minutes before serving. This softens the ganache and cake, enhancing its rich, decadent qualities.
Recommended Products
As an Amazon Associate and member of other affiliate programs, I earn from qualifying purchases.
- Silicone Spatulas
- KitchenAid KSM150PSER Artisan Tilt-Head Stand Mixer with Pouring Shield, 5-Quart, Empire Red
- OXO Good Grips 11-Inch Better Balloon Whisk
Nutrition Information:
Yield:
10 servings
Serving Size:
1 slice
Amount Per Serving:
Calories: 581
Total Fat: 36g
Saturated Fat: 21g
Trans Fat: 0g
Unsaturated Fat: 13g
Cholesterol: 141mg
Sodium: 202mg
Carbohydrates: 64g
Fiber: 4g
Sugar: 50g
Protein: 8g
HOW MUCH DID YOU LOVE THIS RECIPE?
Please leave a comment on the blog or share a photo on Pinterest

