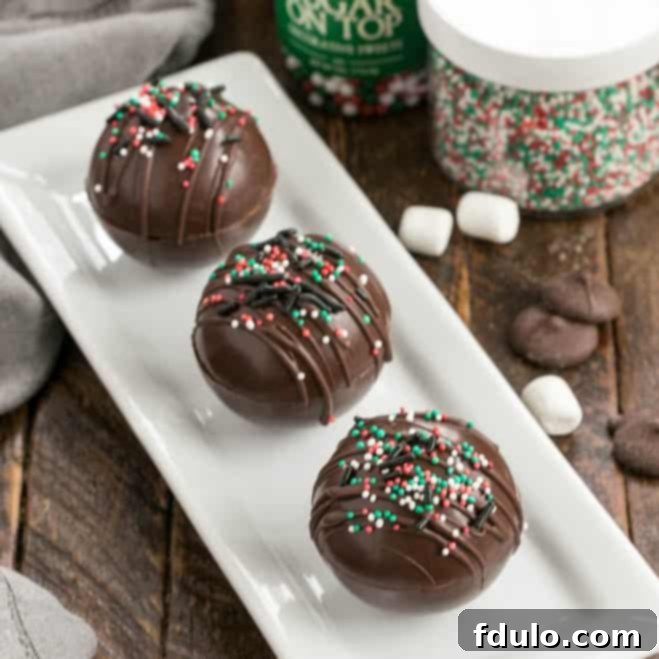
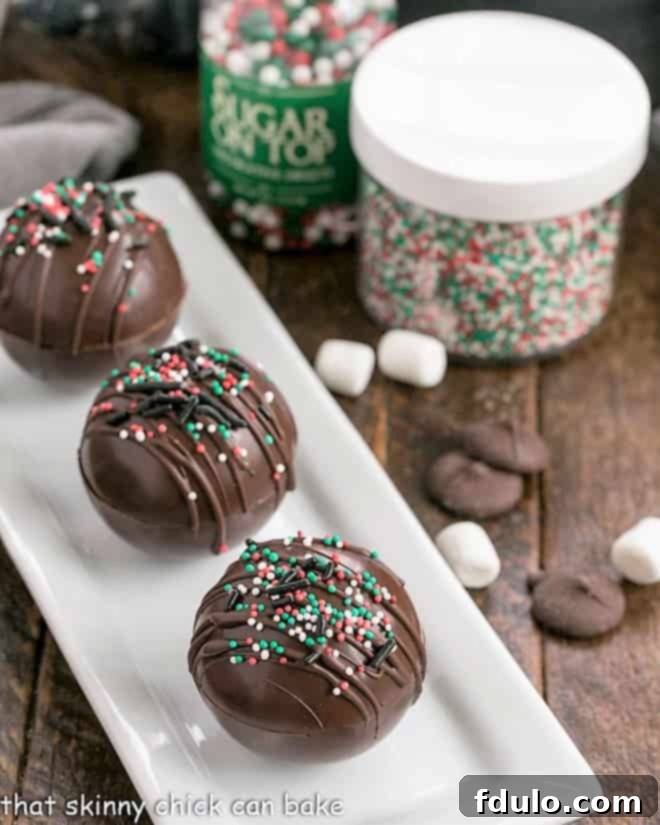
Transform your cozy cold-weather moments into a truly magical experience with these stunning, glossy Hot Chocolate Bombs. Each spherical delight is meticulously crafted and generously filled with a premium cocoa mix and an abundance of mini marshmallows, promising an exquisitely rich and unforgettable beverage with every sip. This isn’t just a drink; it’s an enchanting ritual that brings warmth and wonder to any day.
Forget everything you thought you knew about homemade hot cocoa. This innovative Hot Cocoa Recipe elevates the classic to an art form. Utilizing simple silicone molds, creating the perfectly shaped chocolate shells is a surprisingly straightforward process, culminating in a spectacular, interactive treat. The true magic unfolds when you simply add hot milk, witnessing the chocolate melt away to reveal a burst of cocoa and marshmallows. It’s a delightful spectacle that makes every mug feel special, a perfect blend of simplicity and showmanship that will impress and charm all who partake.
Why These Hot Chocolate Bombs Are a Must-Make This Season
Hot Chocolate Bombs have taken the culinary world by storm, and for good reason. They are more than just a sweet treat; they’re an experience waiting to happen. If you’re looking for a delightful project that yields spectacular results, here’s why these chocolate bombs should be at the top of your list:
- An Interactive Marvel: Watch the awe and excitement light up faces as hot milk melts the chocolate shell, releasing the hidden treasures of cocoa mix and marshmallows into the cup. It’s a captivating, interactive moment that makes every hot chocolate serving an event. Your kids, friends, and family will undoubtedly think you’re a culinary rock star!
- Perfect for Festive Gifting & Celebrations: These chocolate bombs are not only delicious but also incredibly festive and visually appealing. Packaged elegantly in cellophane bags with a colorful ribbon and simple instructions, they make an exceptional homemade hostess gift, thoughtful holiday present, or a charming party favor. They add a touch of handcrafted luxury to any seasonal gathering, spreading joy with every sphere.
- Deceptively Simple to Create: While their intricate appearance might suggest a complex process, making hot chocolate bombs is surprisingly straightforward once you have the right tools. With readily available silicone molds, you’ll discover how easy it is to craft these delightful confections. The process is enjoyable and rewarding, even for novice bakers, proving that impressive results don’t always require expert skills.
- Endless Customization Opportunities: Beyond the classic cocoa and marshmallow filling, these bombs are a canvas for creativity. You can experiment with various types of chocolate for the shells, introduce different cocoa flavors (like peppermint or white chocolate), or add a multitude of exciting inclusions. This versatility ensures that each batch can be uniquely tailored to personal preferences or specific holiday themes, keeping the experience fresh and exciting.
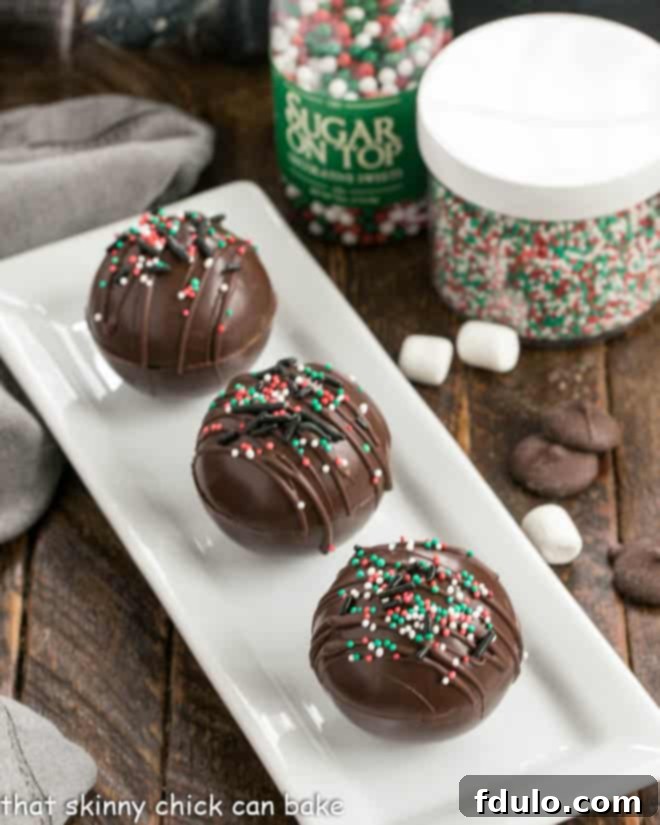
Adding a final drizzle of extra chocolate over each chocolate bomb isn’t just for aesthetics; it provides the perfect sticky canvas for festive sprinkles! For a delightful holiday flair, I opted for a mix of vibrant Christmas sprinkles and classic jimmies, creating a visually appealing treat that’s ready for the season. This fun and interactive way to enjoy hot chocolate is ideal for making ordinary days feel extraordinary, especially during the colder months or any special occasion.
Gathering Your Essentials: Ingredients & Equipment for Hot Chocolate Bombs
Before you embark on your hot chocolate bomb crafting journey, let’s ensure you have all the necessary components. Choosing the right ingredients and having the proper tools will make the process smooth and enjoyable, leading to perfectly structured and delicious results every time.
The Star: High-Quality Chocolate for the Shells
- Ghirardelli Dark Chocolate Melting Wafers (or similar quality melting chocolate): The key to glossy, sturdy shells without the hassle of tempering real chocolate bars. Melting wafers are designed to melt smoothly and set firmly, making them ideal for this recipe. While a 10-ounce bag is recommended, you won’t need the entire quantity for six bombs.
- Why Melting Wafers? Unlike standard chocolate bars, melting wafers contain stabilizers that prevent blooming (a grayish-white haze) and ensure a smooth, professional finish without the precise temperature control required for tempering. This saves you significant time and effort, especially during busy times of the year.
The Core: Rich Cocoa Mix
- 6 scant tablespoons Hot Cocoa Mix (e.g., Ghirardelli hot cocoa mix): The heart of your hot chocolate bomb. Use your favorite high-quality brand for the best flavor. This is where you can start experimenting with different varieties like classic milk chocolate, dark chocolate, or even flavored cocoa mixes.
The Surprise: Mini Marshmallows and Beyond
- 30-36 mini marshmallows: These are essential for that classic hot chocolate experience. They float to the top as the bomb melts, adding a delightful creaminess and sweetness.
- Sprinkles: An absolute must for decoration! Choose festive sprinkles for holidays, or opt for simple jimmies for everyday fun. They add visual appeal and a touch of whimsy.
- Optional Add-ins: This is where your creativity shines! Consider crushed candy canes for a minty kick, a pinch of cinnamon, a tiny spoonful of caramel sauce, or even a dash of espresso powder for a mocha bomb.
To Serve: The Perfect Accompaniments
- 4 ½ cups hot milk (about ¾ cup per serving): The medium that brings your hot chocolate bomb to life. Whole milk offers the creamiest texture, but any milk or milk alternative will work beautifully. Ensure it’s piping hot for optimal melting.
- Extra marshmallows, whipped cream, or caramel sauce: For ultimate indulgence! These garnishes take your hot cocoa from great to gourmet, allowing everyone to customize their drink.
Essential Equipment: Tools for Success
- Silicone Semi-Sphere Molds: These are non-negotiable. They come in various sizes (my molds were about 2-inches in diameter), but the semi-sphere shape is crucial for forming the bomb halves. Silicone’s flexibility makes unmolding incredibly easy.
- Small Rimmed Sheet Pan: Ideal for laying out your molds on a flat, stable surface, making them easy to move and transfer.
- Heatproof Bowl: For melting your chocolate.
- Spoon or Silicone Brush: For coating the molds with melted chocolate. A silicone brush offers precision, while the back of a spoon works perfectly fine.
- Warmed Flat Plate: A simple yet effective tool for melting the edges of your chocolate shells to seal them.
- Piping Bag (optional): For neatly drizzling leftover chocolate for decoration.
- Set of Glass Mixing Bowls: Useful for melting chocolate, holding fillings, and general prep.
Having these ingredients and tools ready will set you up for a smooth and successful hot chocolate bomb creation process.
How to Make Hot Chocolate Bombs: A Step-by-Step Guide
Crafting your own hot chocolate bombs is a fun and rewarding process that comes with a touch of magic. Follow these detailed steps to create perfectly glossy and delicious chocolate spheres:
- Prepare Your Workspace: Begin by laying your silicone molds on a flat surface. A small rimmed sheet pan works exceptionally well, making it easy to handle and move the molds throughout the process. Ensure your workspace is clean and organized.
- Gather Your Fillings: Before you start, have all your hot chocolate bomb fillings ready and within easy reach. This includes your chosen hot cocoa mix, a generous amount of mini marshmallows, and any exciting add-ins like sprinkles, crushed candy canes, or a pinch of cinnamon.
- Melt the Chocolate Flawlessly: Place about ½ to ¾ of your bag of chocolate melting wafers in a microwave-safe, heatproof bowl. Microwave the chocolate in short intervals (30 seconds at a time), stirring thoroughly after each interval. Continue until the chocolate is mostly melted and smooth. Crucially, don’t overheat it! If there are just a few tiny unmelted pieces, allow the residual heat of the chocolate to finish the melting process with continued stirring. This prevents burning and ensures a silky-smooth consistency.
- Create the Chocolate Shells: Using the back of a clean spoon or a small silicone brush, paint a thin, even layer of the melted chocolate onto the inside of each well of your silicone molds. Make sure the entire surface is coated, extending to the edges. While the inside doesn’t need to be aesthetically perfect, thorough coverage is essential for sturdy shells. Allow this first layer to cool and set completely (either at room temperature or in the refrigerator if your kitchen is warm). Once firm, apply a second thin layer of chocolate to reinforce the shells. This double layer is key to preventing breakage.
- Cool and Unmold the Shells: After applying the second layer, let the chocolate cool and set fully. If your kitchen is warm, refrigerating for 5-10 minutes will speed up this process. Once firm, gently pop each chocolate semi-sphere out of its mold. The flexibility of silicone molds makes this step remarkably easy. Handle them carefully to avoid fingerprints or cracks.
- Fill Half the Spheres: Take half of your chocolate spheres and carefully place a generous spoonful of your hot cocoa mix inside each. Then, pile on a heap of mini marshmallows. This is also the time to add any other inclusions you desire, such as crushed candy canes or sprinkles, ensuring they are nestled comfortably within the sphere.
- Prepare to Seal: To seal the bombs, you’ll need to slightly melt the rims of the unfilled chocolate shells. Heat a flat plate (you can do this by pouring hot water from a kettle onto it for a minute, then drying it thoroughly, or gently warming it in the microwave).
- Seal the Bombs: Take one unfilled chocolate shell and place its flat rim onto the warmed plate for just a few seconds until the edge begins to slightly melt. Immediately take this softened shell and place it on top of a filled chocolate shell, aligning the edges perfectly. Gently hold the two halves together for a moment until the melted chocolate cools and acts as a “glue,” sealing the bomb securely.
- Repeat for All Bombs: Continue this sealing process, one bomb at a time, until all your chocolate spheres are filled and sealed. Work efficiently but carefully to ensure strong seals.
- Drizzle and Decorate: If you have any leftover melted chocolate, transfer it to a piping bag (or a ziploc bag with a tiny corner snipped off). Drizzle decorative patterns over the sealed hot chocolate bombs. While the chocolate drizzle is still wet, quickly add any desired sprinkles. This is your chance to add that final, personalized touch of flair before the chocolate hardens completely. Allow all decorations to set before handling or packaging.
Expert Tips for Hot Chocolate Bomb Perfection
Achieving flawless hot chocolate bombs is simpler than you might think, especially with a few insider tips. These pointers will help you navigate common challenges and elevate your creations from good to gourmet.
- Opt for Chocolate Melts Over Real Chocolate Bars: This is arguably the most crucial tip for beginners. Chocolate melts (like Ghirardelli Melting Wafers or candy melts) are formulated to melt smoothly and set without needing to be tempered. Real chocolate bars, on the other hand, require a precise tempering process to prevent “bloom” – a grayish-white haze that appears on untempered chocolate as it cools. Skipping tempering saves you a significant amount of time and stress, especially during a busy holiday season.
- Prevent Overheating Your Chocolate: When melting chocolate, patience is key. Overheated chocolate can seize, becoming thick and grainy, or even burn, developing an unpleasant taste. Use a gentle melting method to maintain its smooth consistency.
- Master the Microwave Melting Technique: For microwave melting, use short intervals (30 seconds) and stir thoroughly after each. The chocolate will appear unmelted for a while, but stirring distributes the heat. Stop microwaving when there are still a few tiny, unmelted pieces. Let the residual heat finish the melting process as you continue to stir. If it’s not perfectly smooth after a minute or two of stirring, a final 10-15 second burst in the microwave might be necessary.
- Ensure Sturdy Chocolate Shells: Don’t skimp on the chocolate coating inside your spheres. Applying two thin, even layers (allowing each to set) is essential for creating shells that are strong enough to handle and won’t easily break when unmolded or handled. Make sure every inch of the mold’s surface is well-covered.
- Efficient Sealing Methods: While some recipes suggest using a candle warmer for melting the edges of the chocolate half-spheres, I’ve found that a small heated plate works just as effectively, if not better. Simply heat a ceramic plate by pouring hot water on it for a minute, then drying it completely. The residual heat will soften the chocolate edges perfectly for sealing.
- Explore Diverse Hot Cocoa Mix Varieties: Don’t limit yourself to just regular hot cocoa mix. The market offers a fantastic array of flavors! Experiment with peppermint hot cocoa for a festive twist, white chocolate for a creamy alternative, gingerbread for a spicy kick, or even Mexican hot chocolate for a touch of warmth and spice.
- Decorate with Flair: After your chocolate bombs have cooled and sealed, drizzle some of your leftover melted chocolate over them. This provides both visual appeal and a base for decorations. Immediately add festive sprinkles, crushed nuts, or a dusting of cocoa powder before the drizzle hardens. This step transforms your bombs into edible works of art.
- Storage Suggestions: Once fully set and decorated, store your hot chocolate bombs in an airtight container at room temperature, away from direct sunlight or heat. They can last for several weeks, making them perfect for making ahead of time.
How to Use Your Hot Chocolate Bombs: The Magical Moment
The true delight of a hot chocolate bomb comes with its dramatic reveal. Here’s how to properly use and enjoy your beautifully crafted creations, transforming them into a rich, steaming mug of cocoa goodness:
- Heat Your Milk to Perfection: Begin by heating your milk of choice until it reaches a gentle simmer. It should be hot enough to melt the chocolate quickly but not boiling, which could scorch the milk or compromise the chocolate’s flavor. Aim for steaming hot, approximately 180-190°F (82-88°C).
- The Grand Entrance: You have two delightful options for the bomb’s introduction. Either place your hot chocolate bomb directly into your empty mug and then slowly pour the hot milk over it, or carefully drop the bomb into an already filled mug of piping hot milk. Both methods create a spectacular melting effect.
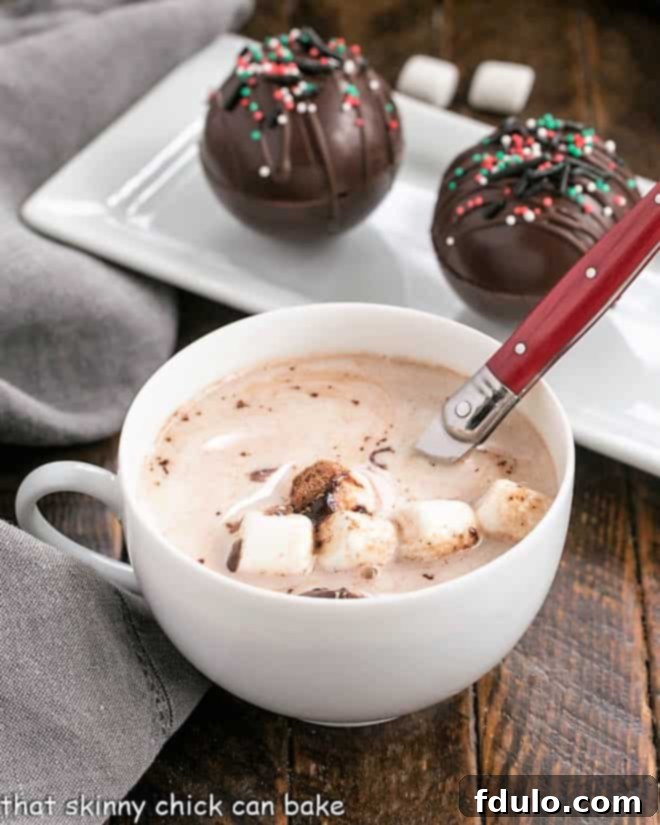
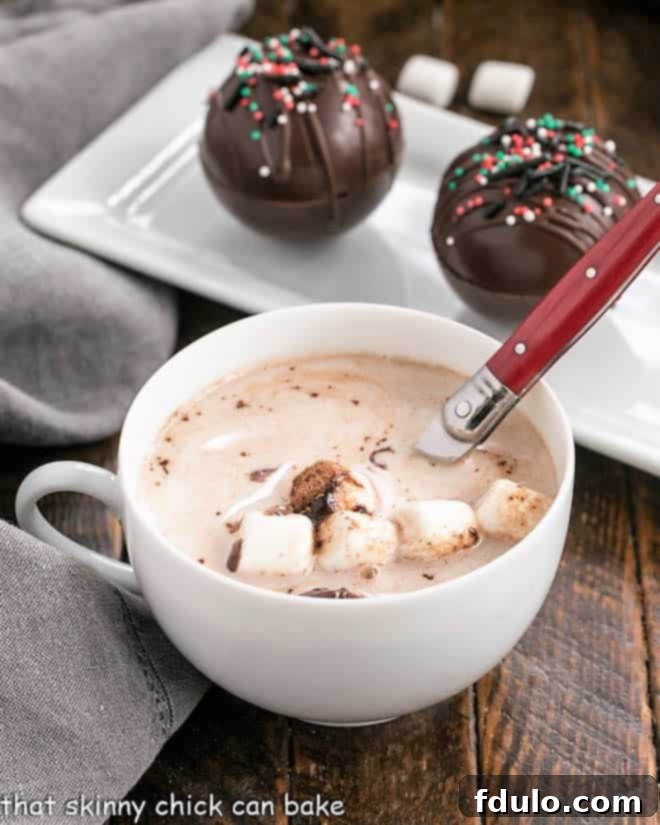
- Watch the Magic Unfold and Stir: As the hot milk envelops the chocolate bomb, watch in anticipation as the chocolate shell gracefully softens and breaks apart. The hidden cocoa mix and mini marshmallows will then erupt into the milk, swirling together to create a luscious base. Once the chocolate has fully dissolved and the contents are released, stir the mixture well with a spoon to ensure everything is thoroughly combined and no lumps remain.
- Garnish and Indulge: Now for the final flourish! Top your freshly made hot cocoa with a generous dollop of whipped cream, a handful of extra mini marshmallows, a drizzle of rich caramel sauce, or a sprinkle of cinnamon. These delightful garnishes not only add extra flavor and texture but also make your beverage feel extra special. This indulgent treat is the perfect companion for a chilly afternoon, a cozy evening by the fire, or simply a moment of sweet escape.
Frequently Asked Questions About Hot Chocolate Bombs
Hot chocolate bombs are undeniably all the rage, captivating enthusiasts with their interactive charm and delicious results. While they may appear intricate, they are surprisingly easy to make. All you really need are some silicone molds, your favorite hot cocoa mix, a supply of mini marshmallows, and quality chocolate melts. Let’s delve into some common queries to demystify these delightful treats.
Hot chocolate bombs are essentially hollow chocolate spheres, meticulously crafted and generously loaded with hot cocoa mix, an ample supply of mini marshmallows, and any other delicious add-ins you wish to incorporate into your ultimate hot chocolate experience. The magic happens when you drop one into a mug of piping hot milk (or, alternatively, pour hot milk over the bomb). The chocolate softens and melts, releasing its flavorful contents, which then dissolve into the milk. A quick stir, and you’re ready to indulge in a rich, deeply satisfying cup of hot cocoa unlike any other.
Absolutely, the beauty of homemade hot chocolate bombs lies in their incredible versatility and the freedom to customize them! You can definitely add a variety of other ingredients to make each bomb unique. Popular choices include crushed candy canes for a refreshing minty twist, colorful sprinkles for extra festive fun, finely grated chocolate for an even richer texture, crushed Oreos for a cookies-and-cream delight, chopped Reese’s peanut butter cups for a sweet and salty combination, or even a dash of chili powder for a Mexican hot chocolate kick. The possibilities are truly endless – simply add anything you would typically enjoy in your hot chocolate directly into the chocolate sphere before sealing.
Yes, there is one key piece of special equipment that is essential for making hot chocolate bombs: half-sphere silicone molds. These flexible molds are crucial for creating the perfect, symmetrical chocolate shells that form the bomb’s exterior. The process involves painting the insides of these molds with melted chocolate. Once the chocolate has cooled and set, the flexible nature of the silicone allows the chocolate shells to effortlessly pop out, ready for filling and assembly. While other tools like a heatproof bowl and a spoon are standard kitchen items, the silicone molds are specifically designed for this purpose and are readily available online or in baking supply stores.
Properly stored, hot chocolate bombs can last for several weeks, making them ideal for preparing in advance. Once they are fully set and any decorations have hardened, store them in an airtight container at room temperature. It’s crucial to keep them away from direct sunlight, heat sources, and humidity, as these elements can cause the chocolate to melt or bloom. Avoid refrigerating them unless your home is exceptionally warm, as condensation can affect the chocolate’s appearance and texture.
For the easiest and most reliable results, chocolate melting wafers (often labeled as candy melts or compound chocolate) are highly recommended. Brands like Ghirardelli or Wilton offer excellent quality. These melts are designed to melt smoothly, set quickly, and maintain a glossy finish without the need for tempering, which is a complex process required for couverture chocolate bars. If you choose to use high-quality chocolate bars, be aware that you will need to temper them to prevent a dull, streaky, or gray appearance (known as bloom) on your finished bombs. For most home bakers, melting wafers simplify the process considerably.
Explore More Delicious Beverage Recipes
If you’ve fallen in love with the magic of hot chocolate bombs, you’ll surely enjoy exploring other delightful beverage recipes that promise warmth and indulgence. Expand your repertoire with these fantastic drinks:
- Salted Caramel Oreo Hot Chocolate Bombs from Hugs and Cookies XOXO
- Nutella Hot Chocolate from Cravings of a Lunatic
- Italian Hot Chocolate
- Mulled Apple Cider
- Peppermint Hot Chocolate
- Discover Over 30 More Beverage Recipes
Stay connected and share your culinary creations with us! Follow @thatskinnychickcanbake on Instagram, Facebook, and Pinterest. Don’t forget to tag me when you try one of my delicious recipes! If you adore the results and find this recipe helpful, please consider leaving a 5-star rating in the recipe card below. Your feedback and shares mean the world to us!
Homemade Hot Chocolate Bombs with Marshmallows
15 minutes
3 minutes
10 minutes
21 minutes
6 delectable bombs
Craft your own magical chocolate spheres, generously filled with rich cocoa mix and fluffy marshmallows, for an instant, luxurious hot cocoa treat that delights all ages!
Average Rating: 5 stars based on 49 reviews
Ingredients You’ll Need
For the Chocolate Shells & Filling:
- 10-ounce bag Ghirardelli Dark Chocolate Melting Wafers (you will use about ½ to ¾ of the bag)
- 6 scant tablespoons of your favorite Hot Cocoa Mix (Ghirardelli hot cocoa mix recommended)
- 30-36 mini marshmallows, or more for extra fluffiness
- Optional: Festive sprinkles for decoration
For Serving:
- 4 ½ cups hot milk (approximately ¾ cup per serving)
- Optional: Extra mini marshmallows, whipped cream, or a drizzle of caramel sauce for garnish
Detailed Instructions for Crafting Your Bombs
- Melt about ½ to ¾ of the bag of chocolate melts in a microwave-safe, heatproof bowl. Follow package directions, typically microwaving in short intervals (e.g., 30 seconds), stirring thoroughly after each, until smooth. Avoid overheating.
- Using a spoon or silicone brush, coat the inside of each silicone mold well with a thin, even layer of melted chocolate. Ensure full coverage. Chill the molds until the chocolate is firm (about 5-10 minutes). Apply a second thin layer of chocolate and chill again until completely set. Gently remove each chocolate semi-sphere from its mold.
- In half of the chocolate semi-spheres, place a scant tablespoon of your hot cocoa mix. Then, generously top with mini marshmallows. This is also the time to add any other desired fillings.
- To seal the bombs, heat a flat plate (by pouring hot water over it, then drying, or warming in the microwave). Take one unfilled chocolate semi-sphere and gently place its rim on the warmed plate for a few seconds until the edge slightly melts. Immediately match this melted edge with a filled chocolate shell and hold them together firmly until the chocolate cools and seals, creating a complete sphere.
- If you have any extra melted chocolate, transfer it to a piping bag (or a small ziploc bag with a tiny corner snipped off). Drizzle decorative patterns on top of each bomb. Before the drizzle hardens, decorate with sprinkles or other desired toppings for a festive touch.
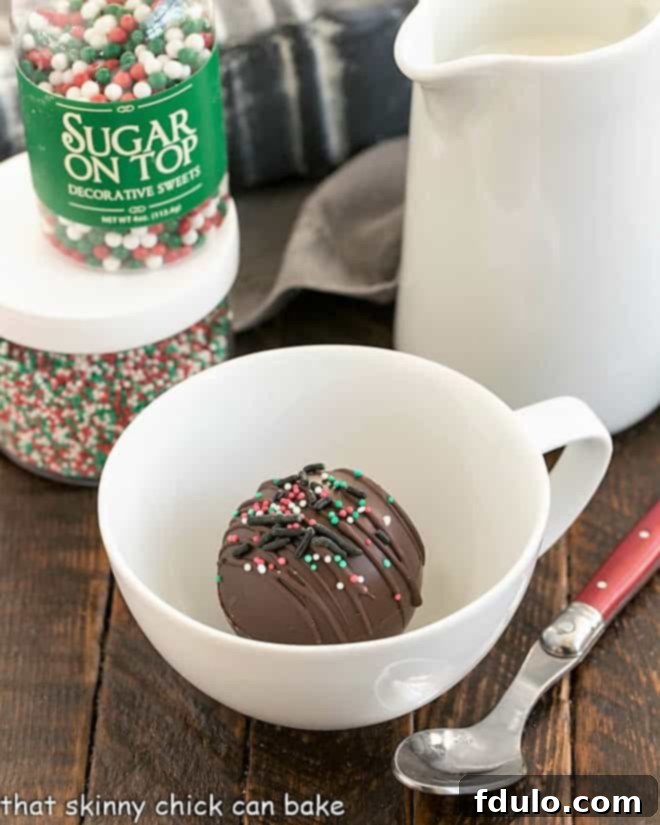
- To serve your spectacular hot chocolate bomb, place one in a teacup or a similarly sized coffee mug.
- Heat your milk to a simmer (steaming hot, but not boiling). Pour the hot milk carefully over the hot chocolate bomb in the cup.
- As the chocolate melts and releases its contents, stir well to thoroughly combine the cocoa mix, marshmallows, and melted chocolate with the hot milk.
- Garnish generously with extra whipped cream, more marshmallows, sprinkles, or a drizzle of caramel sauce, if desired, for the ultimate indulgent experience.
Helpful Notes for Success
My silicone molds were approximately 2-inches in diameter. You can certainly use any size of semi-sphere silicone molds available to you, but remember that you will need to adjust your ingredient amounts (especially chocolate and fillings) accordingly to fit the different mold sizes.
For warming the plate to seal the chocolate bomb halves, a quick and effective method is to pour hot water directly from your teapot onto a ceramic plate. Let it sit for about a minute to absorb the heat, then carefully pour off the water and thoroughly dry the plate. It will retain enough warmth to perfectly soften the chocolate edges for sealing.
Watch the complete video tutorial on making Hot Chocolate Bombs!
Recommended Products for Hot Chocolate Bombs
As an Amazon Associate and member of other affiliate programs, I earn from qualifying purchases, helping to support this blog at no extra cost to you.
- Essential Set of Glass Mixing Bowls
- Ghirardelli Dark Melting Wafers (10 oz)
- High-Quality Silicone Semi-Sphere Molds
Nutrition Information (Estimated):
Yield:
6 Servings
Serving Size:
1 cup (prepared)
Amount Per Serving:
Calories: 414Total Fat: 8gSaturated Fat: 5gTrans Fat: 0gUnsaturated Fat: 3gCholesterol: 16mgSodium: 294mgCarbohydrates: 77gFiber: 2gSugar: 49gProtein: 10g
Thatskinnychickcanbake.com occasionally offers nutritional information for recipes contained on this site. This information is provided as a courtesy and is an estimate only. This information comes from online calculators. Although thatskinnychickcanbake.com attempts to provide accurate nutritional information, these figures are only estimates.
Varying factors such as product types or brands purchased can change the nutritional information in any given recipe. Also, many recipes on thatskinnychickcanbake.com recommend toppings, which may or may not be listed as optional and nutritional information for these added toppings is not listed. Other factors may change the nutritional information such as when the salt amount is listed “to taste,” it is not calculated into the recipe as the amount will vary. Also, different online calculators can provide different results.
To obtain the most accurate representation of the nutritional information in any given recipe, you should calculate the nutritional information with the actual ingredients used in your recipe. You are solely responsible for ensuring that any nutritional information obtained is accurate.
HOW MUCH DID YOU LOVE THIS RECIPE?
Please leave a comment on the blog with your feedback or share a photo of your creations on Pinterest! Your engagement helps our community grow.
