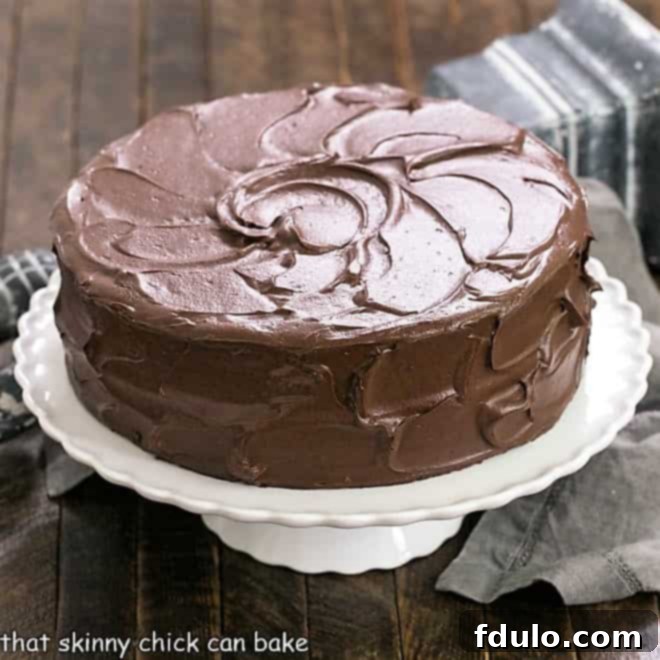
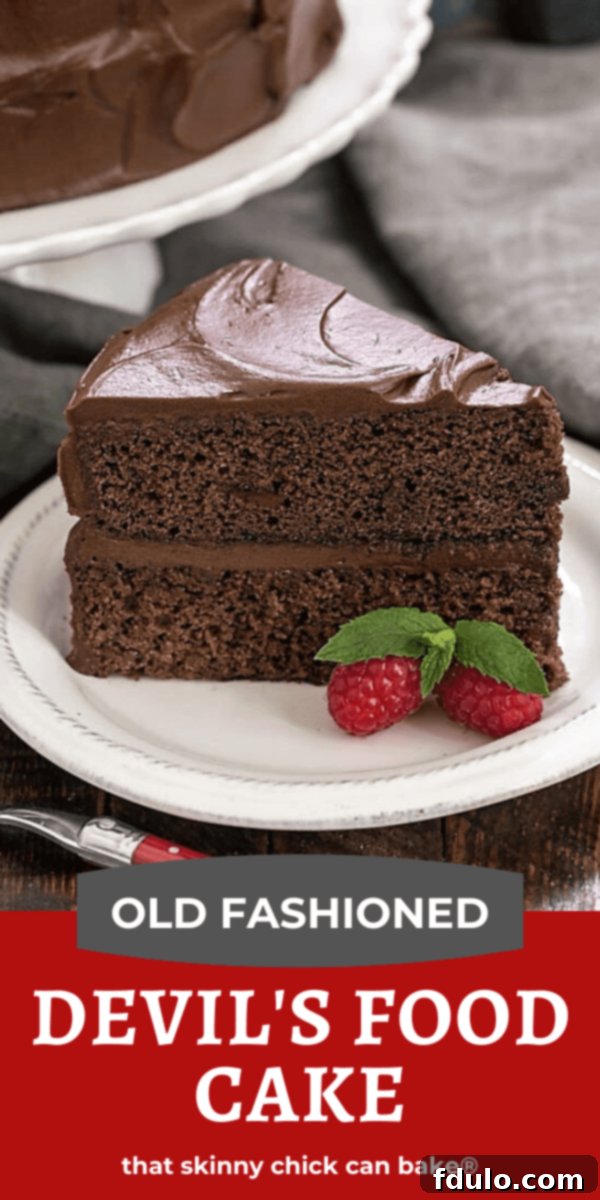
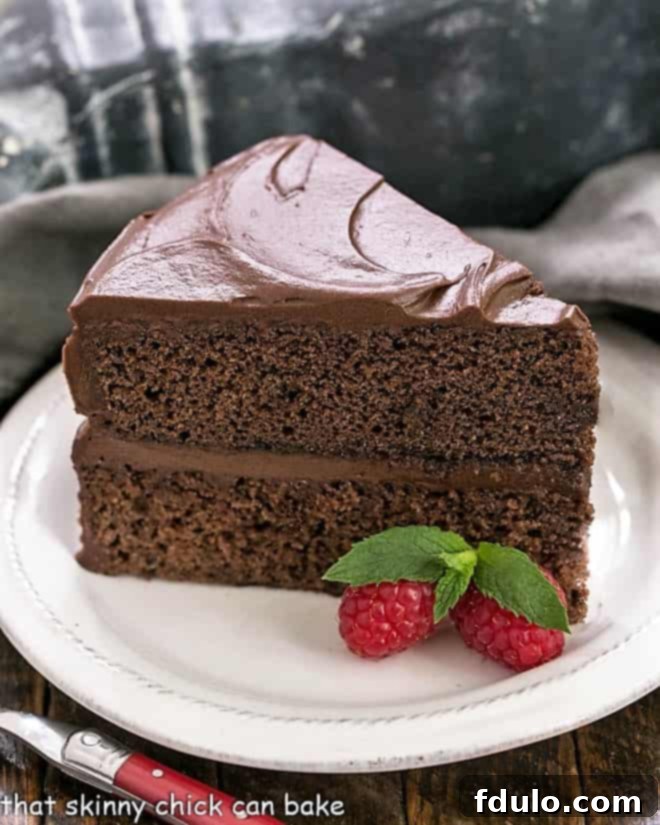
Indulge in the ultimate chocolate experience with this sensational Devil’s Food Cake recipe. This isn’t just any chocolate cake; it’s a testament to rich, deep chocolate flavor, unparalleled moistness, and a velvety texture that melts in your mouth. Crowned with a luxurious, glossy chocolate buttercream frosting, every slice of this decadent dessert promises pure bliss. Prepare to be captivated by a cake so profoundly chocolaty and exquisitely tender, it will instantly become your go-to recipe for celebrations and everyday cravings alike. Experience the classic delight that has charmed palates for generations, now perfected for your home kitchen.
Prepare for an irresistible culinary journey! My family was in an enthusiastic scramble for the final slice of this exceptionally moist and incredibly fluffy chocolate layer cake. It unequivocally stands as one of the best chocolate cake recipes I have ever crafted, a true masterpiece that commands attention and devotion from the very first bite. This cake doesn’t just satisfy; it enchants.
Why This Devil’s Food Cake Recipe is an Absolute Must-Try
There are countless reasons to bake this incredible Devil’s Food Cake, but here are the top compelling factors that make it a standout among all dessert options:
- The Ultimate Celebration Cake: A stunning chocolate layer cake is the quintessential dessert for any festive occasion, especially birthdays. Its impressive height and luscious appearance instantly elevate any gathering, making every moment feel more special and memorable. It’s a showstopper that guarantees smiles and delightful sighs of satisfaction from guests.
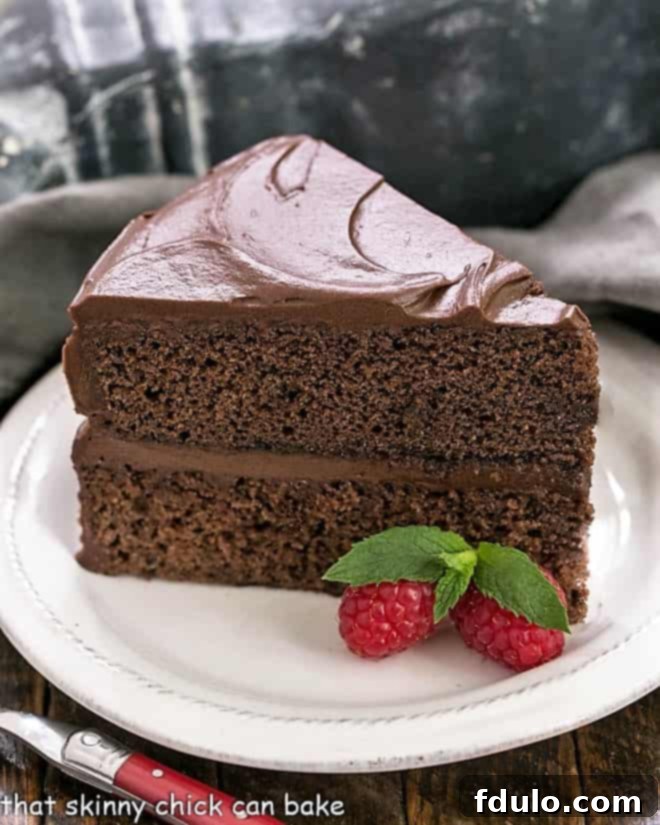
- A Timeless Classic with Unmatched Flavor: Devil’s Food Cake boasts a rich, deep, and distinctively dark chocolate flavor, coupled with an exceptionally moist and tender crumb. It’s a classic that has enchanted dessert lovers for over a century, offering a sophisticated chocolate experience far beyond your average cake. Its enduring popularity is a testament to its perfectly balanced intensity and delightful texture.
- Irresistible Chocolate Buttercream Pairing: The magic truly happens when this exquisite cake is generously frosted with a rich, glossy, and intensely chocolatey buttercream. This pairing creates a symphony of textures and flavors – the tender cake perfectly complemented by the silky-smooth, decadent frosting. Each bite is an indulgent escape, making it truly irresistible and leaving you eager for another.
- Remarkably Moist and Fluffy Texture: Despite its deep, dark appearance, this Devil’s Food Cake is incredibly moist and boasts a light, airy fluffiness that sets it apart. The precise balance of ingredients, especially the buttermilk and leavening agents, ensures a cake that is never dry or heavy, always delivering a delightful melt-in-your-mouth experience.
- Simple Yet Sophisticated: While the result is incredibly impressive and looks like it came from a professional bakery, the recipe itself is straightforward and manageable for home bakers of all skill levels. With clear instructions and readily available ingredients, you can achieve a truly sophisticated dessert without complex techniques.
Essential Ingredient Notes for a Perfect Devil’s Food Cake
The secret to an extraordinary Devil’s Food Cake lies not just in the technique, but in understanding the role of each ingredient. Here’s a closer look at the key components and tips for success:
- Kitchen Staples: Butter, Sugar, Eggs, All-Purpose Flour, Baking Soda, Salt, Milk – These foundational ingredients form the backbone of most baking recipes. Ensure your butter is at room temperature for optimal creaming, and your eggs are fresh. Using quality flour and measuring accurately is crucial for the cake’s structure.
- Vanilla Extract – Do not compromise on quality here. Always opt for pure vanilla extract. Imitation vanilla simply cannot replicate the complex, aromatic depth that real vanilla contributes to chocolate. It enhances the chocolate flavor, making it more pronounced and well-rounded.
- Cocoa Powder – For that signature deep, dark Devil’s Food color and intense chocolate flavor, use a high-quality unsweetened cocoa powder. Brands like Ghirardelli or Hershey’s Special Dark are excellent choices. Always remember to sift your cocoa powder before using it. This crucial step prevents lumps in your batter, ensuring a smooth, consistent texture and even distribution of flavor.
- Baking Powder – This leavening agent is critical for the cake’s rise and light texture. Baking powder can lose its potency over time, so it’s vital to check its freshness. A simple test: pour a teaspoon into a small bowl of very hot water. If it bubbles vigorously, it’s still active. If not, it’s time to replace it. An inactive baking powder will result in a flat, dense cake.
- Baking Soda – Working in conjunction with baking powder and the acid in buttermilk, baking soda contributes to the cake’s rise and tender crumb. Its reaction with acidic ingredients helps create the signature fluffiness of Devil’s Food Cake. Ensure it’s fresh for best results.
- Buttermilk – The unsung hero of many moist cakes, buttermilk is essential for the tender texture and subtle tang in Devil’s Food Cake. The acid in buttermilk reacts with the baking soda, creating air pockets that result in a softer, more delicate crumb. If you don’t have buttermilk on hand, don’t worry! You can easily make a substitute: simply add one tablespoon of lemon juice or a neutral-colored vinegar (like white or apple cider vinegar) to a one-cup liquid measuring cup. Fill the rest of the way to the one-cup mark with 2% or whole milk. Stir gently and let it stand for about 5-10 minutes until it slightly curdles and thickens. This homemade buttermilk can be used cup for cup in your recipe. You will likely need more than one cup for this recipe, so prepare accordingly.
- Powdered Sugar (Confectioners’ Sugar) – Crucial for a smooth, lump-free frosting. Just like cocoa powder, it’s imperative to sift powdered sugar before incorporating it into your buttercream. This eliminates any pesky clumps, ensuring your frosting is perfectly silky and easy to spread.
Crafting a Show-Stopping Four-Layer Devil’s Food Cake
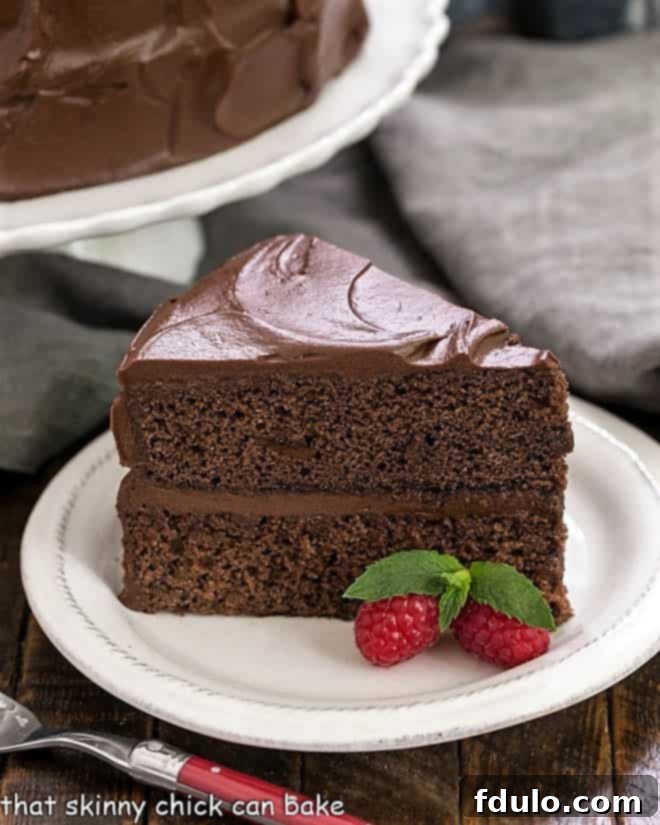
While this recipe yields a magnificent two-layer cake, elevating it to a four-layer masterpiece adds an extra touch of elegance and an even more satisfying frosting-to-cake ratio. Here’s how to transform your two cake rounds into a towering creation:
- The Art of Slicing Layers: Begin by baking your two cake layers as directed. Once they are completely cooled (this is critical to prevent crumbling), you can proceed to slice them horizontally. Each cooled cake layer will be carefully divided into two thinner layers, resulting in four beautiful layers ready for stacking.
- PRO-Tip for Even Slicing: Achieving perfectly even layers might seem daunting, but this simple trick makes it much easier. Insert several toothpicks around the perimeter of each cooled cake layer, positioning them a little more than halfway down the sides. These toothpicks will serve as a visual and physical guide for your knife, helping you maintain a straight, even cut as you slice the cake horizontally. While it might take a little practice, this method significantly improves the consistency of your layers.
- Assembling Your Four-Layer Cake: Once you have your four layers, the assembly is straightforward. Place your first layer on your cake stand or serving plate, flat side down. Spread a generous, even layer of your decadent chocolate buttercream frosting over the top. Carefully place the next cake layer on top, aligning it, and repeat the frosting process. Continue stacking and frosting until all four layers are in place. This method ensures plenty of delicious frosting between each cake layer, creating a truly luxurious dessert.
I typically have a disciplined approach to sweets, but this particular Devil’s Food Cake stands out as one of the best chocolate cake recipes I’ve had the pleasure of making in years. Even my notoriously picky daughter, Katie, enthusiastically devoured her share. When a single dish, especially a dessert, earns unanimous approval from the entire family, it’s a truly noteworthy achievement. This cake has undoubtedly earned its place on a pedestal; it’s a masterpiece.
Expert Tips for Flawlessly Frosting a Layer Cake
Frosting a layer cake can be a rewarding experience, transforming simple baked layers into an elegant dessert. Follow these tips to achieve a professional-looking finish:
- Achieve Even Layers from the Start: The foundation of a beautifully frosted cake begins with even cake layers. Before baking, ensure your batter is distributed equally among your pans. You can achieve this by weighing the batter in each pan or by using a ruler or even a toothpick to check the depth of the batter, ensuring consistency across all layers. Even layers make stacking and frosting significantly easier.
- Ensure Ample Frosting: Nothing is more frustrating than running out of frosting midway through. This recipe provides enough frosting for a thin, elegant coating between the layers. If you choose to keep it as a two-layer cake, you’ll find the frosting will be thicker and more generous. For a four-layer cake, especially if you prefer a more substantial frosting layer, consider making a batch and a half or even doubling the frosting recipe to ensure you have plenty for all layers and a beautiful outer coat.
- Secure the Bottom Layer: To prevent your cake from sliding around while you work, place a small dab of frosting on your cake stand or serving plate before setting down the first layer. This acts as a gentle adhesive, keeping your cake stable throughout the frosting process.
- Keep Your Work Surface Clean: For a neat and tidy presentation, tuck strips of parchment paper or wax paper under the perimeter of your bottom cake layer, extending slightly beyond the edges. These strips will catch any errant frosting drips, keeping your cake stand or plate immaculate. Once you’re finished frosting, simply pull the strips away to reveal a perfectly clean base.
- Start with a Crumb Coat: This is a crucial step often overlooked by novice bakers. After stacking and filling your layers, apply a very thin layer of frosting all over the cake – top and sides. This “crumb coat” traps any loose crumbs, preventing them from mixing into your final, visible layer of frosting. Chill the cake in the refrigerator for about 15-20 minutes to set the crumb coat before applying the main frosting layer.
- Use the Right Tools: An offset spatula is your best friend for frosting. Its angled blade makes spreading frosting evenly across surfaces and along the sides much easier than with a straight spatula. For smoothing the sides and creating sharp edges, a bench scraper or cake smoother can work wonders.
- Evenly Distribute Frosting: Begin by placing a generous dollop of frosting on top of your first layer (flat side down for stability). Using your offset spatula, spread the frosting evenly across the surface, extending all the way to the edges. Eyeball the amount to ensure you’re using roughly the same quantity for each internal layer.
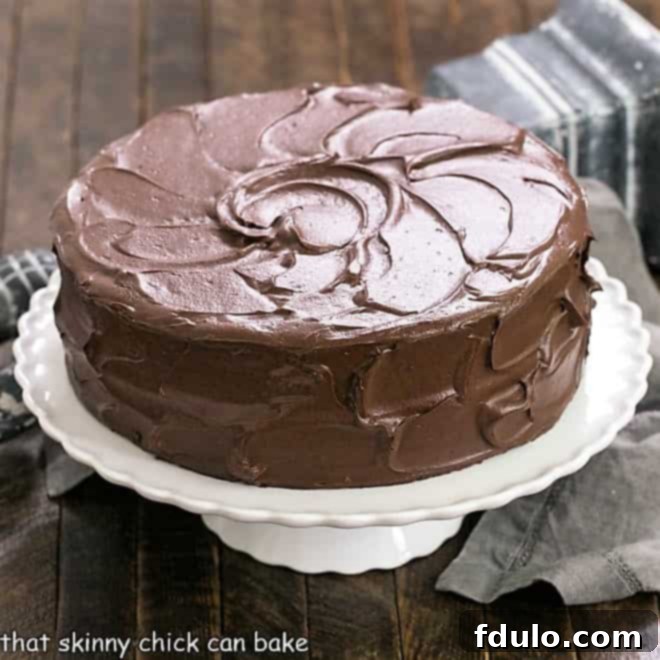
- Frost the Sides with Confidence: Once all layers are stacked and filled, apply the remaining frosting to the sides and top of the cake. Work quickly but confidently, using your offset spatula or bench scraper to smooth the frosting for a polished look, or create attractive swirls and textured patterns for a more rustic charm.
Frequently Asked Questions About Devil’s Food Cake
According to authoritative culinary references like The Food Lover’s Companion, Devil’s Food Cake is defined as a uniquely dark, dense, and deeply flavored baked chocolate item. It stands in stark contrast to its angelic counterpart, the airy, white angel food cake, occupying the opposite end of the spectrum. What makes Devil’s Food Cake distinct is its use of cocoa powder (rather than melted chocolate, which typically yields a lighter crumb) and a higher amount of baking soda or other leavening agents. This combination results in a cake that is exceptionally richer, significantly darker in color, and notably fluffier and more tender than other chocolate cakes, offering a truly indulgent experience.
The origins of the Devil’s Food Cake name are shrouded in delightful speculation, typical of the early 1900s when cakes were often given whimsical and evocative titles. One prominent theory suggests that its name plays off the clear opposition to “Angel Food Cake.” The cake’s intensely dark, almost black color and profound richness were seen as the “devilish” antithesis to the light, airy, and white angel food cake. Another popular thought is that the cake was so incredibly rich and irresistibly decadent, especially compared to other chocolate cake options of the time, that it was deemed “devilishly” good—a truly sinful pleasure to indulge in!
While there are some similarities, a Red Velvet Cake is distinct from a Devil’s Food Cake. Although both contain cocoa powder as a key ingredient, the deep, dark brown hue of a Devil’s Food Cake is fundamentally different from the striking red appearance of a Red Velvet Cake. Red Velvet typically achieves its vibrant color through the use of red food coloring (and sometimes a chemical reaction between natural cocoa, buttermilk, and vinegar). Furthermore, Red Velvet cake is traditionally frosted with either a tangy cream cheese frosting or a vanilla buttercream, which provides a stark contrast to the rich chocolate buttercream typically found on a Devil’s Food Cake. While adding red food coloring to a Devil’s Food Cake would indeed give it a reddish tint, it would result in a more muted red and wouldn’t quite capture the distinct flavor and texture profile of a true Red Velvet cake.
Absolutely! Devil’s Food Cake freezes exceptionally well, making it perfect for meal prepping desserts or saving leftovers. For best results, allow the cake to cool completely. You can freeze individual unfrosted layers, tightly wrapped in plastic wrap and then foil, for up to 2-3 months. Frosted cake can also be frozen; place the cake in the freezer uncovered for about an hour until the frosting is firm, then wrap tightly in plastic wrap and foil. Thaw in the refrigerator overnight before serving.
Several common pitfalls can affect your Devil’s Food Cake. Overmixing the batter can lead to a tough cake, so mix only until just combined. Not sifting cocoa powder or powdered sugar can result in lumps. Using cold ingredients instead of room temperature ones can affect the emulsion and texture. Also, opening the oven door too early while baking can cause the cake to sink in the middle. Always ensure your leavening agents (baking powder and baking soda) are fresh for optimal rise and texture.
Explore More Decadent Cake Creations
While a glorious layer cake often signifies a special occasion, typically reserved for birthdays or significant milestones at our house, it’s truly worthy of any celebration big or small. Though rich chocolate cakes like this amazing Devil’s Food Cake Recipe are most frequently requested by my family, it’s always fun to explore and shake things up with new flavors and textures from time to time! Here are some other cherished cake recipes that are equally delightful:
- Best Banana Cake Recipe from Saving Room for Dessert
- Death by Chocolate Cake
- The Best Red Velvet Cake
- Perfect Yellow Cake
- Best Chocolate Layer Cake
- Classic White Layer Cake
- Lemon Layer Cake
- Discover more of the Best Cake Recipes for every occasion!
Stay connected and share your baking adventures with me through social media! Follow me on Instagram, Facebook, and Pinterest. Don’t forget to tag me when you try one of my delicious recipes! And if you absolutely adore the results, please consider giving it a 5-star rating in the recipe card below. Your feedback and support mean the world!
Ultimate Devil’s Food Cake Recipe
40 minutes
35 minutes
1 hour 15 minutes
12 generous servings
An absolutely terrific celebratory cake that you can customize with 2 or 4 decadent layers, lavishly sandwiched with rich, velvety chocolate buttercream frosting. This recipe ensures a moist, dark, and utterly irresistible chocolate experience.
Ingredients
For the remarkably moist cake:
- ⅔ cup unsalted butter, softened to room temperature
- 1 ¾ cups granulated sugar
- 3 large eggs
- 1 teaspoon pure vanilla extract
- 2 cups all-purpose flour
- ½ cup unsweetened cocoa powder, sifted (for deep chocolate flavor)
- 1 teaspoon baking powder
- ¾ teaspoon baking soda
- ½ teaspoon fine sea salt
- 1 ½ cups buttermilk (or homemade substitute)
For the rich chocolate buttercream frosting:
- ¾ cup unsalted butter, softened
- 1 cup unsweetened cocoa powder, thoroughly sifted
- 4 ½ cups powdered sugar, meticulously sifted (confectioners’ sugar)
- ½ cup milk (whole or 2%)
- 1 ½ teaspoons pure vanilla extract
Instructions
- Prepare for Baking: Preheat your oven to a steady 350°F (175°C). This ensures your cake bakes evenly from the moment it enters the oven.
- Prep Your Pans: Thoroughly grease and flour two 9-inch round cake pans. Ensure the pans are well-coated to prevent sticking and allow for easy release after baking.
- Cream Wet Ingredients: In the bowl of a stand mixer fitted with the whisk attachment (or using a hand mixer), beat together the softened butter, granulated sugar, eggs, and vanilla extract until the mixture is light, fluffy, and pale in color. This process incorporates air, contributing to the cake’s tender texture.
- Combine Dry Ingredients: In a separate large mixing bowl, whisk together the sifted all-purpose flour, sifted cocoa powder, baking powder, baking soda, and salt. Whisking ensures these dry ingredients are evenly distributed.
- Alternate Wet and Dry: Switch your stand mixer to the paddle attachment. Gradually add the dry flour mixture alternately with the buttermilk to the butter mixture, beginning and ending with the dry ingredients. Mix on low speed just until the batter is smooth and no streaks of flour remain. Be careful not to overmix, as this can lead to a tough cake. Pause halfway through to scrape down the bottom and sides of the bowl to ensure everything is fully incorporated.
- Fill Pans: Divide the luscious chocolate batter evenly between your two prepared 9-inch cake pans.
- Bake to Perfection: Bake for approximately 30 to 35 minutes, or until a wooden pick (like a toothpick or skewer) inserted into the center of the cakes comes out clean. This indicates they are fully baked.
- Cool the Cakes: Allow the cakes to cool in their pans on a wire rack for 10 minutes. This helps them firm up before handling. After 10 minutes, carefully invert them onto the wire racks to cool completely. Cooling completely is essential before frosting to prevent the frosting from melting.
- Prepare Layers for Stacking: Once the cakes are completely cool, decide on your cake’s final presentation. If you plan to make an impressive 4-layer cake, carefully slice each cooled cake horizontally in half using a serrated knife (refer to the “PRO-Tip” in the article for guidance). For a classic 2-layer cake, simply leave them whole.
- Begin Frosting Preparation: Once your cake layers are cool, it’s time to prepare the rich chocolate buttercream frosting.
- Melt Butter and Cocoa: In a large microwave-safe bowl, melt the softened butter. Stir in the sifted cocoa powder until a thick paste forms. This creates a deep chocolate base for your frosting.
- Create the Buttercream: Gradually add the sifted powdered sugar and milk to the cocoa-butter mixture, alternating small portions. Beat until the frosting reaches a smooth, spreadable consistency. Adjust milk or powdered sugar as needed to achieve your desired thickness. Finally, beat in the vanilla extract for added depth of flavor.
- Frost and Serve: Use the chocolate buttercream immediately to frost your cooled cake layers. If not using right away, cover the frosting tightly and store it in the refrigerator. Before using, allow it to come to room temperature and beat again until smooth and spreadable.
Notes for Success
The base cake recipe is beautifully adapted from a classic Hershey’s formulation, renowned for its deep chocolate flavor and moist crumb.
Homemade Buttermilk Substitute: If you find yourself without buttermilk, creating a substitute is incredibly easy and effective. Simply add one tablespoon of lemon juice or a neutral vinegar (such as white vinegar or apple cider vinegar) to a one-cup liquid measuring cup. Then, fill the remainder of the cup with milk (2% or whole milk works best) up to the one-cup mark. Give it a gentle stir and allow it to sit for 5-10 minutes. During this time, the milk will slightly curdle and thicken, mimicking the consistency and acidity of true buttermilk. You can then measure and use this substitute as directed in the recipe. If your recipe calls for more than one cup, simply repeat the process for each additional cup needed.
Frosting for a 4-Layer Cake: If you decide to go for an impressive 4-layer cake instead of the standard 2-layer version, you will likely need more frosting to cover all the additional layers and the exterior. I highly recommend making a batch and a half, or even a double batch, of the chocolate buttercream frosting. The exact amount will depend on your personal preference – whether you are a generous frosting lover or prefer a thinner coating! Always err on the side of having too much frosting rather than too little.
Room Temperature Ingredients: For the best results, ensure your butter and eggs are at room temperature before you begin mixing. Room temperature ingredients emulsify better, creating a smoother, more uniform batter and a lighter, fluffier cake texture.
Storage: Store leftover Devil’s Food Cake, loosely covered, at room temperature for up to 2-3 days, or in the refrigerator for up to a week. For longer storage, freeze individual slices or whole layers as detailed in the FAQ section.
Nutrition Information:
Yield:
12
Serving Size:
1 slice
Amount Per Serving (estimated):
Calories: 621Total Fat: 25gSaturated Fat: 15gTrans Fat: 1gUnsaturated Fat: 7gCholesterol: 106mgSodium: 462mgCarbohydrates: 95gFiber: 3gSugar: 72gProtein: 7g
Thatskinnychickcanbake.com occasionally offers nutritional information for recipes contained on this site. This information is provided as a courtesy and is an estimate only. This information comes from online calculators. Although thatskinnychickcanbake.com attempts to provide accurate nutritional information, these figures are only estimates.
Varying factors such as product types or brands purchased can change the nutritional information in any given recipe. Also, many recipes on thatskinnychickcanbake.com recommend toppings, which may or may not be listed as optional and nutritional information for these added toppings is not listed. Other factors may change the nutritional information such as when the salt amount is listed “to taste,” it is not calculated into the recipe as the amount will vary. Also, different online calculators can provide different results.
To obtain the most accurate representation of the nutritional information in any given recipe, you should calculate the nutritional information with the actual ingredients used in your recipe. You are solely responsible for ensuring that any nutritional information obtained is accurate.
HOW MUCH DID YOU LOVE THIS RECIPE?
Please leave a comment on the blog or share a photo on Pinterest and tag me!
I had originally planned to prepare a luxurious beef tenderloin for a recent Beef Checkoff post, which prompted me to invite our eldest son, Tom, over for dinner. This offered the perfect opportunity to celebrate his birthday, albeit 20 days ahead of schedule. A fabulous chocolate birthday cake was absolutely essential for the occasion. True to his witty nature, Tom shared a photo of this magnificent chocolate layer cake on Instagram, accompanied by the humorous caption: “My birthday cake 20 days early because my parents are bad at calendars. Or maybe it’s for Pearl Harbor Day, I dunno.” The standout response, a testament to the cake’s undeniable appeal, was: “You can be bad at calendars when you’re that fabulous at baking.”
Indeed, Tom is fortunate to have such kind and appreciative friends! However, there was a perfectly rational explanation behind the premature birthday celebration. We were scheduled to board an early flight to Los Angeles on the actual morning of his birthday (a rather early start, I might add!), and most likely, we’d be consuming Christmas leftovers from the previous day. Therefore, if he wished for a day entirely dedicated to him and his favorite dessert, this was truly the best I could arrange. And judging by the complete absence of complaints (and the rapid disappearance of the cake), I believe he had absolutely no objections!
