Layered Ice Cream Pie with Chocolate Cookie Crust: Your Ultimate No-Bake Summer Dessert
Indulge in the pure delight of a Layered Ice Cream Pie with Chocolate Cookie Crust – a truly decadent, yet incredibly easy-to-prepare frozen dessert that requires no baking at all. This magnificent ice cream pie is your perfect companion for those sweltering summer days when the mere thought of turning on the oven sends shivers down your spine. It’s a luscious treat that promises cool, creamy bliss in every single bite, making it an absolute must-have for any warm-weather gathering or simply as a well-deserved personal indulgence.
Whether you’re contending with the heat of a scorching summer or navigating a kitchen undergoing renovations, easy ice cream desserts offer a wonderfully delicious and practical solution. My own kitchen has recently been transformed into a drywall zone, leaving me without appliances, countertops, or cabinets. This situation has truly highlighted the beauty of no-bake creations, like this sensational Frozen Pie, allowing me to continue treating my dessert-loving family without any fuss or heat. It’s a testament to how simple yet spectacular desserts can be, even in the most challenging culinary environments.

Why This No-Bake Ice Cream Pie is a Must-Make
This isn’t just another dessert; it’s a game-changer for anyone who loves delicious treats without the fuss. Here’s why the Layered Ice Cream Pie with Chocolate Cookie Crust should be at the top of your recipe list:
- Effortless Preparation, Zero Baking Required: The absolute best part about this dessert is that it needs no oven time. This makes it an ideal choice for summer entertaining when you want to keep your kitchen cool and your energy levels high. Spend less time over a hot stove and more time enjoying your guests and the sunshine.
- Perfect for Make-Ahead Convenience: Planning a party or simply want to have a delightful treat on hand? This ice cream pie is incredibly freezer-friendly. You can assemble it days, or even weeks, in advance and store it in your freezer, ready to be pulled out and served whenever a craving strikes or unexpected guests arrive. This eliminates last-minute stress, allowing you to relax and enjoy.
- Infinitely Adaptable to Your Tastes: One of the most exciting aspects of this ice cream pie recipe is its incredible versatility. It serves as a blank canvas for your culinary creativity. Feel free to experiment with any combination of your favorite ice cream flavors, from classic vanilla and chocolate to more adventurous choices like mint chip, strawberry swirl, or even coffee. You can also mix and match toppings and crusts to create a truly personalized dessert experience every time.

Expert Tips for Crafting the Perfect Layered Ice Cream Pie
My journey with ice cream pies began many years ago, long before I was married, with a recipe for Mississippi Mud Pie from a cherished cookbook. It was a revelation! Back then, I meticulously followed the instructions, blending a hint of cognac and heavy cream into rich chocolate ice cream before spreading it into a classic Oreo crust. Over time, I refined it, adding a decadent layer of fudge sauce, and it has since become a beloved summer dessert tradition in my family. Now, I could probably make it blindfolded! Here are my time-tested tips to help you create your own flawless layered ice cream pie:
- Mastering the Crust: A solid foundation is key. Always make and freeze your chocolate cookie crust until it’s firm. This prevents the ice cream from melting it prematurely and ensures a crisp, stable base for your layers.
- Achieving Ideal Ice Cream Consistency: Before layering, allow your chosen ice cream flavors to sit at room temperature for a few minutes. You don’t want it to be completely melted, but rather softened to a spreadable, almost “soft-serve” consistency. This makes it easy to smooth into the crust without creating air pockets, while still retaining its cold structure.
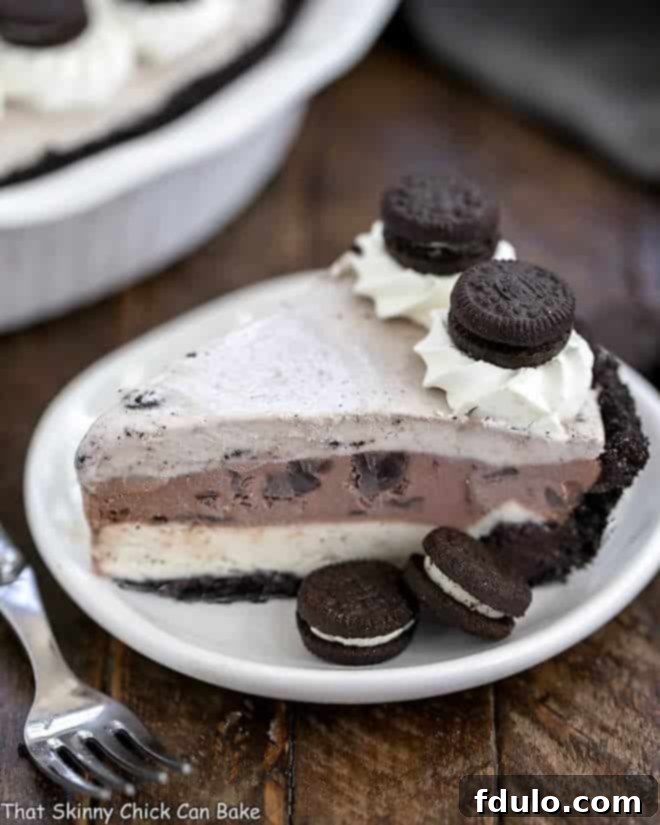
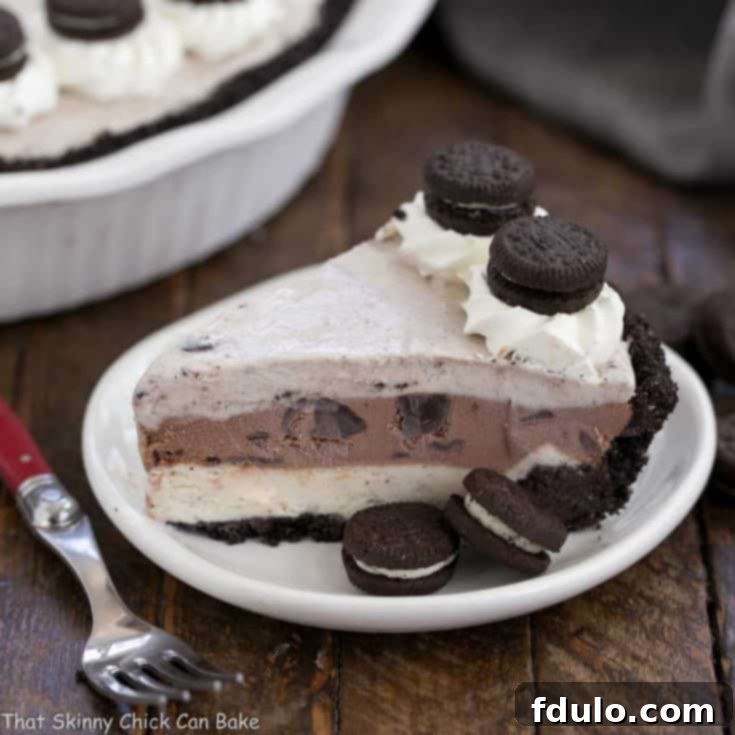
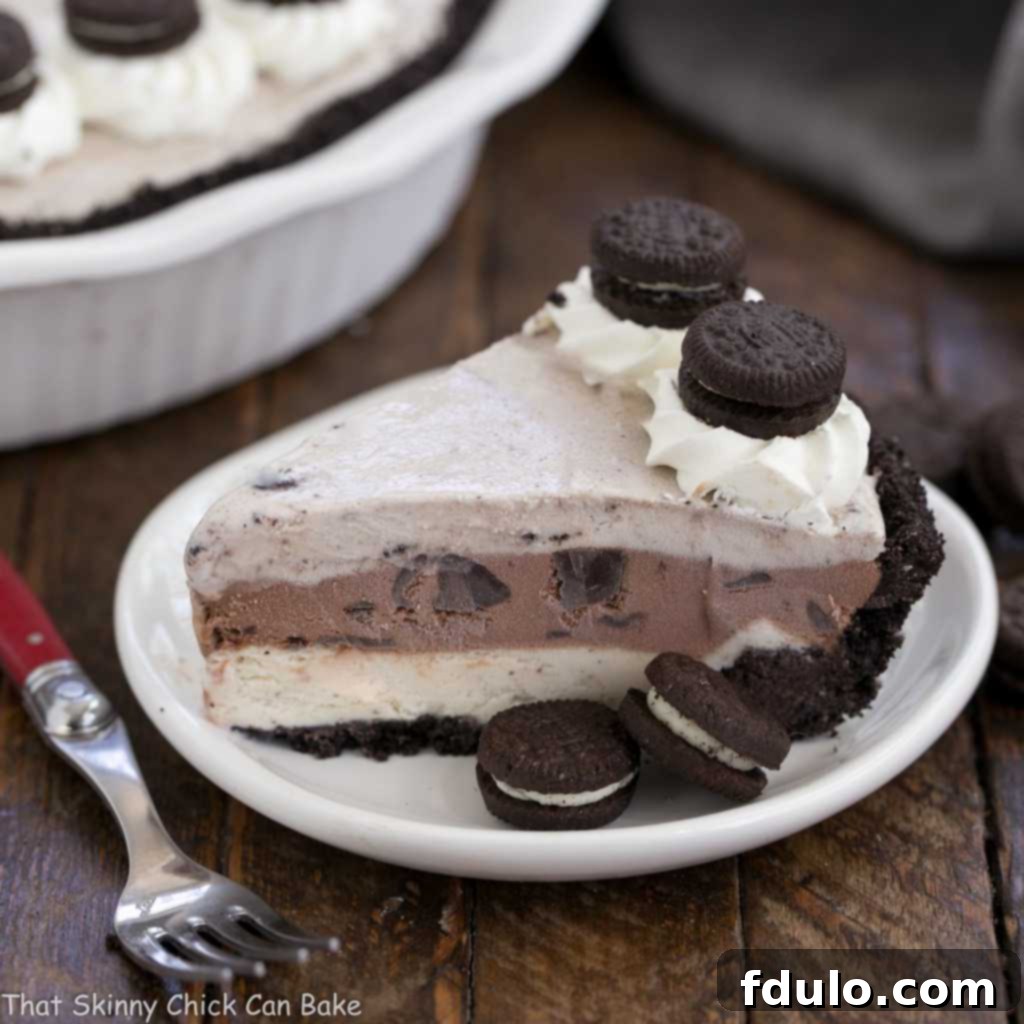
- Layering with Precision: When creating your beautiful layers, aim to eyeball the depth so that each distinct flavor fills approximately one-third of the pie crust’s total depth. Utilize an offset spatula to spread and smooth each layer as flat and level as possible. This not only makes for a stunning presentation but also ensures even distribution of flavors.
- Freezing Between Layers: This step is crucial for achieving those distinct, clean layers. After applying each ice cream layer, return the pie to the freezer until that layer is completely firm before adding the next. Patience here pays off in a pie that holds its shape beautifully when sliced.
- Visual Appeal Through Contrast: For an eye-catching presentation, alternate light and darker-colored ice creams. This contrast makes each layer visually pop, enhancing the overall allure of your layered dessert. Think vanilla, then chocolate, then a vibrant strawberry, for example.
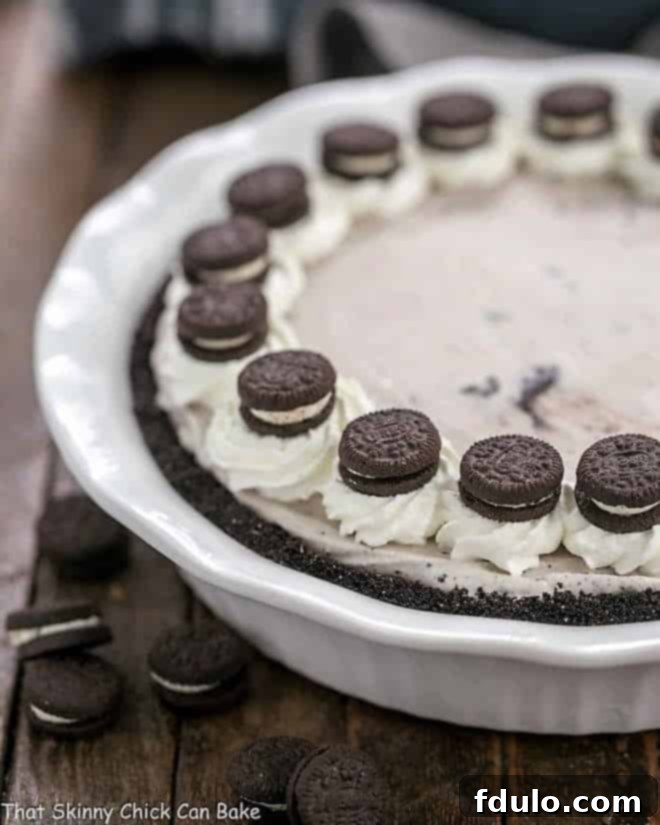
- Elegant Garnish Options: If you love to add a flourish, whip some fresh cream and use a piping bag to create beautiful rosettes around the perimeter of your pie. For my cookies and cream top layer, I often crown each rosette with a mini-Oreo, perfectly complementing the flavors within. Other fantastic garnish ideas include chocolate shavings, fruit slices, sprinkles, or a drizzle of your favorite sauce.
- Homemade vs. Store-Bought Crust: While using a premade chocolate crust is always an option for convenience, for company or a special occasion, serving your pie out of a beautiful ceramic or glass pie plate with a homemade crust truly elevates the experience. The extra effort adds a personal touch that guests will surely appreciate.
Frequently Asked Questions About Layered Ice Cream Pies
What Are the Key Components of an Ice Cream Pie?
My signature ice cream pies typically consist of three delicious components, each offering a world of customization: a perfectly crafted cookie crust, layers of creamy ice cream, and a delectable ice cream topping. Our family’s all-time favorite combination features a rich Oreo crust, decadent chocolate ice cream with a splash of Kahlua for an adult twist, and a luscious fudge topping. Another much-loved version incorporates a classic graham cracker crust, a nutty butter pecan ice cream, and a generous drizzle of warm caramel sauce. The beauty lies in the endless possibilities – feel free to mix and match to create your personal perfect pie!
How Do You Assemble a Layered Ice Cream Pie?
Creating this delightful dessert is simpler than you might imagine. Just follow these straightforward steps:
- Prepare Your Crust: Begin by making your desired cookie crust. Once pressed into the pie plate, chill or bake it as directed. Ensure it is completely cool if baked, then freeze it until firm.
- Soften Ice Cream: Take your first selected ice cream flavor out of the freezer and let it sit at room temperature for about 5-10 minutes, or until it reaches a spreadable, softened consistency.
- First Layer: Spread the softened ice cream evenly into the prepared pie crust, ensuring it forms a level layer across the bottom.
- Freeze Until Solid: Place the pie back into the freezer and allow this first layer of ice cream to freeze completely solid. This is crucial for maintaining distinct layers.
- Repeat for Additional Layers: If you’re adding more ice cream flavors, repeat steps 2-4 for each subsequent layer, making sure each one is frozen solid before adding the next. Alternate colors for visual appeal.
- Add Toppings and Garnish: Once all your ice cream layers are frozen solid, you can add your favorite toppings or garnishes before the final freeze.
- Final Freeze: Freeze the entire pie for at least 4-6 hours, or preferably overnight, to ensure it is completely firm before slicing and serving.
What is the Best Way to Slice an Ice Cream Pie?
Slicing through frozen layers can be a bit tricky, but with the right technique, you’ll achieve perfect, clean slices every time. The secret is to use a hot knife. Run a sharp knife under very hot tap water for about 15-20 seconds, or for a quicker method, carefully and quickly pass the blade through the flame of a gas cooktop. Wipe the knife dry immediately after heating (and before each cut) to prevent water from freezing onto the pie. The heat helps the blade glide effortlessly through the frozen ice cream and crust. Reheat the knife as needed for each new slice.
How Long Will an Ice Cream Pie Last in the Freezer?
When properly stored, your delicious ice cream pie can last surprisingly long in the freezer. To prevent ice crystals from forming and preserve its fresh taste and texture, ensure the pie is thoroughly wrapped. First, cover it tightly with several layers of plastic wrap, pressing it directly onto the surface of the pie to minimize air exposure. Then, add a final protective layer of aluminum foil. With this airtight method, your layered ice cream pie should maintain its quality for up to a month, making it an excellent dessert to have on standby.
How Should I Garnish My Ice Cream Pie for an Impressive Finish?
Garnishing your ice cream pie is the final flourish that elevates it from simple dessert to showstopper. Pipe elegant swirls of freshly whipped cream around the perimeter of the pie for a classic touch. These can then be adorned with an array of complementary toppings that reflect your pie’s flavors – think mini Oreos, colorful candies, chocolate curls, fresh berries, chopped nuts, or even small cookies. Alternatively, for individual slices, a generous dollop of whipped cream paired with a drizzle of hot fudge, caramel sauce, or a fruit coulis creates a sophisticated and delicious presentation. Let your creativity guide you!
More Delightful Dessert Recipes You May Also Like
- Cabernet Ice Cream with Chocolate Shards from Barb – Creative Culinary
- Grilled Peaches with Vanilla Ice Cream and Honey Balsamic Drizzle from Carol – From a Chef’s Kitchen
- The Best Coffee Ice Cream
- Cheesecake Ice Cream
- Chocolate Ice Cream with Fudge Sauce
- Plus, explore all my Best Dessert Recipes for more inspiration!
Stay connected and find more delicious recipes by following me on social media!
Find me on Instagram, Facebook, and Pinterest. Don’t forget to tag me when you try one of my recipes! If you love the results, please consider giving it a 5-star rating in the recipe card below.

The Recipe:
Layered Ice Cream Pie with Chocolate Cookie Crust
30 minutes
30 minutes
8 servings
An easy No-Bake Ice Cream Pie perfect for any occasion, especially warm weather.
Rated 5 out of 5 stars based on 11 reviews.
Ingredients
- 1 (9-ounce) package of chocolate wafer cookies (or 22 chocolate sandwich cookies), processed or crushed into fine crumbs
- 6 tablespoons melted unsalted butter
- 2 tablespoons granulated sugar (omit if using chocolate sandwich cookies, as they are already sweetened)
- 3 pints of your favorite ice cream flavors (e.g., vanilla bean, cookies and cream, double chocolate chip). You will likely not need all 3 pints, as this allows for choice.
Instructions
- In a medium bowl, thoroughly mix the chocolate cookie crumbs, melted butter, and sugar (if using chocolate wafer cookies). Press this mixture firmly and evenly into a greased 9-inch pie plate to form the crust. Place the prepared crust into the freezer to chill and set while you prepare the ice cream.
- While the crust is freezing, take your first desired ice cream flavor out of the freezer and let it soften at room temperature for about 5-10 minutes. It should be pliable enough to spread, but not fully melted.
- Visually divide the depth of your pie crust into thirds. You will want to fill the bottom third with your first ice cream layer. I recommend starting with a lighter-colored ice cream to create a pleasing contrast with the dark chocolate crust. Carefully scoop and spread most of your first ice cream selection into the bottom of the crust, filling it about one-third of the way up.
- Using an offset spatula or the back of a spoon, gently smooth the ice cream layer as flat and level as possible. Return the pie to the freezer immediately and freeze until this layer is completely solid (this may take 1-2 hours).
- Repeat the process with your second ice cream flavor, using slightly less to maintain the layering proportion. For visual contrast, I often use a chocolate ice cream for the second layer. Spread evenly, smooth with the spatula, and return to the freezer until solid.
- Finally, use enough of your third ice cream flavor to fill the remaining depth of the crust. Smooth the top layer meticulously.
- Freeze the entire layered ice cream pie until it is completely solid, ideally overnight, before serving.
- To garnish before serving, pipe decorative swirls of whipped cream around the perimeter of the pie. For an extra touch, top each whipped cream rosette with a mini Oreo, or any other small cookie or candy that complements your chosen ice cream flavors.
Notes
Please note that achieving beautifully defined layers requires extended freezing times between applying each ice cream flavor. To ensure all layers are perfectly set and the pie is easy to slice, it’s highly recommended to prepare this layered ice cream pie the day before you plan to serve it.
Nutrition Information:
Yield: 8 servings
Serving Size: 1 slice
Amount Per Serving:
Calories: 484
Total Fat: 27g
Saturated Fat: 15g
Trans Fat: 0g
Unsaturated Fat: 10g
Cholesterol: 74mg
Sodium: 358mg
Carbohydrates: 56g
Fiber: 2g
Sugar: 41g
Protein: 6g
