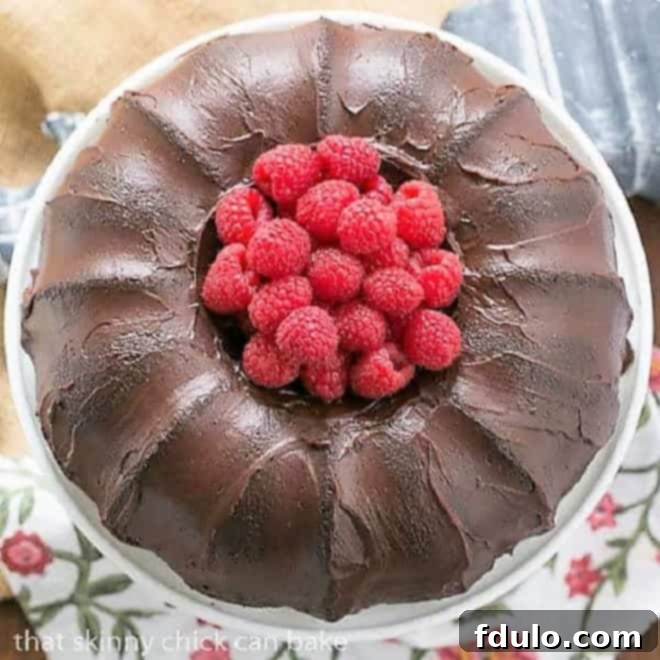
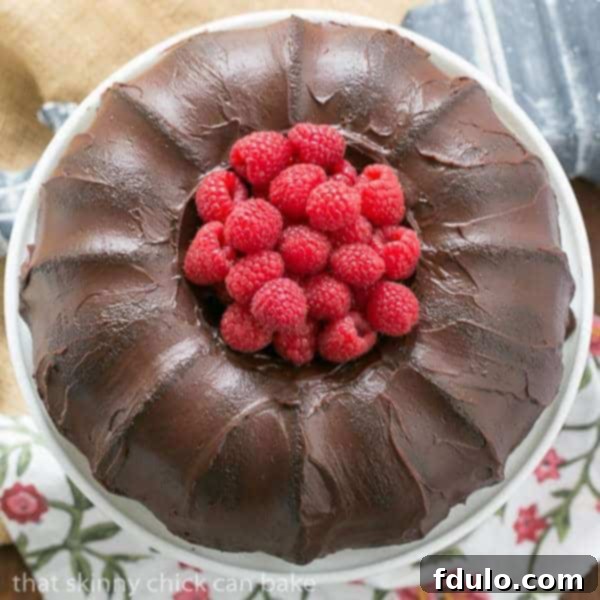
This Chocolate Buttermilk Bundt Cake is a true masterpiece – rich, incredibly moist, and wonderfully tender. It’s the ultimate dessert for any occasion, whether you’re hosting a large gathering or simply craving a decadent treat. Prepare to impress everyone with this delightfully easy yet sophisticated cake!
There’s something uniquely comforting about a homemade chocolate cake, especially one that brings people together. Just last weekend, my family embarked on their annual pilgrimage to Green Bay to cheer on the Packers. Originally, I thought about sending a cheesecake, but my husband, Bill, hesitated, unsure if his brother would enjoy it. That’s when it hit me: the “chocoholic gene” runs strong in our family DNA! A rich, homemade Chocolate Bundt Cake, especially one with a secret ingredient, would surely be a touchdown. And it was!
Why This Chocolate Buttermilk Bundt Cake is a Must-Make
This isn’t just another chocolate cake; it’s an experience waiting to happen. Here’s why this recipe deserves a prime spot in your baking repertoire:
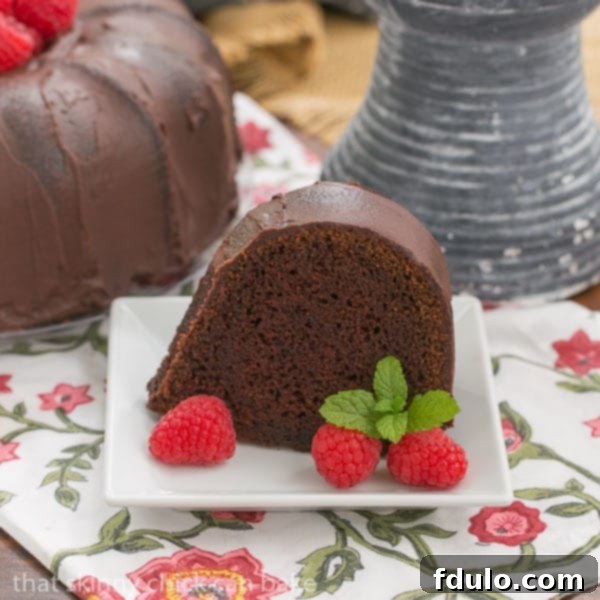
- Unmatched Tenderness: The magic of buttermilk cannot be overstated. Its natural acidity works wonders, tenderizing the gluten in the flour. This results in an incredibly soft, moist crumb that practically melts in your mouth, setting this cake apart from dryer alternatives.
- Effortless Elegance: Bundt cakes are inherently beautiful, requiring no fussy layering or intricate frosting techniques. Their distinctive fluted shape provides a stunning presentation with minimal effort, making them ideal for feeding a crowd without the stress of perfection. A simple drizzle or dusting is all it takes to make it look spectacular.
- Versatile Decadence: Whether you opt for a luxurious chocolate ganache drizzle, a full coating of creamy frosting, or a delicate dusting of powdered sugar, this cake serves as the perfect canvas. It adapts beautifully to various finishes, allowing you to tailor its appearance to any occasion or preference.
- Deep, Rich Chocolate Flavor: Beyond the standard cocoa, this recipe incorporates a special ingredient that amplifies its chocolatey depth, making every bite a truly satisfying experience for any chocolate lover.
- Feeds a Crowd with Ease: A single Bundt cake yields numerous generous slices, making it an economical and convenient choice for potlucks, family dinners, holidays, or any event where you need to serve many people without endless baking.
While this chocolate buttermilk cake relies on classic baking staples like melted chocolate, sugar, eggs, butter, buttermilk, and flour, it has a secret weapon that takes its flavor profile to the next level: quality hot cocoa mix! This unexpected addition enhances the chocolatey richness and depth in a way that regular cocoa powder alone simply cannot.
A generous half-cup of a good quality hot cocoa mix is whisked right along with the flour, baking soda, and salt. This dry mixture is then alternately added with the tangy buttermilk. For the best results, resist the urge to use a bargain brand; investing in a premium hot cocoa mix will truly make a difference in the cake’s final flavor and texture.
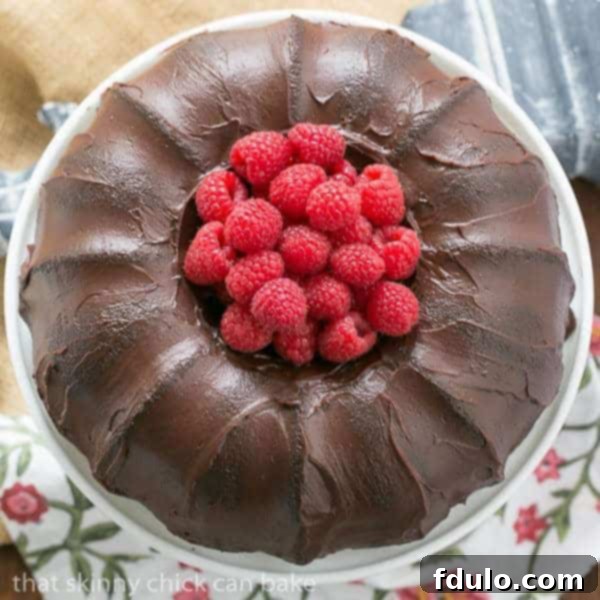
Originally, this cake was destined for a delicate drizzle of chocolate ganache. However, sometimes even seasoned bakers have their moments! My ganache chilled a little too long, transforming into a thick, spreadable frosting. And let’s be honest, precise drizzling isn’t always my strong suit! But the beauty of this cake is its versatility. Feel free to skip the ganache entirely and simply dust it with powdered sugar for an elegant touch, or embrace the ganache in any form you desire – drizzled, spread, or even as a decadent dip!
Ingredient Notes and Substitutions
Crafting the perfect chocolate buttermilk Bundt cake starts with understanding your ingredients. Here’s a detailed look at what you’ll need and why each component is crucial:
- Kitchen Staples: You’ll need butter (unsalted is generally preferred for baking, allowing you to control salt levels), granulated sugar, all-purpose flour, water, baking soda, and salt. Ensure your baking soda is fresh for optimal leavening.
- Unsweetened Cocoa Powder: This provides the foundational chocolate flavor. I highly recommend using a high-quality brand like Ghirardelli for a deeper, richer taste. Dutch-processed cocoa powder can also be used for a darker color and milder flavor, but adjust leavening if your recipe specifically calls for natural cocoa.
- Eggs: Large eggs are standard for baking. It’s crucial to have them at room temperature before incorporating them into the batter. Room temperature eggs emulsify more easily with other ingredients, creating a smoother, more uniform batter and a lighter, airier cake texture.
- Buttermilk: Opt for whole milk buttermilk for the richest flavor and best texture. Its acidity reacts with the baking soda to create lift and contributes significantly to the cake’s signature tenderness and moistness. If you don’t have buttermilk on hand, you can easily make a substitute: simply mix 1 tablespoon of fresh lemon juice or white vinegar into a liquid measuring cup, then fill the rest of the cup to the 1-cup mark with regular milk (whole or 2%). Stir gently and let it sit for 5-10 minutes until it slightly thickens and curdles.
- Vanilla Extract: Always use pure vanilla extract. Artificial vanilla flavoring simply doesn’t compare in terms of depth and complexity of flavor. Check the label carefully to ensure you’re getting the real deal.
- Heavy Cream: For the ganache, heavy cream (also known as heavy whipping cream) is essential. Look for cream with at least 36% butterfat content for the best consistency and richness. Do not substitute with half-and-half or milk.
- Semisweet Chocolate Chips: These are used for the luscious chocolate ganache. Again, a quality brand like Ghirardelli will make a noticeable difference in flavor and melt consistency. You can also chop a high-quality semisweet chocolate bar.
- Vegetable Oil: A neutral-flavored oil such as canola oil, grapeseed oil, or sunflower oil is best for this cake. These oils contribute moisture without imparting their own distinct flavor. Avoid strong-flavored oils like olive oil, as their robust taste will detract from the delicate chocolate profile.
- Bittersweet Chocolate: This adds a sophisticated depth to the cake’s chocolate flavor. Choose a good quality bittersweet chocolate (typically 60-70% cocoa solids) and chop it finely for even melting. Ghirardelli is a reliable choice.
- Sweetened Hot Chocolate Mix: This is the secret ingredient that truly elevates this cake. It adds a unique richness and sweetness that goes beyond standard cocoa powder. Using a premium sweetened hot chocolate mix, such as Ghirardelli, will ensure the best possible flavor. Do not use unsweetened cocoa powder here as a direct substitute; the sweetened mix contributes sugar and other flavor compounds.
Expert Tips for Bundt Cake Perfection
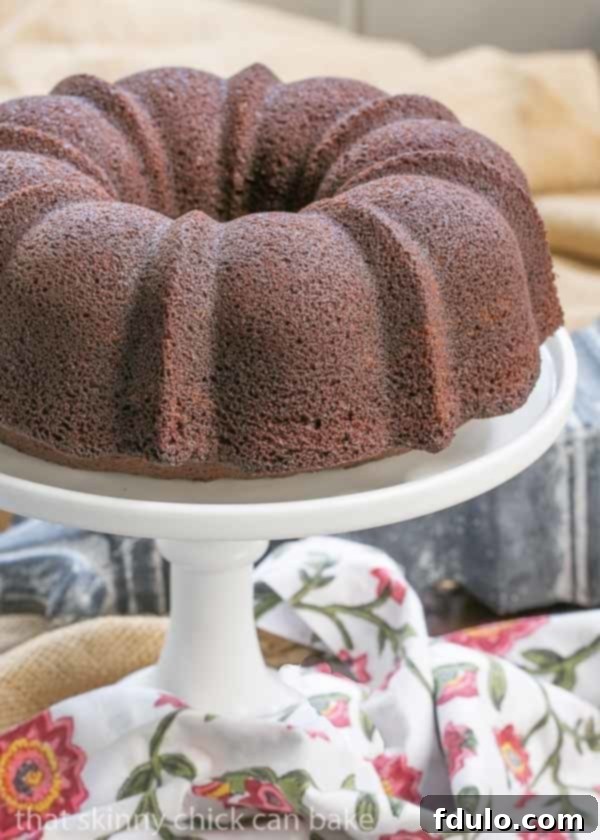
I adore the simplicity and dense deliciousness of a Bundt cake. They offer an elegant dessert option without the complexity and finesse required for perfectly frosted, multi-layered cakes. However, even with their forgiving nature, a few key pointers are essential to ensure your Bundt cake releases cleanly and bakes beautifully every time.
- PRO-Tip: Flawless Pan Preparation is Paramount. This is the single most critical step for a successful Bundt cake. If your cake doesn’t release properly, all your hard work is in vain. As Bundt pans age and undergo multiple uses, their non-stick coating can wear off, making release notoriously difficult.
- I personally prefer and highly recommend using a good quality non-stick Bundt pan. Even with a non-stick pan, proper greasing is non-negotiable.
- My go-to method is using a non-stick baking spray that contains flour, such as Baker’s Joy or Wilton Bake Easy. These sprays provide an excellent, even coating. Alternatively, you can meticulously grease your pan with solid vegetable shortening (butter can sometimes stick) and then thoroughly dust it with all-purpose flour. Ensure you reach every nook and cranny of the intricate Bundt design.
- After dusting with flour, turn your pan upside down over the sink or a garbage can and gently tap out any excess flour. Visually inspect the pan to confirm that every part of the mold, especially the detailed crevices, is coated. If you find any bare spots, apply a little more shortening and re-dust with flour.
- PRO-Tip: Avoid Overfilling Your Pan. A common mistake that leads to overflow disasters in the oven. Never pour your batter more than two-thirds of the way up the Bundt pan. Cake batter expands significantly during baking. If you have excess batter, don’t fret! Simply bake a few delightful cupcakes alongside your Bundt cake.
- Do Not Overbake. An overbaked cake will inevitably be dry and crumbly. Begin checking your cake about 5-10 minutes earlier than the recipe specifies, especially since oven temperatures can vary. Your cake should be lightly golden and feel firm to the touch.
- The Toothpick Test: To confirm doneness, insert a clean wooden toothpick into the thickest part of the cake (usually near the center, but away from the Bundt hole) in a couple of spots. The toothpick should come out with only a few moist crumbs clinging to it, but absolutely no wet batter.
- PRO-Tip: The Golden 15-Minute Cooling Rule. Once your cake is out of the oven, do not attempt to flip it immediately. Place the pan on a wire cooling rack and let it cool for precisely 10-15 minutes. This crucial waiting period allows the cake to set slightly, firm up its structure, and gently pull away from the sides of the pan as it contracts.
- After 10-15 minutes, carefully place the cooling rack on top of the Bundt pan, invert them together, and gently lift the pan away. I like to use oven mitts and give the pan a couple of gentle jiggles or taps to ensure the cake is completely loose before flipping. Waiting much longer than 15 minutes can cause the cake to stick more firmly to the pan, increasing the risk of it breaking or leaving bits behind.
Frequently Asked Questions About Chocolate Buttermilk Cake
Buttermilk is a baker’s secret weapon for a reason! Its natural acidity performs several vital functions in cake recipes. Firstly, the acid tenderizes the gluten in the flour, resulting in a wonderfully soft, moist, and tender crumb that is far superior to cakes made with regular milk. Secondly, buttermilk reacts with leavening agents like baking soda, producing carbon dioxide bubbles that help the cake rise and create a lighter texture. This acidic environment also contributes to a longer shelf life and a subtle tang that balances the sweetness. If you find yourself without buttermilk, you can easily create a substitute by mixing a scant cup of milk (dairy or non-dairy) with one tablespoon of lemon juice or a neutral vinegar (like white vinegar or apple cider vinegar). Let it sit for about 5-10 minutes until it curdles and thickens slightly before using.
The beauty of a Bundt cake lies in its elegant shape, which means you don’t need elaborate decorating skills! There are countless ways to adorn your chocolate buttermilk Bundt cake to make it look special. This recipe was initially intended for a classic chocolate ganache drizzle, where ribbons of glossy chocolate cascade down the fluted edges. However, if your ganache chills too much, like mine did, it becomes the perfect consistency for spreading into a luscious, smooth frosting over the entire cake!
For a simpler, yet equally stunning presentation, consider a light dusting of powdered sugar. You can use a stencil for a decorative pattern, or simply sift it over for a delicate, snowy effect. Other popular options include a simple vanilla glaze, a cream cheese frosting, or even a sophisticated glaze made with espresso. For extra flair, pipe stars or rosettes of whipped cream around the top rim of the cake and nestle fresh berries (like raspberries or strawberries), chocolate curls, or small round chocolate candies into each swirl. A sprinkle of chopped nuts or toasted coconut can also add texture and visual appeal. The possibilities are endless, allowing you to match your cake to any occasion.
When properly stored, this chocolate buttermilk cake boasts excellent shelf life, allowing you to enjoy its deliciousness for days. At room temperature, if wrapped tightly in plastic wrap or stored in an airtight cake dome or container, it will stay wonderfully fresh for 3-4 days. To extend its freshness even further, you can refrigerate the cake for up to a week. The refrigerator will help maintain its moisture and prevent spoilage.
If you’re planning to bake ahead or want to save some for later, this cake freezes beautifully. To freeze, wrap the cooled cake first in several layers of plastic wrap, ensuring it’s completely airtight, then follow with a layer of heavy-duty aluminum foil. It can be frozen for up to 2 months.
For cakes with frosting, freeze the cake unwrapped for a couple of hours until the frosting is completely firm. This will protect the delicate frosting from sticking to the wrapping. Once firm, proceed with wrapping as described above. Alternatively, you can freeze the unfrosted cake and then defrost it overnight in the refrigerator. Once fully thawed, you can then frost it fresh before serving, ensuring a perfect presentation.
Explore More Delightful Bundt Cake Recipes
If you’ve fallen in love with the ease and elegance of Bundt cakes, you’re in for a treat! There’s a world of flavors to explore beyond this chocolate masterpiece. Here are some other fantastic Bundt cake recipes that are sure to become new favorites:
- Chocolate Raspberry Bundt Cake from TidyMom: A delightful combination of rich chocolate and tart raspberries.
- White Chocolate Bundt Cake: For those who prefer a lighter, creamy chocolate experience.
- Chocolate Sour Cream Bundt Cake: Another recipe promising an incredibly moist and tender crumb thanks to sour cream.
- Apple Bundt Cake: A comforting autumn-inspired cake bursting with warm spices and tender apples.
- Cheesecake Filled Chocolate Bundt Cake: Two favorite desserts combined into one glorious cake.
- Chocolate Zucchini Bundt Cake: A surprisingly moist and flavorful cake that cleverly incorporates vegetables.
- Discover more of the Best Cake Recipes for every occasion.
Stay connected with us and share your baking adventures on social media! Find us on Instagram, Facebook, and Pinterest. Don’t forget to tag me when you try one of my recipes! If you love the results, please consider giving it a 5-star rating in the recipe card below. Your feedback helps other bakers discover delicious recipes!
Chocolate Buttermilk Bundt Cake
30 minutes
1 hour
1 hour 30 minutes
12 servings
A tender chocolate buttermilk cake drizzled with semisweet chocolate ganache.
Ingredients
Cake:
- 2 teaspoons unsweetened baking cocoa
- 1 cup water
- ¾ cup butter, cut into pieces
- ¾ cup canola oil
- 4 ounces bittersweet chocolate, chopped
- 1½ cups sugar
- 3 cups flour
- ¾ cup (high quality) hot chocolate mix, sweetened, I used Ghirardelli
- 2½ teaspoons baking soda
- ½ teaspoon salt
- 3 eggs
- ¾ cup buttermilk
- 1 tablespoon vanilla
Ganache:
- ⅓ cup heavy cream
- 2 tablespoons buttermilk
- 14 ounces semisweet chocolate chips
Instructions
- Heat oven to 350°F. Lightly grease a 10-inch fluted bundt pan with Pam w/flour and sprinkle with unsweetened cocoa.
- In a pot combine water, butter, oil, and bittersweet chocolate. Cook over low heat for 8 to 10 minutes, stirring constantly until the chocolate is melted and the mixture is smooth.
- Remove from heat. Transfer to a mixer and stir in sugar until blended. Cool for 10 minutes.
- In a bowl, whisk together flour, cocoa powder, hot chocolate mix, baking soda, and salt.
- Add eggs to the cooled chocolate, one at a time. Beat well with a whisk.
- Add flour mixture alternately with buttermilk, stirring just until blended.
- Add vanilla.
- Pour batter into pan.
- Bake for 45 to 50 minutes or until a toothpick inserted in the center comes out clean.
- Cool for 15 minutes; remove from pan to cooling rack. Cool completely, about 2 hours.
- To make the ganache, microwave all ingredients until melted and smooth, stirring.
- Let sit for 10 minutes or however long it takes for yours to thicken.
- Drizzle on the cake or spread a light coating over the surface, and chill until set.
Notes
Total time does not reflect cooling times.
Adapted from Betty Crocker via Hugs & Cookies XOXO
Recommended Products
As an Amazon Associate and member of other affiliate programs, I earn from qualifying purchases.
- Pyrex Measuring Cups
- Bundt Pan
- OXO Good Grips 11-Inch Better Balloon Whisk
Nutrition Information:
Yield:
12
Serving Size:
1 slice
Amount Per Serving:
Calories: 712Total Fat: 45gSaturated Fat: 20gTrans Fat: 1gUnsaturated Fat: 23gCholesterol: 85mgSodium: 503mgCarbohydrates: 75gFiber: 5gSugar: 45gProtein: 9g
HOW MUCH DID YOU LOVE THIS RECIPE?
Please leave a comment on the blog or share a photo on Pinterest
