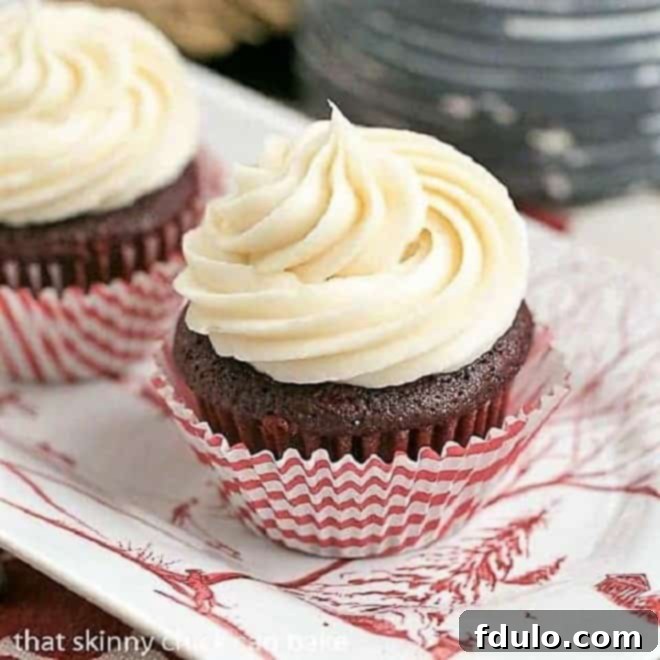
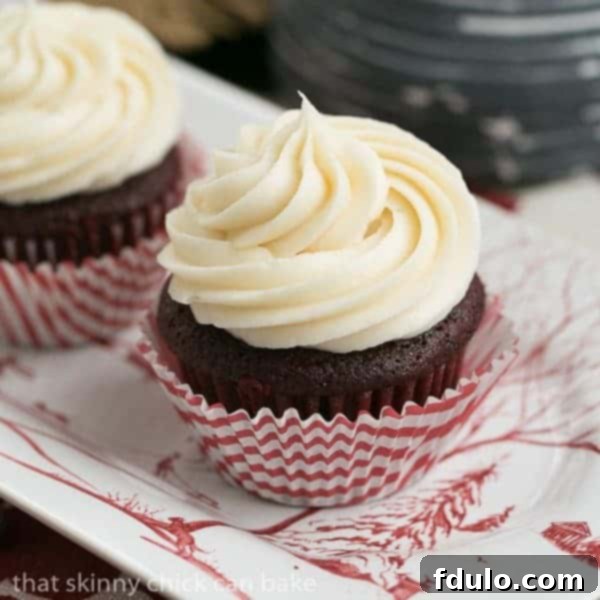
Welcome to the ultimate guide for crafting the most exquisite Red Velvet Cupcakes you’ll ever experience. This classic recipe, featuring the perfect blend of buttermilk and a hint of vinegar, promises a baking journey that culminates in utterly moist, intensely flavorful cupcakes. Each delightful treat is crowned with a generous, luscious swirl of our decadent Cream Cheese Frosting, creating a dessert that’s truly a cut above the rest. Whether you’re a seasoned baker or a curious beginner, prepare to fall in love with these iconic red velvet beauties.
Beyond individual cupcakes, this remarkably versatile recipe also serves as the foundation for an extraordinary layer cake. If your heart desires a grander dessert, simply scroll down for detailed instructions on how to transform this recipe into a show-stopping three-layer Red Velvet Cake. For any devotee of the timeless pairing of Red Velvet Cake with Cream Cheese Frosting, this is undeniably the definitive recipe you’ve been searching for!
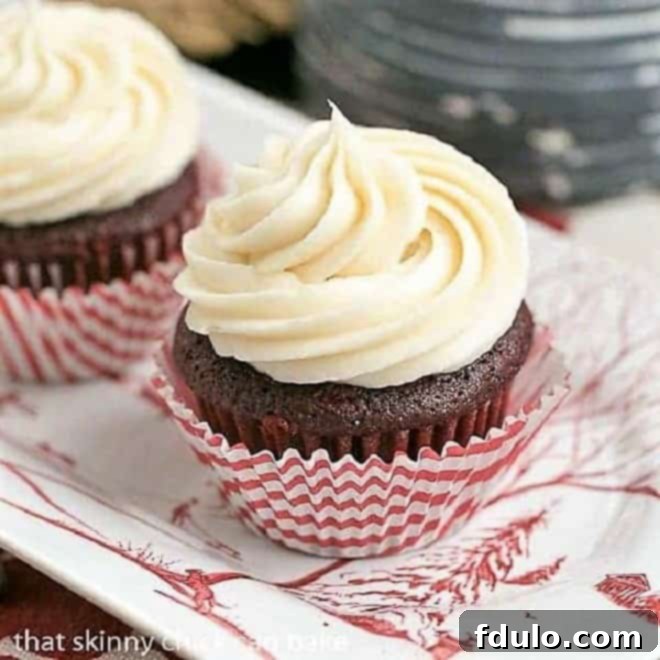
Why These Red Velvet Cupcakes Are an Absolute Must-Bake
What makes a Red Velvet Cupcake truly unforgettable? It’s that delicate balance of a tender crumb, a subtle cocoa whisper, and the signature tangy cream cheese frosting. This recipe encapsulates all of these elements and more, making it a staple for celebrations or simply a well-deserved indulgence. I once shared these with my “limoncello” girlfriends, and their unanimous request for a repeat baking session confirmed their irresistible appeal. While I’ve experimented with variations like mascarpone icing in the past, the traditional cream cheese frosting reigns supreme for its beloved tang and creamy texture.
Despite the vibrant red hue requiring a few bottles of food coloring, the effort is undeniably worth it. The visual appeal is as captivating as the taste, making these cupcakes perfect for holidays like Valentine’s Day or Christmas, or any occasion where you want to add a splash of color and joy. They offer a unique flavor profile that distinguishes them from a typical chocolate cupcake, providing a delightful surprise for those who try them.
- Unmatched Quality: Many have proclaimed this to be the absolute best red velvet cupcake recipe they’ve ever baked or tasted, guaranteeing a superior dessert experience.
- Exceptional Texture: Each cupcake boasts a super moist and wonderfully tender crumb, a hallmark of a truly well-crafted red velvet. The unique combination of ingredients ensures a melt-in-your-mouth texture that is simply irresistible.
- Harmonious Pairing: The distinct, mild cocoa flavor of red velvet cake is impeccably complemented by the rich, tangy, and magnificently smooth cream cheese frosting, creating a symphony of flavors in every bite.
Essential Ingredient Notes for Perfect Red Velvet Cupcakes
Understanding the role of each ingredient is key to achieving bakery-quality Red Velvet Cupcakes. Here’s a breakdown of what you’ll need and why each component is crucial:
- Kitchen Staples: You’ll start with fundamental baking ingredients like Table Salt, Granulated Sugar, White Vinegar, and Baking Soda. These common pantry items play crucial roles in flavor, texture, and leavening.
- Cake Flour: Opting for cake flour over all-purpose flour is a game-changer. Its lower protein content results in less gluten development, contributing significantly to the desired tender and delicate crumb texture characteristic of a perfect red velvet cupcake.
- Unsweetened Cocoa (Not Dutch-Processed): The specific type of cocoa is vital for the distinct flavor and color of red velvet. Non-Dutch-processed cocoa is acidic, which reacts chemically with the baking soda and buttermilk to enhance the red hue and contribute to the cake’s lift and unique taste.
- Canola Oil: This neutral oil is preferred over butter for its ability to create an exceptionally moist and tender cake. It ensures a consistent softness that lasts, preventing the cupcakes from drying out quickly.
- Eggs: For optimal emulsification and a smoother batter, ensure your eggs are at room temperature. This allows them to blend more easily and evenly with other ingredients, leading to a lighter, airier texture.
- Red Food Coloring: To achieve that iconic, deep crimson hue, red food coloring is essential. Liquid food coloring is commonly used, but for a more intense color with less liquid, food coloring gel can be substituted. If using gel, remember to adjust the overall liquid content by replacing the equivalent amount of liquid coloring with water.
- Vanilla Extract: Always use real vanilla extract for the best flavor. Its warm, aromatic notes elevate the overall taste profile, providing a beautiful complement to the subtle cocoa and tangy buttermilk.
- Buttermilk: This acidic dairy product is integral to red velvet. It reacts with the baking soda to provide lift and also contributes to the cake’s tender texture by inhibiting gluten development. If you don’t have buttermilk on hand, a simple homemade substitute can be prepared (details in the tips section below).
- Cream Cheese (for Frosting): For the signature tangy cream cheese frosting, cold cream cheese is recommended. This helps achieve a firmer consistency that whips up beautifully.
- Unsalted Butter (for Frosting): Have your butter at room temperature. Softened butter creamed with the cream cheese creates a smooth, luscious, and easily spreadable or pipeable frosting.
- Powdered Sugar (for Frosting): Sifting powdered sugar is a non-negotiable step for a perfectly smooth, lump-free cream cheese frosting. This ensures a silky texture that melts in your mouth.
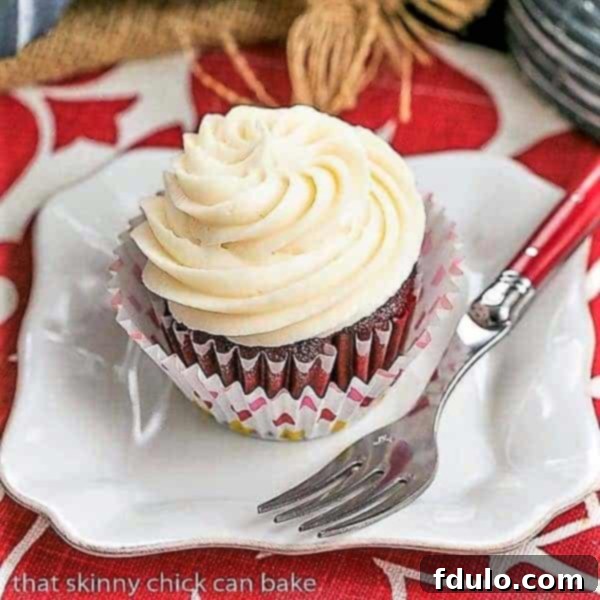
Transforming Your Cupcake Recipe into a Magnificent 3-Layer Red Velvet Cake
This phenomenal Red Velvet Cupcake recipe isn’t just for small treats; it’s also the secret to baking an impressive three-layer Red Velvet Layer Cake. The process is straightforward, allowing you to easily scale up your baking ambitions for a grander presentation.
To begin, thoroughly grease three 9-inch cake pans with butter or baking spray. For an extra layer of assurance against sticking, line the bottoms of the pans with parchment paper. This step makes removal effortless and ensures beautifully intact cake layers. Once your pans are prepared, mix the cupcake batter exactly as directed in the recipe card below. The consistency and flavor profile are perfectly suited for a larger cake.
Carefully divide the prepared batter evenly among the three lined cake pans. Aim for roughly equal amounts in each pan to ensure consistent baking and even layers. Transfer the pans to your preheated oven and bake for approximately 40-45 minutes. Baking times can vary slightly depending on your oven, so always keep an eye on them. You’ll know the cake layers are done when a cake tester or toothpick inserted into the center comes out clean, or with just a few moist crumbs attached.
Once baked, remove the cakes from the oven and let them cool in their pans for about 10-20 minutes. This crucial cooling period allows the cakes to set and firm up, making them less fragile for handling. After this initial cooling, carefully invert the cakes onto a wire rack, gently peel off the parchment paper, and allow them to cool completely. It’s essential that the cake layers are entirely cool before you even think about frosting them, otherwise, your beautiful cream cheese frosting will melt and slide off. Whether you choose to serve them as charming cupcakes or a grand layer cake, this recipe guarantees delicious, show-stopping results every time!
Expert Recipe Tips for Flawless Red Velvet Cupcakes
Achieving bakery-perfect cupcakes is easier than you think with these simple yet effective tips. As with any recipe, taking a moment to read through the entire instructions one or two times before you start will help you understand the process, ensure you have all ingredients on hand, and plan your time efficiently.
- PRO-Tip: Plan Ahead for Red Food Coloring: Red food coloring can be in high demand, especially during festive seasons like Christmas or Valentine’s Day. Make sure to hunt down and purchase THREE 1-ounce bottles well in advance to avoid last-minute stress. This amount is crucial for achieving the signature vibrant red hue.
- Room Temperature Ingredients are Key: For the smoothest batter and best emulsification, ensure all your refrigerated ingredients, particularly eggs and buttermilk, are at room temperature. Take them out of the refrigerator 1-2 hours before you plan to start baking.
- Quick Fix for Cold Eggs: If you forget to take your eggs out ahead of time, simply place them in a bowl of very warm (not boiling) water for about 5-10 minutes. This will quickly bring them to the desired temperature.
- PRO-Tip: Homemade Buttermilk Substitute: No buttermilk? No problem! You can easily make a substitute at home. Pour 1 tablespoon of either white vinegar or lemon juice into a 1-cup liquid measuring cup. Then, fill the rest of the cup with milk (any kind works, though whole milk is preferred for richness) up to the 1-cup mark. Stir it gently and let it sit for about 5 minutes. The milk will curdle slightly, signaling it’s ready to use in your recipe just like store-bought buttermilk.
- PRO-Tip: Avoid Over-Mixing: This is a golden rule for tender baked goods. Over-mixing the batter develops the gluten in the flour excessively, which can lead to tough, chewy cupcakes instead of the desired tender crumb. Mix only until the ingredients are just combined.
- Achieve Uniformity with a Scoop: For perfectly sized and evenly baked cupcakes, use a 1/4 cup scoop to portion out the batter into each cupcake liner. This ensures all cupcakes are the same size, bake consistently, and finish at the same time.
- Understand Your Oven’s Quirks: Every oven is unique and bakes differently. Start checking your cupcakes a minute or two before the specified baking time. I use a combination of the toothpick test and the finger tap method to determine doneness.
- The Toothpick Test: Insert a clean toothpick into the center of one or more cupcakes. If it comes out clean or with only a few moist crumbs clinging to it, your cupcakes are done. If you see wet batter, continue baking for a couple more minutes and recheck.
- The Finger Tap Method: Gently press the top of a cupcake with your index finger. If the indentation bounces right back up, the cupcakes are ready. If your finger leaves a lasting impression, they need a bit more time in the oven.
- Cooling is Crucial: Allow your freshly baked cupcakes to cool in their tins for 10-15 minutes before transferring them to a wire rack to finish cooling completely. This short period helps the cupcake structure firm up, preventing them from falling apart when removed from the pan.
- Frost Only When Completely Cool: Patience is a virtue here! Ensure the cupcakes are absolutely cool to the touch before applying frosting. Any residual warmth will cause the cream cheese frosting to melt and become runny. You can take your cream cheese and butter out of the refrigerator ahead of time to soften while the cupcakes cool.
- PRO-Tip: Double-Wrapper Presentation: For the most attractive presentation, place your baked and frosted cupcakes into a second, clean, and perhaps decorative paper cupcake wrapper before serving. The original wrapper often shows grease seepage during baking, which isn’t as visually appealing.
Universally Loved: Why Everyone Admires These Cupcakes
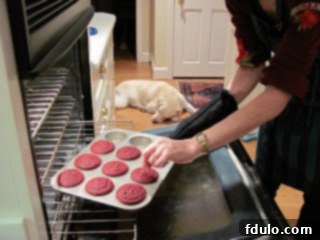
These Red Velvet Cupcakes consistently receive rave reviews from everyone who tries them, making them a true crowd-pleaser. Even our sweet first Labrador retriever, Lambeau, who was an expert crumb remover and absolutely loved when I baked, would enthusiastically approve (especially of any flour dustings on the floor!). Baking often meant a happy clean-up for her, a testament to the joy these recipes bring, even to our four-legged friends.
These cupcakes are a particular favorite of my daughter, who, unlike some, doesn’t gravitate towards overly rich chocolate desserts. The subtle cocoa note and the refreshing tang of the cream cheese frosting hit just the right spot for her. Even my picky husband, a self-proclaimed chocoholic, will happily devour his fair share, though he often muses about his preference for an intensely rich, dark chocolate cupcake. Yet, the allure of these red velvet gems is undeniable, even for the most dedicated chocolate purist.
I recently had my lovely mother-in-law, a warm and petite Irish woman, staying with us. She rarely snacks, but after one bite, these red velvet cupcakes with cream cheese frosting instantly transported her back to memories of the tender cupcakes her own mother used to bake. She not only enjoyed her fair share but waxed poetic about their delicate flavor and perfect texture. This recipe truly has a way of evoking cherished memories and creating new ones. Prepare to experience this magic yourself – you’ll love them too!
Frequently Asked Questions About Red Velvet Cupcakes
While some might assume red velvet is merely a chocolate cake with red food coloring, the truth is more nuanced. My husband, a self-proclaimed chocoholic, would quickly point out that a true red velvet cake doesn’t have nearly enough chocolate to be considered a standard chocolate cake! Despite its often dark appearance, red velvet cake typically contains only a few tablespoons of cocoa powder. This cocoa is primarily used to deepen and enrich the red color, rather than to impart a strong chocolate flavor. The subtle cocoa provides a gentle background note, but it is far from the dominant flavor found in a rich chocolate cake.
Furthermore, a crucial element of red velvet is the addition of vinegar to the batter. This vinegar interacts with the cocoa powder and buttermilk, creating a fascinating baking chemistry. This acidic trio works synergistically to bring out the natural red anthocyanin pigments present in some cocoa powders, thereby enhancing the cake’s characteristic red hue. The chemical reaction also contributes to the cake’s tender texture.
Therefore, if you’re expecting a slice of red velvet cake or a red velvet cupcake to taste overtly like a rich chocolate cake, you might be surprised. You’ll encounter a very mild hint of chocolate from the cocoa powder, but the predominant flavors are a unique blend of subtle tanginess from the buttermilk and vinegar, combined with a moist, velvety texture. If you appreciate a cake that is tender, delicately flavored, and boasts a unique profile, you’ll instantly become a fan!
In most modern red velvet recipes, the vibrant red color is primarily achieved through the generous use of red food coloring. Historically, the color was a result of a chemical reaction between the acidic ingredients (like buttermilk and vinegar) and the non-Dutch-processed cocoa powder, which brought out the reddish hues in certain types of cocoa. While this chemical reaction still contributes to the color depth and overall flavor profile, today’s recipes often rely on food coloring to guarantee the iconic, striking crimson that defines red velvet.
Absolutely! You’re in luck, as this very cupcake recipe was originally inspired by and adapted from a fantastic 3-layer red velvet cake recipe. The conversion is incredibly simple. You’ll follow the same batter preparation instructions, but instead of filling cupcake liners, you’ll divide the batter evenly among three greased and parchment-lined 9-inch cake pans. The baking time will be slightly longer, typically 40-45 minutes, or until a cake tester inserted into the center comes out clean. Full details on baking the layer cake version are provided above in the “Directions for Making a 3-Layer Cake” section.
Buttermilk plays a multifaceted and essential role in the magic of red velvet. Firstly, its inherent acidity is crucial for the chemical reactions that occur during baking. As mentioned, the acid in buttermilk reacts with the cocoa powder, which, historically, helped to enhance the red tint in the batter. More importantly, buttermilk’s acidity activates the baking soda, creating carbon dioxide bubbles that act as a leavening agent, giving the cake its light and airy texture.
Secondly, and equally vital, the acid in buttermilk works to tenderize the cake. It helps to break down gluten development in the flour, preventing the cake from becoming tough or dense. This results in the characteristic soft, moist, and velvety texture that gives red velvet its name. Without buttermilk, the cake would lack both its signature tenderness and the subtle tang that perfectly balances the sweetness.
Explore More Decadent Delights: You May Also Enjoy These Recipes
If you’ve fallen in love with these Red Velvet Cupcakes, you’re in for a treat! Here are a few more irresistible cupcake and red velvet-inspired recipes from my collection that I highly recommend you try:
- Vanilla Buttercream Topped Cocoa Cupcakes: A delightful classic for chocolate lovers, featuring rich cocoa cupcakes crowned with creamy vanilla buttercream.
- Cocoa Cupcakes with Ganache Filling: For an extra layer of chocolate indulgence, these cupcakes boast a surprise molten ganache center.
- Holly Topped White Cupcakes: Perfect for festive occasions, these charming white cupcakes are adorned with cheerful holly decorations.
- Red Velvet Brownies with White Chocolate Frosting: All the flavor of red velvet in a fudgy brownie form, topped with a luscious white chocolate frosting.
- Red Velvet Checkerboard Cake: A visually stunning cake that combines red velvet and white cake in an intricate checkerboard pattern.
- Red Velvet Cookies with White Chocolate Chips: Chewy, vibrant red cookies studded with sweet white chocolate chips – a delightful twist on the classic.
- Plus, don’t forget to explore all my other Best Dessert Recipes for a treasure trove of sweet inspiration!
Stay connected and share your baking triumphs! Follow me on social media @ Instagram, Facebook, and Pinterest. Don’t forget to tag me when you try one of my delicious recipes! If you love the results, please consider giving it a 5-star rating in the recipe card below – your feedback means the world to me.
Classic Red Velvet Cupcakes Recipe
30 minutes
30 minutes
1 hour
36 cupcakes
This is the BEST red velvet recipe you’ll ever find, I promise! Perfectly moist and topped with an irresistible cream cheese frosting.
Ingredients
For the Cupcakes:
- 3 ½ cups cake flour
- ½ cup unsweetened cocoa (ensure it’s not Dutch-processed)
- 1 ½ teaspoons salt
- 2 cups canola oil
- 2 ¼ cups granulated sugar
- 3 large eggs, at room temperature
- 3 ounces red food coloring (liquid or gel, adjust as needed)
- 1 ½ teaspoons pure vanilla extract
- 1 ¼ cups buttermilk
- 2 teaspoons baking soda
- 2½ teaspoons white vinegar
For the Cream Cheese Frosting:
- 16 ounces cream cheese, cold
- 12 tablespoons unsalted butter, at room temperature
- 1 tablespoon plus 1 teaspoon pure vanilla extract
- 6 cups powdered sugar, sifted
Instructions for Red Velvet Cupcakes
- Prepare for Baking: Preheat your oven to 350ºF (175ºC). Line three standard 12-count muffin tins with paper cupcake liners. This recipe yields 36 cupcakes, so prepare enough tins.
- Combine Dry Ingredients: In a medium bowl, whisk together the cake flour, unsweetened cocoa powder, and salt until well combined. Set this dry mixture aside.
- Cream Wet Ingredients (Part 1): In the bowl of an electric mixer fitted with the paddle attachment, beat the canola oil and granulated sugar on medium speed until the mixture is light, fluffy, and well blended. This usually takes about 2-3 minutes.
- Incorporate Eggs and Coloring: Add the eggs one at a time, beating well after each addition until fully incorporated. Reduce the mixer speed to low to prevent splashing, then carefully add the red food coloring. Mix until the color is evenly distributed throughout the batter.
- Alternate Wet and Dry: Stir in the vanilla extract. Then, gradually add the dry flour mixture alternately with the buttermilk, starting and ending with the dry ingredients. Begin by adding half of the flour mixture, mix until just combined, then add half of the buttermilk, mix, then the remaining flour, mix, and finally, the remaining buttermilk. Do not over-mix.
- Final Batter Mix: Scrape down the sides of the bowl with a rubber spatula to ensure all ingredients are incorporated. Mix briefly on low speed, just until the batter is smooth and no streaks of flour remain.
- Activate Leavening: In a small separate dish, combine the baking soda and white vinegar. It will immediately begin to bubble and expand. Pour this mixture into the cupcake batter with the mixer running on low speed. Beat for just 10 seconds to evenly distribute the leavening agents.
- Fill and Bake Cupcakes: Fill each cupcake liner about two-thirds full with batter. Bake for 25-30 minutes, or until a toothpick inserted into the center of a cupcake comes out clean or with a few moist crumbs.
- Cool Completely: Allow the cupcakes to cool slightly in the muffin tins for 10-15 minutes before transferring them to a wire rack to cool completely. Ensure they are entirely cool before frosting.
- Prepare Cream Cheese Frosting: For the frosting, in an electric mixer, beat the cold cream cheese, room temperature butter, and vanilla extract until just blended and creamy. Gradually add the sifted powdered sugar, about 2 cups at a time, beating on low speed until smooth and at your desired consistency. You may adjust the amount of powdered sugar to achieve your preferred sweetness and thickness.
- Frost and Serve: Pipe or spread the cream cheese frosting generously onto the completely cooled cupcakes. A 1M piping tip creates a beautiful swirl. This recipe yields approximately 4 cups of frosting. Enjoy your delicious Red Velvet Cupcakes!
Chef’s Notes
This cherished recipe has been thoughtfully adapted from the renowned Confetti Cakes, ensuring a delightful and reliable baking experience every time.
Recommended Baking Tools and Products
As an Amazon Associate and member of other affiliate programs, I may earn from qualifying purchases made through the links below.
- Wilton 1M Open Star Decorating Tip
- KitchenAid Artisan Tilt-Head Stand Mixer, 5-Quart
- OXO Good Grips 11-Inch Better Balloon Whisk
Nutrition Information (Per Serving):
Yield:
36 servings
Serving Size:
1 cupcake
Approximate Amount Per Serving:
Calories: 368Total Fat: 21gSaturated Fat: 6gTrans Fat: 0gUnsaturated Fat: 14gCholesterol: 39mgSodium: 251mgCarbohydrates: 43gFiber: 0gSugar: 31gProtein: 3g
HOW MUCH DID YOU LOVE THIS RECIPE?
Please leave a comment on the blog or share a photo on Pinterest
