Effortlessly Elevate Your Desserts with Homemade Chocolate Shards
Transform your desserts into show-stopping masterpieces with the ultimate easy chocolate decoration: Chocolate Shards. Forget the frustration of delicate chocolate curls; these elegant and impressive garnishes are surprisingly simple to create, making you look like a professional pastry chef with minimal effort!
From luxurious cakes and creamy cheesecakes to delightful tarts and even simple ice cream sundaes, these beautiful chocolate shards provide a sophisticated touch that will impress any guest. If you’ve ever dreamt of adding a refined, handcrafted chocolate element to your sweet treats without the fuss, this guide is for you.

Why You’ll Love This Foolproof Chocolate Decoration
For many home bakers, creating elaborate chocolate garnishes can feel like a daunting task. Traditional chocolate curls, often made by scraping a chocolate bar with a peeler, are notorious for their inconsistency. They melt quickly in your hands, often result in more crumbs than curls, and rarely achieve the grand, impressive look you envision.
While some techniques, like Pioneer Woman’s method, offer a more reliable way to produce beautiful dark or white chocolate curls, they typically require a significant amount of chocolate – sometimes needing as much as 4 ounces to yield just 2 ounces of usable curls. Considering the rising cost of quality chocolate, this can be an inefficient and wasteful approach for everyday decorating.
- Effortless Elegance: Chocolate shards offer a rustic yet incredibly elegant aesthetic that instantly elevates any dessert. Their irregular shapes and crisp texture provide a beautiful contrast to smooth creams and soft cakes.
- Zero Waste, Maximum Impact: Unlike curls, this method uses virtually all of your chocolate, ensuring maximum return on your ingredient investment.
- Completely Foolproof: This technique is so straightforward, even novice bakers can achieve stunning results on their first attempt. There’s no special skill or equipment required beyond basic kitchen tools.
- Versatility: Perfect for a wide range of desserts, from simple weeknight treats to elaborate holiday confections. They adhere beautifully to frosting, whipped cream, ganache, and more.

How to Make Chocolate Shards: A Simple Step-by-Step Guide
Believe it or not, this “recipe” features just one ingredient, yet it possesses the power to transform an ordinary dessert into something truly extraordinary. Let’s dive into the incredibly easy process.
Ingredients & Equipment You’ll Need
The beauty of chocolate shards lies in their simplicity. You truly only need one main ingredient and a few basic tools to get started.
Ingredients:
- 4 ounces semi-sweet chocolate, chopped: For the best results, we highly recommend using a high-quality chocolate bar, such as a Ghirardelli bar, rather than chocolate chips. Chocolate bars typically contain more cocoa butter, which contributes to a smoother melt, a more brilliant sheen, and a satisfying crisp snap when chilled. Chocolate chips often contain stabilizers that prevent them from melting as smoothly, which can affect the final texture and appearance of your shards.
Equipment:
- Microwave-safe bowl: For gently melting your chocolate.
- Small offset spatula: Ideal for spreading the chocolate thinly and evenly. Its angled blade makes the process much easier than a standard spatula.
- Wax paper: Crucial for preventing the chocolate from sticking. You’ll need two sheets, approximately 16 inches long.
- Baking sheet: For supporting the rolled chocolate as it chills.
The Easy Process:
- Gently Melt the Chocolate: Begin by finely chopping your chosen semi-sweet chocolate. Place it in a microwave-safe bowl. Heat the chocolate in the microwave in short bursts, typically 20-30 second increments, stirring thoroughly after each interval. It’s crucial to melt the chocolate gently to prevent scorching and to ensure an even, smooth consistency. Continue this process until the chocolate is completely smooth and free of any lumps.
- Prepare Your Surface: Lay one 16-inch sheet of wax paper flat on a clean, dry surface, such as a countertop or baking sheet.
- Spread the Chocolate: Using your small offset spatula, spread the melted chocolate thinly and evenly over the wax paper. Aim for a consistent, very thin layer, leaving a small border free of chocolate around the edges. The thinner the layer, the more delicate and crisp your shards will be.
- Layer with More Wax Paper: Carefully place a second 16-inch sheet of wax paper directly on top of the chocolate layer. Gently smooth the top sheet with your hands or a soft cloth to ensure the chocolate spreads evenly between the two layers and no air bubbles are trapped.
- Roll It Up: Starting from one of the short sides, carefully and gently roll the wax paper, with the chocolate sandwiched inside, into a tight log. Once rolled, place this chocolate log onto a baking sheet.
- Chill for Perfection: Transfer the baking sheet with the chocolate log to the refrigerator and chill for a minimum of 2 hours. This chilling time is essential for the chocolate to set completely and achieve the firm, brittle texture required for clean breaks.
- Create the Shards: Once fully chilled, remove the chocolate log from the refrigerator. Hold onto one short end of the rolled wax paper, and with your other hand, carefully unroll it. As you unroll, the chilled chocolate will naturally fracture and break into beautiful, irregular shards.
- Garnish & Store: Remove the top sheet of wax paper. Carefully (to prevent melting from the warmth of your hands) transfer the chocolate shards directly onto your dessert or into an airtight container for later use. Keep the shards cool if not used immediately to maintain their crispness.
Pro Tips for Perfect Chocolate Shards Every Time
- Choose Quality Chocolate: As mentioned, a good quality chocolate bar (around 60-70% cacao for semi-sweet) will yield the best results in terms of flavor, shine, and snap. Avoid compounds or baking melts if you want true chocolate flavor.
- Mind the Temperature: Ensure your kitchen isn’t too warm, as this can make the chocolate harder to work with and prone to melting while spreading or handling. A cool, dry environment is ideal.
- Even Spreading is Key: The thickness of your chocolate layer directly impacts the final shards. Aim for a layer that is consistently thin for delicate, uniform breakage. If it’s too thick, the shards might be chunky; too thin, and they might be overly fragile.
- Patience During Chilling: Do not rush the chilling process. Two hours is a minimum to ensure the chocolate is completely firm and stable. If it’s not thoroughly chilled, it won’t break cleanly into distinct shards.
- Handle with Care (and Gloves!): Chocolate melts quickly from body heat. When transferring or arranging shards, try to handle them as little as possible, touching only the edges. For large batches or delicate work, consider wearing food-safe gloves to prevent fingerprints and melting.
- Experiment with Chocolate Types: While semi-sweet is classic, don’t hesitate to try milk chocolate for a sweeter profile or dark chocolate for a more intense flavor. White chocolate shards also create a beautiful contrast, especially on darker desserts.
- Add Some Flair: Before placing the second sheet of wax paper, you can sprinkle finely chopped nuts, sea salt flakes, or colorful sprinkles onto the wet chocolate for added texture and visual interest.
Versatile Serving Suggestions
Chocolate shards are incredibly versatile and can enhance almost any dessert. Here are some ideas to get your creativity flowing:
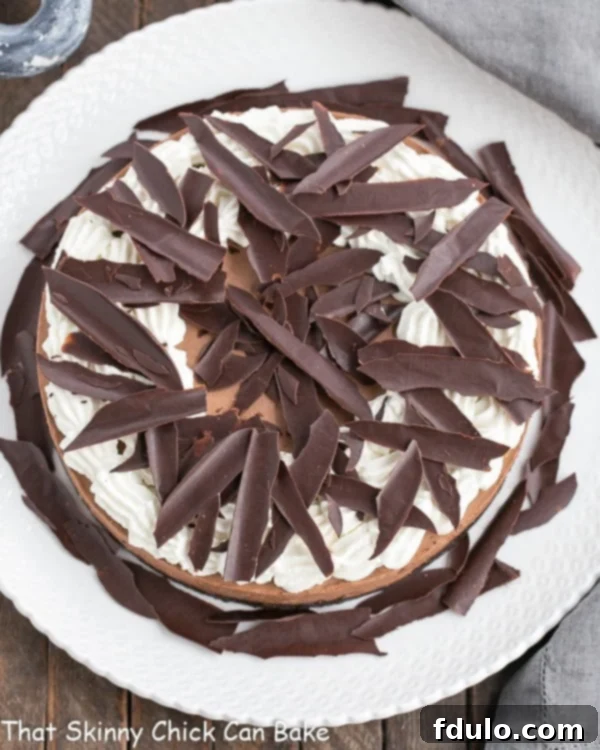
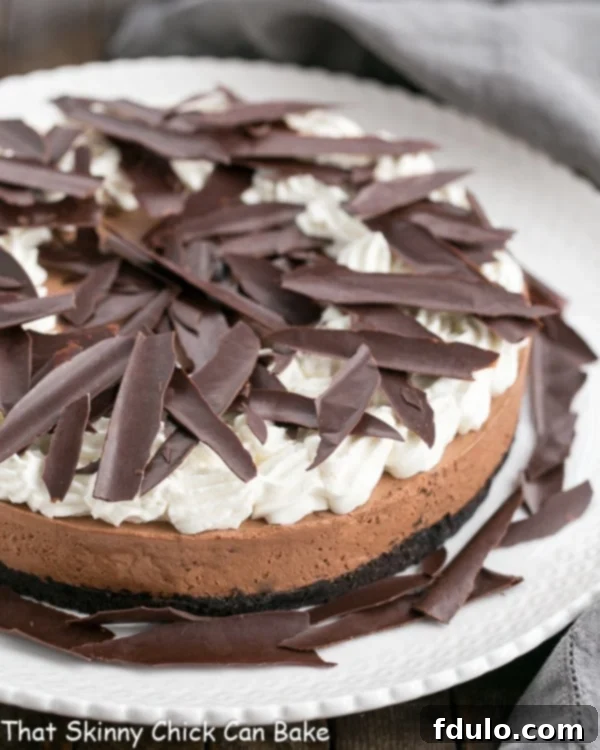
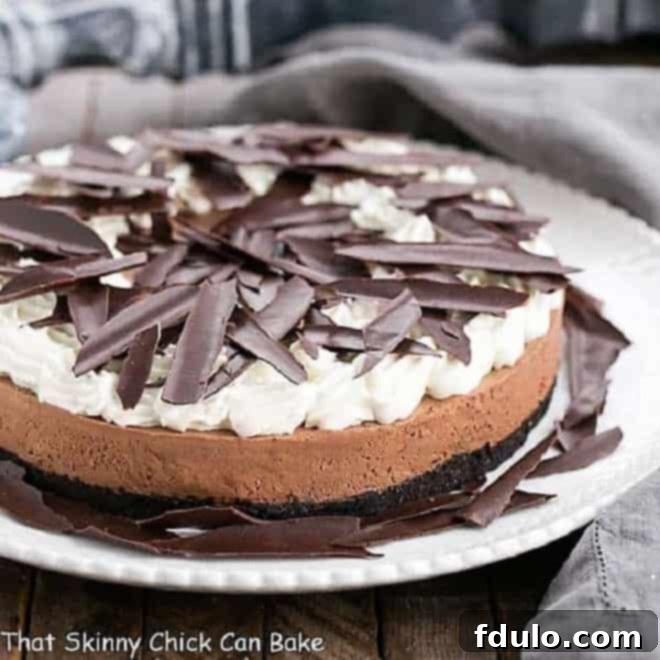
- Cakes: Adorn the top and sides of layer cakes, sheet cakes, or bundt cakes. They add architectural interest and a sophisticated finish to cakes like our featured Easy Chocolate Mousse Tart.
- Cheesecakes: Sprinkle them generously over a creamy cheesecake for an elegant crunch.
- Tarts & Pies: Use them as a stunning topping for chocolate tarts, fruit tarts, or even classic Chocolate Velvet Pie.
- Cupcakes & Muffins: Insert a shard into the frosting of cupcakes for a mini masterpiece.
- Ice Cream & Puddings: A fantastic garnish for scoops of ice cream, parfaits, mousses, or creamy puddings.
- Hot Beverages: A few shards melting into a mug of hot chocolate or coffee create an indulgent experience.
- Doughnuts & Pastries: Add a gourmet touch to glazed doughnuts, croissants, or other baked goods.
Troubleshooting Common Issues
- Chocolate too soft/sticky after chilling: This usually means the chocolate wasn’t chilled long enough, or your kitchen is too warm. Return it to the fridge for another 30-60 minutes, or consider a quick stint in the freezer (5-10 minutes) if you’re in a hurry.
- Chocolate not breaking cleanly: Again, this points to insufficient chilling. Ensure your chocolate is completely firm. If it bends instead of snaps, it needs more time in the cold.
- Shards melting in your hands: Work quickly! Use an offset spatula or a fork to transfer shards, minimizing direct hand contact. Wearing thin gloves can also help.
Frequently Asked Questions (FAQ)
Can I use chocolate chips instead of a chocolate bar?
While technically possible, it is not recommended for the best results. Chocolate chips contain less cocoa butter and often have stabilizers that make them retain their shape, even when melted. This can result in a thicker, less smooth spread and a duller finish, lacking the crisp snap and shine you get from a quality chocolate bar. If you must use chips, ensure they are high quality and melt them very gently.
Will parchment paper work instead of wax paper?
Parchment paper can sometimes work, but it’s less reliable than wax paper. Wax paper has a natural non-stick quality that parchment paper may lack, especially if your parchment isn’t siliconized. If you only have parchment paper, you might want to do a small test batch first to ensure the chocolate releases cleanly.
How long do chocolate shards last, and how should I store them?
Chocolate shards, when stored properly, can last for several weeks. Keep them in an airtight container at room temperature in a cool, dry place, away from direct sunlight or strong odors. If your home is very warm, the refrigerator is acceptable, but be aware that condensation can sometimes form, leading to a dull “sugar bloom” on the chocolate’s surface. This doesn’t affect flavor but can alter appearance.
Can I make chocolate shards ahead of time?
Absolutely! This is one of their biggest advantages. You can prepare a batch days or even a week in advance, store them as described above, and have them ready to go for last-minute decorating needs. This makes entertaining much easier.

Chocolate Shards
An easy way to add a special touch to your chocolate desserts.
5 minutes
1 minute
6 minutes
12 (Enough for one large dessert)
Rating: 4.8 stars based on 24 reviews.
Ingredients
- 4 ounces semi-sweet chocolate, chopped (We recommend a 4 ounce Ghirardelli bar for best results instead of chocolate chips)
Instructions
- Gently melt the chocolate in the microwave, stopping and stirring at 20-second intervals until smooth.
- Place a 16-inch sheet of waxed paper on a flat surface. With a small offset spatula, spread the melted chocolate evenly over the waxed paper, leaving the edges free of chocolate.
- Top with a second sheet of waxed paper and very gently smooth the top to ensure an even layer and remove air bubbles.
- Roll the layered wax paper from short side to short side, creating a tight chocolate log. Carefully place the roll on a baking sheet.
- Chill in the refrigerator for at least 2 hours, or until completely firm.
- To make shards, hold onto one short end of the roll and unroll with your other hand. The chilled chocolate should naturally break into elegant pieces.
- Remove the top sheet of waxed paper and carefully (so as not to melt chocolate) move the shards to the top of your dessert or into an airtight container for storage.
- Keep the shards cool and dry if not used immediately to maintain their crispness and shine.
Notes
Total time does not include the 2-hour chilling time required for the chocolate to set properly.
Watch the Video: How to Make Chocolate Shards
See just how easy this process is by watching the quick tutorial below:
Click to watch “How to Make Chocolate Shards” (Video Duration: 33 seconds)
Recommended Products
As an Amazon Associate and member of other affiliate programs, I earn from qualifying purchases.
- Small Offset Spatula
- Wax Paper
- Ghirardelli Semi-sweet Chocolate Bar
Nutrition Information:
Yield: 12 servings
Serving Size: 1/12 of batch
Amount Per Serving:
- Calories: 54
- Total Fat: 3g
- Saturated Fat: 2g
- Trans Fat: 0g
- Unsaturated Fat: 1g
- Cholesterol: 0mg
- Sodium: 1mg
- Carbohydrates: 7g
- Fiber: 1g
- Sugar: 6g
- Protein: 0g
How much did you love this recipe?
Please leave a comment on the blog or share a photo on Pinterest!
Explore More Delicious Chocolate Recipes
If you loved creating these chocolate shards, you’ll surely enjoy these other chocolate-inspired delights:
- Easy Chocolate Mousse Tart: The perfect rich and decadent base for showcasing your freshly made chocolate shards, as seen in the photos!
- Chocolate Velvet Pie: A smooth, creamy pie with a delightful meringue crust that would be beautifully contrasted by crisp shards.
- Mocha Chocolate Chip Cookie Icebox Cake: A no-bake marvel that gets even better with a sprinkle of homemade chocolate garnish.
- Discover more Homemade Chocolate Recipes for every occasion.
Conclusion: Your Journey to Effortless Dessert Decoration Starts Here
Gone are the days of wrestling with melting chocolate bars or struggling to create perfect curls. Chocolate shards offer a superior alternative that is not only incredibly easy and practically foolproof but also delivers an impressive, professional-looking finish to all your desserts. With just one ingredient and a few simple steps, you can transform any sweet treat into a gourmet delight, proving that elegant presentation doesn’t have to be complicated.
So, gather your chocolate, grab some wax paper, and get ready to impress. Your desserts—and your guests—will thank you!
