The Ultimate Guide to Homemade Pizza Dough: Crafting the Perfect Crust from Scratch
There’s an undeniable magic in the aroma of freshly baked pizza wafting through your home. And the secret to that magic? A truly exceptional pizza dough. Forget store-bought shortcuts; using a simple 5-ingredient homemade pizza dough isn’t just easy, it transforms your pizza into a culinary masterpiece that rivals your favorite pizzeria. This comprehensive guide will walk you through every step of creating a versatile, flavorful pizza crust, perfect for any topping combination you can dream of. Get your family involved, especially the kids, and turn pizza night into an unforgettable, hands-on cooking adventure.

Why Homemade Pizza Dough Reigns Supreme
In a world of convenience, choosing to make your pizza dough from scratch might seem like an extra step, but the rewards are immense. The taste difference alone is reason enough. Freshly made dough boasts a superior flavor profile and an incredible texture – crispy on the outside, delightfully chewy on the inside. Beyond taste, crafting your own dough gives you complete control over the ingredients, allowing you to avoid preservatives and tailor it to your dietary preferences. It’s also remarkably cost-effective, turning a potentially expensive takeout meal into an affordable family feast. Plus, there’s an immense sense of satisfaction that comes from creating something so delicious from basic components, an experience that mass-produced alternatives simply cannot replicate.
The Five Essential Ingredients for Flawless Pizza Dough
The beauty of a classic pizza dough lies in its simplicity. Just a few humble ingredients come together to create something extraordinary. Understanding the role of each component is key to achieving pizza perfection.
- Warm Water (105-115 degrees F): This is the crucial activator for your yeast. Water that’s too cold won’t awaken the yeast, while water that’s too hot can kill it, leading to a flat, dense crust. Using a thermometer ensures you hit that sweet spot.
- Active Dry Yeast: The living organism responsible for the dough’s rise and distinctive yeasty flavor. Ensure your yeast is fresh and active. You can use active dry or instant yeast; active dry typically requires proofing, while instant can often be mixed directly with dry ingredients.
- Honey (or Sugar): A small amount of honey (or sugar) provides initial food for the yeast, helping it to activate and multiply, leading to a more robust rise and contributing to a beautiful golden-brown crust.
- Olive Oil: Extra virgin olive oil adds richness, flavor, and helps to tenderize the dough, making it more pliable and easier to work with. It also contributes to the desired crispness of the final crust.
- Unbleached Bread Flour (or All-Purpose Flour): Bread flour, with its higher protein content, develops stronger gluten, resulting in a chewier, more structured crust—ideal for handling toppings without tearing. All-purpose flour can also be used for a slightly softer crust.
- Salt: Essential for flavor, salt not only enhances the taste of the dough itself but also balances the sweetness from the honey. It also helps to regulate yeast activity, ensuring a steady and controlled rise.
Mastering the Art of Pizza Dough: Step-by-Step Instructions
Making pizza dough from scratch is a journey, not a race. Each step contributes to the final texture and flavor. Follow these detailed instructions for a truly remarkable homemade crust.
Activating Your Yeast: The Foundation of a Great Dough
The first and most critical step is ensuring your yeast is alive and ready to work its magic. Even if the package date looks good, a quick test can save you from a failed batch of dough.
- First, check the expiration date on your yeast packaging. If it’s past its prime, it’s best to get a new packet.
- If you have a jar of active dry yeast or are unsure of its potency, combine about ½ cup of your warm water (from the recipe) with a pinch of honey or sugar and your yeast in a small bowl. Let it sit for 5-10 minutes. If the mixture becomes foamy and bubbly, your yeast is active and good to go. If not, discard it and start with fresh yeast.
- PRO-Tip: Did you know you can store yeast in the freezer? This extends its shelf life significantly, keeping it viable for years! Always use room temperature yeast for best results, so remove it from the freezer a little while before you plan to use it.
Mixing and Kneading: Building the Dough’s Structure
Kneading is where the magic of gluten development happens, creating the elastic structure that gives pizza its characteristic chew.
- In the bowl of a stand mixer, combine your flour and salt. Then, pour in the activated yeast mixture (water, honey, yeast, and olive oil).
- Using the paddle attachment, mix on low speed until the ingredients just come together.
- Switch to the dough hook attachment. Knead the dough on low to medium-low speed for about 8-10 minutes. If kneading by hand, vigorously fold and press the dough for 10-12 minutes on a lightly floured surface.
- The dough should transform from shaggy to smooth, elastic, and slightly sticky to the touch. It should pass the “windowpane test” – if you can stretch a small piece thin enough to see light through it without tearing, your gluten is well developed.
The All-Important Proof: Giving Your Dough Time to Shine
Proofing allows the yeast to ferment, producing carbon dioxide that creates air pockets, and developing complex flavors in the dough.
- Lightly oil a clean mixing bowl, add your kneaded dough, and turn it once to coat all sides with oil. This prevents it from drying out.
- Cover the bowl tightly with plastic wrap or a clean kitchen towel.
- Place the dough in a warm spot to rise. An ideal temperature is around 85 degrees F (30 degrees C). This could be a slightly warm oven (turned off), near a sunny window, or on top of a warm appliance.
- Let it rise until doubled in size, which typically takes about an hour.
- For the best flavor development, consider an overnight cold rise: After coating the dough in oil, cover it tightly and refrigerate it for 12-24 hours. The slow, cool fermentation produces more flavorful byproducts, resulting in a more complex and nuanced crust. If using this method, remember to bring the dough to room temperature for about an hour before shaping.
Shaping Your Masterpiece: From Ball to Base
Once your dough has proofed, it’s time to transform it into a pizza base. Unlike most yeast breads, pizza dough usually only requires one proofing cycle.
- Gently punch the dough down to release the air. If you’ve done an overnight rise, divide the dough in half at this point (this recipe yields two pizza crusts).
- On a lightly floured surface or a piece of parchment paper, begin to shape the dough. You can start by gently stretching it on the backs of your hands, allowing gravity to do some of the work, and using your thumbs and knuckles to rotate and expand it.
- Alternatively, place the dough directly on parchment paper and use your fingertips to gently press and stretch it outwards from the center, working towards a desired circular or rectangular shape. Avoid using a rolling pin excessively, as it can press out too much of the air and result in a less airy crust.
Preparing for Perfection: Preheating Your Oven and Stone
High heat is crucial for a perfectly crisp pizza crust. A preheated pizza stone or steel is your best friend here.
- Place your pizza stone or heavy baking sheet in the oven and preheat to the highest temperature your oven allows, typically 500-550ºF (260-290ºC).
- Allow the oven and the stone to preheat for at least 30-60 minutes. This ensures the stone is thoroughly heated and will deliver that essential blast of heat to the bottom of your crust, creating a beautifully crisp base.
Topping Your Pizza: A Symphony of Flavors
Now for the fun part! While the classic Margherita is a fantastic choice, feel free to experiment with your favorite toppings.
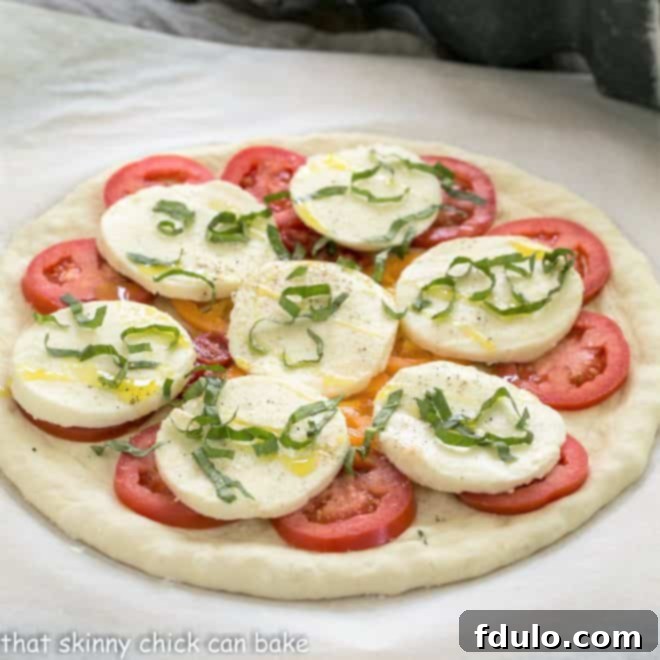
- For a classic homemade pizza Margherita, I use sliced Roma tomatoes, which I always drain on paper toweling to remove excess moisture. This prevents a soggy crust. Thinly sliced fresh mozzarella, a generous chiffonade of fresh basil, a drizzle of extra virgin olive oil, and a light sprinkling of kosher salt and black pepper complete this simple yet elegant pizza.
- PRO-Tip: Do not overload your pizza with toppings. Less is often more when it comes to pizza, as too many ingredients can weigh down the crust and prevent it from crisping properly. Additionally, ensure any soft or watery ingredients, like tomatoes, mushrooms, or spinach, are free of excess liquid. If they’re too wet, they will make your pizza crust gummy.

Baking to Golden Perfection: The Final Act
The moment of truth! Get ready for that irresistible aroma.
- Carefully slide your topped pizza, still on its parchment paper, onto the preheated pizza stone using a pizza peel. The parchment paper makes transfer much easier and cleaner.
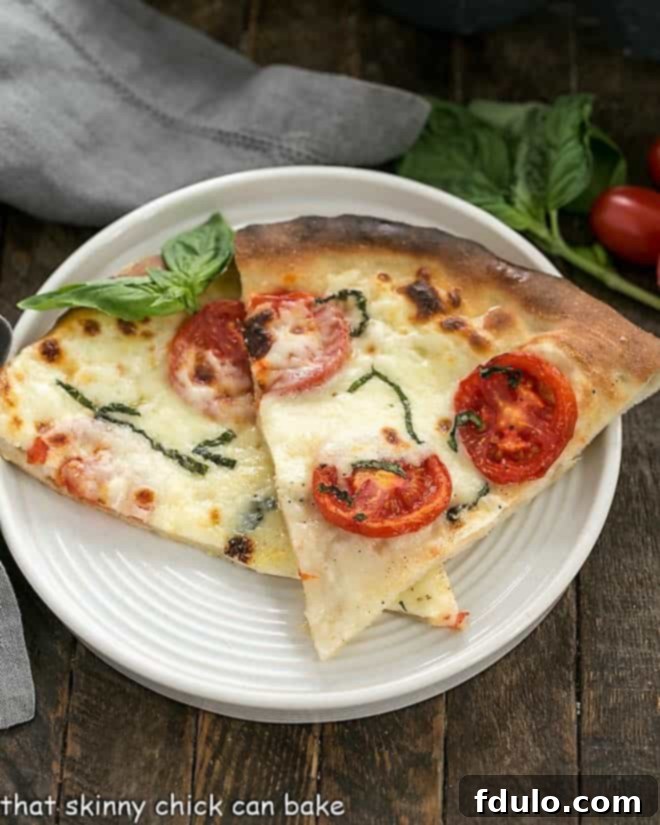
- Bake for 8-15 minutes, or until the crust is golden brown, puffed, and the cheese is melted and bubbling with a few caramelized spots. Keep a close eye on it, as oven temperatures can vary.
The Grand Finale: Resting and Serving
Almost there – just one more step for the perfect slice.
- Using the pizza peel, carefully remove the hot pizza (still on the parchment) and transfer it to a wire cooling rack. This allows air to circulate around the bottom of the crust, preventing it from steaming and becoming soggy.
- Let the pizza rest for 2-3 minutes before slicing. This helps the cheese to set and prevents toppings from sliding off. Slice, serve, and enjoy your simple, yummy meatless meal, made extra special by your homemade pizza dough!
Pro Tips for Pizza Dough Success
Elevate your pizza-making game with these expert recommendations:
- Yeast Storage is Key: As mentioned, freezing yeast dramatically extends its life. Always store opened packages in an airtight container in the freezer.
- Perfect Proofing Temperature: While 85°F (30°C) is ideal for a quicker rise, remember that a cooler, slower rise (like overnight in the fridge) builds more flavor. Experiment to find your preferred balance.
- Don’t Overload Toppings: A common mistake is piling on too many ingredients. This weighs down the dough, inhibits proper cooking, and can lead to a soggy center. Aim for a balanced distribution.
- Manage Moisture: Ingredients like fresh tomatoes, spinach, or mushrooms can release a lot of water during baking. Pre-sautéing watery vegetables or draining sliced tomatoes on paper towels can make a huge difference in crust crispness.
- High Hydration for Chewiness: While this recipe is well-balanced, for an even chewier, more airy crust, you can sometimes slightly increase the water content (a tablespoon or two) in the dough, if it feels too stiff.
- Weigh Your Ingredients: For consistent results, especially with flour, using a kitchen scale is far more accurate than measuring cups, which can vary wildly.
- Batch Make and Freeze Dough: This dough freezes beautifully! After the first proof, divide the dough, lightly oil each ball, and place them in individual freezer-safe bags. Thaw overnight in the fridge before bringing to room temperature and shaping.
Beyond Margherita: Creative Pizza Topping Inspirations
While the classic Margherita is a timeless favorite, your homemade dough is a canvas for endless culinary creativity. Here are a few ideas to spark your imagination:
- BLT Pizza: A unique twist with crispy bacon, fresh lettuce, and ripe tomatoes (added after baking).
- Homemade Sausage and Mushroom Pizza: A hearty option with savory crumbled sausage and earthy mushrooms.
- Easy Fig, Goat Cheese, and Prosciutto Pizza: A sophisticated blend of sweet figs, tangy goat cheese, and salty prosciutto (added after baking).
- Spicy Chicken BBQ Pizza: Shredded chicken tossed in barbecue sauce, red onion, and a sprinkle of cilantro.
- Mediterranean Veggie Pizza: Artichoke hearts, Kalamata olives, feta cheese, and roasted red peppers.
Storing Your Homemade Pizza Dough
One of the great advantages of making dough from scratch is its versatility in storage. If you make extra, you can easily save it for future pizza nights.
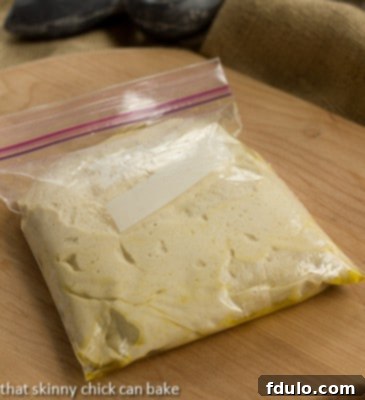
- Refrigeration: After the first rise, you can punch down the dough, lightly oil it, place it in an airtight container or a Ziploc bag, and refrigerate it for up to 3 days. This actually enhances the flavor!
- Freezing: For longer storage, divide the dough into individual portions after the first rise. Lightly oil each ball, place them in separate freezer-safe bags, and freeze for up to 2-3 months. Thaw frozen dough in the refrigerator overnight, then bring to room temperature for about an hour before shaping and baking.

More Pizza Recipes You’ll Love:
- BLT Pizza from Never Enough Thyme
- Pizza Margherita Recipe
- Homemade Sausage and Mushroom Pizza
- Easy Fig, Goat Cheese and Prosciutto Pizza
- Easy Pizza Casserole
- Fresh Fruit Pizza
- Apple Pie Pizza
- More Yeast Bread Recipes

Classic Pizza Dough
20 minutes
1 hour
1 hour 20 minutes
2 pizza crusts
An easy recipe for a classic pizza dough made with yeast! Now your homemade pizza will taste like it came from a pizza parlor!
Ingredients
- 1 ½ cups warm water, 105-115 degrees (use a thermometer)
- 3 tablespoons honey
- 2 ¼ teaspoons active dry yeast (one 1/4 ounce packet)
- 3 tablespoons olive oil (plus more to coat the bowl for the dough)
- 4 cups unbleached bread flour, preferred or all-purpose flour
- 1 tablespoon salt
Instructions
- Combine water, honey, yeast, and olive oil. Let rest for about 5-10 minutes; the mixture should become foamy. Mix flour and salt in the bowl of a stand mixer fit with the dough hook. Knead on low speed (refer to your manufacturer’s instructions to protect your motor) or knead by hand for 10 minutes. The dough should be elastic and slightly sticky.
- Oil a mixing bowl, add the dough, then turn to coat the dough with oil. Cover with plastic wrap and let rise in a warm place until doubled in size, about an hour. Alternatively, for improved flavor development, place it in the fridge for an overnight rise. If using the overnight method, bring the dough to room temperature before proceeding.
- Punch the dough down and divide it in half. Pat out onto a pizza pan or parchment paper, add your chosen toppings, and bake as directed in your pizza recipe.
Notes
Recipe adapted from Cuisine at Home.
This recipe makes enough for 2 pizzas.
Recommended Products
As an Amazon Associate and member of other affiliate programs, I earn from qualifying purchases.
- Pizza Peel
- Reynolds Cookie Baking Sheets Non-Stick Parchment Paper, 25 Sheet, 4 Count
- Pizza Cutter
Nutrition Information:
Yield:
8
Serving Size:
1 Servings
Amount Per Serving:
Calories: 377Total Fat: 6gSaturated Fat: 1gTrans Fat: 0gUnsaturated Fat: 5gCholesterol: 0mgSodium: 798mgCarbohydrates: 69gFiber: 2gSugar: 7gProtein: 10g
HOW MUCH DID YOU LOVE THIS RECIPE?
Please leave a comment on the blog or share a photo on Pinterest
