Ultimate Chocolate Chip Oreo Cookie Brownies: A Triple-Layered Dessert Dream!
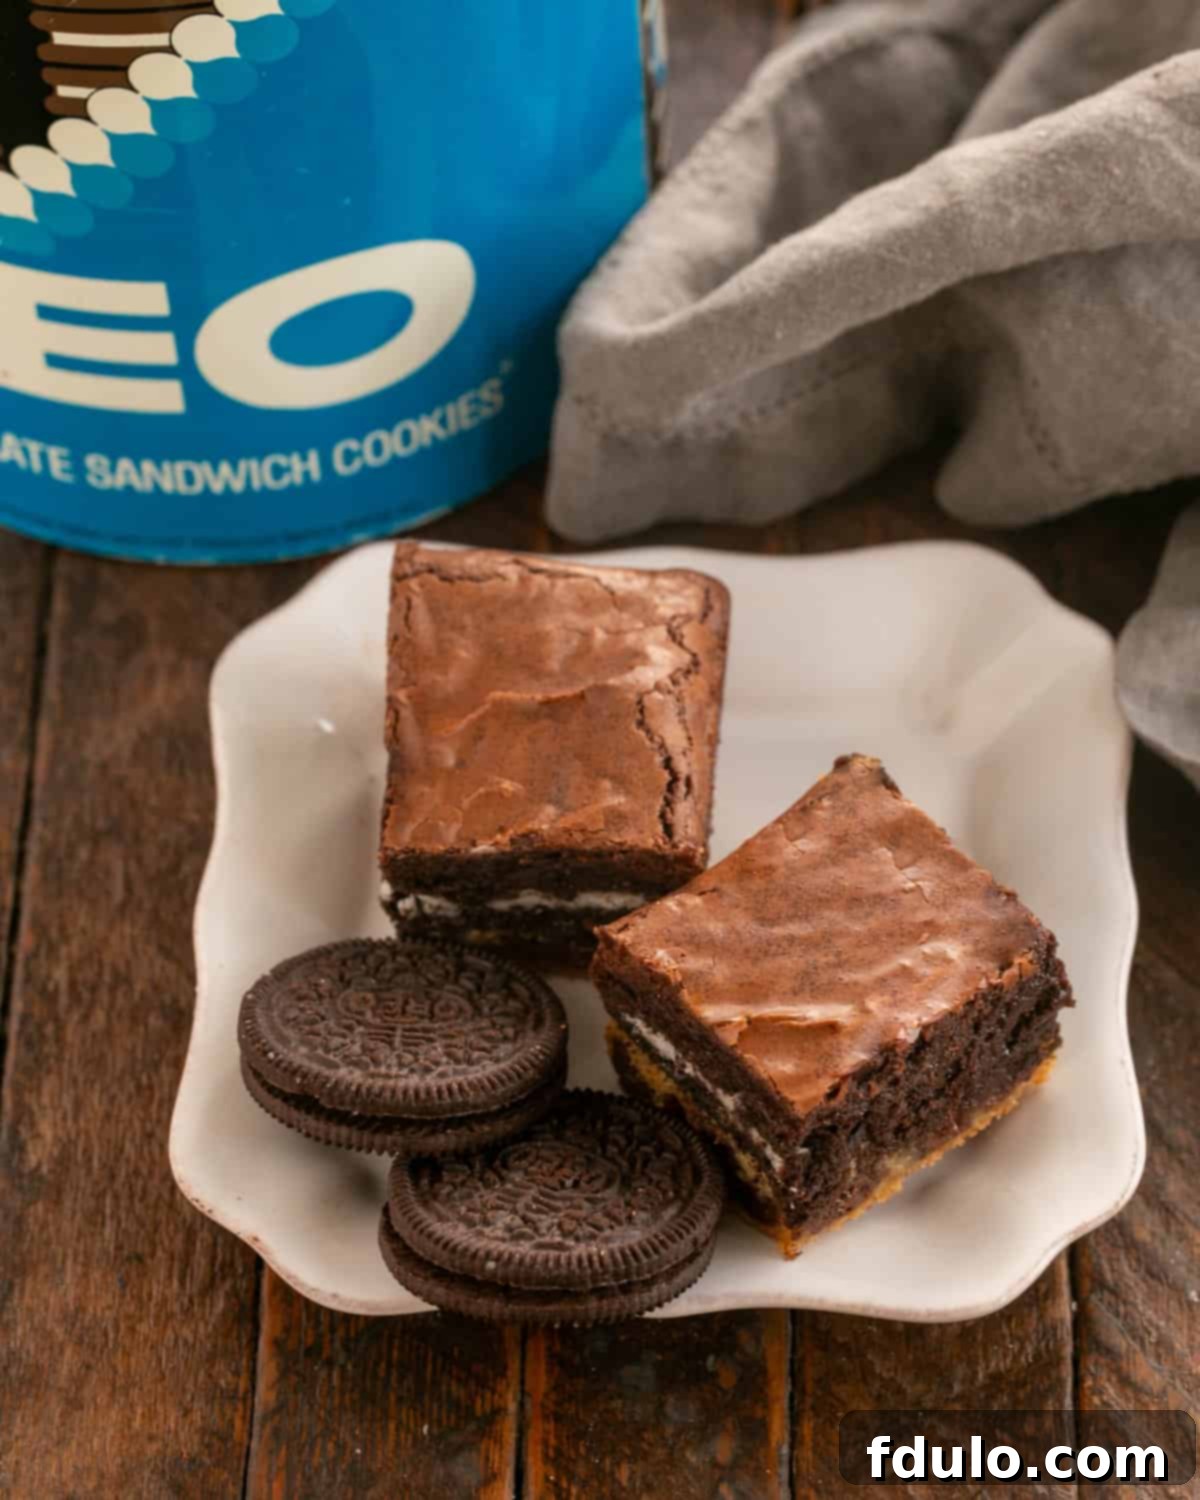
Chocolate Chip Oreo Cookie Brownies are the ultimate dessert mashup, bringing together three beloved treats into one incredibly decadent creation! This ingenious recipe is your perfect solution when you’re torn between baking a classic fudgy brownie, a chewy chocolate chip cookie, or simply indulging in the iconic crunch of an Oreo. Why choose when you can have it all?
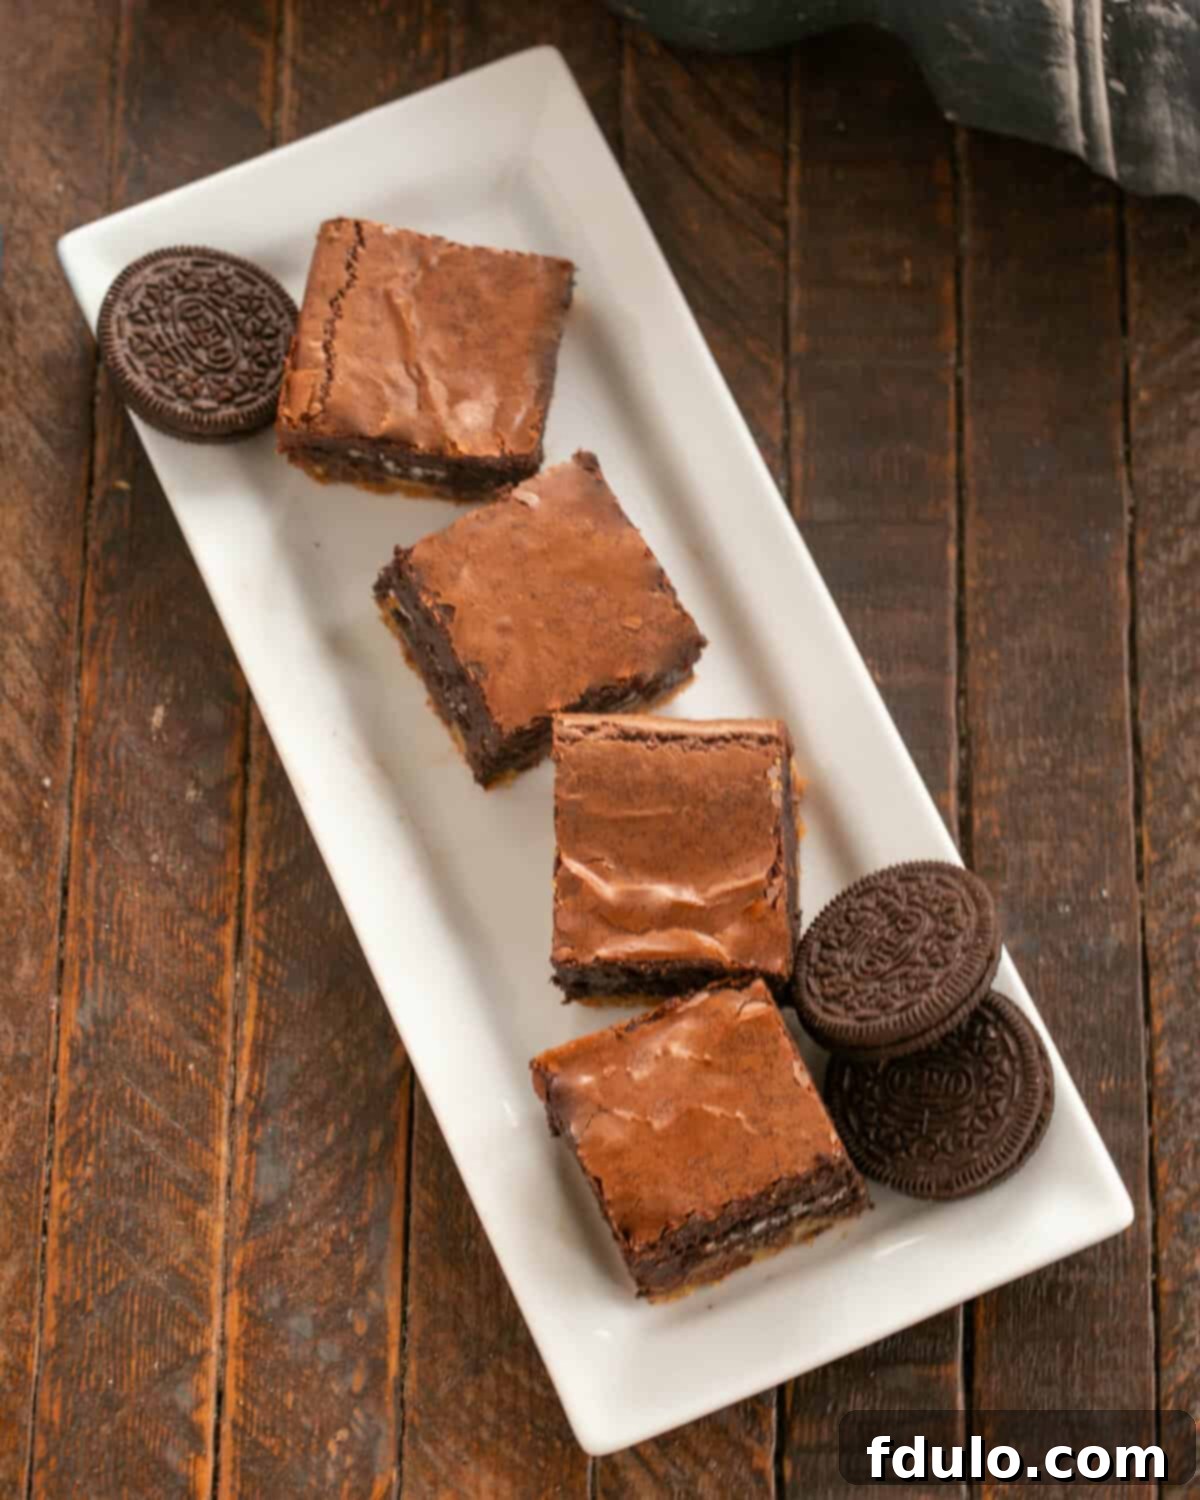
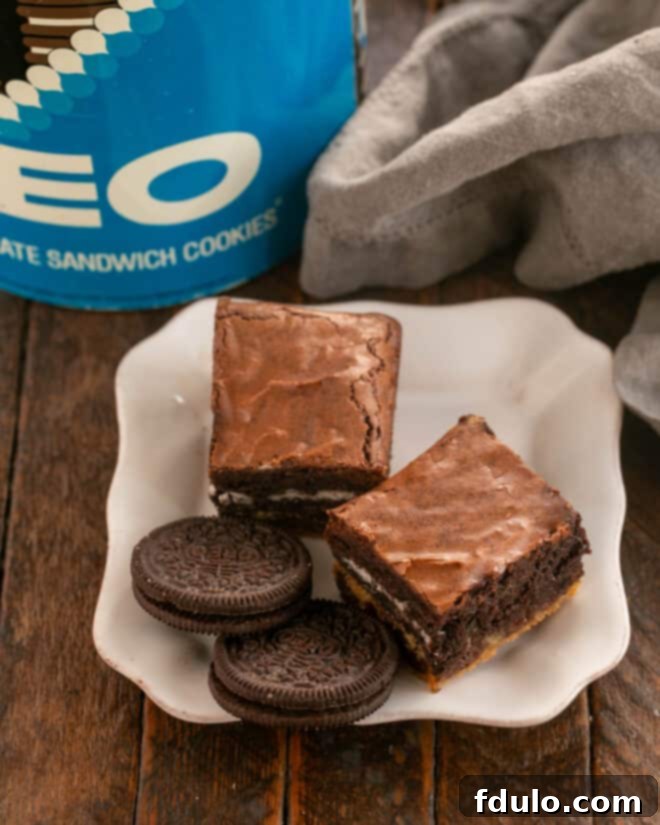
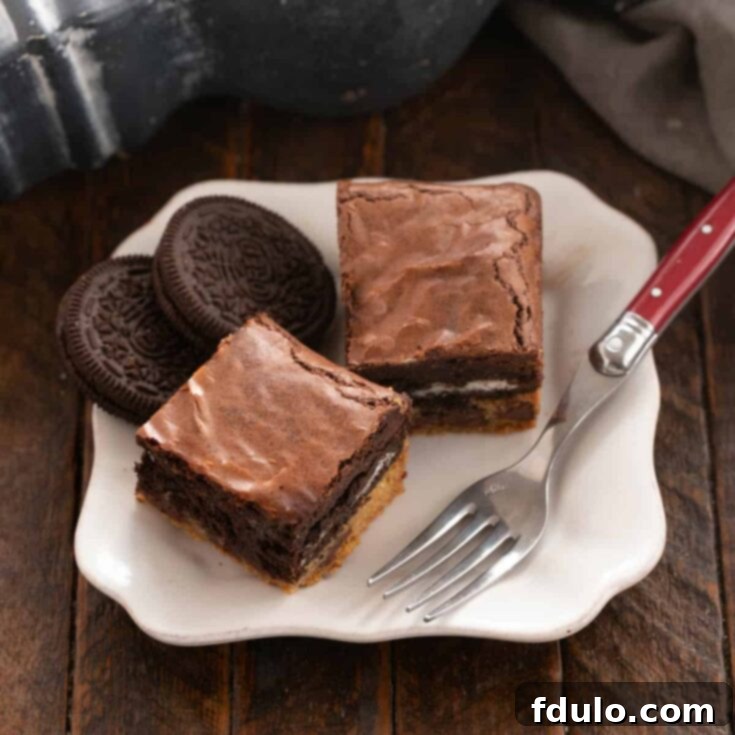
Imagine sinking your teeth into a rich, fudgy brownie, only to discover a delightful surprise layer of crisp Oreo cookies, followed by a soft, warm chocolate chip cookie base. Each bite is pure bliss, delivering an explosion of textures and flavors that will satisfy even the most intense sweet cravings. These brownies aren’t just a dessert; they’re an experience, a symphony of chocolatey goodness that promises to be a showstopper at any gathering or a luxurious treat for yourself.
Why You Must Bake These Irresistible Layered Brownies
If you’re still contemplating whether to embark on this baking adventure, let us convince you why these Chocolate Chip Oreo Cookie Brownies are an absolute must-try:
- The Perfect Dessert Trifecta: This recipe brilliantly combines the best elements of fudgy brownies, classic chocolate chip cookies, and everyone’s favorite sandwich cookie – Oreos. It’s a harmonious blend of chewy, crisp, and gooey textures in every single bite.
- A Unique Twist on Classics: For those who adore traditional brownies, this recipe offers an exciting and innovative upgrade. It takes a beloved classic and elevates it to extraordinary new heights, making it anything but ordinary.
- Unleash Your Inner Cookie Monster: If you’re a devout fan of chocolate chip cookies, prepare to be amazed. The soft, buttery cookie dough base provides a delightful foundation, perfectly complementing the rich brownie layer above.
- The Oreo Lover’s Dream: For anyone who can’t get enough of Oreos – much like my husband, who insists on always having a package in the pantry – this dessert is tailor-made. Even if you’re like me and don’t typically reach for an Oreo on its own, you’ll find their crunch and chocolatey cream filling provide a surprisingly delicious contrast within these brownies.
- An Unforgettable Crowd-Pleaser: Looking for a dessert that will truly impress? These layered brownies are guaranteed to be the star of any potluck, party, or family gathering. Their unique composition and irresistible flavor make them an instant hit, leaving everyone asking for the recipe.
- Satisfy Every Craving: Sweet, salty, chewy, fudgy, crunchy – these brownies hit every note. They’re designed to quell all your dessert cravings in one glorious package.
A Deep Dive into Key Ingredients for Perfect Oreo Cookie Brownies
Crafting the perfect Chocolate Chip Oreo Cookie Brownies begins with understanding the role of each ingredient. Using high-quality components and paying attention to small details will elevate your baking from good to absolutely phenomenal.
- Kitchen Staples: These essential pantry items form the backbone of both your brownie and cookie dough layers.
- Butter: Use unsalted butter to control the salt content. For the cookie dough, ensuring your butter is at room temperature is crucial for a smooth, creamy texture when beaten with sugars, leading to a perfectly chewy cookie.
- Sugar & Brown Sugar: Granulated sugar provides crispness and sweetness, while brown sugar adds moisture, chewiness, and a subtle molasses flavor, especially important for that classic chocolate chip cookie texture.
- Eggs: Large eggs provide structure, richness, and bind the ingredients together. For best results, use them at room temperature; they incorporate more smoothly into batters, preventing curdling and promoting an even texture.
- All-Purpose Flour: The foundation of your baked goods. Spooning flour into your measuring cup and leveling it (rather than scooping) prevents over-measurement, which can lead to dry, dense brownies and cookies.
- Salt: A pinch of salt is vital. It doesn’t just add flavor; it balances the sweetness and enhances the chocolate notes, making the overall dessert taste richer and more complex.
- Baking Soda: This leavening agent reacts with acidic ingredients (like cocoa powder) to create carbon dioxide, giving your brownies and cookies a tender crumb and helping them rise.
- Cocoa Powder: The choice of cocoa significantly impacts the brownie’s flavor. I prefer a high-quality brand like Ghirardelli for its deep, rich chocolate flavor, but Hershey’s is a reliable and widely available option. For an even darker, more intense chocolate profile, consider using Dutch-processed cocoa powder.
- Vanilla Extract: Real vanilla extract is a non-negotiable. Brands like Nielsen-Massey offer superb quality. Avoid imitation vanilla, as it often has an artificial, alcohol-heavy taste that can detract from the overall flavor of your brownies. Vanilla enhances the chocolate and brings out the warmth in your dessert.
- Regular Oreos: While many Oreo flavors exist, regular Oreos are ideal here. Their classic chocolate wafer and creamy filling provide the perfect contrast in texture and flavor. Don’t hesitate to cut some in half to ensure a complete, even layer over the chocolate chip cookie dough – this creates a beautiful, continuous Oreo experience in every slice.
- Semisweet Chocolate Chips: I find Ghirardelli semisweet chocolate chips melt beautifully and offer a balanced sweetness. Nestles is another excellent and accessible choice. The quality of your chocolate chips will directly impact the melted chocolate pockets in your cookie layer.
- Baking Powder: Often confused with baking soda, baking powder is a different leavening agent that contains both an acid and a base. Its freshness is crucial for proper leavening. Always check the expiration date on your tin. A quick freshness test: drop a spoonful into hot water; if it bubbles vigorously, it’s still active and ready to make your desserts light and airy.
Expert Tips & Tricks for Flawless Oreo Brownies
Achieving perfectly layered, fudgy, and delicious Oreo Cookie Brownies is easier than you think with these expert tips:
- PRO-Tip: The Magic of Non-Stick Foil: Lining your baking pan with non-stick foil (or parchment paper with overhangs) is an absolute game-changer. This simple step ensures that once your brownies are cool, you can effortlessly lift the entire slab out of the pan onto a cutting board. This allows for clean, precise cuts without damaging your beautiful layers or the pan itself. Plus, cleanup is a breeze!
- Room Temperature Eggs are Key: Always remember to bring your eggs to room temperature before incorporating them into your batter. Room temperature eggs emulsify more effectively with other ingredients, creating a smoother, more uniform batter and a more consistent texture in your final product. Plan ahead by taking them out of the fridge about 30 minutes before you start baking.
- Measure Flour Accurately: Precision in measuring flour is vital for the desired texture. Instead of scooping flour directly with your measuring cup (which can compact it and lead to too much flour), spoon the flour into the cup. Then, use an offset spatula or a straight edge (like the back of a knife) to level off the excess. This method, often called “spoon and level,” is the most accurate way to measure flour without using a digital kitchen scale.
- PRO-Tip: Gentle Mixing for Cookie Dough: When mixing your chocolate chip cookie dough, especially if using a stand mixer, always opt for the lowest speed setting. Over-mixing introduces too much air into the batter, which can result in a cake-like cookie layer rather than the desired soft, chewy texture. If the dough isn’t too stiff, a wooden spoon is often the best tool for mixing by hand, giving you more control over the consistency.
- Leveling the Cookie Dough Layer: After pressing the cookie dough into the bottom of your prepared pan, use an offset spatula to gently spread and level it. Taking the time to create an even layer now will ensure that your brownies bake uniformly and that each slice has a beautifully balanced cookie base.
- Chocolate Chip Versatility: While semisweet chocolate chips are a classic choice and offer a balanced flavor, feel free to customize! If you prefer a bolder, less sweet profile, bittersweet chocolate chips are an excellent substitute. For a sweeter touch, milk chocolate chips could also work, though they might make the overall dessert very rich. You can also experiment with white chocolate chips or a mix of different types for added complexity.
- Don’t Overbake Your Brownies: Overbaking is the arch-nemesis of fudgy brownies. Start checking for doneness around the minimum bake time. A toothpick inserted into the center should come out with moist crumbs, but not wet batter. If it comes out completely clean, your brownies are likely overbaked and will be dry.
- Patience During Cooling: This is perhaps the hardest tip to follow, but it’s crucial! Allow your brownies to cool completely for at least a few hours, or even better, overnight. Cooling allows the brownies to set, firm up, and become truly fudgy. Cutting warm brownies will result in a crumbly mess. Pop them in the fridge for 30 minutes before cutting for extra clean slices.
How to Craft Your Triple-Layered Chocolate Chip Oreo Cookie Brownies: Step-by-Step Guide
Get ready to create a masterpiece! Follow these detailed steps to assemble your incredible Chocolate Chip Oreo Cookie Brownies. Each stage is designed to ensure a perfect balance of flavor and texture in every bite.
Part 1: Preparing the Fudgy Brownie Batter
The foundation of our brownies begins with a rich, chocolatey batter that promises an incredibly fudgy texture.
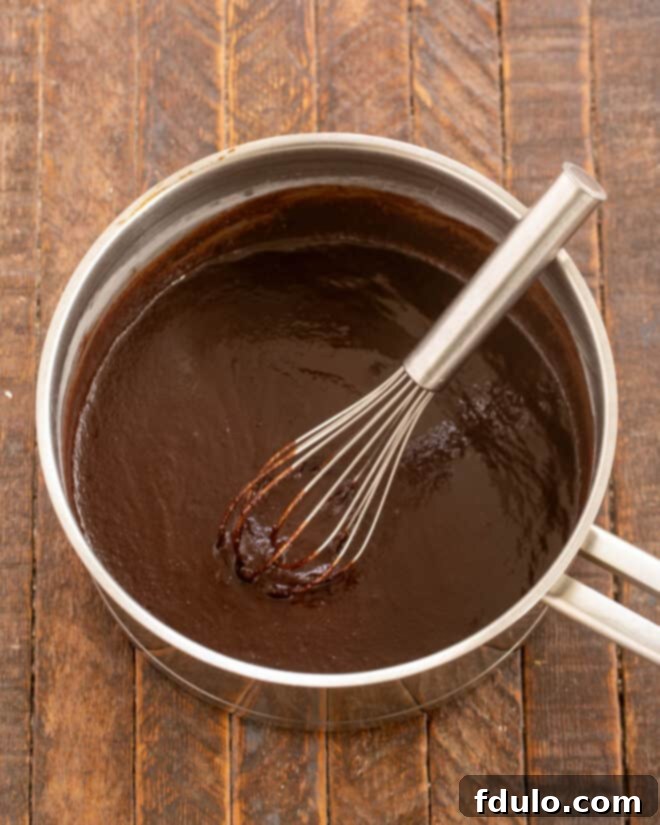
- Melt Butter and Combine with Cocoa & Sugar: In a medium saucepan, gently melt the butter over low heat. Once melted, remove the pan from the heat. Whisk in the cocoa powder and granulated sugar until well combined. This method helps to “bloom” the cocoa, intensifying its chocolate flavor.
- Cool Slightly: Allow the mixture to cool for a few minutes. You don’t want to add eggs to a hot mixture, as they will scramble.
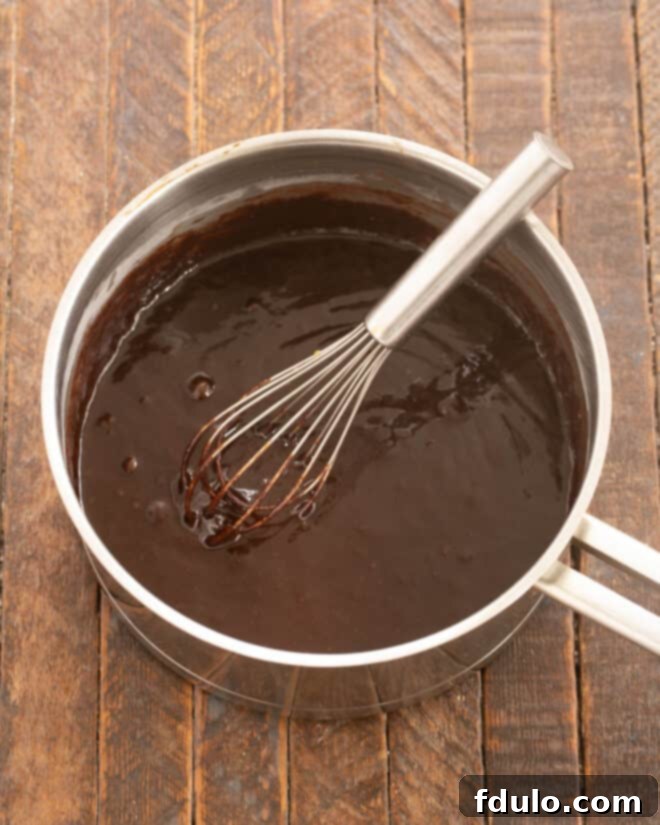
- Whisk in Flavor Enhancers: Add the salt, vanilla extract, and room temperature eggs to the cooled chocolate mixture. Whisk vigorously until the mixture is smooth and glossy. The eggs provide richness and structure.
- Fold in Flour: Gently stir in the all-purpose flour until just combined. Be careful not to overmix, as this can develop the gluten too much, leading to tougher brownies. Set this delicious brownie batter aside while you prepare the cookie dough.
Part 2: Creating the Decadent Chocolate Chip Cookie Dough Base
Next, we build the chewy, chocolate-studded base that gives these brownies their unique character.
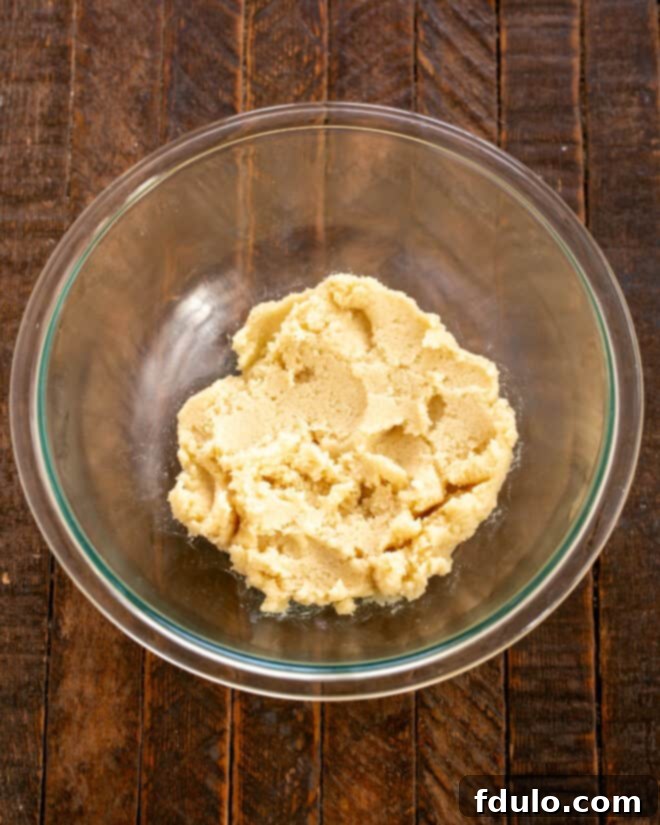
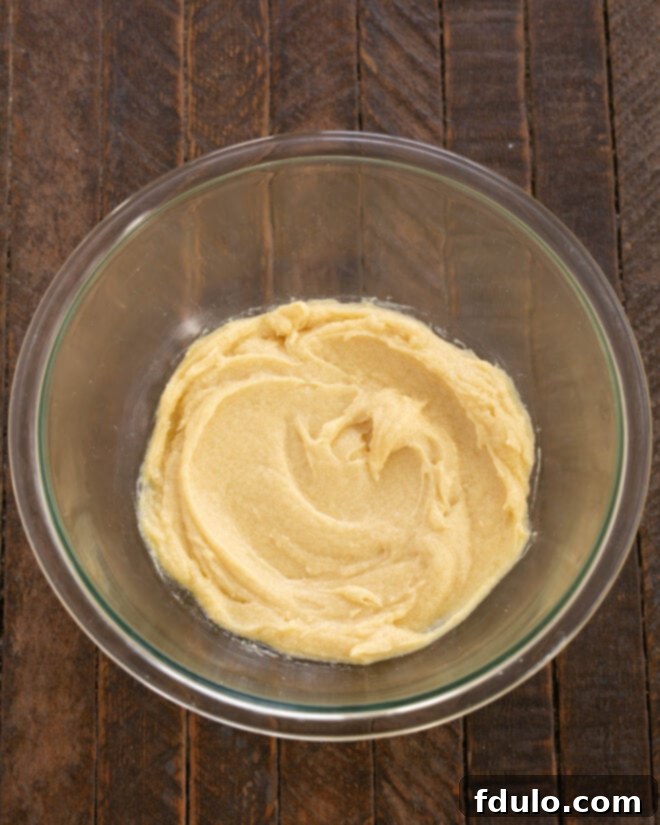
- Cream Butter and Sugars: In a large mixing bowl, using an electric mixer or a sturdy wooden spoon, beat together the room temperature butter, brown sugar, and granulated sugar until the mixture is light, fluffy, and creamy. This can take 2-3 minutes.
- Incorporate Wet Ingredients: Mix in the vanilla extract and the single egg, beating until fully incorporated. Scrape down the sides of the bowl to ensure everything is well combined.
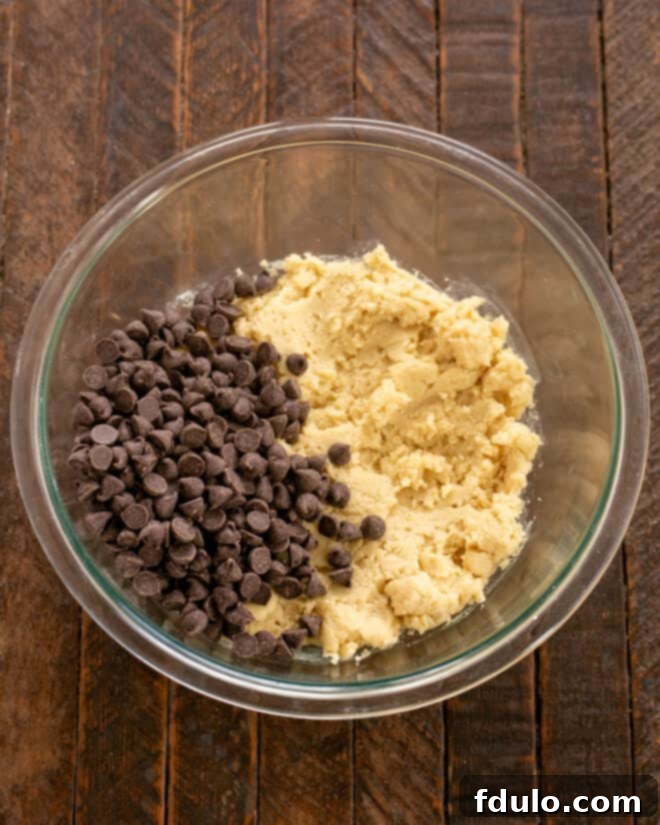
- Add Dry Ingredients and Chocolate Chips: In a separate bowl, whisk together the flour, salt, baking powder, and baking soda. Gradually add these dry ingredients to the wet mixture, mixing on low speed (or by hand) until just combined. Finally, fold in the semisweet chocolate chips until evenly distributed throughout the dough. Remember, minimal mixing here keeps the cookie dough tender.
Part 3: Layering, Baking, and Cooling for Perfection
Now comes the exciting part – assembling your triple-layered treat and bringing it to life in the oven!
- Preheat Oven and Prepare Pan: Preheat your oven to 350°F (175°C). Line a 9×9-inch (23×23 cm) baking pan with non-stick foil or parchment paper, leaving an overhang on all sides to easily lift the brownies out later.
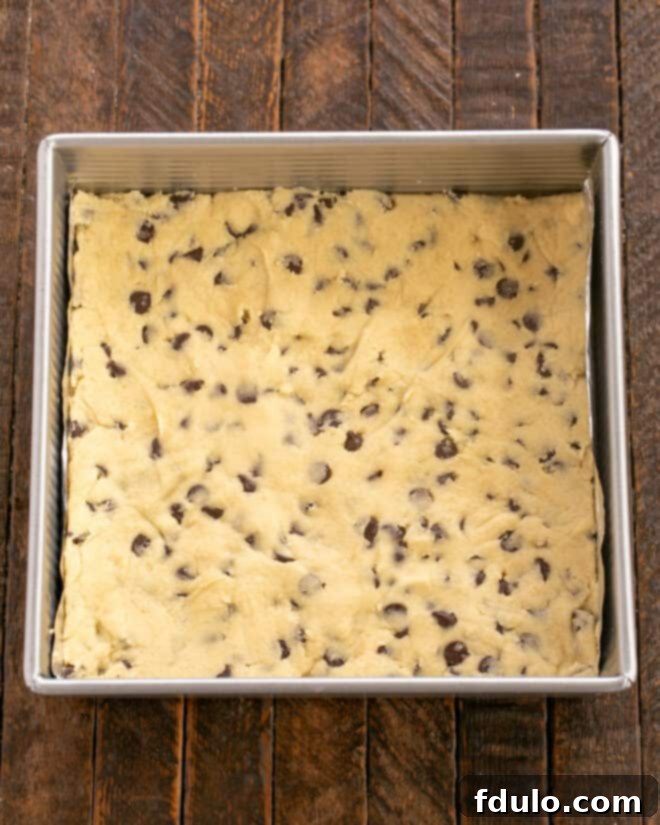
- Press in Cookie Dough Layer: Take your prepared chocolate chip cookie dough and press it evenly into the bottom of the lined pan. Use an offset spatula or your hands to ensure it forms a smooth, level layer from edge to edge.
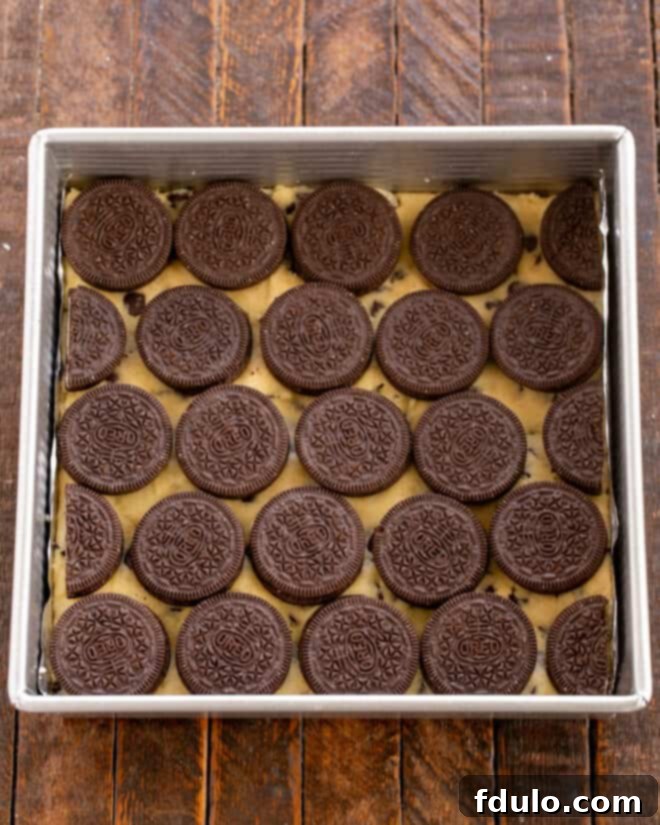
- Arrange the Oreo Layer: Carefully lay the regular Oreos over the cookie dough layer. Arrange them closely together, breaking some in half if necessary, to cover the entire surface uniformly. This creates a delightful crunchy barrier between the cookie and brownie.
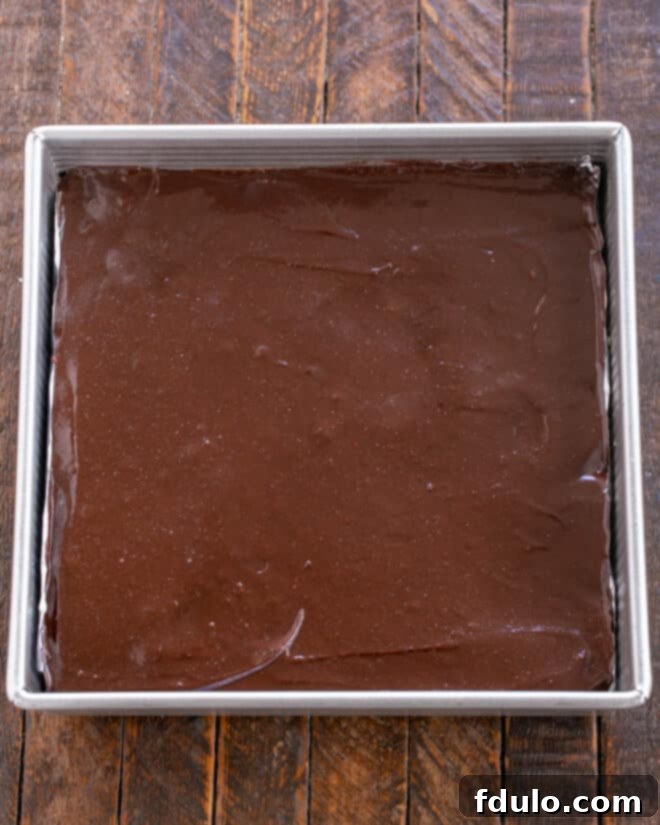
- Top with Brownie Batter: Pour the rich brownie batter over the Oreo layer. Gently spread it using an offset spatula or the back of a spoon, ensuring the Oreos are completely covered with an even layer of brownie batter.
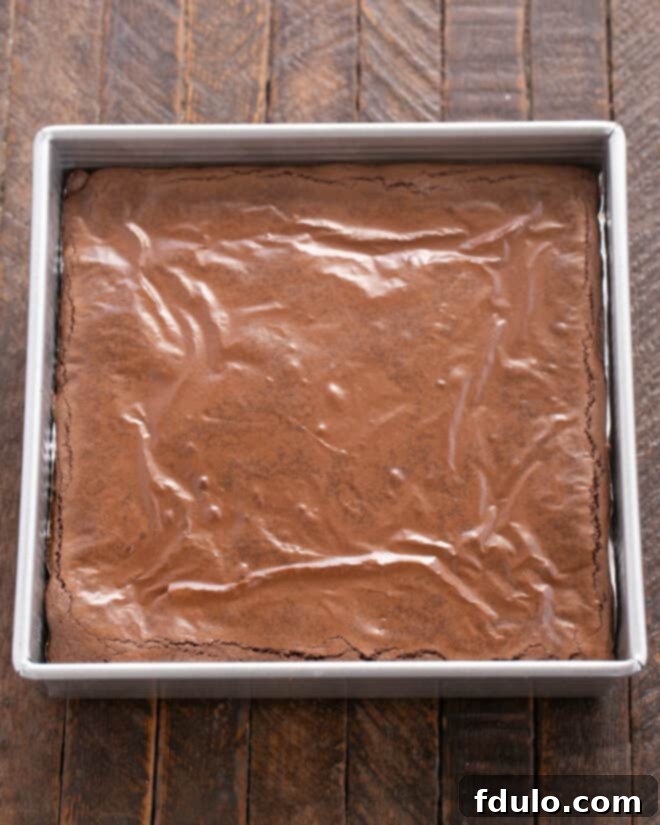
- Bake to Perfection: Transfer the pan to the preheated oven and bake for 35-40 minutes. The brownies are done when a toothpick inserted into the center comes out with moist crumbs, not wet batter. The edges should look set, but the center might still have a slight jiggle.
- Crucial Cooling Time: This step is non-negotiable for true fudginess and clean cuts! Allow the brownies to cool completely in the pan on a wire rack for at least a few hours. For the best results and easiest cutting, I recommend cooling them thoroughly, perhaps even chilling them in the refrigerator for 30-60 minutes before slicing.
- Slice and Serve: Once completely cool and firm, use the foil overhangs to lift the brownies out of the pan. Place them on a cutting board and slice into 16 squares. Now, gather your loved ones and prepare to indulge in this extraordinary triple-layered dessert!
Storage, Freezing, and Serving Suggestions
To ensure your Chocolate Chip Oreo Cookie Brownies remain as delicious as possible, here are some storage and serving tips:
- Room Temperature: Store brownies in an airtight container at room temperature for up to 3-4 days. Placing a piece of parchment paper between layers can prevent sticking.
- Refrigeration: If you prefer a firmer, chewier brownie or live in a warm climate, you can refrigerate them in an airtight container for up to a week. Let them come to room temperature or warm slightly before serving for optimal flavor.
- Freezing: These brownies freeze beautifully! Once completely cooled, cut them into individual squares. Wrap each brownie tightly in plastic wrap, then place them in a freezer-safe bag or container. They can be frozen for up to 3 months. Thaw at room temperature or gently warm in the microwave.
- Serving Suggestions: While undeniably delicious on their own, these brownies are fantastic served warm with a scoop of vanilla bean ice cream or a drizzle of chocolate fudge sauce. A sprinkle of sea salt can also enhance their rich chocolate flavor!
Common Questions About Oreo Cookie Brownies (FAQ)
Here are answers to some frequently asked questions to help you master this incredible recipe:
- Can I use different types of Oreos? Absolutely! While classic Oreos are recommended for their iconic flavor and crunch, feel free to experiment with other varieties like Double Stuf, Golden Oreos, or even flavored ones (mint, peanut butter) if you want to add a unique twist. Just be mindful that the flavor profile will change.
- How do I know when the brownies are perfectly done? Look for set edges with a slightly cracked surface. A toothpick inserted into the center should come out with moist crumbs attached, but not wet batter. Remember, brownies continue to cook slightly from residual heat after being removed from the oven, so it’s better to slightly underbake than overbake for that fudgy texture.
- My brownies turned out dry/cakey. What went wrong? The most common culprits are overbaking or measuring too much flour. Ensure you’re using the “spoon and level” method for flour and checking for doneness at the earliest recommended bake time. An inaccurate oven temperature can also play a role, so consider using an oven thermometer.
- Can I make these gluten-free? Yes, you can. Substitute the all-purpose flour in both the brownie and cookie dough recipes with a 1:1 gluten-free baking flour blend (ensure it contains xanthan gum). Make sure your Oreos are also gluten-free if strict dietary needs apply. The texture might vary slightly but should still be delicious.
- What kind of pan is best for brownies? A light-colored metal pan is ideal as it conducts heat evenly and prevents the edges from burning before the center is cooked. Darker pans can sometimes lead to faster browning, so keep an eye on your bake time if using one.
Indulge in More Decadent Desserts!
If you’ve fallen in love with these Chocolate Chip Oreo Cookie Brownies, you’re in for a treat! Explore more delightful dessert recipes that promise to satisfy your sweet tooth and impress your guests:
- Oreo Bark from Cravings of a Lunatic: A simple yet addictive treat, perfect for quick cravings or holiday gifts.
- Chocolate Brownie Cookies: Get the rich, intense flavor of a brownie in a convenient, chewy cookie form.
- Mini Oreo Cheesecakes: Individual cheesecakes with an Oreo crust and creamy filling, elegant and easy to serve.
- Rich Frosted Brownies: A classic, intensely chocolatey brownie topped with a luscious, smooth frosting.
- All my Best Brownie Recipes: A comprehensive collection of irresistible brownie variations for every occasion.
We love seeing your creations! Stay in touch and share your baking journey with us through social media on Instagram, Facebook, and Pinterest. Don’t forget to tag me when you try one of my recipes! If you adore the results and these brownies brought a smile to your face, please consider giving this recipe a 5-star rating in the recipe card below. Your feedback truly helps!
Oreo Cookie Brownies Recipe
30 minutes
40 minutes
1 hour
2 hours 10 minutes
16 brownies
Decadent fudgy brownies with a chewy chocolate chip cookie base and a delightful Oreo layer in between, creating the ultimate triple-layered dessert.
Ingredients
For the Fudgy Brownie Layer:
- 10 tablespoons unsalted butter
- ¾ cup unsweetened cocoa powder (Ghirardelli or Hershey’s recommended)
- 1 ¼ cups granulated sugar
- 2 large eggs, at room temperature
- 2 teaspoons pure vanilla extract
- ½ cup all-purpose flour
- ¼ teaspoon salt
For the Oreo Layer:
- 1 package (approx. 14.3 oz or 390g) regular Oreos
For the Chocolate Chip Cookie Dough Layer:
- ½ cup (1 stick) unsalted butter, softened to room temperature
- ¼ cup packed light brown sugar
- ¾ cup granulated sugar
- 1 large egg, at room temperature
- 1 teaspoon pure vanilla extract
- 1 ¼ cups all-purpose flour
- ½ teaspoon salt
- ½ teaspoon baking powder
- ½ teaspoon baking soda
- 1 cup semisweet chocolate chips (Ghirardelli or Nestle recommended)
Instructions
- Prepare Brownie Batter: In a saucepan, melt the butter over low heat. Remove from heat, then whisk in the cocoa powder and 1 ¼ cups sugar until combined.
- Allow the mixture to cool slightly (about 5 minutes).
- Whisk in the ¼ teaspoon salt, 2 teaspoons vanilla, and 2 large eggs until smooth and glossy.
- Stir in ½ cup flour until just combined. Set aside.
- Prepare Cookie Dough: In a large bowl, beat together ½ cup softened butter, ¼ cup brown sugar, and ¾ cup granulated sugar until light and creamy.
- Mix in 1 teaspoon vanilla and 1 egg until well incorporated.
- In a separate small bowl, whisk together 1 ¼ cups flour, ½ teaspoon salt, ½ teaspoon baking powder, and ½ teaspoon baking soda. Gradually add these dry ingredients to the wet mixture, mixing until just combined. Fold in the 1 cup semisweet chocolate chips.
- Assemble & Bake: Preheat oven to 350°F (175°C). Line a 9×9-inch (23×23 cm) baking pan with non-stick foil, leaving an overhang on the sides.
- Press the cookie dough evenly into the bottom of the prepared pan, using an offset spatula to level the surface.
- Lay Oreos over the cookie dough layer, covering the entire surface. Cut some Oreos in half if necessary to fill gaps.
- Carefully pour the brownie batter over the Oreo layer and spread it gently with an offset spatula to cover the Oreos completely.
- Bake for 35-40 minutes, or until a toothpick inserted into the center comes out with moist crumbs (not wet batter).
- Cool & Serve: Allow the brownies to cool completely in the pan on a wire rack for at least 1-2 hours. For best results and clean cuts, cool for several hours or even chill in the refrigerator before cutting.
- Lift the brownies out of the pan using the foil overhangs, cut into 16 squares, and serve!
Notes
Adapted from Hugs and Cookies XOXO. For room temperature eggs, simply take them out of the fridge 30 minutes before you begin baking.
Recommended Products
As an Amazon Associate and member of other affiliate programs, I earn from qualifying purchases.
- Small Offset Spatula
- Nonstick Foil
- 9 x 9-inch Baking Pan
Nutrition Information:
Yield:
16
Serving Size:
1 brownie
Amount Per Serving:
Calories: 424Total Fat: 24gSaturated Fat: 14gTrans Fat: 1gUnsaturated Fat: 8gCholesterol: 94mgSodium: 197mgCarbohydrates: 54gFiber: 1gSugar: 47gProtein: 3g
HOW MUCH DID YOU LOVE THIS RECIPE?
Please leave a comment on the blog or share a photo on Pinterest
