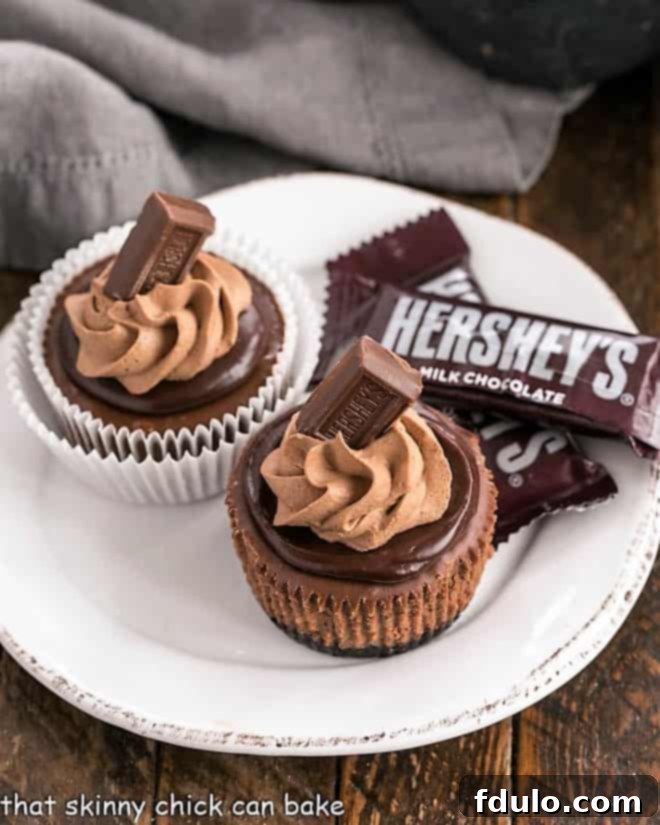
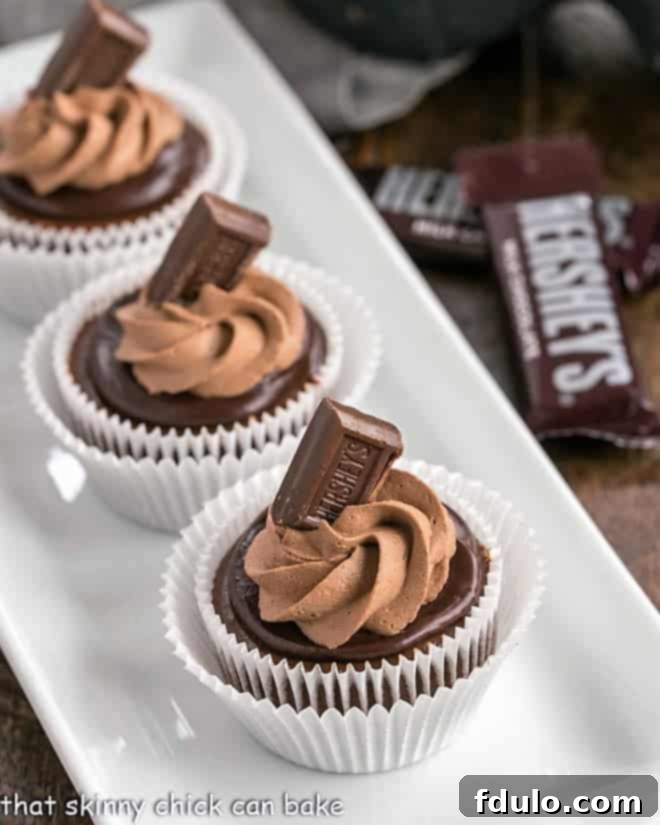
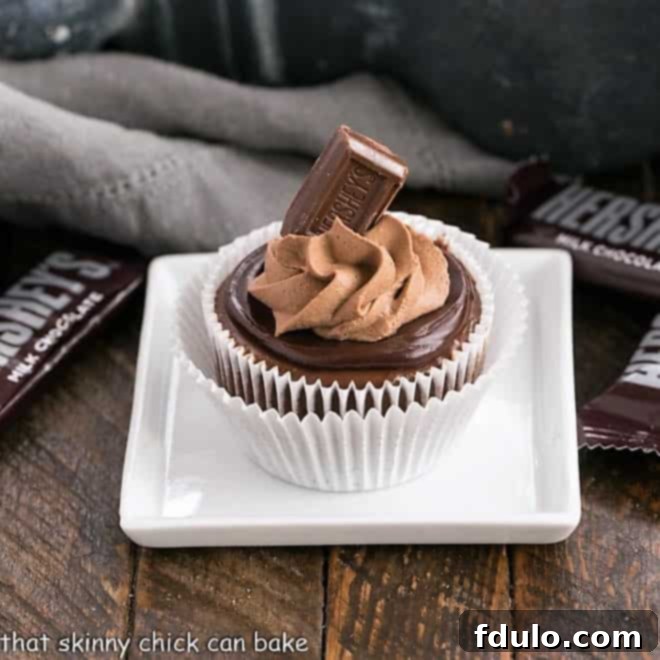
Chocolate Mini Cheesecakes offer the ultimate indulgence in a perfectly portion-controlled package! Imagine a rich, dreamy chocolate experience, individually crafted to satisfy your deepest dessert cravings without guilt. Life, after all, is about balance, and a delicious Individual Chocolate Cheesecake Recipe is the ideal sweet ending to any meal. These decadent mini cheesecakes are not just a dessert; they are a statement of sophisticated simplicity, promising a luxurious bite every time.
For years, my signature party dessert consisted of dainty Mini Cheesecakes baked in mini muffin tins. They were delightful, offering just a bite or two, and a beloved addition to any dessert buffet. However, these slightly larger, cupcake-sized cheesecakes elevate the experience entirely. They are substantial enough to truly satisfy those persistent chocolate and cheesecake cravings, making them far more fulfilling than their tiny counterparts. Each one is a personal masterpiece, ensuring a rich, creamy texture and profound chocolate flavor in every spoonful.

Why You Absolutely Need to Make These Decadent Chocolate Mini Cheesecakes
Do you ever find yourself struggling with portion control when faced with an irresistible dessert? I certainly do! I might initially cut a small sliver just for a taste, only to find myself returning for “just one more bite” numerous times. Before I know it, I’ve consumed far more than a regular-sized serving. This is precisely why these Chocolate Mini Cheesecakes are a game-changer for anyone who loves dessert but seeks balance.
- Perfect Portion Control: Each mini cheesecake is individually sized, making it incredibly easy to manage your indulgence. You get a complete, satisfying dessert experience without the temptation to overeat, ensuring you enjoy every moment without the guilt.
- Luxurious Indulgence in Every Bite: While perfectly portioned, these cheesecakes are still a luscious, rich indulgence. The deep chocolate flavor combined with the creamy cheesecake texture is so fulfilling that one is often all you need to truly satisfy your sweet tooth. Say goodbye to the need for seconds!
- A Chocoholic’s Dream Come True: If you or your loved ones are passionate about chocolate, prepare for pure bliss. These cheesecakes are infused with rich chocolate throughout, from the crust to the decadent ganache and the airy chocolate whipped cream topping. They deliver an intense chocolate experience that will thrill any self-proclaimed chocoholic.
- Ideal for Entertaining and Gifting: Their individual size makes them perfect for parties, gatherings, or as thoughtful homemade gifts. No slicing, no mess – just beautiful, ready-to-serve desserts that impress. They look stunning on any dessert table and are easy for guests to pick up and enjoy.
- Easy to Prepare Ahead: These mini cheesecakes can be made in advance, making them an excellent choice for busy hosts or anyone looking to enjoy a homemade treat without last-minute stress. Simply prepare, chill, and garnish just before serving.
The Unmatched Allure of Individual Desserts
Beyond the undeniable benefit of portion control, individual desserts like these Chocolate Mini Cheesecakes offer a myriad of advantages that elevate the dining experience. They bring a touch of elegance and thoughtful presentation to any occasion, transforming a simple sweet treat into a memorable event.
Firstly, the aesthetic appeal is undeniable. Each mini cheesecake is its own little masterpiece, adorned with luscious ganache and a swirl of chocolate whipped cream, making them visually stunning on any dessert spread. This eliminates the often-messy task of slicing and serving a large cheesecake, ensuring every guest receives a perfectly formed and beautifully garnished dessert. There’s no more worrying about uneven slices or crumbling edges, just pristine perfection every time.
Secondly, individual desserts promote a sense of personal luxury. Each person gets their own dedicated treat, making them feel special and pampered. This format also ensures optimal freshness for each serving, as the entire dessert isn’t exposed to the air once cut. They are fantastic for meal prepping, allowing you to have a delightful dessert ready in the fridge whenever a craving strikes, or for packing into lunchboxes for a delightful midday treat.
Finally, they are incredibly versatile. Whether you’re hosting a formal dinner party, a casual barbecue, a cozy family gathering, or simply want a special treat for yourself, individual cheesecakes fit every scenario. They can be easily transported for potlucks or picnics, and they make wonderful, heartfelt gifts for friends, neighbors, or teachers. The convenience and charm of individual desserts truly make them a superior choice for any occasion.
Essential Ingredient Notes for Your Perfect Mini Cheesecakes
Achieving the best results for your Chocolate Mini Cheesecakes starts with understanding the role of each ingredient. Quality and temperature are key to a smooth, rich, and perfectly set cheesecake.
- Kitchen Staples: You’ll need granulated sugar, unsalted butter, and unsweetened cocoa powder. For the cocoa, investing in a high-quality brand like Ghirardelli makes a noticeable difference in the depth of chocolate flavor.
- Oreo Crumbs: For the crust, you can either purchase pre-crushed Oreo crumbs from the baking aisle for convenience or make your own. If making your own, simply pulverize whole Oreos (remember to remove the cream filling first for the best texture) in a food processor until fine. This creates a wonderfully dark and flavorful base that complements the chocolate cheesecake beautifully.
- Cream Cheese: This is the star of your cheesecake, so choose a full-fat variety for the richest, creamiest texture. Crucially, ensure it’s brought to room temperature 1-2 hours before mixing. This allows it to blend smoothly with other ingredients, preventing lumps and ensuring a silky-smooth batter.
- Sour Cream: Full-fat sour cream adds a delightful tang that balances the sweetness and richness of the chocolate. Like the cream cheese, having it at room temperature will aid in creating a homogenous, lump-free batter.
- Vanilla Extract: Always opt for pure vanilla extract over imitation. A good quality vanilla, such as Nielsen-Massey, enhances the overall flavor profile of the cheesecake and the whipped cream, adding a subtle warmth that elevates the chocolate.
- Eggs: Use large eggs and ensure they are at room temperature. This helps them incorporate into the batter more easily and evenly, contributing to a smooth consistency and preventing overmixing, which can lead to cracks.
- Semisweet Chocolate: For the melted chocolate in the cheesecake batter and the ganache, use high-quality semisweet chocolate bars, like Ghirardelli. Chopping the chocolate before melting ensures it melts smoothly and evenly, yielding a luxurious, rich chocolate element.
- Heavy Cream: Essential for both the luscious ganache and the fluffy whipped cream, use heavy cream with at least 36% butterfat. This higher fat content ensures a stable ganache and whipped cream that holds its shape beautifully.
- Powdered Sugar: Used in the whipped cream, powdered sugar dissolves easily, resulting in a smooth, silky topping. If your powdered sugar is lumpy, sift it first for the best results.
- Mini Hershey Bars (Optional Garnish): These are a delightful decorative touch, especially when serving to guests or preparing them as gifts. They add a charming, professional finish to each mini cheesecake.
Expert Tips for Crafting Flawless Chocolate Mini Cheesecakes
Creating perfect cheesecakes, whether mini or full-sized, involves a few key techniques. These expert tips will help ensure your Chocolate Mini Cheesecakes are irresistibly smooth, creamy, and visually stunning.
- Always Line Your Muffin Tins: This is a non-negotiable step. Use paper cupcake liners in your muffin tins. Without them, removing the delicate cheesecakes after baking and chilling will be incredibly difficult, often resulting in damage. Liners also make serving neat and tidy.
- PRO-Tip: Room Temperature Ingredients are Crucial: As mentioned in the ingredient notes, ensure your cream cheese, sour cream, and eggs are at room temperature. This allows them to emulsify properly, creating an incredibly smooth, uniform batter free of lumps, which is essential for a creamy cheesecake texture.
- Crust Shortcut: For a super quick crust, instead of mixing cookie crumbs and butter, simply place one whole regular Oreo cookie at the bottom of each paper wrapper in your tin. This provides a sturdy, delicious base with minimal effort.
- PRO-Tip: Use a Tassie Tamper for the Crust: A tassie tamper (affiliate link) is an invaluable tool for pressing down cookie crumb crusts firmly and evenly into the muffin cups. This ensures a compact crust that won’t crumble when the cheesecakes are removed from their liners. If you don’t have one, the bottom of a small, sturdy glass or a shot glass can work too.
- Mix with a Paddle Attachment, Not a Whisk: When preparing the cheesecake batter, use the paddle attachment on your stand mixer (or beaters on a hand mixer). A whisk attachment incorporates too much air into the batter, which can cause the cheesecake to puff up excessively during baking and then crack or sink dramatically as it cools.
- Add Eggs One at a Time: Introduce eggs into the batter one at a time, mixing only until each is just incorporated before adding the next. Overmixing eggs can develop too much air and lead to a tough or cracked cheesecake. Gentle mixing is key here.
- The Art of Garnish: While delicious on their own, the ganache and whipped cream combo elevates these mini cheesecakes to an elegant presentation. For a professional look, use an open star tip with a piping bag to create beautiful swirls of chocolate whipped cream. If you prefer a simpler approach, a spoon or cookie disher can create charming dollops.
- Slow Cooling Prevents Cracks: The baking method (baking, then leaving in a turned-off oven with the door cracked) is designed to allow the cheesecakes to cool slowly. This gradual temperature change is vital in preventing unsightly cracks on the surface of your cheesecakes. Avoid sudden temperature changes.
- Chill Thoroughly: Once baked and cooled, allow the cheesecakes to chill in the refrigerator for at least 4 hours, or ideally overnight. This allows them to set completely, ensuring a firm texture and intensifying the flavors.
- Bring to Room Temperature Before Serving: For the absolute creamiest and most flavorful experience, remove your chilled mini cheesecakes from the refrigerator about 15-20 minutes before serving. This allows the flavors and textures to soften slightly, bringing out their full potential.

Frequently Asked Questions About Chocolate Mini Cheesecakes
The baking time for mini cheesecakes can vary significantly based on their size and the type of pan you use. I’ve personally experimented with mini muffin tins, standard muffin tins, and specialized mini cheesecake pans with removable bottoms, each yielding slightly different baking durations.
For this particular recipe, utilizing a standard cupcake/muffin tin, the ideal baking process is as follows: Bake for an initial 15 minutes at 300°F (after an initial 5-minute crust bake at 325°F and then lowering to 300°F). After this, shut off the oven heat completely but leave the cheesecakes inside for an additional 10 minutes. Finally, crack the oven door open and allow them to remain in the cooling oven for another 20 minutes. This method of gradual cooling is crucial for preventing cracks and achieving a perfectly set, creamy texture.
The nutritional information, including calorie count, for individual cheesecakes can vary based on the exact ingredients used, portion size, and the amount of toppings applied. For this specific recipe, if you include all the suggested whipped cream topping, each mini cheesecake typically contains approximately 370 calories. However, I often find myself with a little leftover chocolate whipped cream, which would slightly reduce the calorie count per serving. Factors such as the brand of cream cheese, type of chocolate, and even the size of your “mini” muffin cups can subtly alter these figures. For precise nutritional data based on your specific ingredients, it’s always recommended to use an online calculator with the exact products you’ve chosen.
Yes, mini cheesecakes freeze beautifully! To freeze, ensure they are completely cooled and chilled. Place them uncovered on a baking sheet in the freezer for about an hour, or until firm. Then, individually wrap each cheesecake tightly in plastic wrap, followed by a layer of aluminum foil. Store them in an airtight container in the freezer for up to 1-2 months. When ready to serve, thaw them in the refrigerator overnight. You can then garnish them fresh.
Properly stored in an airtight container in the refrigerator, these Chocolate Mini Cheesecakes will stay fresh for 3-5 days. It’s best to keep them covered to prevent them from drying out or absorbing other odors from the fridge. For the best flavor and texture, I recommend consuming them within 3 days.
Absolutely! These mini cheesecakes are an ideal make-ahead dessert. You can bake the cheesecakes and prepare the ganache up to 2-3 days in advance, keeping them refrigerated in separate airtight containers. On the day of your event, simply melt and warm the ganache if it has solidified, drizzle it over the chilled cheesecakes, and then prepare and pipe the fresh chocolate whipped cream. This allows you to spread out the preparation and enjoy your guests without last-minute stress.
Customizing Your Chocolate Mini Cheesecakes
While this recipe delivers a classic, decadent chocolate experience, don’t hesitate to get creative and customize your mini cheesecakes to suit your taste or occasion. The possibilities are endless!
- Crust Variations: Instead of Oreo crumbs, consider using graham cracker crumbs mixed with a little cocoa powder for a slightly different flavor profile. Shortbread cookies or even gluten-free chocolate cookies could also make excellent crusts.
- Topping Adventures: Beyond the ganache and chocolate whipped cream, try drizzling with salted caramel, raspberry sauce, or a sprinkle of toasted coconut flakes. Fresh berries like raspberries or strawberries add a beautiful contrast in both color and flavor. Crushed peppermint candies for a holiday twist, or mini chocolate chips for extra chocolatey goodness are also fantastic options.
- Flavor Infusions: For an extra layer of flavor in the cheesecake batter, consider adding a hint of espresso powder to deepen the chocolate notes, or a few drops of peppermint extract for a refreshing mint-chocolate experience. A dash of orange zest could also brighten the flavor.
- Decorative Touches: Experiment with different piping tips for your whipped cream, or add edible glitter, chocolate shavings, or a dusting of cocoa powder for an elegant finish.
More Delightful Individual Dessert Recipes:
If you’ve fallen in love with the convenience and charm of individual desserts, here are more inspiring recipes to explore, perfect for any occasion:
- 20 Bite-Sized Fruit Desserts from Big Bear’s Wife – A refreshing array of fruity delights perfect for lighter cravings.
- Caramel Topped Mini Cheesecakes – For those who love a rich, buttery caramel accent on their creamy cheesecake.
- Mini Pumpkin Cheesecakes – A seasonal favorite, bringing warmth and spice in a bite-sized format.
- Warm Chocolate Cheesecakes – A comforting twist on the classic, perfect for a cozy evening.
- Mini Vanilla Bean Cheesecakes – The timeless elegance of vanilla, showcasing the simplicity of a perfect cheesecake.
- Plus, More Homemade Cheesecake Desserts – A collection of unique and exciting cheesecake creations to broaden your baking horizons.
Stay connected and share your culinary creations with us! Follow us on social media @ Instagram, Facebook, and Pinterest. Don’t forget to tag me when you try one of my recipes – I absolutely love seeing your delicious results! And if you adore these Chocolate Mini Cheesecakes as much as I do, please take a moment to give them a 5-star rating in the recipe card below. Your feedback helps other dessert lovers discover these amazing treats!

Chocolate Mini Cheesecakes
30 minutes
20 minutes
50 minutes
12 Individual Cheesecakes
Indulge in these rich, creamy, and perfectly portioned chocolate individual cheesecakes, baked with love in a standard cupcake tin!
Ingredients
For the Crunchy Oreo Crust:
- 1 cup Oreo cookie crumbs
- 2 tablespoons of unsalted butter, melted
For the Decadent Chocolate Cheesecake Filling:
- 12 ounces (about 1 ½ blocks) full-fat cream cheese, softened at room temperature
- ½ cup granulated sugar
- 2 tablespoons of unsweetened cocoa powder (high-quality recommended)
- ¼ cup full-fat sour cream, at room temperature
- ½ teaspoon pure vanilla extract
- 2 large eggs, at room temperature
- 4 ounces (about ⅔ cup) semisweet chocolate, melted and slightly cooled
For the Silky Chocolate Ganache Topping:
- 3 ounces (about ½ cup) semisweet chocolate, finely chopped
- ¼ cup heavy cream (36% butterfat)
For the Light Chocolate Whipped Cream:
- ¾ cup heavy cream (36% butterfat), very cold
- 3 tablespoons powdered sugar, sifted
- 3 tablespoons unsweetened cocoa powder, sifted
- ½ teaspoon pure vanilla extract
- Mini Hershey bars or chocolate shavings, for optional garnish
Instructions
- Prepare for Baking: Preheat your oven to 325°F (160°C). Line a 12-cup standard cupcake or muffin pan with paper liners. This is essential for easy removal.
- Make the Crust: In a small bowl, combine the Oreo cookie crumbs and melted butter. Mix until well combined. Press about 1 tablespoon of the mixture firmly into the bottom of each prepared cupcake liner. Use a tassie tamper or the back of a small spoon to ensure a compact crust.
- Pre-bake Crust: Bake the crusts for 5 minutes. Remove from oven and set aside to cool slightly while you prepare the filling.
- Adjust Oven Temperature: Lower the oven temperature to 300°F (150°C). This lower temperature is key for preventing cracks in your cheesecakes.
- Prepare Cheesecake Filling (Step 1): In a large mixing bowl with a paddle attachment (or using a hand mixer), beat the softened cream cheese on low speed until smooth. Gradually add the granulated sugar and cocoa powder, continuing to beat on low until just combined and smooth. Avoid overmixing.
- Prepare Cheesecake Filling (Step 2): Incorporate the sour cream and vanilla extract into the cream cheese mixture, mixing on low speed. Add the eggs one at a time, mixing only until each egg is just incorporated before adding the next. Finally, gently fold in the melted and slightly cooled semisweet chocolate until just combined. Be careful not to overmix the batter at any stage.
- Fill the Cups: Spoon the cheesecake mixture evenly over each pre-baked crust, filling each cupcake liner about two-thirds full. Gently tap the pan on the counter a few times to release any air bubbles.
- Bake the Cheesecakes: Bake for 15 minutes at 300°F (150°C). After 15 minutes, turn off the oven heat completely, but leave the cheesecakes inside with the oven door closed for an additional 10 minutes. Then, crack the oven door open slightly (you can use a wooden spoon to keep it ajar) and leave the cheesecakes in the cooling oven for another 20 minutes. This slow cooling process helps prevent cracking.
- Chill Thoroughly: Remove the cheesecakes from the oven and let them cool completely on a wire rack to room temperature. Once cooled, transfer them to the refrigerator to chill for at least 4 hours, or preferably overnight, until fully set.
- Make the Ganache: Once the cheesecakes are cold, prepare the ganache. In a small saucepan over medium-low heat, combine the chopped semisweet chocolate and ¼ cup heavy cream. Stir continuously until the chocolate is fully melted and the mixture is smooth and glossy. Alternatively, you can heat the cream in a microwave until simmering, then pour it over the chopped chocolate in a heatproof bowl and let it sit for 5 minutes before whisking.
- Apply Ganache: Spoon or drizzle a small amount of the warm ganache over the top of each chilled cheesecake. Return the cheesecakes to the refrigerator to allow the ganache to set, about 15-20 minutes.
- Prepare Whipped Cream: While the ganache chills, make the chocolate whipped cream. In a cold mixing bowl, combine the cold ¾ cup heavy cream, sifted powdered sugar, sifted cocoa powder, and vanilla extract. Beat with a whisk attachment (or hand mixer) on medium-high speed until stiff peaks form. Be careful not to overbeat, or it will become grainy.
- Garnish and Serve: Transfer the chocolate whipped cream to a piping bag fitted with an open star tip. Pipe a generous swirl of whipped cream on top of each ganache-topped cheesecake. Garnish with a mini Hershey bar or chocolate shavings, if desired. If you don’t have a piping bag, a simple dollop with a spoon or a cookie disher works just as well.
- Storage and Serving Tip: Store your finished cheesecakes in an airtight container in the refrigerator. For the creamiest and most luscious texture, allow them to sit at room temperature for about 15-20 minutes before serving.
Notes
Adapted from a beloved recipe by Hugs and Cookies XOXO, with enhancements for texture and flavor perfection.
Recommended Products for Cheesecake Perfection
As an Amazon Associate and member of other affiliate programs, I earn from qualifying purchases. These are tools I genuinely recommend for ease and success in your kitchen!
- Essential Silicone Spatulas
- KitchenAid Artisan Stand Mixer
- Non-Stick 12-Cup Cupcake Tin
Nutrition Information:
Yield:
12
Serving Size:
1 Mini Cheesecake
Amount Per Serving (Estimated):
Calories: 370Total Fat: 27gSaturated Fat: 16gTrans Fat: 0gUnsaturated Fat: 9gCholesterol: 90mgSodium: 153mgCarbohydrates: 30gFiber: 2gSugar: 24gProtein: 5g
Thatskinnychickcanbake.com occasionally offers nutritional information for recipes contained on this site. This information is provided as a courtesy and is an estimate only. This information comes from online calculators. Although thatskinnychickcanbake.com attempts to provide accurate nutritional information, these figures are only estimates.
Varying factors such as product types or brands purchased can change the nutritional information in any given recipe. Also, many recipes on thatskinnychickcanbake.com recommend toppings, which may or may not be listed as optional and nutritional information for these added toppings is not listed. Other factors may change the nutritional information such as when the salt amount is listed “to taste,” it is not calculated into the recipe as the amount will vary. Also, different online calculators can provide different results.
To obtain the most accurate representation of the nutritional information in any given recipe, you should calculate the nutritional information with the actual ingredients used in your recipe. You are solely responsible for ensuring that any nutritional information obtained is accurate.
HOW MUCH DID YOU LOVE THIS RECIPE?
Please leave a comment on the blog or share a photo on Pinterest
