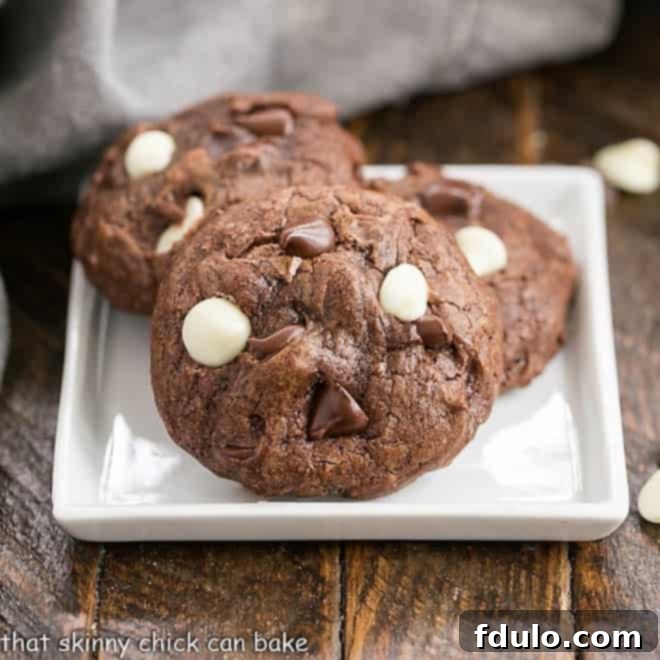
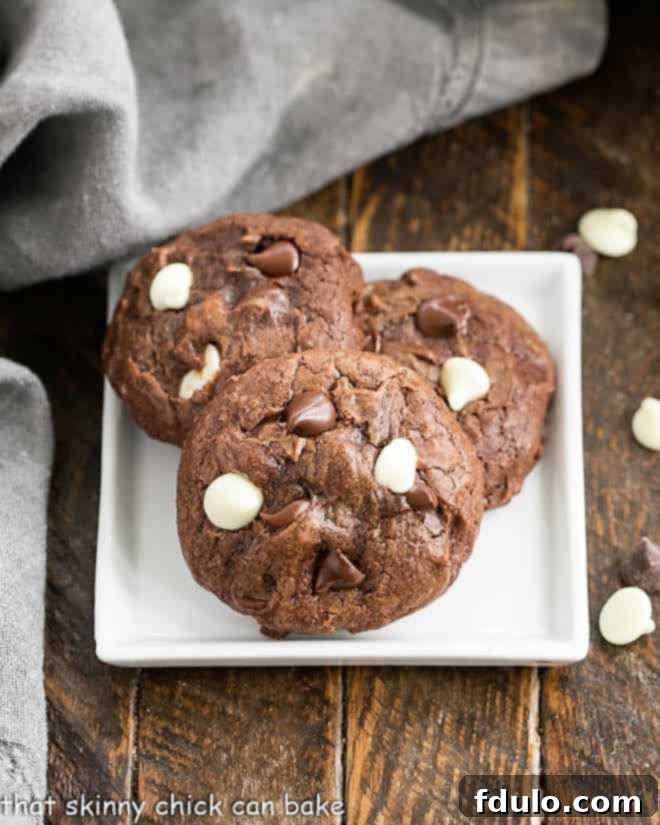
Ultimate Chewy Fudgy Brownie Cookies: If you adore the rich, decadent taste of brownies but crave the convenience and portability of a cookie, then you’re about to discover your new favorite dessert! These cookies are a sublime fusion, delivering intense chocolate flavor, an incredibly fudgy interior, and that delightful chewiness that makes them utterly irresistible. Each bite is a heavenly experience, loaded with generous amounts of both semi-sweet and creamy white chocolate chips for a perfect textural and flavor contrast.
This exquisite Chewy Fudgy Chocolate Cookies Recipe elevates a classic treat to new heights. We’re talking about a cookie so rich and moist, it blurs the line between a gourmet brownie and a perfectly baked chocolate chip cookie. Enhanced by a luxurious blend of decadent semi-sweet and creamy white chocolate chips or wafers, these cookies are truly heaven in every single bite. Prepare to impress everyone with these homemade delights that are surprisingly simple to make.
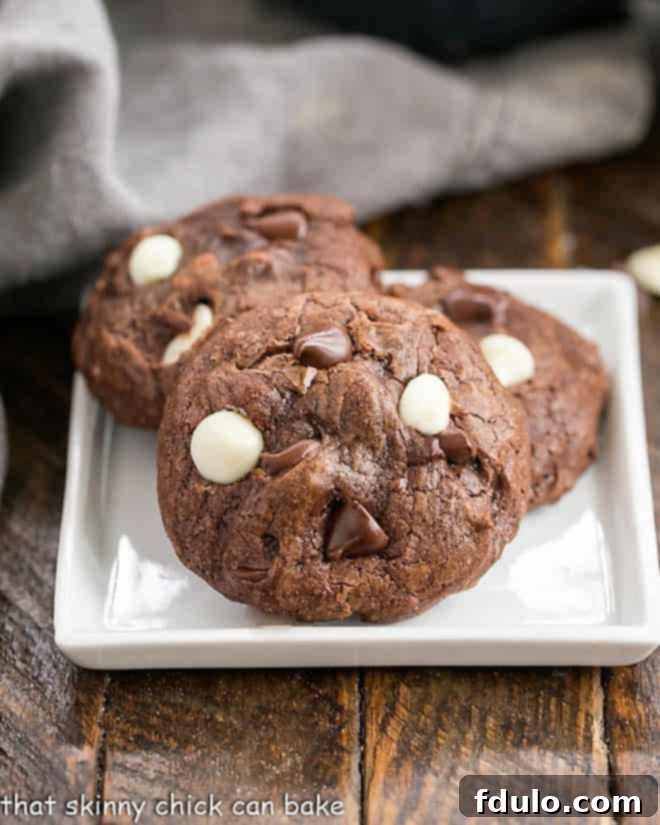
Why These Chewy Fudgy Brownie Cookies Are a Must-Bake
Imagine a cookie that captures the very essence of your favorite fudgy brownie – dense, intensely chocolatey, and incredibly satisfying. That’s exactly what you get with these amazing chewy brownie cookies. They are not just cookies; they are an experience, designed to delight every chocolate enthusiast and make any moment special.
- Unforgettable Flavor & Texture: These brownie drop cookies boast a texture that is both wonderfully soft and incredibly fudgy, with a perfect chew that’s reminiscent of a gourmet brownie. The rich, deep chocolate base is complemented by a generous scattering of two types of chocolate chips, adding bursts of melty goodness and a delightful contrast in every bite. This unique combination makes them stand out from your average chocolate cookie.
- Effortless Baking Pleasure: One of the greatest joys of this recipe is its simplicity. As “drop cookies,” they require no elaborate shaping, rolling, or chilling (unless you prefer a thicker cookie, as noted in our tips). You simply scoop the dough onto a baking sheet, and let your oven do the rest. This makes them ideal for busy bakers, last-minute treats, or anyone seeking maximum deliciousness with minimum fuss.
- A Chocolate Lover’s Dream Come True: If you find yourself constantly reaching for anything chocolate, this recipe is tailor-made for you. The double dose of chocolate from the unsweetened cocoa in the base and the mix of semi-sweet and white chocolate chips ensures a profoundly satisfying chocolate experience that will curb any craving. It’s a true celebration of all things chocolate.
- Perfect for Any Occasion: Whether you’re baking for a special event, a casual get-together, a school bake sale, or simply treating yourself to an indulgent snack, these cookies are always a hit. Their impressive appearance and incredible taste make them a fantastic addition to any dessert platter, a thoughtful homemade gift, or a comforting snack with a glass of milk or a cup of coffee.
- Quick Preparation: Despite their luxurious taste and appearance, these chewy brownie cookies come together remarkably fast. With just 20 minutes of prep and 10 minutes of bake time, you can have a fresh batch ready in under an hour, making them perfect for unexpected guests or sudden cravings.
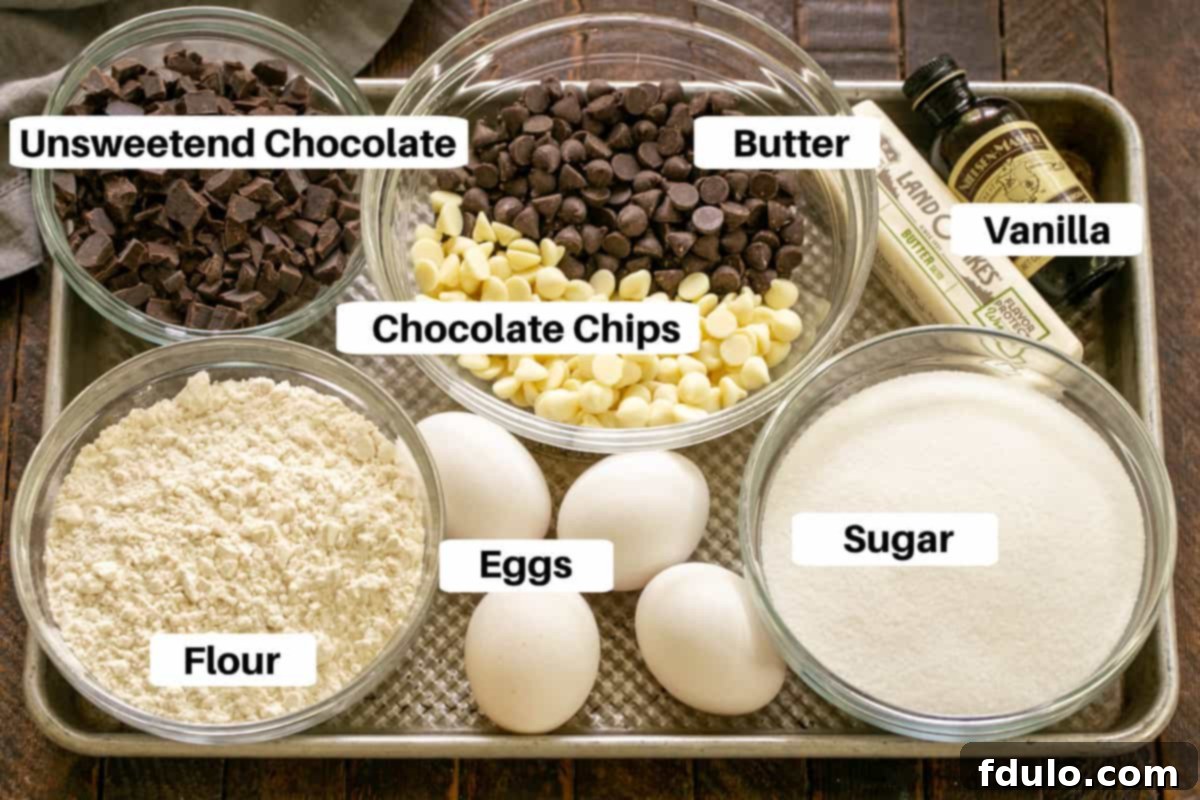
Essential Ingredients for Perfect Chewy Fudgy Brownie Cookies
Crafting the perfect chewy brownie cookie starts with understanding the role of each ingredient. Using quality components and paying attention to small details can make all the difference in achieving that irresistible fudgy texture and rich flavor. Here’s a detailed breakdown of what you’ll need and why:
- Unsweetened Chocolate: The Foundation of Deep Chocolate Flavor
- For an intense, authentic chocolate taste that truly mimics a brownie, high-quality unsweetened chocolate is paramount. I highly recommend using premium bars, like Ghirardelli, and chopping them yourself. This allows for a richer, more complex chocolate flavor compared to just using cocoa powder. The fat content in baking chocolate also plays a crucial role in achieving that desirable fudgy, dense texture in your cookies.
- Butter: For Richness and Moisture
- Butter not only adds a rich flavor but also contributes significantly to the cookie’s tender crumb and moisture. I typically use salted butter in my baking as it perfectly balances the sweetness and enhances other flavors. If you prefer or only have unsalted butter on hand, remember to add an extra pinch of salt (about ¼ teaspoon) to the dough. Salt is crucial here; without it, the cookies can taste flat and lack depth, failing to bring out the full chocolate flavor. Ensure your butter is softened to room temperature for optimal creaming with sugar, leading to a smoother, more uniform dough.
- Granulated Sugar: Sweetness, Texture, and Shine
- Granulated sugar is essential for both sweetness and contributing to the cookie’s structure. It helps create that characteristic slightly crisp edge and a wonderfully chewy center. The amount is carefully balanced to ensure sweetness without overwhelming the deep chocolate notes, allowing them to shine through.
- Large Eggs: The Binding and Structure Agents
- Eggs are vital for binding the ingredients together, adding richness, and contributing to the overall structure and moisture of the cookies. For the best emulsification and seamless incorporation into the chocolate mixture, ensure your large eggs are at room temperature. This helps them blend evenly into the batter, preventing a curdled appearance and ensuring a consistently smooth dough. Eggs are key to achieving the signature chewy, fudgy texture we’re aiming for.
- Pure Vanilla Extract: The Flavor Enhancer
- Always opt for pure vanilla extract over artificial vanilla flavoring. Real vanilla enhances the chocolate notes, adding a layer of warmth, depth, and complexity that artificial versions simply cannot replicate. It’s a small but significant detail that elevates the overall flavor profile of your cookies.
- All-Purpose Flour: The Structural Backbone
- Standard all-purpose flour provides the necessary structure to hold your cookies together. When adding flour, mix just until it’s incorporated. If you are baking gluten-free, a high-quality, all-purpose gluten-free flour blend (one that includes xanthan gum) should work well as a direct substitute, allowing everyone to enjoy these delightful cookies. Be careful not to overmix the flour once added, as this can develop the gluten too much, leading to tough, rather than chewy, cookies.
- Chocolate Chips: The Double Chocolate Delight and Texture Play
- The magic of these cookies lies in the generous inclusion of two kinds of chocolate chips: semi-sweet for classic chocolatey goodness and white chocolate for a creamy, contrasting sweetness and visual appeal. This combination offers a beautiful contrast in flavor and appearance. However, feel free to customize! You can use all semi-sweet for a classic dark chocolate profile, or incorporate bittersweet chocolate chips if you desire an even deeper, more intense chocolate flavor. For those who love a nutty twist, peanut butter chips are an excellent addition, turning these into a Reese’s-lover’s dream! You could also experiment with milk chocolate chips, dark chocolate chunks, or even mint chocolate chips for a seasonal variation.
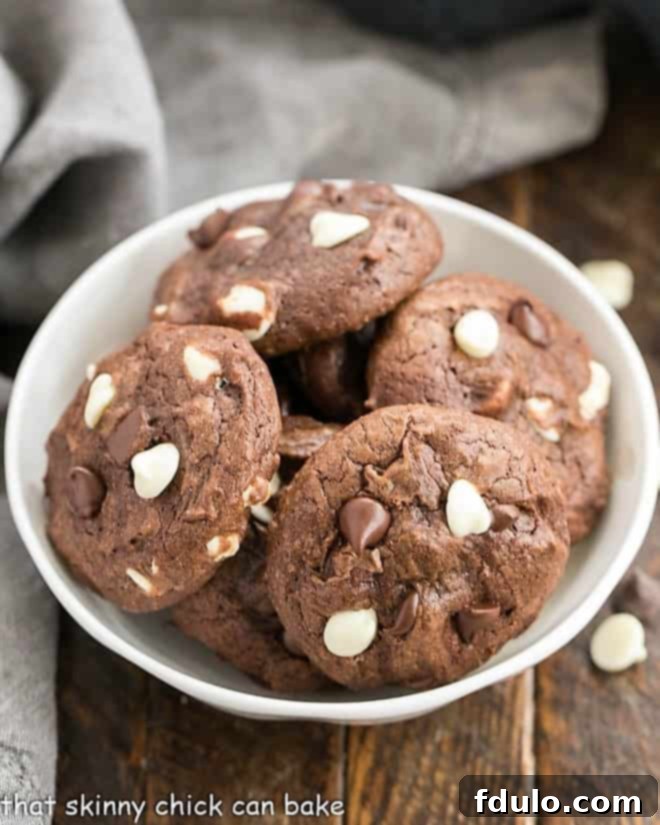
Expert Tips for Baking the Best Chewy Fudgy Brownie Cookies
Achieving bakery-quality brownie cookies at home is easier than you think with these simple yet effective tips. From preparing your ingredients to perfecting the bake, these insights will help you create truly exceptional chewy, fudgy delights every single time.
- PRO-Tip: Room Temperature Ingredients are Key!
- As with most cookie doughs, having your butter and eggs at room temperature is crucial for proper emulsification and easier incorporation. Room temperature butter creams more smoothly with sugar, creating a light and airy base, while room temperature eggs blend more evenly into the mixture, preventing a curdled appearance and ensuring a consistently smooth dough. This leads to a more uniform and tender crumb in the final cookie.
- Hand Mixing for That Perfect Fudgy Texture:
- This soft, rich dough is often best mixed by hand with a sturdy wooden spoon or spatula. While a stand mixer can be tempting for speed, hand mixing helps prevent excessive air from being incorporated into the dough. Too much air can lead to a cakey texture, and we’re aiming for dense, intensely chewy, and fudgy cookies, not light and fluffy cakes. Mix just until combined, avoiding overworking the gluten, which can make cookies tough.
- Parchment Paper: Your Baking Best Friend:
- Always line your baking sheets with parchment paper or silicone baking mats. This simple step is a game-changer! It ensures your cookies don’t stick to the pan, promotes even baking by preventing scorched bottoms, and makes cleanup incredibly easy. No more scraping or stubborn baked-on bits!
- Consistent Scooping for Uniform Cookies:
- For beautifully uniform cookies that bake evenly and look professional, drop generous tablespoonfuls (approximately 4 teaspoons each) of dough about 2 inches apart on your prepared baking sheets. If you prefer more consistent sizes and shapes, a medium cookie scoop (about 1.5 to 2 tablespoons) is an invaluable tool. Uniformity ensures all cookies bake at the same rate, preventing some from being overdone while others are underbaked.
- The Art of Underbaking for Ultimate Chewiness:
- To achieve that coveted chewy texture, slightly underbake your cookies. The timing provided in the recipe aims for this perfect chew. When removed from the oven, the centers should still look a little soft and slightly underbaked – they will continue to set as they cool on the hot baking sheet, resulting in a perfectly fudgy and chewy interior.
- Know Your Oven:
- Remember that all ovens can vary significantly in temperature and air circulation. The first batch is your test batch! Pay close attention to how long your cookies take to bake perfectly in your specific oven. Adjust timing for subsequent batches if necessary, typically by a minute or two. An oven thermometer can also help you calibrate your oven’s true temperature.
- PRO-Tip: Shaping for Picture-Perfect Rounds:
- If you desire perfectly round cookies for a professional, bakery-quality presentation, here’s a trick: immediately after removing the cookies from the oven, use a spatula or the back of a spoon to gently tap or push the edges of each cookie inwards. They’ll be hot and pliable for just a minute or two, allowing you to reshape them into beautiful circles before they set.
- Enhance Visual Appeal with Extra Chips:
- For that irresistible, bakery-style look, press a few extra chocolate chips (both semi-sweet and white work beautifully) onto the surface of the cookies while they are still warm from the oven. This makes them look even more appetizing, signals the abundance of chocolate within, and creates an appealing presentation.
- Cooling Protocol for Best Results:
- Allow the cookies to cool on the baking pan for a few minutes (about 5-10 minutes) before carefully transferring them to a wire cooling rack to cool completely. This initial cooling on the hot pan helps them firm up and finish baking subtly without becoming brittle, preventing them from breaking when moved.
- Combatting Spread: The Refrigeration Method:
- If you find your cookie dough spreads more than desired during baking (this can happen if your kitchen is very warm, your butter was too soft, or you live in a humid environment), cover the dough with plastic wrap and refrigerate it for 30-60 minutes before baking. Chilled dough holds its shape better, resulting in thicker, chewier cookies with less spread.
Step-by-Step Guide: How to Bake Irresistible Chewy Fudgy Brownie Cookies
Follow these detailed instructions to create your own batch of irresistible chewy fudgy brownie cookies. Each step is designed for clarity, ensuring a successful and delicious baking experience from start to finish. Remember to always preheat your oven and gather all your ingredients before you begin.
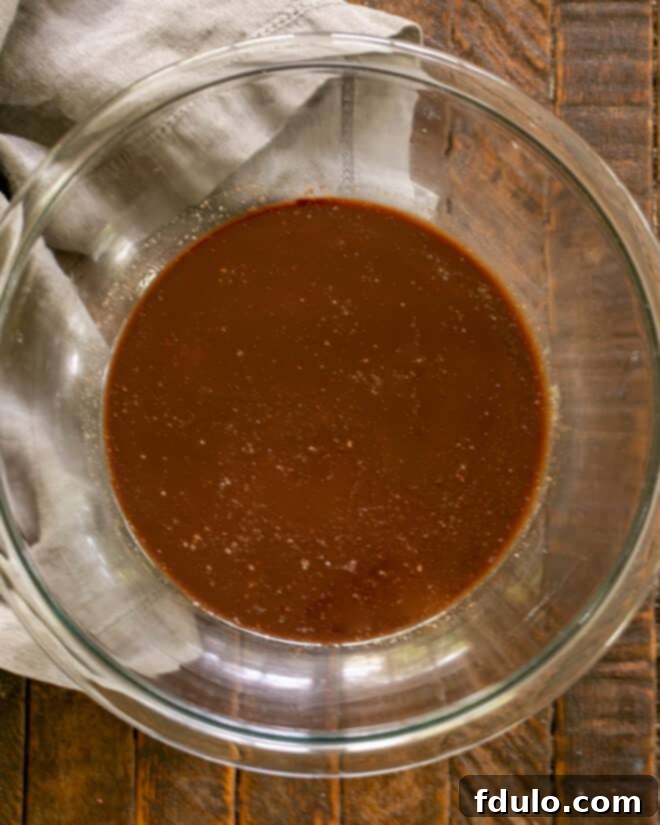
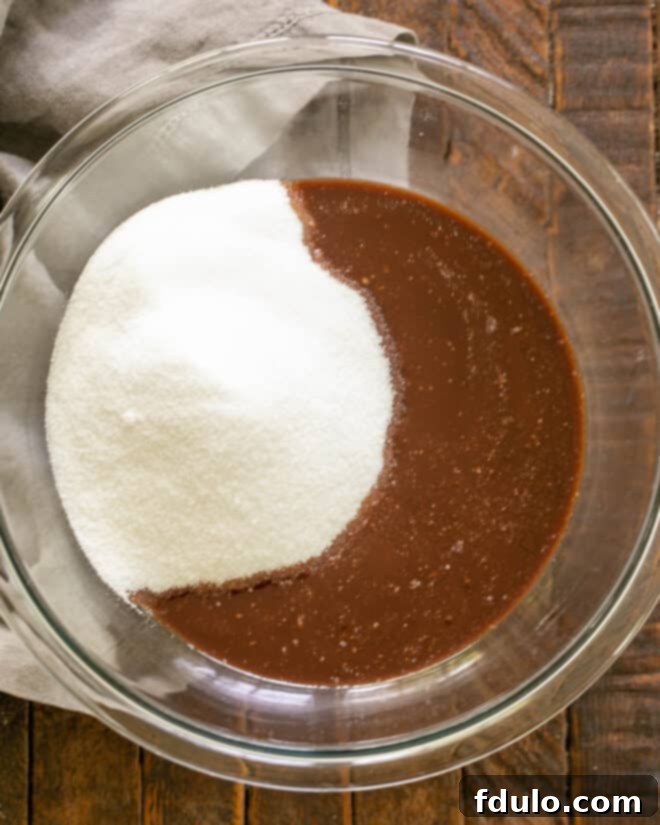
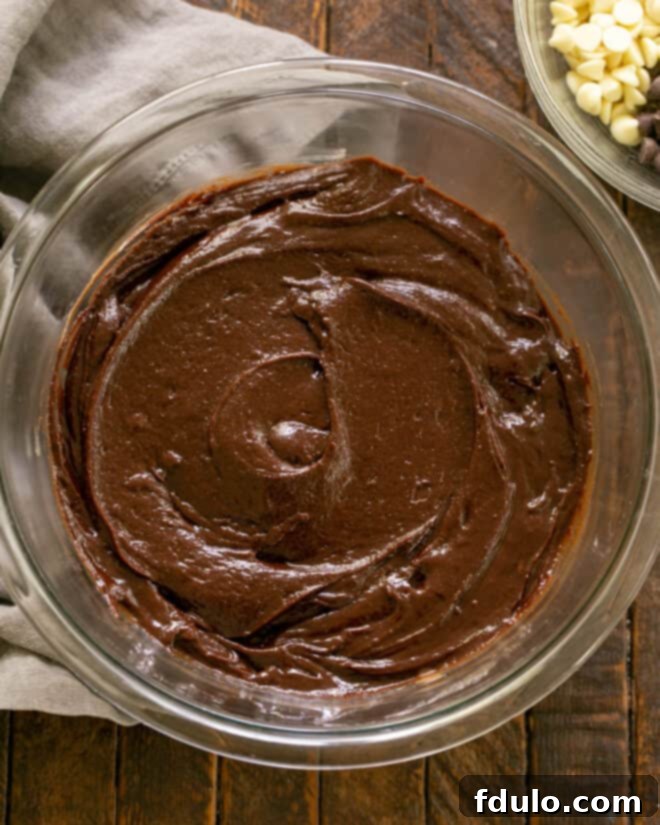
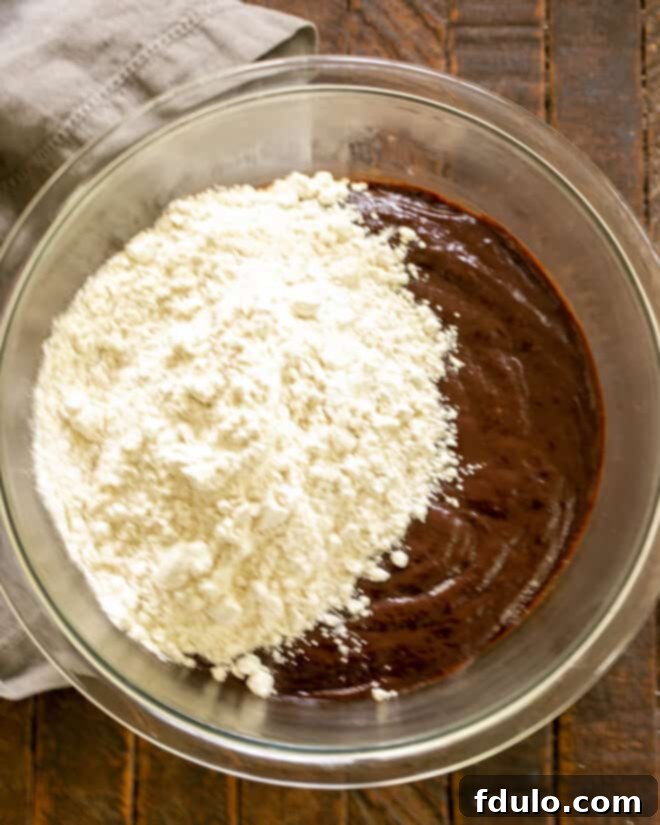
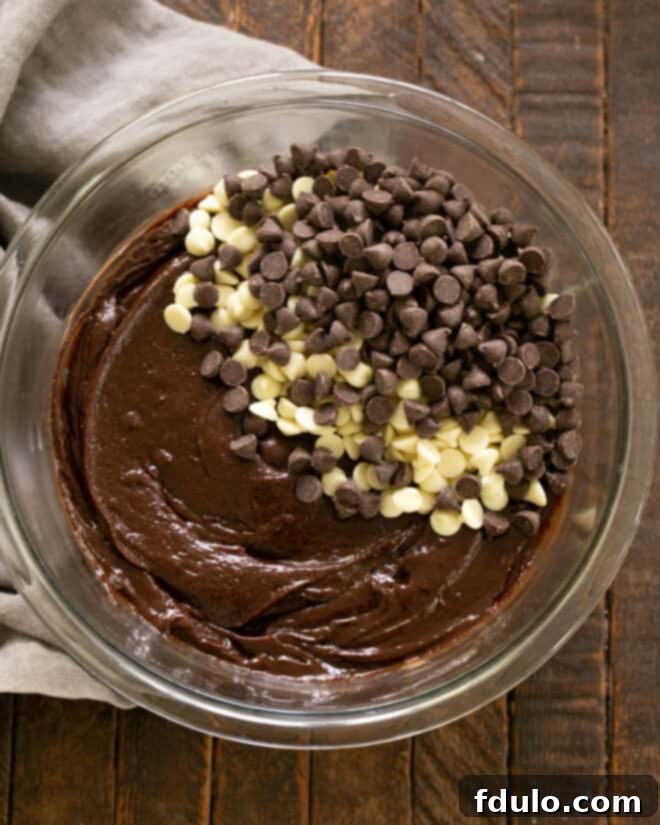
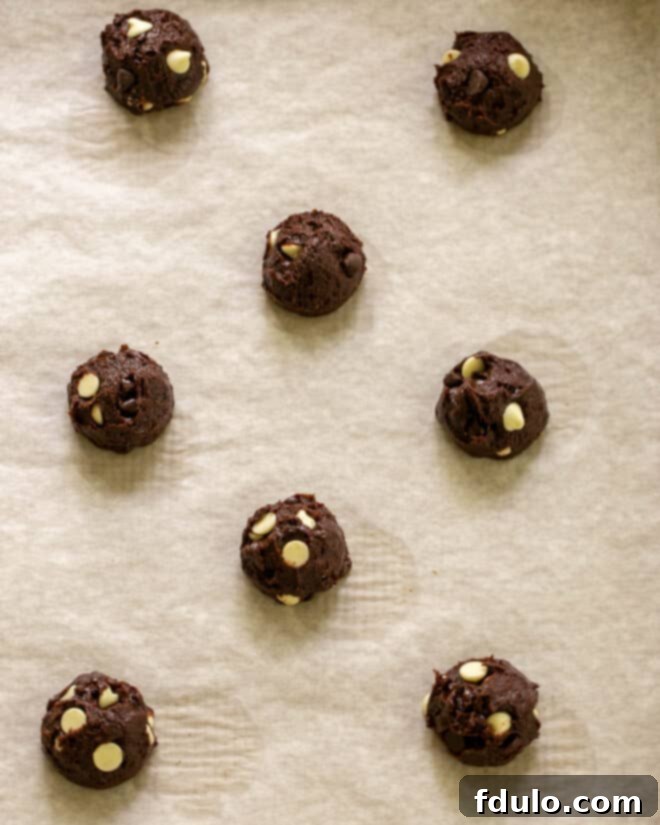
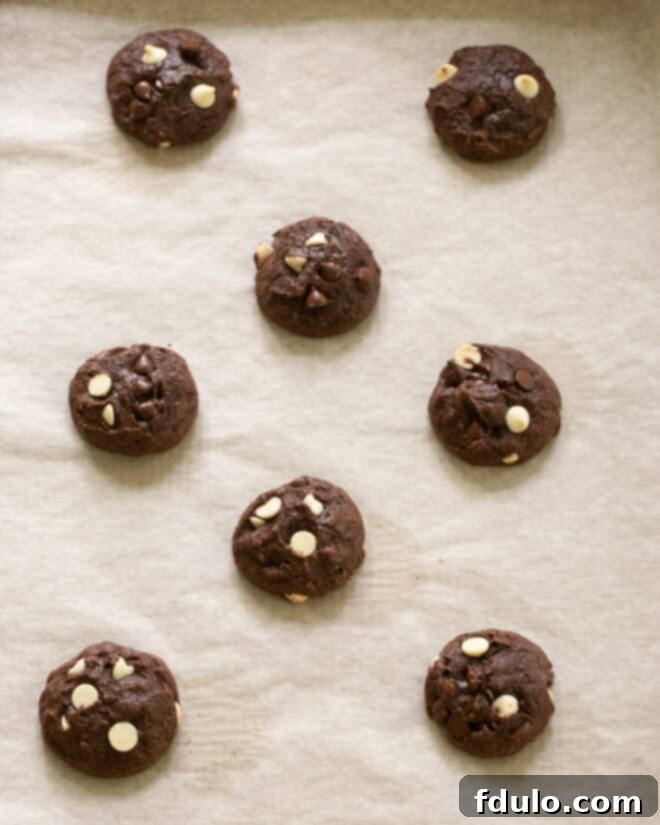
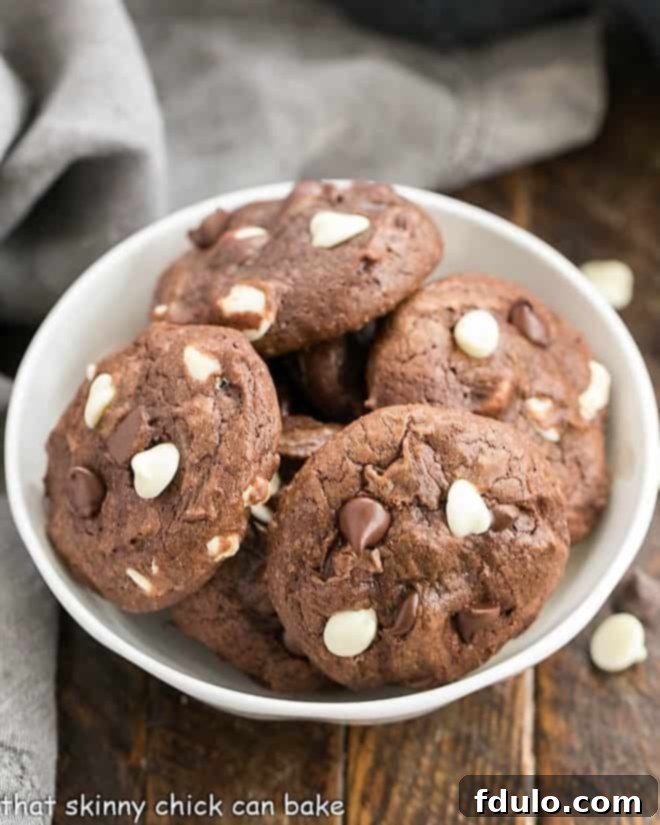
Preheat your oven to 350°F (175°C). Line two baking sheets with parchment paper or silicone baking mats, preparing them for your delicious cookies.
- Melt Chocolate & Butter: In a large microwave-safe bowl, combine the 6 ounces of chopped unsweetened chocolate and ½ cup of butter. Microwave for 60 seconds on high. Remove and stir well with a spatula. Continue to heat in 30-second increments, stirring after each, until the mixture is completely smooth, glossy, and fully melted. Ensure there are no lumps of chocolate remaining.
- Add Sugar: Add the 1 ¾ cup of granulated sugar to the warm chocolate-butter mixture. Mix vigorously with your wooden spoon or spatula until the sugar is thoroughly incorporated and the mixture takes on a beautifully glossy appearance. This step helps in creating the unique chewiness of the cookies.
- Incorporate Eggs & Vanilla: Crack the 4 large, room temperature eggs into the chocolate mixture, one at a time. After adding each egg, mix thoroughly until it is fully combined and no streaks of egg yolk are visible. Once all eggs are in, stir in the 1 teaspoon of pure vanilla extract. The mixture should be smooth and cohesive.
- Fold in Flour: Gradually add the 1 ¼ cup of all-purpose flour to the wet ingredients. With gentle motions, mix just until the flour is incorporated and no dry pockets or streaks remain. Be extremely careful not to overmix, as overworking the dough can lead to a tougher cookie by developing too much gluten.
- Add Chocolate Chips: Gently fold in the ¾ cup of semi-sweet chocolate chips and ¾ cup of white chocolate chips until they are evenly distributed throughout the thick, fudgy dough. Avoid crushing the chips while folding.
- Scoop & Bake: Using a medium cookie scoop (or rounded tablespoons, approximately 4 teaspoons each), drop portions of the dough onto the prepared baking sheets, ensuring they are spaced about 2 inches apart to allow for proper spreading. Place the baking sheets in the preheated oven and bake for exactly 10 minutes. The cookies should appear set around the edges, but their centers should still look slightly soft and even a bit underbaked. This is paramount for achieving that incredibly chewy and fudgy texture.
- Cool: Once baked, remove the baking sheets from the oven. Allow the cookies to cool on the hot pans for at least 5-10 minutes. This critical cooling period allows them to firm up without becoming brittle and helps the centers to fully set. If desired, you can gently press a few extra chocolate chips onto the surface of the warm cookies for an even more enticing visual appeal. After this initial cooling, carefully transfer the cookies to a wire rack to cool completely before serving.
Frequently Asked Questions About Chewy Fudgy Brownie Cookies
Got questions about these delicious chewy brownie cookies? We’ve got answers! Here are some common inquiries to help you master this recipe and enjoy your homemade treats even more. Understanding these aspects will help you achieve perfect results every time.
Drop cookies are perhaps the easiest and most popular type of cookie to make, exemplified by classics like chocolate chip cookies. They are characterized by a soft, scoopable dough that you simply drop or spoon onto a baking sheet. Unlike rolled, cut-out, or pressed cookies, they require no special shaping, chilling (though sometimes recommended for certain textures, as detailed in our tips), or intricate techniques. This straightforward preparation method makes them perfect for beginner bakers and a fantastic go-to for quick dessert fixes. Other cookie categories include bar cookies, refrigerator cookies, pressed cookies, rolled cookies, sandwich cookies, fried cookies, and no-bake cookies, each with their unique preparation methods.
Making cookies for gifts is a thoughtful gesture, and presenting them beautifully adds immensely to their charm. First, ensure uniformity in size: use a cookie scoop to make all your cookies consistently sized, which looks more professional. Immediately after baking, while the cookies are still warm and pliable, use a spatula or the back of a spoon to gently nudge and tap the edges into a perfectly round shape. For an extra professional touch, press a few additional chocolate chips or any other mix-ins onto the top surface of each cookie while they’re still hot. When packaging, look for attractive paper boxes at craft stores or specialty shops. Line the box with pretty tissue paper or crinkle paper, then place your completely cooled cookies in sealed bags (to maintain freshness and prevent sticking together) before arranging them. Finish with a coordinating ribbon or bow and a small, handwritten gift tag for a truly personal touch.
The versatility of this brownie cookie dough is one of its best features! Beyond the classic semi-sweet and white chocolate chips, there are countless delicious possibilities to explore to customize your cookies. I’ve successfully made these with regular M&Ms and seasonal M&Ms, which are fantastic for holidays like Easter, Halloween, or Christmas, adding both vibrant color and a delightful candy crunch. Other fantastic additions include:
- Toffee Bits: Adding chunks of toffee or toffee bits introduces a delightful caramel-like flavor and a wonderful chewy texture.
- Peanut Butter Chips: For fans of the classic chocolate-peanut butter combination, these are a must-try. They melt into creamy pockets of peanut butter goodness.
- Caramel Chips: These will melt into gooey pockets of rich caramel goodness within the cookie, adding another layer of indulgence.
- Chopped Nuts: Finely chopped walnuts, pecans, or even almonds can add a lovely crunch and earthy flavor that beautifully complements the chocolate.
- Mint Chocolate Chips: A seasonal favorite, especially around winter holidays, for a refreshing and festive twist.
- Dried Fruits: Chopped dried cherries, cranberries, or even raspberries can add a burst of tartness to balance the richness of the chocolate.
- Espresso Powder: A teaspoon of instant espresso powder can deepen the chocolate flavor without making the cookies taste like coffee.
Feel free to get creative and experiment with your favorite mix-ins! Just remember to keep the total volume of add-ins similar to the chocolate chips to maintain the dough’s consistency.
While both traditional brownies and brownie cookies deliver a delightful chocolate experience, their preparation and form are quite distinct. Traditional brownies are typically baked in a pan (like a square or rectangular baking dish) and then cut into squares or bars for serving. They often have a slightly different texture profile, sometimes more cake-like or sometimes incredibly dense, depending on the recipe. Brownie cookies, on the other hand, are individual portions of a thicker, more pliable dough designed to be formed into balls or scooped onto a baking sheet. They retain the fudgy, chewy characteristics of a good brownie but offer the convenience, portability, and often crispier edges of a cookie. Essentially, brownie cookies take all the best qualities of a brownie and put them into a handheld, perfectly portioned form, making them ideal for sharing or grab-and-go treats.
To maintain their irresistible fudgy texture and freshness, store your completely cooled chewy brownie cookies in an airtight container at room temperature for up to 3-4 days. Placing a slice of plain bread in the container can help keep them soft. For longer storage, you can freeze them. Arrange baked and cooled cookies in a single layer on a baking sheet, then transfer to a freezer-safe bag or airtight container once frozen solid. They will keep beautifully for up to 2-3 months in the freezer. Thaw them at room temperature for a few hours, or warm briefly in the microwave for a fresh-baked taste and gooey chocolate chips.
Absolutely! This brownie cookie dough is excellent for make-ahead preparation, making your baking day much easier. Prepare the dough as directed, then cover the bowl tightly with plastic wrap and refrigerate for up to 2-3 days. Chilling the dough can actually enhance the flavors as they meld together, and it often results in slightly thicker cookies that spread less during baking. When you’re ready to bake, let the dough sit at room temperature for about 15-20 minutes to soften slightly, making it easier to scoop and handle.

Explore More Decadent Cookie Recipes You’ll Love:
- Irresistible Chocolate Peanut Butter Cookies from Amanda’s Cookin’
- Fudgy Brookies: The Best of Both Worlds from Savory Experiments
- Ultimate Death By Chocolate Cookies
- Classic Double Chocolate Cookies
- Unique Layered Chocolate Chip Cookies
- Gooey Caramel-Filled Chocolate Cookies
- Moreish Double Chocolate Chip Cookies
- Discover the Best Cookie Recipes for Every Craving
We hope you adore this recipe as much as we do! Stay connected with us for more delectable treats and baking inspiration through social media. You can find us @ Instagram, Facebook, and Pinterest. Don’t forget to tag us and share a photo when you try one of our recipes! Your beautiful creations inspire us and our community. If you love the results, please consider leaving a 5-star rating and a review in the recipe card below – it truly helps others discover these amazing cookies and fuels our passion for baking.
Chewy Fudgy Brownie Cookies Recipe
20 minutes
10 minutes
30 minutes
24 delicious cookies
These rich, intensely chocolatey cookies are loaded with both dark and white chocolate chips, offering an irresistible fudgy and chewy texture that tastes just like your favorite brownie!
Ingredients You’ll Need:
- 6 ounces unsweetened chocolate, high-quality, chopped
- ½ cup (1 stick) unsalted butter, softened to room temperature (add ¼ tsp salt if using unsalted)
- 1 ¾ cup granulated sugar
- 4 large eggs, at room temperature
- 1 teaspoon pure vanilla extract
- 1 ¼ cup all-purpose flour
- ¾ cup semi-sweet chocolate chips
- ¾ cup white chocolate chips
Detailed Instructions:
- Preheat your oven to 350°F (175°C). Prepare two baking sheets by lining them with parchment paper or silicone baking mats.
- In a large microwave-safe bowl, combine the chopped unsweetened chocolate and butter. Microwave for 60 seconds, then stir well. Continue heating in 30-second increments, stirring after each, until the mixture is completely smooth and melted.
- Add the granulated sugar to the warm chocolate and butter mixture. Mix vigorously until well combined and the mixture appears glossy. Crack in the eggs one at a time, mixing thoroughly after each addition until fully incorporated. Stir in the pure vanilla extract.
- Gradually add the all-purpose flour to the wet ingredients. Mix just until the flour is incorporated and no dry streaks remain. Be careful not to overmix the dough. Gently fold in both the semi-sweet and white chocolate chips until they are evenly distributed.
- Drop rounded tablespoons of the dough onto the prepared baking sheets, leaving about 2 inches between each cookie. A medium cookie scoop can help ensure uniform sizing. Bake for exactly 10 minutes. The cookies will look set at the edges but should still appear slightly soft and underbaked in the centers – this is key for a chewy texture.
- Remove the baking sheets from the oven. Let the cookies cool on the hot pans for 5-10 minutes to allow them to firm up slightly. If desired, gently press a few extra chocolate chips onto the tops of the warm cookies for an enhanced appearance. Transfer the cookies to a wire rack to cool completely before serving.
Chef’s Notes & Tips:
Recipe adapted from a beloved Caprial Pence creation.
For the best texture and incorporation, always ensure your eggs and butter are at room temperature.
Feel free to experiment with different varieties or combinations of chocolate chips – bittersweet, milk chocolate, or even peanut butter chips make fantastic alternatives or additions!
If your cookies spread too much, chilling the dough for 30-60 minutes before baking can help them hold their shape better.
For perfectly round cookies, use a spatula to gently nudge the edges into shape immediately after they come out of the oven, while still warm and pliable.
Recommended Baking Products:
As an Amazon Associate and member of other affiliate programs, I earn from qualifying purchases.
- Reynolds Cookie Baking Sheets Non-Stick Parchment Paper
- USA Pan Bakeware Half Sheet Pan
- OXO Good Grips Medium Cookie Scoop
Nutrition Information:
Yield:
24 cookies
Serving Size:
1 cookie
Amount Per Serving:
Calories: 226Total Fat: 12gSaturated Fat: 7gTrans Fat: 0gUnsaturated Fat: 4gCholesterol: 42mgSodium: 50mgCarbohydrates: 28gFiber: 2gSugar: 21gProtein: 3g
HOW MUCH DID YOU LOVE THIS RECIPE?
Please leave a comment on the blog or share a photo on Pinterest
After creating these incredibly popular Chewy Fudgy Brownie Cookies for Bill’s nursing staff, the empty tray was a testament to their irresistible deliciousness! There was nothing left but crumbs, which is the highest compliment any baker can receive. It was a joy to share such a beloved recipe that began as an early Food Network discovery and has since become a cherished staple in my repertoire. These cookies truly deliver that dense, moist, and intensely chocolatey brownie experience in a convenient, handheld form, making them an instant favorite for anyone who tries them. They are more than just a dessert; they are a delightful expression of comfort and joy, perfect for sharing with those you appreciate or simply indulging yourself after a long day.
