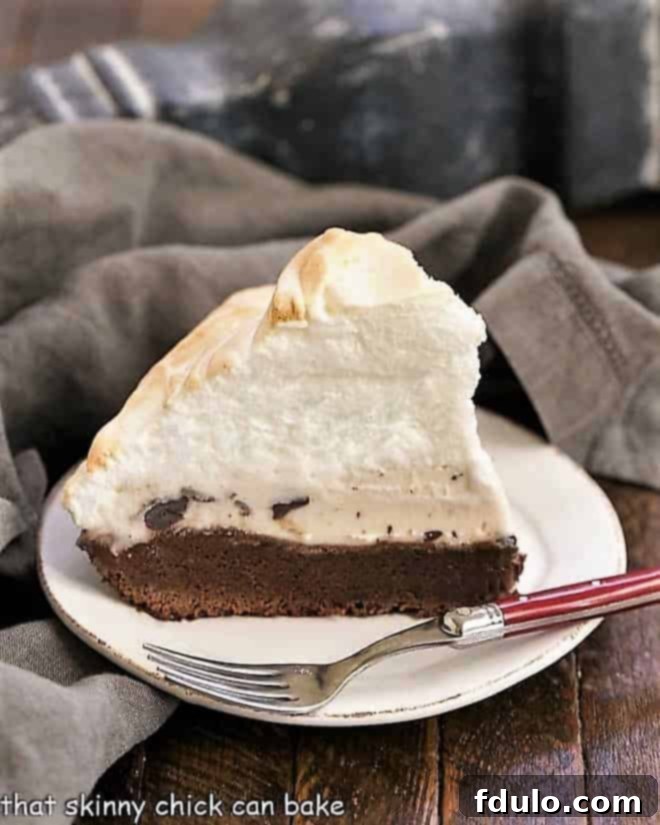
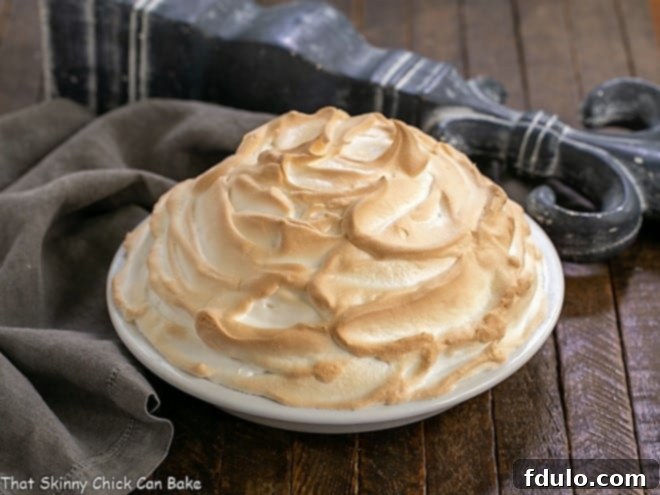
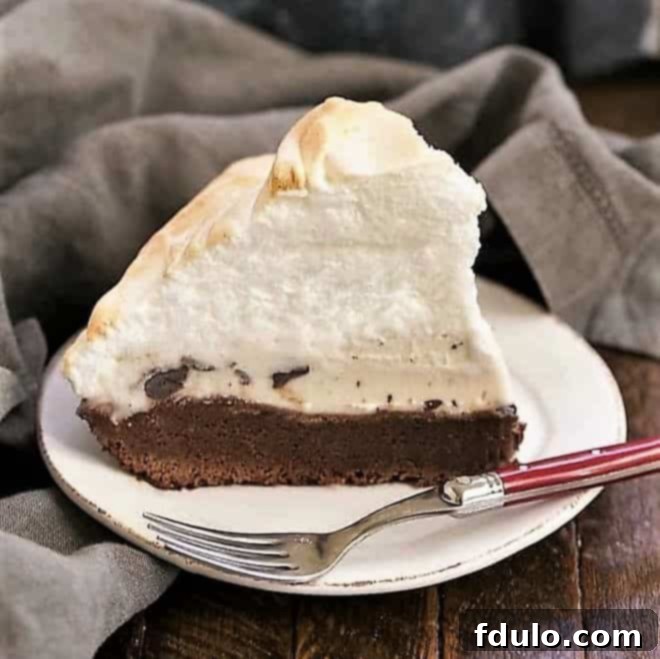
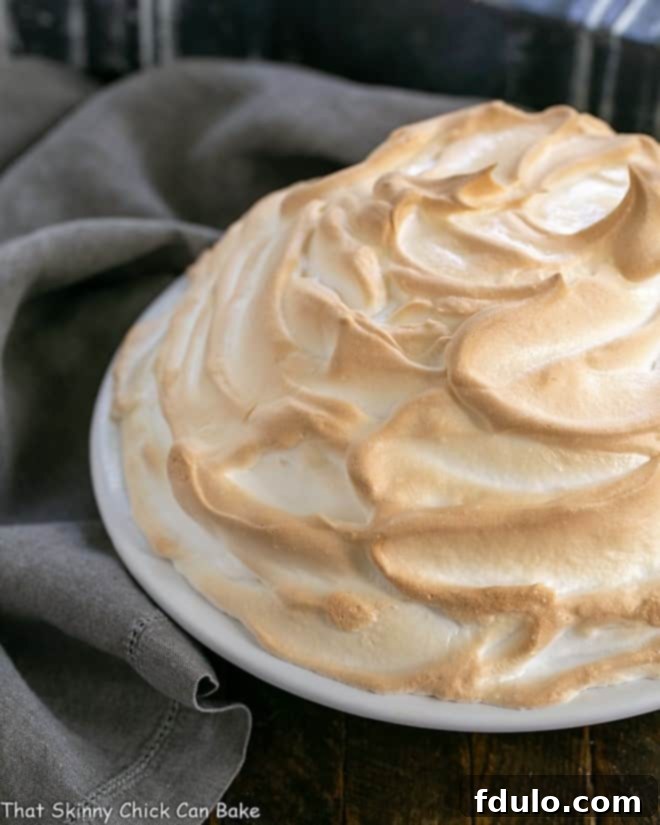
A Brownie Baked Alaska stands as a magnificent reimagining of the classic meringue-topped dessert. This iconic treat, originally named after the United States’ acquisition of Alaska in the late 1800s, blends delightful contrasts of hot and cold, making it a true showstopper for any occasion. Our version elevates this elegant dessert by introducing a rich, fudgy brownie base, offering an irresistible twist for chocolate lovers.
Prepare to impress your guests with this extraordinary Baked Alaska recipe. It boasts a towering cloud of perfectly toasted meringue, encasing layers of creamy ice cream and a dense, chocolatey brownie. The visual appeal alone makes it a centerpiece, but the harmony of textures and flavors ensures every bite is a memorable experience.
Why You Must Try This Brownie Baked Alaska Recipe
There are countless reasons why this particular Baked Alaska recipe deserves a spot in your dessert repertoire. Beyond its stunning presentation, it offers a symphony of flavors and textures that will captivate anyone who tries it.
- A Modern Twist on a Classic: This recipe offers a unique, decadent twist on an iconic dessert. By substituting the traditional sponge cake with a rich, fudgy brownie, we’ve created a dessert that’s both familiar and exciting, perfect for those who crave a chocolatey indulgence.
- Perfect for Chocoholics: If you adore chocolate, this is your dream dessert. The dense brownie base provides a deep cocoa foundation that perfectly complements the creamy ice cream and sweet meringue, satisfying every chocolate craving.
- Impressive Presentation, Surprisingly Simple: While it looks incredibly elaborate and complex, the process of assembling a Brownie Baked Alaska is more straightforward than you might imagine. The “wow factor” it delivers far outweighs the effort, making you look like a culinary genius.
- Endless Flavor Customization: The versatility of this dessert is a huge bonus. While vanilla chocolate chip ice cream is a fantastic choice, you can easily experiment with your favorite flavors. Imagine peppermint stick for holidays, rich coffee ice cream, or a luxurious salted caramel swirl. The possibilities are truly endless, allowing you to tailor it to any palate or occasion.
- A Crowd-Pleasing Dessert: This dessert invariably elicits enthusiastic responses. As my oldest, Tom, once quipped while savoring a slice, “This can’t be good for you!”—a testament to its utterly delicious and indulgent nature. It’s the kind of treat that creates lasting memories and happy sighs.
Understanding the Classic Baked Alaska
Before diving into our brownie-infused creation, let’s appreciate the original. A Baked Alaska is a dessert consisting of ice cream and cake topped with toasted meringue. The magic lies in the meringue’s insulating properties. When baked briefly at a high temperature or torched, the meringue quickly browns and caramelizes on the outside, creating a crisp, sweet crust. Crucially, this meringue layer acts as a protective shield, insulating the frozen ice cream underneath from the heat, preventing it from melting. This delightful contrast of a warm, slightly crispy exterior and a cold, creamy interior is what makes Baked Alaska so captivating.
Historically, the dessert gained prominence in the United States around 1876 at Delmonico’s Restaurant in New York City, where chef Charles Ranhofer reportedly created it to celebrate the United States’ purchase of Alaska. It was initially called “Alaska-Florida” due to the stark hot-and-cold contrast, before being simplified to “Baked Alaska.” Its European counterparts were known by names such as “omelette norvégienne” (Norwegian omelette), “omelette surprise,” or “omelette sibérienne,” highlighting its international appeal and the surprising element of a baked ice cream dessert.
Essential Ingredient Notes for Your Brownie Baked Alaska
Crafting the perfect Brownie Baked Alaska begins with understanding your ingredients. Each component plays a vital role in achieving the desired texture, flavor, and impressive presentation.
- Sugar: While regular granulated sugar works perfectly well for the meringue, opting for superfine sugar (also known as caster sugar) can make a noticeable difference. Its finer crystals dissolve more quickly and evenly into the egg whites, resulting in a smoother, more stable, and glossy meringue.
- Brownie Base: The foundation of this unique dessert. You have the flexibility to use your favorite homemade fudgy brownie recipe or a high-quality box mix for convenience. Whichever you choose, ensure it’s baked in a pie dish for the correct shape and is completely cooled before assembling. A dense, fudgy brownie works best, providing a sturdy contrast to the soft ice cream and airy meringue. If using a box mix, you may not need all the batter for a standard pie dish; adjust accordingly to avoid an overly thick base.
- Premium Ice Cream: The quality of your ice cream truly shines through here. Select 2 pints of premium ice cream. I highly recommend a rich vanilla with chocolate chips, like Graeter’s, as it harmonizes beautifully with the brownie. However, feel free to experiment with other complementary flavors such as coffee, mint chocolate chip, caramel, or even a berry swirl for a fruity counterpoint. Ensure the ice cream is firm when you begin assembling.
- Egg Whites: These are the star of your meringue. For maximum volume and stability, separate your eggs while they are cold; the yolks are less likely to break and contaminate the whites when cold. However, always let the egg whites come to room temperature before beating. Room temperature whites whip up faster and achieve significantly more volume than cold ones, resulting in a fluffier, more stable meringue.
- Cream of Tartar: This acidic ingredient is crucial for stabilizing the egg whites, helping them achieve greater volume and a firmer, more resilient structure. It prevents the meringue from collapsing. If you don’t have cream of tartar, an equal amount of fresh lemon juice or white vinegar can serve as an effective substitute, providing the necessary acidity.

Step-by-Step: How to Make Brownie Baked Alaska
Creating this stunning dessert is an enjoyable process. Follow these detailed steps to ensure a flawless Brownie Baked Alaska every time.
- Bake the Brownie Base: Prepare your chosen brownie recipe (homemade or box mix) and bake it in a 9-inch pie plate. Ensure the brownie is cooked through but remains fudgy. If using a box mix, you might not need all the batter; adjust as necessary.
- Level the Brownie (Optional): After baking and while the brownie is still slightly warm, gently press down on the top with a spatula or the back of a spoon if it’s uneven. This creates a level surface for the ice cream layer.
- Cool Completely: Allow the brownie to cool completely to room temperature. This is crucial to prevent the ice cream from melting prematurely during assembly.
- Prepare the Ice Cream Layer: Remove the ice cream from its containers. For easier handling, you can slice each pint into three thick rounds. Arrange these rounds to cover the cooled brownie base in the pie plate.
- Fill and Mound: Use any remaining ice cream to fill in gaps or holes in the ice cream layer, then pile the rest of the ice cream in the center of the pie plate to create a slight dome. This rounded shape will give your Baked Alaska its classic domed appearance once covered with meringue.
- Freeze Firmly: Place the pie plate with the brownie and ice cream layers into the freezer. Freeze for at least 30-60 minutes, or until the ice cream is very firm. This firm freezing is essential to prevent melting when the meringue is applied and baked.
- Preheat Oven: Preheat your oven to 375°F (190°C). If you plan to use a kitchen torch, this step can be skipped, though oven baking yields a more even browning.
- Prepare the Meringue: Approximately 5 minutes before you are ready to finish the dessert, begin making the meringue. In a very clean mixing bowl, beat the room-temperature egg whites with a pinch of salt using an electric mixer until they become foamy. Add the cream of tartar (or lemon juice) and continue beating until the whites hold soft peaks.
- Sweeten and Stiffen: Gradually add the sugar to the egg whites, about a tablespoon at a time, while continuing to beat. Whip until the meringue is glossy and holds stiff peaks. This means when you lift the beaters, the meringue peaks stand upright and don’t flop over.
- Mound the Meringue: Promptly remove the frozen brownie and ice cream base from the freezer. Generously mound the stiff meringue over the entire ice cream layer, ensuring it spreads all the way to the edges of the pie plate. The goal is to completely seal the ice cream, providing a protective barrier against the heat. You can create decorative swirls or peaks with a spatula.
- Bake and Serve: Place the assembled Baked Alaska into the preheated oven. Bake for approximately 8-12 minutes, or until the meringue turns a beautiful golden brown. Alternatively, use a kitchen torch to brown the meringue evenly until golden. Serve immediately to enjoy the delightful contrast of warm meringue and cold ice cream.
Expert Recipe Tips and Tricks
Achieving a perfect Brownie Baked Alaska is simpler with these professional tips and tricks:
- Base Customization: While our recipe champions the brownie, the base of a Baked Alaska is incredibly versatile. Instead of a typical sponge cake or brownie, you could use a cookie crust, a dense blondie, or even a gingerbread base for seasonal variations. Remember to bake your chosen base in a pie plate for the traditional shape, rather than a classic round cake pan.
- Box Mix Brownie Batter: If you opt for a box brownie mix, be aware that you might not need all the batter for a standard 9-inch pie plate. Using too much batter will result in an overly thick base. Adjust the quantity to ensure a balanced dessert.
- Ice Cream Flavor Pairings: The ice cream layer offers another opportunity for creativity. Classic vanilla is always a good choice, especially with a chocolate brownie, but feel free to experiment! Coffee, mint, butter pecan, strawberry, or even a non-dairy alternative can be delicious as long as the flavor complements the brownie base.
- The Critical Freeze: Never rush the freezing step. The ice cream layer must be completely frozen and firm before you add the meringue. This prevents the ice cream from turning into a melted mess when exposed to the oven’s heat during the final browning of the meringue. Aim for at least 30-60 minutes of freezing time.
- Meringue Volume is Key: A generous, billowy meringue topping is the hallmark of an exceptional Baked Alaska. The original recipes often called for 6 egg whites for a truly massive meringue. While decreasing to 4 egg whites still yields a beautiful, fluffy mound, ensure you follow best practices for maximum volume.
- PRO-Tip: Room Temperature Egg Whites: This cannot be stressed enough. For the most voluminous and stable meringue, always use egg whites that have come to room temperature. Cold egg whites resist whipping and will not achieve the same airy volume.
- PRO-Tip: Impeccably Clean Equipment: Meringue is finicky. Any trace of grease, oil, or egg yolk contamination on your mixing bowl or beaters will prevent the egg whites from whipping properly. Ensure all your equipment is sparkling clean, ideally run through a dishwasher, to guarantee success.
- One-by-One Egg Separation: To avoid catastrophe, separate your eggs one at a time into a small, separate dish before adding the whites to your main mixing bowl. If even a tiny dribble of yolk contaminates a white, that egg white won’t whip. This method ensures that if one yolk breaks, you only lose one egg white, not the entire batch.
- PRO-Tip: Make-Ahead Option: This dessert is perfect for advance preparation. You can assemble the brownie and ice cream layers, cover them tightly, and freeze for up to two days. When you’re ready to serve, simply prepare the meringue, top the frozen base, and bake as directed. You might need to extend the baking time slightly if the base is extremely cold.

Frequently Asked Questions About Baked Alaska
A classic Baked Alaska is typically constructed with three distinct layers: a base of sponge cake, followed by a generous layer of ice cream, and finished with a billowy, toasted meringue topping. The brilliance of the dessert lies in its preparation: the cake and ice cream layers are thoroughly frozen before the meringue is applied. This meringue then insulates the ice cream, allowing the dessert to be briefly baked or torched until the meringue is golden brown, while the ice cream inside remains perfectly frozen and creamy.
The dessert purportedly received its name in 1876 from Charles Ranhofer, a renowned chef at Delmonico’s Restaurant in New York City. He is credited with creating the dish to commemorate the United States’ purchase of Alaska from Russia in 1867, a transaction often dubbed “Seward’s Folly.” Initially, due to the striking contrast between the hot meringue and cold ice cream, it was sometimes referred to as “Alaska-Florida.” However, the name quickly evolved to the now-famous “Baked Alaska.” While Ranhofer popularized the name, there are undocumented claims that Antoine Alciatore of Antoine’s restaurant in New Orleans may have also originated a similar baked ice cream dessert around the same time. This frozen delight wasn’t entirely new, having been known in Europe as omelette norvégienne (Norwegian omelette), omelette surprise, or omelette sibérienne. For an even more dramatic presentation, if you douse your Baked Alaska in rum and ignite it tableside, it transforms into a flamboyant Bombe Alaska.
Slicing through a meringue topping can indeed be a bit challenging, as the sticky meringue often adheres to the knife, causing it to tear rather than glide cleanly. To achieve perfect slices, try these methods: First, the most common and effective technique is to dip a sharp knife into boiling hot water, quickly wipe it dry, and then slice. The heat from the knife helps to melt through the meringue and ice cream effortlessly. Repeat this process for each slice. Alternatively, for more controlled cutting, you can use the sharp point of your knife to gently pierce along the line where you intend to slice, creating a series of “dots.” Then, follow these guiding marks to make your clean cut, minimizing tearing.
Serving and Storage Suggestions
Serving your Brownie Baked Alaska immediately after browning the meringue is crucial for the optimal experience of hot exterior and cold interior. Garnish with fresh berries, chocolate shavings, or a drizzle of chocolate sauce for added elegance. For best results, don’t let it sit out for too long. Any leftovers can be carefully wrapped in plastic wrap and then aluminum foil to prevent freezer burn. It will keep well in the freezer for up to 3-4 days, though the meringue might lose some of its crispness over time. For individual portions, slice the dessert and wrap each piece separately before freezing.
Discover More Delicious Dessert Recipes
If you loved this exquisite frozen dessert, explore other fantastic sweet treats that are sure to delight:
- Frozen Chocolate Mousse Cake
- Frozen Grasshopper Pie
- No-Churn Ice Cream Cake
- Frozen Chocolate Peanut Butter Pie
- Individual Baked Alaskas
- Explore more Dessert Recipes
Stay in touch through social media @ Instagram, Facebook, and Pinterest. Don’t forget to tag me when you try one of my recipes! And if you love the results, please give it a 5-star rating in the recipe card below.
Brownie Baked Alaska Recipe

Brownie Baked Alaska Recipe
30 minutes
45 minutes
1 hour 15 minutes
8 servings
A fudgy twist on a classic Baked Alaska, featuring a rich brownie base and creamy vanilla chocolate chip ice cream, all crowned with toasted meringue.
Ingredients
- 1 brownie recipe, homemade or boxed, baked in a 9-inch pie dish and cooled
- 2 pints premium ice cream (e.g., Graeter’s Vanilla with Chocolate Chips)
For the Meringue:
- 4 large egg whites, at room temperature
- ¼ teaspoon cream of tartar (or an equal amount of lemon juice)
- ½ cup granulated sugar (superfine sugar preferred)
Instructions
- Bake Brownies: Bake your chosen brownie recipe in a 9-inch pie plate. If using a box mix, you likely won’t need all the batter. If using a fudgy brownie recipe, it’s okay to leave out a small amount of batter.
- Level Top: If the brownie top is uneven after partially cooling, gently press down to level it.
- Cool Completely: Allow the baked brownie to cool completely to room temperature.
- Prepare Ice Cream: Remove ice cream from paper containers. Slice each pint into 3 rounds. Arrange 3 rounds on top of the cooled brownie in the pie plate. Cut each remaining round into 6 wedges.
- Form Ice Cream Dome: Fill any holes in the ice cream layer with some of the ice cream wedges. Pile the remainder in the center of the pie plate to create a dome shape.
- Freeze: Freeze the brownie and ice cream base for 30-60 minutes, or until very firm.
- Preheat Oven: Preheat oven to 375°F (190°C).
- Prepare Meringue (Initial Whip): About 5 minutes before you are ready to finish the dessert, beat egg whites and a pinch of salt with an electric mixer until foamy. Add cream of tartar and continue to beat until whites hold soft peaks.
- Stiffen Meringue: Gradually add sugar, beating until the whites just hold stiff, glossy peaks.
- Apply Meringue: Remove the frozen ice cream base from the freezer. Mound the meringue over it, spreading it to the very edge of the plate to completely cover and seal the ice cream.
- Bake and Serve: Bake until golden brown, approximately 8-12 minutes. Alternatively, use a kitchen torch to brown the meringue. Serve immediately.
- Make-Ahead Option: You can prepare the brownie and ice cream layers up to 2 days in advance. Cover and freeze. Then, top with meringue and bake as directed, extending baking time by a few minutes if needed.
Notes
To cut through the meringue cleanly, use a hot, dry knife. Dip the knife in boiling water, wipe it dry, then slice. Repeat for each cut.
* I recommend using my Fudgy Brownie Recipe for the base.
Recommended Products
As an Amazon Associate and member of other affiliate programs, I earn from qualifying purchases.
- KitchenAid 9-Speed Digital Hand Mixer
- Ceramic pie plate
- Superfine Sugar
Nutrition Information:
Yield:
8
Serving Size:
1 slice
Amount Per Serving:
Calories: 461
Total Fat: 14g
Saturated Fat: 7g
Trans Fat: 0g
Unsaturated Fat: 6g
Cholesterol: 38mg
Sodium: 156mg
Carbohydrates: 81g
Fiber: 1g
Sugar: 69g
Protein: 5g
HOW MUCH DID YOU LOVE THIS RECIPE?
Please leave a comment on the blog or share a photo on Pinterest

