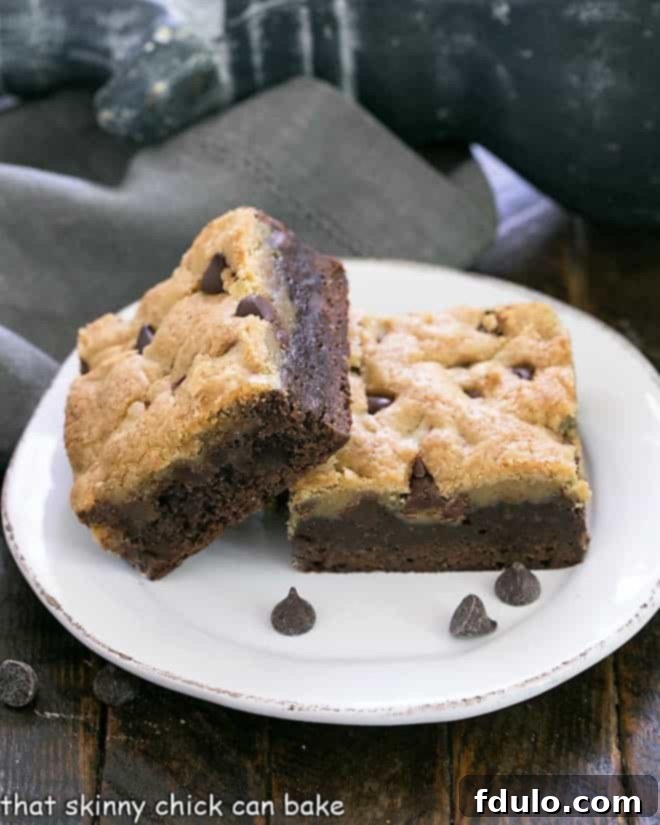
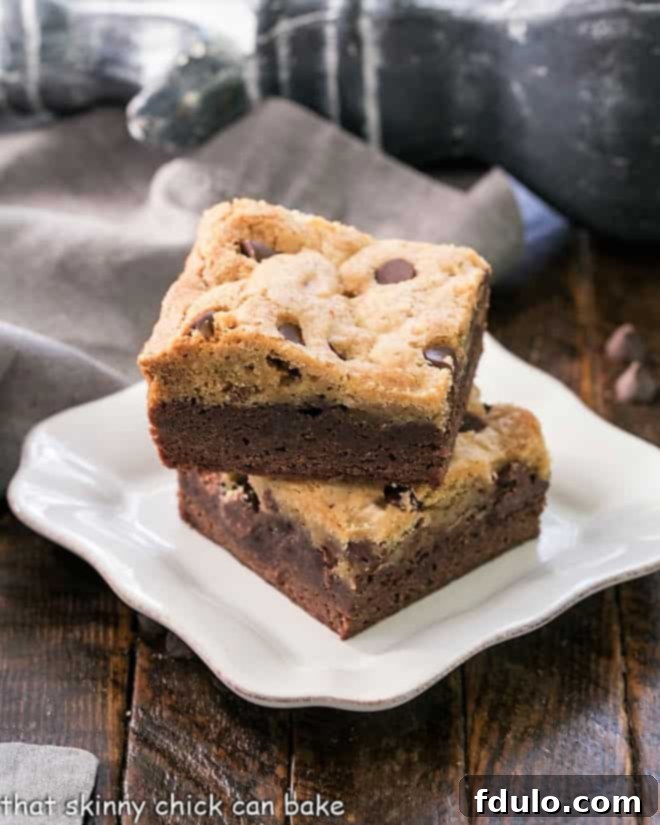
Welcome to the irresistible world of **Brookie Bars**! Imagine your fudgy, rich brownie obsession meeting your chewy, delightful chocolate chip cookie cravings in one perfect bite. This isn’t just a dessert; it’s a culinary masterpiece, a harmonious blend of two beloved classics that come together to create an experience far greater than the sum of its parts. Forget choosing between a brownie and a cookie; with Brookie Bars, you get the best of both worlds, layered into an outrageously delicious, utterly satisfying treat that will become your new go-to for any occasion.
For years, this ingenious dessert mashup has captivated sweet tooths everywhere, and for good reason. Each bite delivers the intense cocoa notes and dense texture of a perfectly baked brownie, seamlessly transitioning into the soft, buttery sweetness and melty chocolate chips of a classic cookie. It’s a decadent, family-friendly dessert that eliminates decision fatigue and doubles the delight. Whether you’re a lifelong chocoholic or simply seeking an easy-to-make, crowd-pleasing treat, these **Brownie Cookie Bars** promise pure bliss.
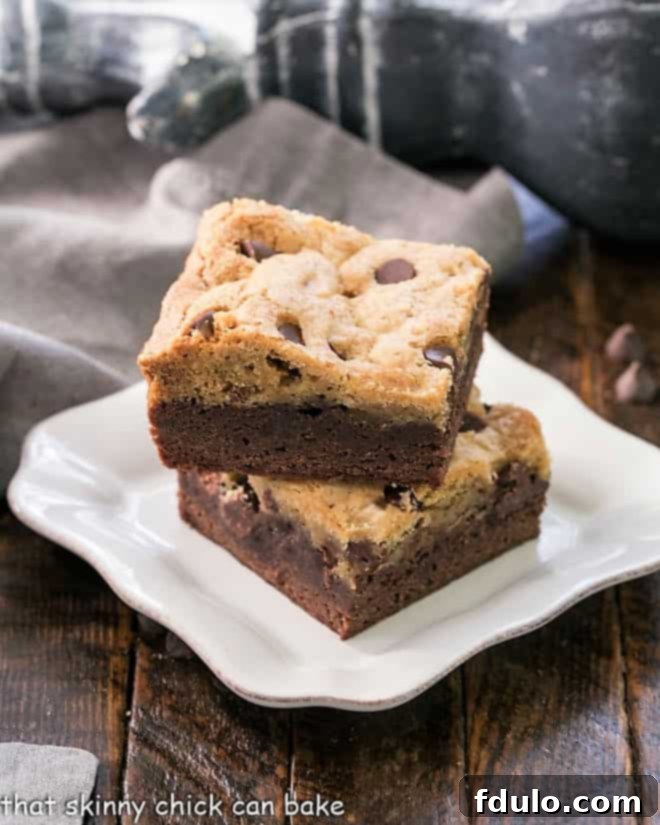
Why You Need These Incredible Brookie Bars in Your Life
If you’re still contemplating whether to embark on this delightful baking adventure, let us convince you. Brookie Bars are more than just a dessert; they are a celebration of flavor, texture, and pure indulgence. Here’s why these **layered brownie and cookie bars** are an absolute must-make:
- The Ultimate Dessert Fusion: Can’t decide between a rich, fudgy brownie and a chewy, chocolate-packed cookie? You don’t have to! Brookies offer a heavenly layer of each, satisfying both cravings in every single bite. It’s the perfect solution for the indecisive dessert lover.
- A Chocoholic’s Dream Come True: Overflowing with deep cocoa flavor from the brownie base and generous chocolate chips in the cookie layer, these bars are a dream for anyone who truly loves chocolate. Prepare for an intense, satisfying chocolate experience.
- Irresistibly Gooey Perfection: For those who appreciate a dessert with a tender, melt-in-your-mouth quality, these bars are a winner. Underbake them just slightly, and you’ll achieve an unbelievably gooey center that is simply divine. The edges will be perfectly set, while the middle remains wonderfully soft – oh, so good!
- Easy to Make, Impressive to Serve: Despite their sophisticated appearance and complex flavor profile, Brookie Bars are surprisingly straightforward to prepare. They utilize simple, familiar ingredients and a process that even novice bakers can master, making them perfect for last-minute gatherings or special occasions where you want to impress without stress.
- Crowd-Pleasing Versatility: From casual family movie nights to elegant dinner parties, these bars are always a hit. Their universal appeal makes them a fantastic choice for potlucks, bake sales, or as a thoughtful homemade gift. Everyone loves a good brownie, and everyone loves a good chocolate chip cookie – combine them, and you have an unstoppable force of deliciousness!
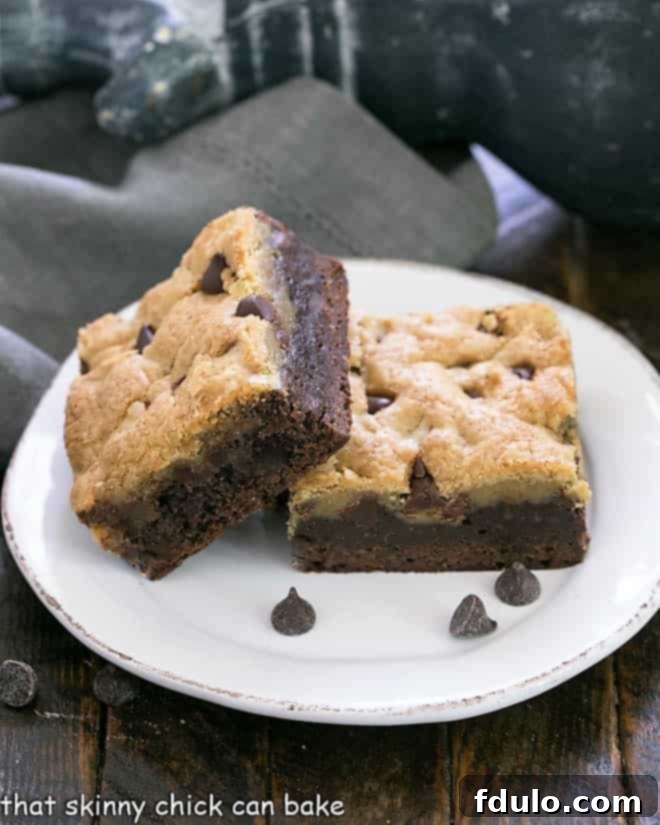
Crafting Your Perfect Brookie Bars: A Step-by-Step Guide
Making these sensational **homemade Brookie Bars** is a rewarding experience. The process is designed to be enjoyable, leading to a truly spectacular dessert that combines fudgy brownies with chewy chocolate chip cookies. After perfecting this recipe over the years, I’m thrilled to share my method to ensure your success in creating the most delicious **chocolate chip cookie brownies** you’ve ever tasted.
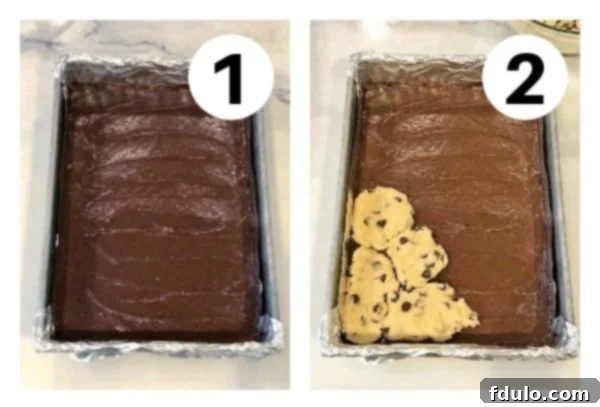
- Prepare Your Pan and Brownie Batter: Begin by generously spraying a 9×13 inch baking pan with non-stick baking spray, or line it with non-stick foil for easy removal. This ensures your beautiful Brookie Bars come out perfectly intact. Then, prepare your brownie batter. I favor a simple, one-bowl brownie recipe for its ease and incredible fudgy texture. Once mixed, spread the rich, chocolatey batter evenly across the bottom of the prepared pan. An offset spatula is an invaluable tool here, helping you achieve a smooth, level base, which is crucial for even baking.
- Layer with Chocolate Chip Cookie Dough: Next comes the star layer – the classic chocolate chip cookie dough. For the best results, take small handfuls of the cookie dough and gently flatten them between your palms. This makes them easier to handle and ensures a more uniform coverage.
- Cover the Brownie Layer: Carefully place these flattened cookie dough pieces over the brownie batter, working to cover the entire surface completely. Don’t worry if there are small gaps; you can gently use your fingers or an offset spatula to press and seal the “joints” between the dough pieces, creating a cohesive cookie layer. This meticulous layering is what gives Brookie Bars their signature distinct strata.
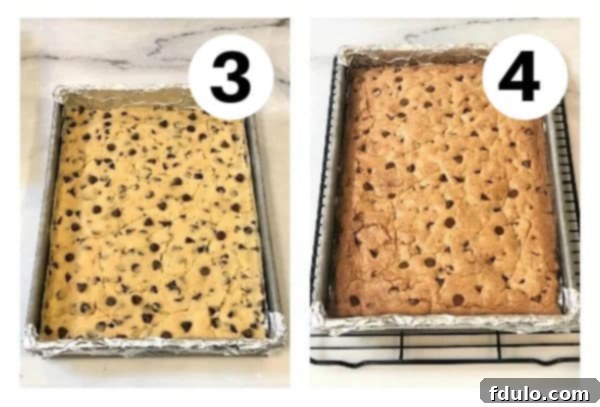
- Bake to Perfection: Transfer your layered masterpiece to the preheated oven. Bake until the surface of the cookies is lightly golden brown. The beauty of Brookie Bars lies in their balance of textures. After approximately 30 minutes, the insides should remain wonderfully soft and slightly gooey, while the edges are perfectly set. This is the sweet spot for that irresistible fudgy-chewy combination.
- PRO-Tip for a Professional Finish: For an extra touch of bakery-quality charm, carefully press a few additional chocolate chips across the top of the Brookie Bars immediately after they come out of the oven. The residual heat will slightly melt them, creating a beautiful, glossy finish that makes these bars even more appealing, especially if you’re sharing them with friends or serving them to guests.
- Serving Suggestion: While delicious at room temperature, my kids absolutely love to gently warm up slices in the microwave. This brings the chocolate chips back to a melty, gooey state, enhancing the overall indulgence. A warm Brookie Bar is pure comfort!
The first time I served these to my husband, Bill, he was so utterly thrilled that when I offered our oldest son a few to take home, Bill gave me a look of playful panic! This dessert truly has that kind of magic. While some prefer their bars fully set, which you can achieve by baking for another 5 minutes, I, like Bill, prefer my Brookie Bars slightly underbaked. As a gal who would often rather eat cookie dough than a fully baked cookie, that slightly gooey center is my absolute favorite texture, adding to the decadent experience.
Tips for Success: Achieving Brookie Perfection
To ensure your **homemade Brookie Bars** turn out flawlessly every time, keep these expert tips in mind:
- Don’t Overmix: When preparing both the brownie batter and cookie dough, mix only until ingredients are just combined. Overmixing can lead to a tougher texture in both layers.
- Room Temperature Ingredients: For the cookie dough, ensure your butter and eggs are at room temperature. This helps them cream together smoothly, creating a more uniform and tender dough.
- Even Spreading: Take your time spreading the brownie batter and arranging the cookie dough. An even base ensures consistent baking and a beautifully layered final product.
- The Power of Underbaking: For that coveted gooey center, watch your Brookie Bars closely. The edges of the cookie layer should be golden, but the center might still look slightly soft. A toothpick inserted into the brownie layer should come out with moist crumbs, not wet batter.
- Cool Completely: Patience is key! Allow the Brookie Bars to cool completely on a wire rack before cutting. This not only makes for cleaner slices but also allows the layers to set properly, preventing them from crumbling. Chilling them in the refrigerator for 30 minutes before cutting can also help achieve perfect squares.
- Quality Ingredients Matter: Using good quality cocoa powder and chocolate chips can significantly elevate the flavor of your Brookie Bars. Dark chocolate chips, milk chocolate chips, or even a mix can be used based on your preference.
Brookie Bar Variations and Serving Suggestions
While the classic Brookie Bar is a masterpiece on its own, don’t hesitate to get creative with variations to suit your taste:
- Nutty Crunch: Add chopped walnuts or pecans to either the brownie or cookie layer for an extra textural dimension.
- Peanut Butter Swirl: Swirl a few spoonfuls of peanut butter into the brownie batter or dollop it onto the cookie dough for a delightful peanut butter chocolate twist.
- White Chocolate Delight: Swap out some of the semi-sweet chocolate chips for white chocolate chips in the cookie layer for a milder, sweeter flavor.
- Espresso Kick: A teaspoon of instant espresso powder mixed into the brownie batter can deepen the chocolate flavor without making it taste like coffee.
- Holiday Sprinkles: Add festive sprinkles to the top of the cookie dough before baking for seasonal flair.
These bars are fantastic on their own, but here are some serving suggestions to elevate the experience:
- Serve warm with a scoop of vanilla bean ice cream.
- Drizzle with caramel sauce or hot fudge for an extra layer of decadence.
- Pair with a cold glass of milk for the ultimate comforting treat.
- Cut into smaller squares for a dessert platter at parties.
Frequently Asked Questions About Brookie Bars
Got questions about these delightful **Brookie Bars**? We’ve got answers!
Brookies, as the name cleverly suggests, are a delicious dessert that combines a brownie and a cookie. The most popular version, like this recipe, features a rich, fudgy brownie base topped with a chewy chocolate chip cookie layer, all baked together into bars. Another variation involves “brookie cookies,” which are individual cookies made with half chocolate dough and half chocolate chip cookie dough. While the exact origin of this brilliant dessert remains a delicious mystery, its popularity is undeniable.
Once cooled, Brookie Bars can be stored at room temperature in an airtight container for up to 3 days. If you find yourself with more bars than you can enjoy within a few days, they freeze exceptionally well! Ensure they are completely cooled before wrapping them tightly in plastic wrap, then an additional layer of aluminum foil. Stored properly, **frozen Brookie Bars** can last for up to 3 months. Thaw them at room temperature or gently warm in the microwave for a fresh-from-the-oven feel.
Absolutely! While this recipe provides a fantastic homemade experience, you can definitely use a high-quality box brownie mix and a store-bought chocolate chip cookie dough (or a simple homemade one without chilling) to expedite the process. Just prepare each component according to package directions, then layer and bake as instructed in this recipe. It’s a great shortcut for when you’re short on time but still crave that incredible brookie taste.
For perfectly neat slices, ensure your Brookie Bars are completely cooled, and ideally, chilled in the refrigerator for at least 30 minutes to an hour. Use a large, sharp knife, wiping the blade clean with a warm, damp cloth between each cut. This prevents sticking and ensures smooth, defined edges for every bar.
Explore More Decadent Desserts
If you’ve fallen in love with the richness of these Brookie Bars, you’ll adore these other sensational brownie and bar cookie recipes:
- Caramel Chocolate Brownies: Layers of rich chocolate and gooey caramel make for an unforgettable treat.
- One Bowl Fudgy Brownies: The ultimate easy recipe for dense, moist, and intensely chocolatey brownies.
- Sheet Pan Brownies: Perfect for feeding a crowd, these brownies are simple, delicious, and bake up beautifully.
- Strawberry Cheesecake Brownies: A delightful blend of fruity, creamy, and chocolatey flavors in one stunning bar.
- German Chocolate Brownies: All the classic flavors of a German chocolate cake packed into a rich brownie form.
- Plus, for another fantastic dessert mashup, be sure to check out these Cheesecake Swirl Brownies!
- Discover more of my Best Brownie Recipes for endless sweet inspiration.
Stay connected for more delectable recipes through social media @ Instagram, Facebook, and Pinterest. Don’t forget to tag me when you try one of my recipes! If you love the results, please consider giving it a 5-star rating in the recipe card below.
Brookie Bars
30 minutes
35 minutes
1 hour 5 minutes
24 bars
Indulge in the best of both worlds with these amazing Brookie Bars! A delightful combination of rich, fudgy brownies and chewy chocolate chip cookies, baked into one incredible bar.
Ingredients
For the Fudgy Brownie Layer:
- 2 cups granulated sugar
- ⅔ cup unsweetened cocoa powder
- 1 cup (2 sticks) unsalted butter, melted
- 4 large eggs
- 2 teaspoons pure vanilla extract
- 1½ cups all-purpose flour
- ½ teaspoon salt
For the Chewy Chocolate Chip Cookie Layer:
- 10 tablespoons unsalted butter, at room temperature
- ⅔ cup packed light brown sugar
- ⅓ cup granulated white sugar
- 1 large egg + 1 additional large egg yolk
- 1 teaspoon pure vanilla extract
- 1⅔ cups all-purpose flour
- ¾ teaspoon baking soda
- ¾ teaspoon salt
- 1 cup semi-sweet chocolate chips, plus a few extra to sprinkle on top for garnish
Instructions
- Prepare the Pan & Preheat Oven: Lightly spray a 9 x 13 inch baking pan with non-stick baking spray or line it entirely with non-stick foil, leaving an overhang on the sides to lift the bars out easily later. Preheat your oven to 350ºF (175ºC).
- Make the Brownie Batter: In a large mixing bowl, combine the melted butter, granulated sugar, eggs, and vanilla extract. Whisk them together until well blended and smooth.
- Combine Brownie Dry Ingredients: Add the flour, cocoa powder, and salt to the wet ingredients. Mix until just combined and no streaks of dry ingredients remain. Be careful not to overmix. Spread this rich brownie batter evenly into the bottom of the prepared 9×13 inch pan. Use an offset spatula to ensure a smooth, level layer.
- Prepare the Cookie Dough: In a separate medium mixing bowl, using an electric mixer, cream together the softened butter, brown sugar, and white sugar until light and fluffy.
- Add Wet Cookie Ingredients: Beat in the egg, additional egg yolk, and vanilla extract until fully combined and smooth.
- Add Dry Cookie Ingredients & Chips: Gradually add the flour, baking soda, and salt to the wet ingredients. Mix on low speed, or use a wooden spoon, until just combined. Fold in the 1 cup of chocolate chips until evenly distributed throughout the dough.
- Layer the Cookie Dough: Take small handfuls of the chocolate chip cookie dough and flatten each piece gently in your hands. Carefully arrange these flattened pieces across the brownie layer, aiming to cover the entire surface. Gently press the edges of the cookie dough pieces together to form a continuous layer.
- Bake: Sprinkle a few extra chocolate chips over the top of the cookie layer for a beautiful finish. Bake for 30-35 minutes, or until the cookie layer is lightly golden brown and a toothpick inserted into the brownie layer comes out with moist crumbs (not wet batter). For a gooier center, err on the side of less baking time.
- Cool & Serve: Remove the pan from the oven and place it on a wire rack to cool completely before cutting into squares. Cooling thoroughly allows the bars to set properly for clean slices. Enjoy your decadent Brookie Bars!
Notes
Recipe adapted from a delightful creation by Hugs & Cookies XOXO. For easier cutting and an even fudgier texture, chill the cooled bars in the refrigerator for about 30 minutes before slicing.
Recommended Products
As an Amazon Associate and member of other affiliate programs, I earn from qualifying purchases.
- Baking Rack Cooling Rack Set of 2
- OXO Good Grips 11-Inch Better Balloon Whisk
- Nonstick Foil
- 9 x 13 Baking Pan
Nutrition Information:
Yield:
24
Serving Size:
1 bar
Amount Per Serving:
Calories: 370Total Fat: 21gSaturated Fat: 12gTrans Fat: 0gUnsaturated Fat: 7gCholesterol: 71mgSodium: 303mgCarbohydrates: 44gFiber: 2gSugar: 28gProtein: 5g
HOW MUCH DID YOU LOVE THIS RECIPE?
Please leave a comment on the blog or share a photo on Pinterest
