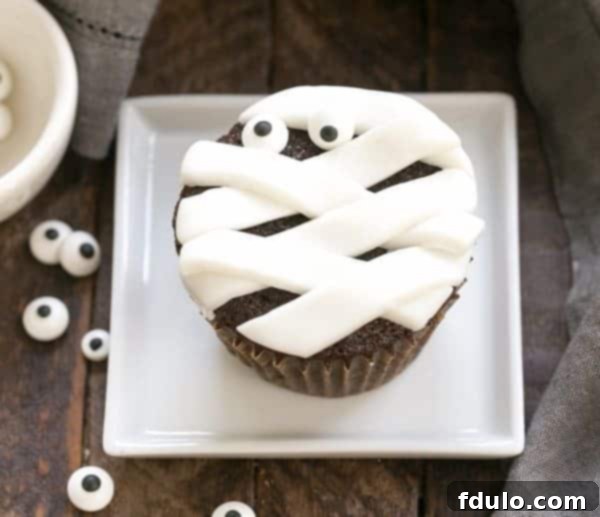
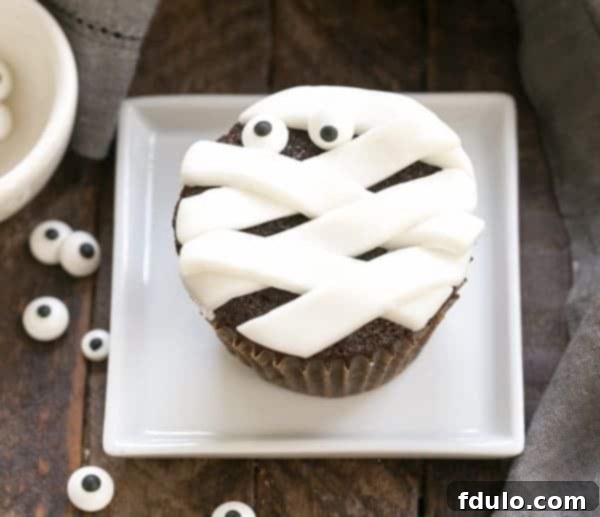
Get ready to wrap up some fun this Halloween with these utterly adorable and incredibly easy-to-make Chocolate Mummy Cupcakes! These festive treats are the perfect addition to any spooky celebration, combining rich, moist chocolate cupcakes with a simple, yet striking, mummy-inspired decoration. Whether you’re a seasoned baker or just starting out, this recipe offers a low-stress technique to create a truly memorable dessert that will delight both kids and adults.
Forget the complexities of elaborate Halloween baking. Our focus here is on simplicity and maximum impact. You won’t need advanced piping skills or hours in the kitchen to bring these charming mummies to life. With just a few key ingredients and our straightforward guide, you’ll be able to whip up a batch of these delicious and visually appealing cupcakes in no time. They are not only incredibly easy on your schedule but also wonderfully tasty, ensuring they’ll be a hit at your next Halloween party or family gathering.
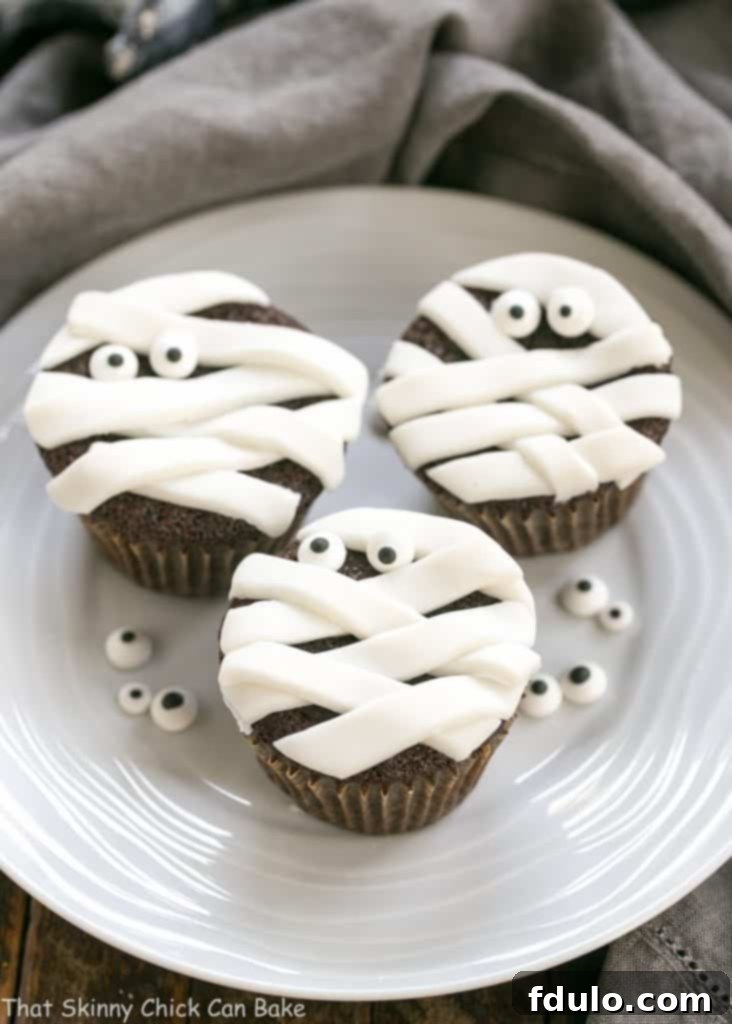
Why These Chocolate Mummy Cupcakes Are a Must-Bake This Halloween
Halloween baking is often synonymous with intricate designs and demanding techniques. However, these Chocolate Mummy Cupcakes offer a refreshing alternative, providing all the festive charm without the stress. Here’s why this recipe should be at the top of your holiday baking list:
- Effortless Elegance: These “yummy mummy” cupcakes are incredibly simple to make, making them perfect for busy parents, new bakers, or anyone looking for a quick yet impressive treat. You can even use a store-bought chocolate cake mix to streamline the process further, saving precious time without compromising on flavor or fun.
- Kid-Friendly & Not-So-Scary: Unlike some overly gruesome Halloween desserts, these mummy cupcakes are charmingly spooky rather than frightening. Their cute sugar eyes and playful wrappings make them appealing to even the youngest trick-or-treaters, ensuring everyone enjoys a bite. They’re the ideal sweet treat for school parties or family gatherings where you want festive flair without the gore.
- Simple Decorating Technique: While traditional piping bags and tips can create beautiful frosting designs, our method for creating mummy wrappings is much simpler. Using strips of fondant allows for quick and consistent results, even for those with no prior decorating experience. It’s a forgiving technique that still yields a professional-looking finish.
- Delicious & Customizable: Fondant provides a smooth, clean finish that looks fantastic and is easy to work with. While some prefer the taste of buttercream, fondant offers unparalleled ease for this specific mummy design. For those with discerning palates who prefer frosting, you can absolutely use your favorite homemade chocolate cupcake recipe and pipe or drizzle vanilla buttercream for the mummification process, adapting to your family’s preferences.
- Perfect for Any Skill Level: Whether you’re a seasoned baker or just starting your culinary journey, mastering these mummy cupcakes is a breeze. The steps are intuitive, and the results are consistently delightful. You’ll gain confidence in your decorating abilities while creating a truly adorable dessert.
Essential Ingredient Notes for Your Mummy Cupcakes
Creating these delightful Halloween treats requires just a few key components. Choosing the right ingredients can make all the difference in both the ease of preparation and the final taste. Here’s a closer look at what you’ll need and some helpful tips:
- Chocolate Cupcakes: The foundation of our mummy treats! You have several options here to suit your schedule and preference. You can bake your own from scratch using your favorite homemade recipe for a truly rich, decadent flavor. Alternatively, a good quality boxed chocolate cake mix is a fantastic shortcut that yields consistently moist and delicious results. For ultimate convenience, many bakeries and grocery stores offer plain, unfrosted chocolate cupcakes during the holiday season – just make sure they’re completely cooled before you begin decorating.
- White Fondant: This is the star of our mummy transformation. Fondant is a pliable sugar dough that can be rolled thin and cut into shapes, making it perfect for creating the bandage-like strips of our mummies. You can typically find pre-made white fondant in the baking aisle of craft stores like JoAnn’s or Michaels, or readily available online on platforms like Amazon. It comes in various sizes, so choose one that will give you enough to cover your batch of cupcakes.
- Powdered Sugar (Confectioners’ Sugar): Crucial for working with fondant. When rolling out fondant, it has a tendency to stick to your work surface and rolling pin. Dusting your surface and tools with powdered sugar prevents this stickiness, allowing you to roll and cut the fondant cleanly without it tearing or deforming. Unlike regular flour, powdered sugar melts into the fondant or simply adds a touch of sweetness if any remains on the surface, making it ideal for dessert garnishes.
- Sugar Eyeballs: These small, edible candy eyes are what truly bring your mummies to life! They add that whimsical, slightly spooky touch that makes these cupcakes so endearing. You can find them in most baking supply sections of grocery stores or craft stores, especially around Halloween. If you can’t find them, small chocolate chips, white chocolate dots with a tiny piped black dot, or even tiny dots of black frosting can serve as a substitute.
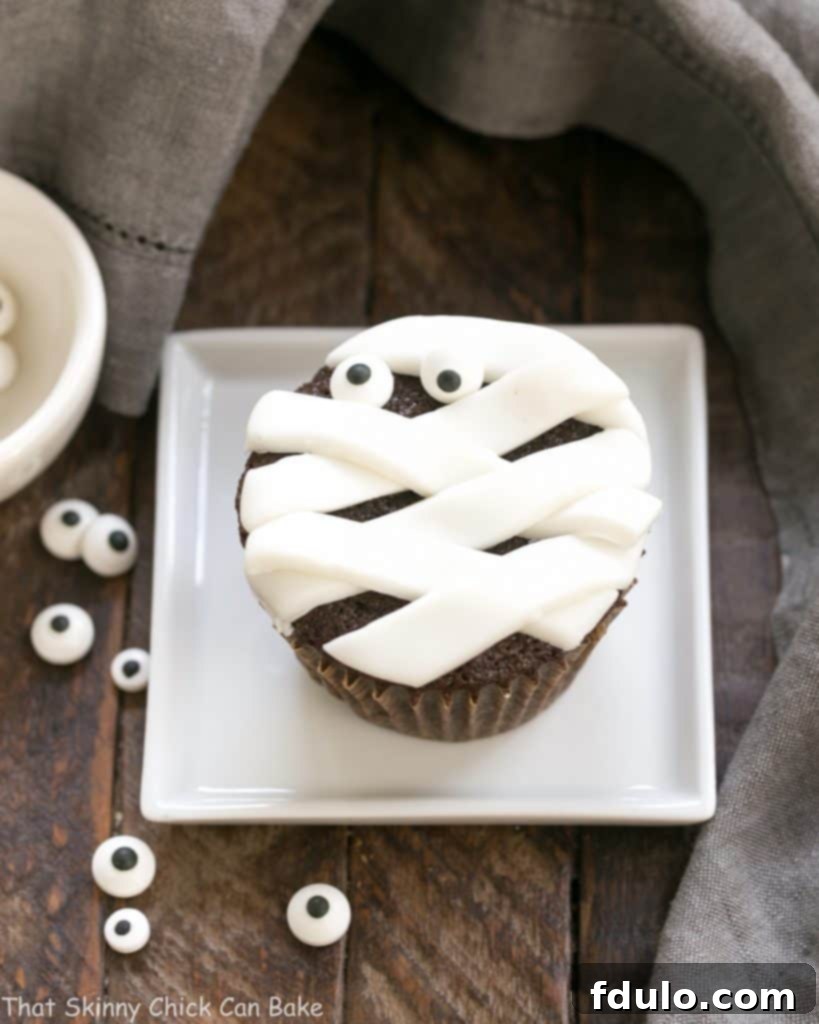
Step-by-Step Guide: How to Make Chocolate Mummy Cupcakes
Creating these enchanting Chocolate Mummy Cupcakes is a fun and simple process. Follow these detailed steps to transform ordinary cupcakes into extraordinary Halloween treats:
- Prepare and Cool Your Cupcakes: Begin by baking your chocolate cupcakes according to your chosen recipe (homemade, box mix, or even unfrosted store-bought ones). This is a crucial step: ensure your cupcakes are completely cooled before you even think about decorating them. Warm cupcakes will melt the fondant and make it impossible to work with, leading to a messy outcome. Place them on a wire rack to cool thoroughly.
- Prepare Your Work Surface and Fondant: Lightly dust a clean, dry work surface (like a countertop or large cutting board) with powdered sugar. This prevents the fondant from sticking. Take a portion of the white fondant from its package and knead it gently with the palms of your hands until it becomes pliable and smooth. This warms it slightly and makes it easier to roll.
- Roll Out the Fondant: Using a rolling pin, roll the kneaded fondant out to an even thickness, approximately 1/8-inch (about 3mm) or slightly thinner. Aim for a consistent thickness across the entire sheet for uniform mummy wraps. If it starts to stick, lightly dust your rolling pin or the fondant itself with more powdered sugar.
- Cut Fondant Strips: Using a sharp knife, pizza cutter, or even kitchen shears, cut the rolled fondant into thin strips. The width of your strips can vary slightly, from about 1/4 inch to 1/2 inch, to mimic the imperfect nature of real bandages. Aim for lengths that will easily wrap across your cupcakes. You can cut various lengths and widths to create a more dynamic look.
- Create the Mummy Wrappings: Gently pick up a fondant strip and lay it across the top of a cooled cupcake. Begin to criss-cross the strips over the surface of each cupcake, weaving them over and under other strips to create the appearance of authentic mummy wrappings. Don’t worry about perfection; slightly uneven or overlapping strips add to the charm.
- Trim Excess Fondant: Once you’re happy with the wrapping pattern, gently trim off any excess fondant that hangs too far over the edge of the cupcake liner using your knife or scissors. The goal is to keep the wraps contained to the top of the cupcake, giving it a neat finish.
- Add the Sugar Eyeballs: Now for the personality! To make the sugar eyeballs stick securely to the fondant, dampen the back of each eye with a tiny drop of water or a minuscule dab of white frosting (store-bought or a paste made from powdered sugar and water). Place two sugar eyeballs onto the fondant where you want the mummy’s face to be. The moisture will slightly melt the sugar in the fondant, creating a sticky surface for the eyes to adhere.
- Repeat for All Cupcakes: Continue this process for the remaining cupcakes until your entire batch of adorable chocolate mummies is complete and ready to scare up some appetites!
My Halloween memories are often interwoven with birthday festivities, as my special day falls just before All Hallows’ Eve. Growing up in a small college town, our trick-or-treating schedule was ingeniously adjusted by some wise soul. They decided that having boisterous college students and excited young children sharing the streets on Halloween night might not be the most prudent idea. So, we joyfully went house to house on the 30th instead of the 31st, extending the celebratory spirit.
This meant my birthday concluded with a delightful haul of Tootsie Rolls, Milk Duds, and Milky Way Bars – not too shabby for a young kid! I don’t recall my artistic mother making any specific Halloween treats, but I can only imagine the amazing Halloween cupcakes she could have conjured, perhaps even Halloween mummy cupcakes. So, if you’re looking to create a special, memorable holiday treat for your kids that combines a touch of spooky fun with deliciousness, these easy yummy mummy cupcakes come highly recommended!
Pro Tips for Perfect Chocolate Mummy Cupcakes
Elevate your mummy cupcake game with these helpful tips and tricks, ensuring your Halloween treats are not only delicious but also beautifully decorated with ease:
- Cupcake Choice Flexibility: Don’t feel pressured to bake from scratch if time is short. Homemade chocolate cupcakes provide that extra personal touch, but a good quality box mix will yield fantastic results. For ultimate convenience, many grocery stores offer plain, unfrosted chocolate cupcakes – just be sure they are cooled thoroughly before decorating.
- Cooling is Key: This cannot be stressed enough. Ensure your cupcakes are completely and utterly cooled before you begin any decorating. Warm cupcakes will cause the fondant to soften, tear, or even melt, leading to a frustrating experience and a less-than-perfect finish. Patience here pays off!
- Where to Find Fondant and Sugar Eyes: White fondant and edible sugar eyes are widely available. Check the baking sections of major craft stores like Michael’s or JoAnn Fabrics. They are also easily found online through retailers like Amazon, often with various size options.
- Tools for Cutting Fondant: While a sharp paring knife works perfectly fine for cutting fondant strips, a pizza cutter can be even more efficient for straight lines. For a truly professional look, consider using a specialized fondant cutter or even a sharp pair of kitchen scissors for precise cuts.
- Powdered Sugar for Non-Stick: When rolling and cutting fondant, always use powdered sugar (confectioners’ sugar) instead of flour to prevent sticking. Powdered sugar disappears seamlessly into the fondant or simply adds a touch of sweetness, which is much more appropriate for a dessert garnish than flour.
- Making Fondant Stick to Fondant: If you need two pieces of fondant to adhere to each other (for instance, if a strip lifts), simply dampen the surface of one piece with a tiny bit of water. The water will slightly melt the sugar, creating a natural adhesive.
- Storage Solutions: Once decorated, store your mummy cupcakes in an airtight container at room temperature for up to 3-4 days. For longer storage, they can be frozen for up to 3 months. When ready to serve, defrost them overnight in the refrigerator, and for the best taste and texture, allow them to come to room temperature before enjoying.
- Fondant Alternatives: If you prefer not to use fondant, you can achieve a similar mummy look with vanilla buttercream. Simply pipe thin lines across the cooled cupcake using a small round tip (like a Wilton 3 or 4), leaving a gap for the eyes. This method offers a softer texture and a buttery flavor.
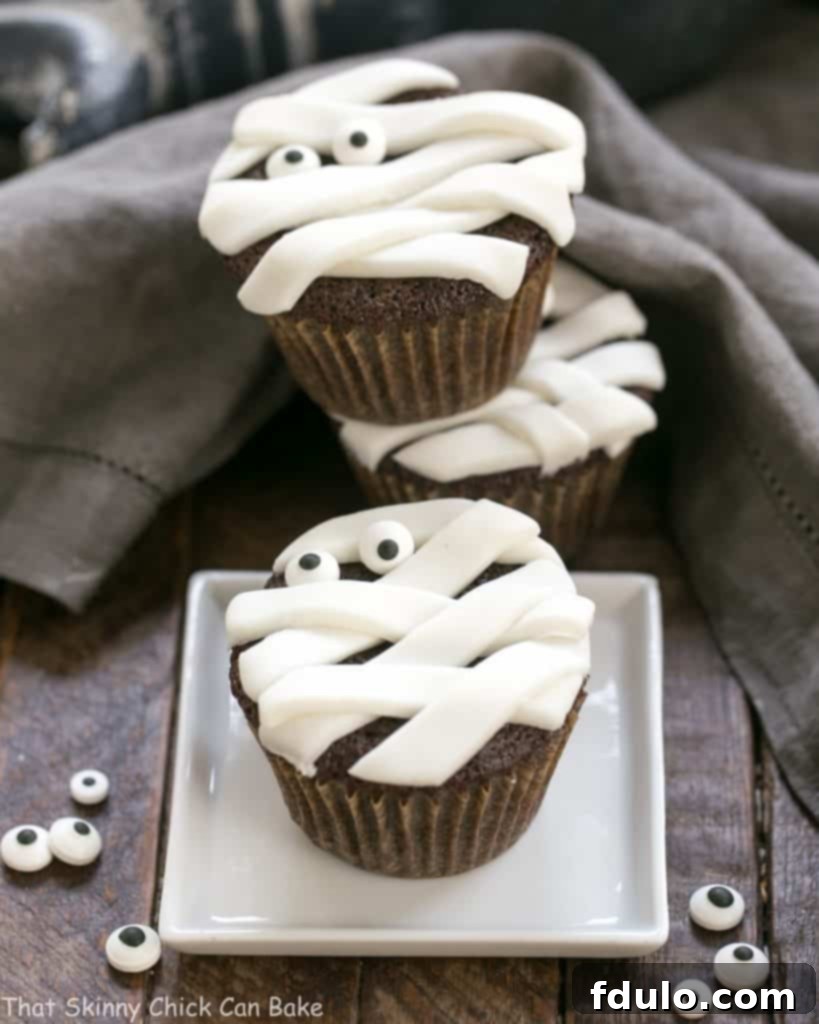
Frequently Asked Questions About Halloween Cupcakes
The possibilities are endless! Beyond mummies, try making a witch’s hat by placing an Oreo on a frosted cupcake and topping it with an upside-down Hershey’s Kiss. Spiders are another favorite: use an Oreo for the body, pipe eight frosting legs, and add sugar eyeballs. You can also simply top frosted cupcakes with classic Halloween candies like candy corn or candy pumpkins. Let your imagination run wild with edible glitter, sprinkles, and themed toppers!
To maintain freshness, store your decorated cupcakes in an airtight container at room temperature. They will typically stay fresh and delicious for 3-4 days. If you need to prepare them further in advance, you can freeze them for up to 3 months. Just make sure to defrost them overnight in the refrigerator, and for the best flavor and texture, allow them to come to room temperature before serving.
Absolutely! While white fondant creates the classic mummy look, you could experiment with light grey or even a very pale yellow for an aged effect. Alternatively, for a whimsical twist, you could use bright green or purple fondant strips, turning your mummies into friendly, colorful monsters!
No sugar eyes? No problem! You can easily create eyes using small chocolate chips (pointy side down), mini M&Ms, or even by piping two small white dots of frosting with a tiny black dot in the center using a toothpick dipped in food coloring. Get creative with what you have!
Yes, with a few substitutions! For gluten-free mummies, simply use your favorite gluten-free chocolate cupcake recipe or a gluten-free boxed mix. For vegan cupcakes, use a vegan chocolate cupcake recipe and ensure your fondant and sugar eyes are certified vegan (most commonly available brands are, but always check labels). This makes them accessible for everyone to enjoy.
The Halloween Project: More Spooky Treats!
I’ve had the pleasure of participating in a wonderful tradition with a group of talented bloggers, sharing festive Halloween recipes for the past few years. And, of course, if you’re looking for an easy-peasy idea that guarantees smiles, always keep these delightful mummy Halloween cupcakes in the back of your mind! But don’t stop there – explore even more fantastic and Easy Halloween Treats below to fill your spooky season with deliciousness!
- Black Velvet Cupcakes with Raspberry Jam from Cookie Named Desire
- Melting Monster Halloween Punch from The Speckled Palate
- Bloody Good Pancakes from Sugar Dish Me
- Glow in the Dark Jello Shots from Feast + West
You May Also Like: More Holiday Recipes!
If you loved these Chocolate Mummy Cupcakes and are eager for more festive baking inspiration, you’re in luck! Here’s a curated selection of other spooky and delightful treats, perfect for Halloween and beyond. Dive into these recipes to keep the holiday spirit alive in your kitchen!
- Spiderweb Cookie Cake
- Spiderweb Cupcakes
- 20+ Halloween Treats
- Jack Skellington Macarons from Big Bear’s Wife
- Bloody White Cake with Raspberry Jam from A Cookie Named Desire
- Going Batty Cupcakes from Sugar Dish Me
- Bloody Good Cheesecake from Sugar Dish Me
- More of theBest Holiday Recipes
Stay in touch through social media @ Instagram, Facebook, and Pinterest. Don’t forget to tag me when you try one of my recipes! And if you love the results, please give it a 5-star rating in the recipe card.
Chocolate Mummy Cupcakes Recipe
30 minutes
21 minutes
51 minutes
14
An easy way to dress up your cupcakes for Halloween!
Rating: 5 Stars (Based on 37 reviews)
Ingredients
For Cupcakes
- 1 cup plus 2 tablespoons flour
- ¼ cup cocoa powder
- 1 ¼ teaspoons baking soda
- ¼ teaspoon salt
- 1 egg
- ½ cup brown sugar
- ½ cup sugar
- ½ cup plus 2 tablespoons milk
- ⅓ cup strong coffee
- ½ cup butter melted
To Garnish
- 1 box of white fondant
- Powdered sugar
- A small amount of white frosting (from the grocery store or you can make a paste from powdered sugar and water)
- Sugar eyes
Instructions
- Preheat oven to 350ºF (175ºC). Line a muffin tin with cupcake liners.
- In a small bowl, whisk together the flour, cocoa, baking soda, and salt. In a separate medium bowl, whisk together the egg, brown sugar, and white sugar until well combined. Gradually whisk in the milk, strong coffee, and melted butter into the wet ingredients. Finally, whisk the dry ingredients into the wet mixture until just combined, being careful not to overmix. Divide the batter evenly into 12 spots in the prepared muffin tins, filling each about ¾ full. This recipe usually yields enough batter for 2 additional cupcakes.
- Bake for 15-21 minutes (oven times may vary) or until a wooden skewer or toothpick inserted into the center of a cupcake comes out clean. Allow the cupcakes to cool in the muffin tin for 10 minutes before carefully removing them to a wire rack to cool completely. This is essential before decorating.
- Once the cupcakes are thoroughly cool, remove some of the white fondant from its box or wrapper.
- Lightly dust your work surface with powdered sugar. Knead the fondant using the base of your palms until it becomes smooth and pliable. Roll the fondant out to an even thickness of about 1/8-inch or slightly less.
- Use a biscuit cutter or a round cookie cutter that is approximately the same diameter as the top of your cupcakes to cut out fondant rounds. You can re-roll these rounds slightly to make the diameter just a touch larger than your cupcake top, ensuring good coverage.
- From these fondant rounds, or directly from the rolled sheet, cut strips of fondant using a sharp knife, pizza cutter, or kitchen scissors. Arrange these strips over the cooled cupcake tops in a criss-cross pattern, mimicking mummy bandages. Trim off any excess fondant around the edges to maintain a neat appearance.
- Determine where you want your mummy’s eyes to be. Place a small dab of white frosting (or a paste made from powdered sugar and water) in two locations for the eyes. Gently press the sugar eyeballs onto the frosting dabs to secure them. Repeat this process for all your chocolate mummy cupcakes.
Notes
Feel free to make cupcakes from a box mix to save time, or use your favorite homemade chocolate cupcake recipe.
White fondant and edible sugar eyes are widely available at craft stores like Michaels and Jo-Ann Fabrics, as well as in the baking aisle of most large grocery stores or online retailers like Amazon.
The cupcake recipe provided here is adapted from a Ghirardelli recipe for rich chocolate flavor.
Recommended Products
As an Amazon Associate and member of other affiliate programs, I earn from qualifying purchases.
- French Rolling Pin
- Wilton White Fondant
Nutrition Information:
Yield:
14
Serving Size:
1 cupcake
Amount Per Serving:
Calories: 180Total Fat: 8gSaturated Fat: 4gTrans Fat: 0gUnsaturated Fat: 3gCholesterol: 31mgSodium: 216mgCarbohydrates: 28gFiber: 0gSugar: 26gProtein: 1g
HOW MUCH DID YOU LOVE THIS RECIPE?
Please leave a comment on the blog or share a photo on Pinterest
