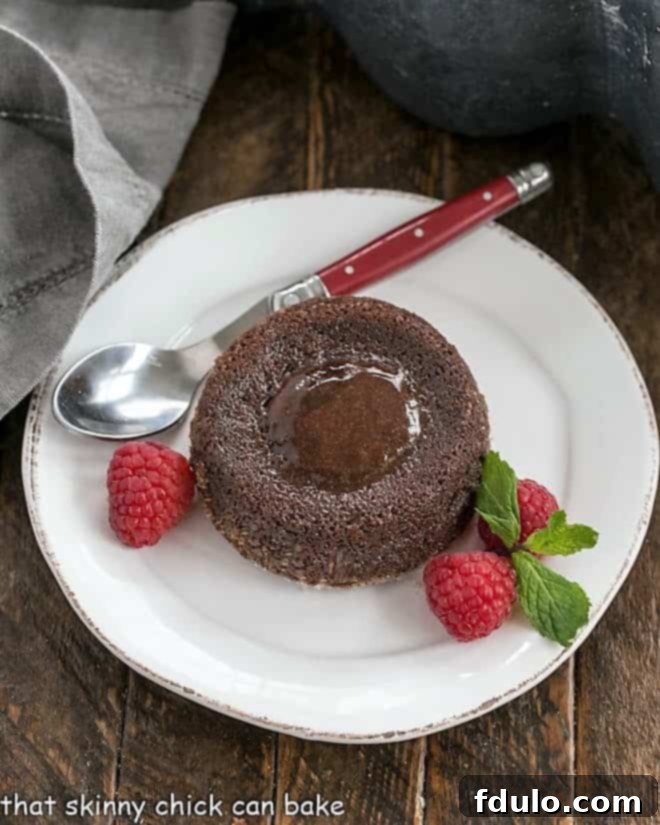
Molten Lava Cakes are the epitome of indulgent dessert – individual chocolate masterpieces that promise a warm, gooey, fudgy center just waiting to ooze out with your very first spoonful. These delectable treats combine the rich intensity of a chocolate cake with the luscious surprise of a molten core, creating an unforgettable experience for any sweet tooth.
For years, Chocolate Lava Cakes have been a cherished holiday tradition in our home, signaling festive gatherings and moments of pure culinary delight. Their enduring appeal lies not only in their exquisite taste but also in their remarkable simplicity. They’re surprisingly easy to prepare, quick to bake, and incredibly versatile when it comes to serving. Whether you opt for a simple dusting of powdered sugar, a vibrant medley of fresh berries, a cloud of whipped cream, or a scoop of creamy vanilla ice cream, these cakes are guaranteed to impress. The moment those distinct ramekins emerge from the cupboard, my family’s excitement is palpable – a clear sign that a special treat is on its way!
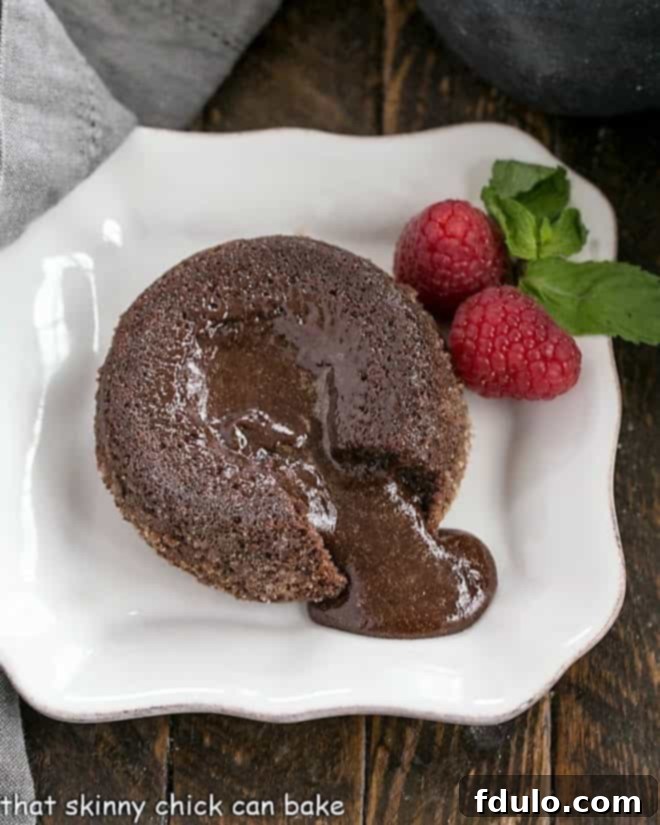
The Irresistible Chocolate Lava Cake Recipe: A Culinary Journey
My first foray into crafting these magical molten cakes dates back to 2011, and the recipe has since become a timeless classic in my repertoire. It was definitely high time for an encore! While I’ve experimented with various sizes over the years, these perfectly portioned 4-ounce versions strike an ideal balance. They offer a rich, luscious chocolate experience without being overly heavy, making them the ultimate conclusion to any meal or a delightful stand-alone indulgence.
One charming aspect of homemade lava cakes is their unique character. On occasion, the sugar dusted on the ramekins creates a beautiful, two-toned crust effect, a testament to the organic artistry of home baking. Not every bit of sugar releases evenly, and that’s perfectly okay! In fact, after my family devoured their beautiful cakes, I found myself scraping every last bit of chocolate-sugar-butter goodness left clinging to the dishes. They might argue, but I truly believe I savored the very best part – the concentrated essence of chocolate bliss!
Mastering Molten Magic: How to Make Lava Cakes
Creating these restaurant-quality desserts at home is surprisingly straightforward, requiring just a few key steps and a keen eye for detail. Follow these instructions to achieve perfectly molten centers every time:
- Prepare Your Ramekins: This crucial first step ensures your cakes release flawlessly. Begin by thoroughly greasing the inside of each ramekin with softened butter. Next, cut small rounds of parchment paper to fit the bottom of each ramekin and press them firmly into place, then grease the parchment as well. Finally, dust the entire inside of the ramekin generously with granulated sugar, rotating it to ensure an even coating, then tap out any excess. This creates a non-stick barrier and a beautifully caramelized crust.
- Preheat the Oven: Accuracy is key for lava cakes. Preheat your oven to a precise 450°F (232°C). A hot oven is essential for cooking the exterior quickly while leaving the center delightfully gooey.
- Prepare the Batter: The batter for molten lava cakes is relatively simple but requires careful handling. It typically involves melting high-quality chocolate with butter, then whisking eggs, egg yolks, sugar, and vanilla until light and fluffy. Finally, gently fold in a small amount of flour to give the cake its structure. Avoid overmixing, as this can lead to a tougher cake.
- Divide Evenly: Once your silky batter is ready, carefully divide it among your prepared ramekins. Fill them about two-thirds to three-quarters full, leaving enough room for the cakes to rise slightly without overflowing.
- Bake to Perfection: Place the ramekins on a baking sheet and transfer them to the preheated oven. Bake until the edges of the cakes appear firm and set, but the very middles still jiggle slightly when gently nudged. This delicate balance is what creates the molten center. Overbaking will result in a fully cooked, miniature chocolate cake rather than a lava cake.
- Remove and Loosen: As soon as the cakes are baked to your desired molten level, carefully remove them from the oven. Let them rest for just 1-2 minutes. Then, gently run a thin metal spatula or a small, sharp knife around the perimeter of each cake, separating it from the ramekin walls to ensure a smooth release.
- Cool, Invert, and Serve: Allow the cakes to cool in their ramekins for another 2-3 minutes. This short cooling period helps the exterior firm up enough to handle without collapsing. Place a dessert plate upside down over each ramekin, then confidently invert the ramekin and plate together. Lift the ramekin to reveal your perfectly formed, molten-centered chocolate cake. Serve immediately to enjoy the warm, flowing lava!
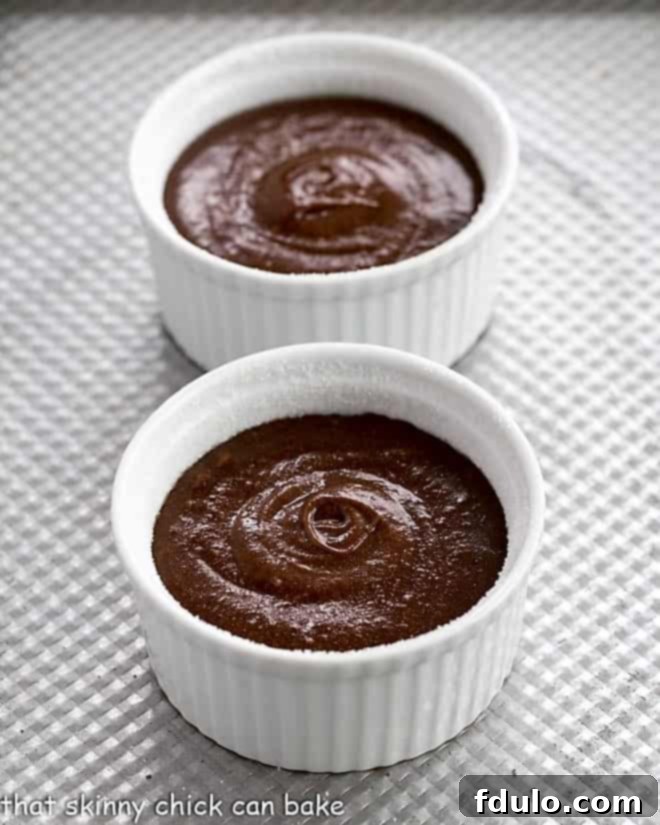
Unlock the Secret to Perfect Molten Lava Cakes: Essential Recipe Tips
Achieving that iconic molten center and a perfectly tender cake exterior isn’t difficult, but a few expert tips can elevate your chocolate lava cakes from good to absolutely extraordinary:
- **Prioritize Chocolate Quality:** The quality of your chocolate directly impacts the flavor of your molten lava cakes. For the best results, always opt for good-quality chocolate bars (like Ghirardelli, Callebaut, or Valrhona) over chocolate chips. Chocolate bars typically have a higher cocoa butter content and fewer stabilizers, resulting in a smoother melt and a richer, more complex chocolate flavor in your final dessert.
- **Flawless Ramekin Preparation is Non-Negotiable:** This is arguably the most critical step for successful unmolding. Ensure your ramekins are thoroughly buttered and generously dusted with sugar. The butter acts as a base, and the sugar provides an additional non-stick layer while also creating a delightful, slightly caramelized crust. Alternatively, you can use a baking spray that contains both flour and oil, like Baker’s Joy, for a convenient and effective solution. Don’t skip the parchment paper round at the bottom either; it provides an extra layer of insurance against sticking.
- **Timing is Everything: Bake Just Before Serving:** These individual chocolate cakes are at their absolute peak when served warm, straight from the oven. Plan to bake them while you’re enjoying the main course of your dinner. This ensures the molten center is perfectly warm and gooey for immediate enjoyment. If you bake them too far in advance, reheating can inadvertently cook the “lava” center, turning your lava cake into a standard mini chocolate cake.
- **Master the Art of Doneness:** The hallmark of a perfect lava cake is the contrast between a set exterior and a flowing interior. Bake your cakes until the sides are firm and slightly puffed, but the very centers still exhibit a distinct jiggle when the ramekin is gently nudged. It’s a fine line: bake too long, and you’ll lose the molten effect; bake too little, and the cake might not hold its shape. Trust the jiggle!
- **Patience for Unmolding:** After removing the cakes from the oven, resist the urge to immediately invert them. Allow them to cool in their ramekins for about 2 minutes. This brief cooling period helps the exterior structure firm up enough to withstand unmolding. Before flipping, gently run a thin knife or offset spatula between the cake and the ramekin wall. This ensures that even the most stubborn spots are loosened, guaranteeing a clean and effortless release onto your dessert plate.
Elevating the Experience: How to Serve Molten Lava Cakes
Molten Lava Cakes are inherently impressive, but thoughtful presentation and accompaniments can transform them into an unforgettable dessert experience. I remember one particular game day – the Colts-Packers showdown – and I needed a quick yet show-stopping dessert for the “gang.” These cakes came to the rescue, whipped up in about 30 minutes, and tasted absolutely amazing. Here’s how to serve them to perfection:
- Optimal Temperature: As mentioned, these individual chocolate cakes are truly best when served still warm from the oven. The contrast between the warm, rich chocolate and any cool accompaniments is pure bliss.
- Garnish for Glamour: The visual appeal of a molten lava cake is undeniable, and a simple garnish can enhance it further.
- A dollop of freshly whipped cream adds a light, airy contrast to the dense chocolate.
- A scoop of premium vanilla bean ice cream creates a delightful hot-and-cold sensation.
- Fresh berries, such as raspberries or strawberries, provide a burst of tartness, vibrant color, and a refreshing counterpoint to the richness.
- A light dusting of powdered sugar adds an elegant, classic touch.
- Consider a drizzle of caramel sauce or a sprinkle of flaky sea salt for an extra layer of flavor complexity.
- Perfect Pairings: Complement the richness of the lava cakes with suitable beverages. Offer hot coffee, a soothing cup of tea, or an after-dinner digestif like an espresso martini, port wine, or a rich liqueur.
That game day, there were zero complaints as my green-jerseyed family devoured these cakes, mostly without additional accouterments, opting for pure, unadulterated chocolate pleasure. Katie, ever the diplomat, had her Peyton Manning pin perfectly placed on her Packer attire, showcasing her divided loyalties. Their chocolate cravings satisfied, they were out the door, leaving Lambeau, our loyal dog, and me to enjoy the quiet house to ourselves, perhaps with a cheeky bite or two of leftover goodness.
Frequently Asked Questions About Molten Lava Cakes
Absolutely! You can prepare the batter and fill your ramekins up to a day in advance. Simply cover them tightly with plastic wrap and store them in the refrigerator. When you’re ready to bake, remove the ramekins from the fridge about an hour before you plan to bake them, allowing them to come closer to room temperature. If they’re still quite cool after an hour, you might need to add an extra minute or two to the baking time. Always look for that tell-tale slight jiggle in the center to ensure the molten core remains intact. Over the years, I’ve made countless versions of lava cakes, and no matter the recipe, the anticipation alone practically sends the boys into hyperventilation! These are truly a perfect and impressive dessert for any chocolate lover in your life, even with a little planning ahead.
The “lava” in these decadent mini cakes is, by design, a warm and luscious but not entirely cooked batter. Due to the presence of raw eggs in the batter, this dessert carries a small risk of foodborne illness. Therefore, it is generally advised not to serve molten lava cakes to very young children, the elderly, or individuals with compromised immune systems. However, if you have access to pasteurized eggs, using them in this recipe makes the dessert 100% safe for everyone to enjoy without concern. For the adventurous home cook, it is also possible to pasteurize eggs at home with the help of a very accurate thermometer, opening up this delightful treat to all.
No ramekins? No problem! You can still enjoy molten lava cakes by using a standard muffin tin. When using a muffin tin, make sure to prepare each cavity exceptionally well, buttering and sugaring them thoroughly to prevent sticking. Since muffin tin cavities are typically smaller than standard ramekins, your lava cakes will be individual mini versions and will require a shorter baking time. Watch them very carefully and remove them from the oven as soon as the edges are set and only the very centers still have that signature jiggle.
Explore More Chocolate Delights: You May Also Like
Having tried a myriad of molten lava cake recipes over the years, I can confidently say that while they may vary slightly in the type or amount of chocolate, eggs, sugar, or flour, they all share one common thread: they are utterly delectable. This particular version stands out for its elegant simplicity and consistently impressive results. The key to its success, as with all lava cakes, lies in meticulous attention to baking time, ensuring that only the very center retains that coveted undercooked, molten consistency.
Additionally, allowing for a brief cooling time before unmolding is crucial; it permits the exterior to firm up just enough for a graceful release. I always make it a point to run a thin knife around the edge of each ramekin before flipping, which significantly aids in easy unmolding. Your favorite chocoholic (or simply any dessert enthusiast) will undoubtedly thank you for bringing these exquisite treats into their life. Don’t stop at just one – explore these other fantastic variations:
- Classic Chocolate Lava Cake Recipe (perfect for larger 6-8 ounce ramekins, offering an even grander molten experience)
- Luxurious White Chocolate Lava Cakes (a delightful twist for those who adore white chocolate, typically made in 4-ounce ramekins)
- Decadent Lava Cakes with Kahlua Whipped Cream (an adults-only indulgence, often baked in 6-ounce ramekins for a generous serving)
- Innovative Chocolate Lava Cookies (a creative, bite-sized take on the molten concept, perfect for parties)
- Plus, explore an array of my best Homemade Chocolate Desserts for more inspiration!

And yes, you guessed it! On that epic game day, our beloved Lambeau was proudly sporting her retro Packers jersey, eagerly awaiting any dropped morsels, though none were ever granted from these precious cakes!
Join our community and stay connected through social media! Follow us on Instagram, Facebook, and Pinterest for daily inspiration and delicious recipes. Don’t forget to tag us when you recreate one of our recipes – we love to see your culinary creations! And if you’re thrilled with the results, please consider leaving a 5-star rating in the recipe card below to help other home bakers discover this amazing dessert.
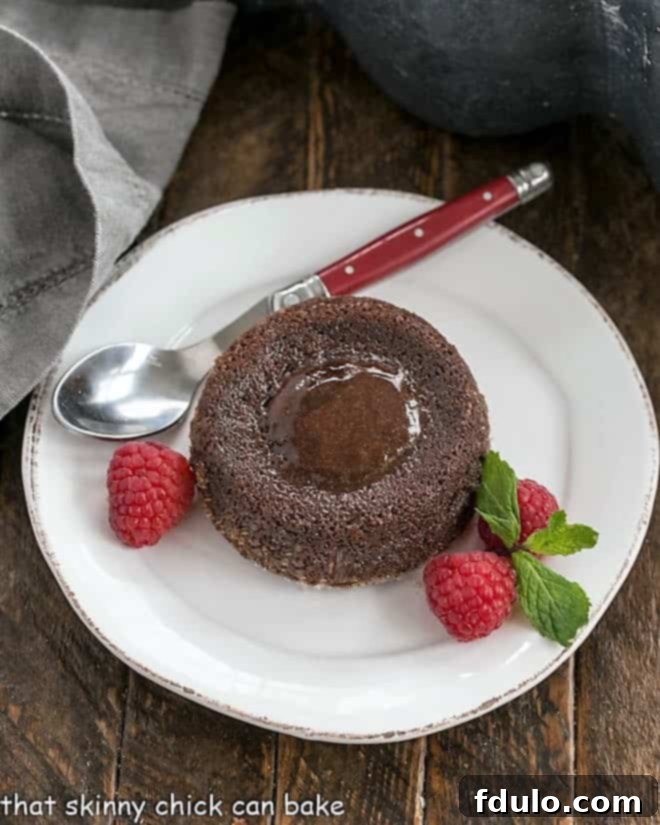
Decadent Chocolate Lava Cakes
20 minutes
10 minutes
30 minutes
4 servings
Indulge in these rich, individual chocolate cakes, each boasting a luscious, molten chocolate center that flows deliciously with every bite. A perfect elegant dessert that’s surprisingly simple to prepare!
Ingredients
- ½ cup (1 stick) unsalted butter, cut into pieces
- 4 ounces high-quality semi-sweet chocolate, finely chopped
- 2 large whole eggs
- 2 large egg yolks
- ½ cup granulated sugar (plus extra for dusting ramekins)
- ½ teaspoon pure vanilla extract
- 1 tablespoon cake flour (or all-purpose flour)
- Optional garnishes: Fresh berries, sweetened whipped cream, or vanilla ice cream
Instructions for a Perfect Molten Lava Cake
- Preheat your oven to a blazing 450ºF (232ºC). Prepare four 6-8-ounce ramekins by generously buttering their interiors. Cut out parchment paper circles to fit the bottom of each ramekin, press them in, and butter the parchment. Then, liberally dust the entire inside of each ramekin with granulated sugar, rotating to coat, and tap out any excess. This meticulous preparation is key for easy unmolding. If you’re using a muffin tin, butter and sugar each cavity equally well; note that muffin tin cakes will be smaller and yield more than 4, requiring less baking time.
- In a microwave-safe bowl, combine the finely chopped semi-sweet chocolate and the cut pieces of butter. Melt this mixture in the microwave using 30-second intervals, stirring thoroughly after each interval, until it is completely smooth and glossy. Be careful not to scorch the chocolate. Set the melted chocolate-butter mixture aside to cool slightly while you prepare the egg mixture.
- In a large mixing bowl, combine the 2 whole eggs, 2 egg yolks, ½ cup granulated sugar, and ½ teaspoon vanilla extract. Using an electric mixer (stand or hand-held), beat this mixture on high speed for a full 10 minutes. This extensive beating incorporates a lot of air, making the mixture light, pale, and significantly increased in volume, which is vital for the cake’s delicate texture.
- Once the egg mixture is light and airy, gently fold in the cooled chocolate-butter mixture using a spatula until just combined. Be careful not to overmix, as you want to preserve the air in the batter. Then, sift or gradually fold in the 1 tablespoon of cake flour until no dry streaks of flour are visible. Spoon the velvety batter evenly into your four meticulously prepared ramekins, filling them about two-thirds full.
- Carefully place the filled ramekins onto a baking sheet. Bake in the preheated 450ºF (232ºC) oven for 9-10 minutes. The cakes are perfectly baked when their edges are firm and set, but the very centers still remain soft and jiggle slightly when you gently nudge the ramekin. This indicates the molten core is still liquid and ready to flow. Do not overbake!
- Remove the cakes from the oven and let them cool in their ramekins for about 2-3 minutes. This short cooling period helps the cake’s structure firm up, preventing it from falling apart during unmolding. After cooling, run a thin knife or metal spatula carefully around the edge of each cake to loosen it from the ramekin. Place a dessert plate on top of each ramekin, then confidently invert the ramekin and plate together. Gently lift the ramekin to reveal your stunning molten lava cake. Serve immediately with your favorite garnishes such as fresh berries, a dollop of whipped cream, or a scoop of creamy vanilla ice cream for an ultimate dessert experience!
Chef’s Notes & Important Information
This recipe has been lovingly adapted from a classic Ghirardelli formulation, known for its rich chocolate flavor and reliable results.
Important Note on Safety: Since a portion of the cake’s center remains in a warm, liquid (uncooked) state, it contains raw egg. For health and safety, it is advised not to serve these molten lava cakes to very young children, the elderly, or individuals with compromised immune systems. If you have concerns, consider using pasteurized eggs for this recipe, which makes it safe for everyone to enjoy.
Recommended Products for Your Kitchen
As an Amazon Associate and member of other affiliate programs, I earn from qualifying purchases, helping to support this blog at no extra cost to you.
- Reynolds Cookie Baking Sheets Non-Stick Parchment Paper, 25 Sheet, 4 Count
- KitchenAid KSM150PSER Artisan Tilt-Head Stand Mixer with Pouring Shield, 5-Quart, Empire Red
Nutrition Information:
Yield:
4 servings
Serving Size:
1 cake
Amount Per Serving:
Calories: 413Total Fat: 18gSaturated Fat: 10gTrans Fat: 0gUnsaturated Fat: 8gCholesterol: 201mgSodium: 71mgCarbohydrates: 59gFiber: 4gSugar: 52gProtein: 8g
Share Your Love for This Recipe!
Did you create these incredible molten lava cakes? We’d love to hear about it! Please leave a comment on the blog below or share a photo of your masterpiece on Pinterest and tag us. Your feedback helps our community of bakers!
