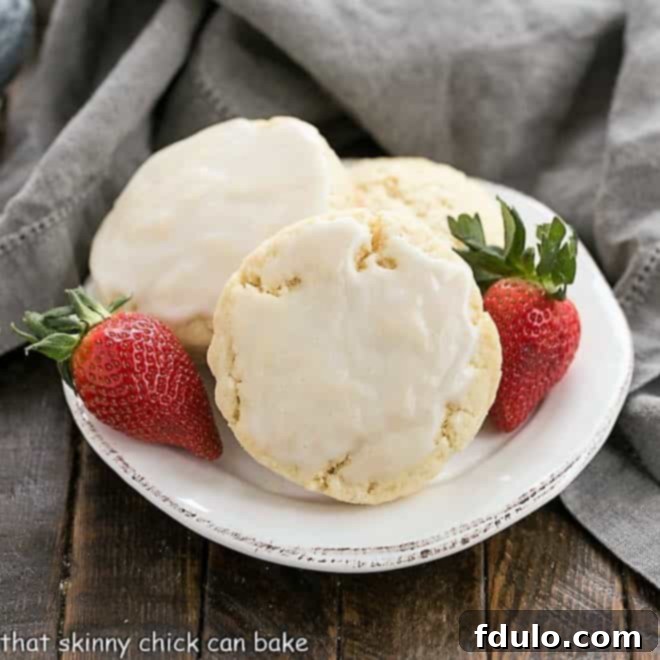
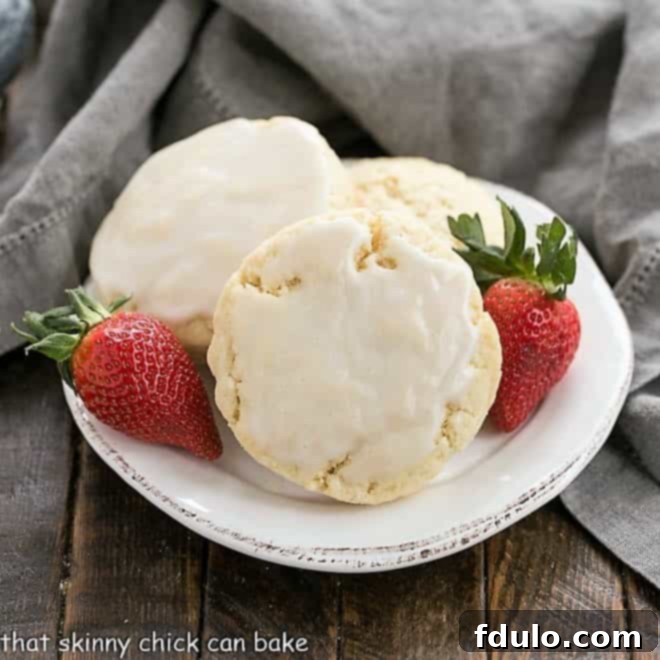
Indulge in the ultimate breakfast or brunch treat with these exquisite Vanilla Bean Scones. Each bite offers a delightful combination of moist, tender texture and a rich, aromatic vanilla flavor that consistently earns rave reviews. While scones are truly best enjoyed fresh from the oven, any leftovers can be easily frozen to preserve their deliciousness for another day.
When it comes to elevating your morning routine or perfecting an afternoon tea spread, nothing quite compares to the charm of a perfectly baked scone. And not just any scone – we’re talking about the kind that melts in your mouth, boasting a tender crumb and an irresistible aroma. This comprehensive guide will walk you through my tried-and-true tips for How to Make Scones, a recipe so exceptional that my friends and dedicated taste testers unanimously declared it the Best Scone Recipe they’d ever experienced. Prepare to transform your kitchen into a beacon of warmth and delightful aromas.

Why These Vanilla Bean Scones Are an Absolute Must-Bake
This particular vanilla scone recipe holds a special place in my heart, originating back in 2013 when a fellow blogger first inspired me to explore The Pioneer Woman’s Scones. My initial intention was to share these delightful creations with a cherished group of women I met with bi-weekly, eagerly awaiting their honest and invaluable feedback. Little did I know, this recipe would become a cornerstone of my baking repertoire.
- What truly sets these vanilla scones apart from countless others I’ve baked is the exquisite vanilla glaze they’re dipped in post-baking. This isn’t merely an adornment; it’s a crucial component that “gilds the lily,” as frosting often does, while simultaneously ensuring the scones remain incredibly moist and tender. This glaze transforms them from simply good to absolutely unforgettable.
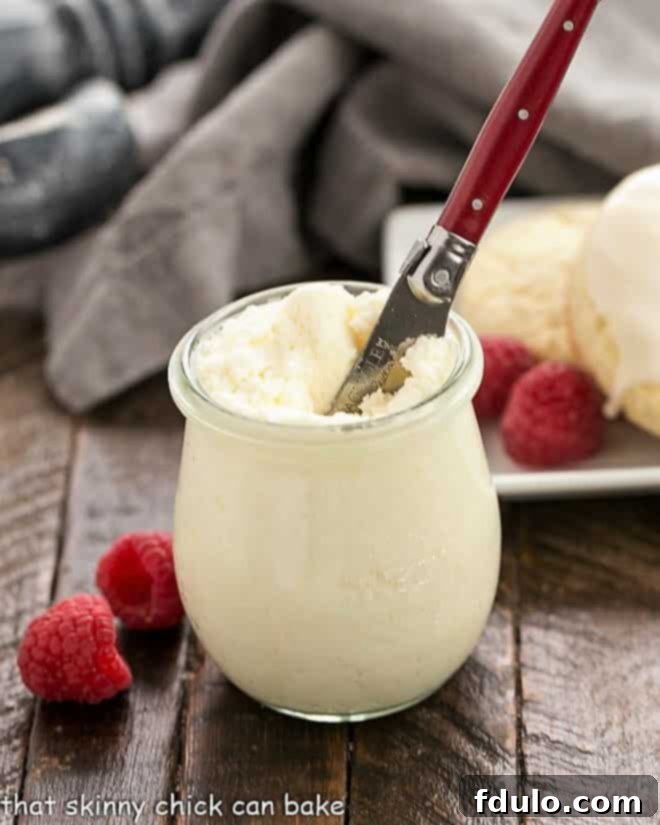
- Fast forward nearly six years, and I baked another fresh batch, this time pairing them with my homemade clotted cream. The response was identical, if not more enthusiastic. My friends showered them with praise, with one even proclaiming them the best thing I had ever baked! Such high commendation speaks volumes about the unparalleled quality and flavor of these scones.
- Even Bill, my notoriously picky husband, who typically shies away from quick breads and muffins, hesitantly tried one for breakfast. To my utter surprise, he’s now a genuine fan of scones! This conversion of a skeptical palate is perhaps the strongest testament to how truly special and universally appealing this recipe is. It proves that even those who claim not to like scones will fall in love with these tender, vanilla-infused treats.
The Secret to Baking Perfectly Tender Vanilla Bean Scones
Achieving the perfect scone, one that is light, flaky, and moist, rather than dense and dry, hinges on a few fundamental baking principles. These principles are especially vital for our Vanilla Bean Scones, ensuring every batch lives up to its delicious potential. Understanding the role of key ingredients and techniques will elevate your scone-making from good to extraordinary.
Essential Ingredient Notes for Optimal Flavor and Texture
The quality and temperature of your ingredients play a pivotal role in the final outcome of your scones. Pay close attention to these details for the best results.
- Kitchen Staples – You’ll need all-purpose flour, granulated sugar, salt, an egg, and milk. These form the basic structure and flavor profile of the scones.
- Baking Powder – This is the primary leavening agent that gives scones their signature lift and airy texture. It’s crucial that your baking powder is active. To test its potency, simply place a spoonful in a glass of hot water; it should bubble vigorously if still active. If not, it’s time to replace it to ensure your scones rise beautifully. Baking powder has a shorter shelf life than baking soda, so always check the expiration date.
- Unsalted Butter – The butter must be very cold and cut into small pieces. Cold butter is key to creating those desirable pockets of steam during baking, which result in tender, flaky layers. Using room-temperature butter will lead to a denser, more cake-like scone.
- Heavy Cream – This rich ingredient contributes significantly to the scones’ moisture, tenderness, and luxurious texture. It provides a richness that milk alone cannot replicate, creating a truly decadent scone.
- Whole Vanilla Beans – For the most authentic and pronounced vanilla flavor, fresh whole vanilla beans are incomparable. The tiny seeds, often called “caviar,” impart a depth of flavor and visual appeal that enhances the overall experience. However, if fresh beans are not readily available, high-quality vanilla extract or vanilla bean paste are excellent substitutes.
- Powdered Sugar – Essential for the smooth, delicate glaze. Sifting the powdered sugar beforehand is crucial to prevent lumps and achieve a silky consistency.

Advanced Recipe Tips for Unbeatable Scones
Beyond the ingredients, mastering a few techniques will ensure your homemade scones are consistently perfect.
- Embrace the Vanilla Bean: This vanilla scone recipe truly shines with the use of “caviar” from fresh whole vanilla beans. Seek out pods that are dark, plump, and flexible – these indicate freshness and potency. While I source mine from specialty purveyors like Penzey’s for their superior quality, you can often find good quality beans in gourmet grocery stores. The seeds from vanilla pods or a good vanilla bean paste will yield a noticeably fresher and more pronounced vanilla flavor compared to extract, making a real difference in these vanilla bean scones.
- Vanilla Substitutions: If whole vanilla beans are not accessible, don’t despair! You can effectively substitute one teaspoon of pure vanilla extract for each bean specified in the recipe. Alternatively, 2-3 teaspoons of vanilla bean paste can also be used per bean, offering a good balance of flavor and the visual appeal of vanilla specks.
- The Crucial Cold Butter: This is perhaps the most vital tip for achieving tender, flaky scones. When you cut very cold butter into the flour mixture, it creates small, distinct pieces. As these pieces of butter melt in the hot oven, the water content within them rapidly turns to steam, creating tiny pockets that separate the layers of dough. This process is what yields a light, airy, and flaky scone, rather than a dense or heavy one. Ensure your butter is diced and kept chilled until the very last moment.
How to Make Scones: A Step-by-Step Guide to Perfection
After sharing these culinary delights with my friends, the natural progression was a flurry of questions about the secrets behind such perfect scones. I explained that this recipe includes an egg, which might be slightly uncommon for some traditional scone recipes, yet it contributes significantly to their moistness and richness. Another common query revolved around the butter’s state – “was it melted?” Just like in making a delicate pie crust, the butter absolutely needs to be very cold. This is the cornerstone for achieving those sought-after tender, flaky layers that define an exceptional scone.
- Prepare Your Butter: Begin by dicing your very cold butter into small, uniform pieces. Immediately return these pieces to the refrigerator to keep them thoroughly chilled while you prepare the dry ingredients. This step is non-negotiable for flaky results.
- Combine Dry Ingredients and Cut in Butter: In a large mixing bowl, whisk together your sifted flour, sugar, baking powder, and salt. Then, retrieve your cold butter and incorporate it into the dry mixture. You can use a pastry blender, two knives, or even your fingertips. The goal is to work the butter quickly until the mixture resembles coarse cornmeal with pea-sized pieces of butter throughout. Avoid overworking, as this will warm the butter. If your kitchen is warm or your hands tend to be hot, feel free to place the bowl back into the fridge for a few minutes to re-chill the butter.
- Introduce Wet Ingredients and Form Dough: In a separate small bowl, whisk together the heavy cream and your chosen vanilla (vanilla bean seeds, extract, or paste), along with the egg. Gradually add this wet mixture to the dry ingredients, stirring gently with a fork or spatula until a cohesive dough just begins to form. The precise amount of liquid may vary slightly depending on the humidity of your environment, so you might need a tiny bit more cream if the dough seems too dry. Be very careful not to overmix the dough. Excessive mixing develops the gluten and breaks down the butter further, resulting in tougher, less tender scones.
- Shape and Cut the Dough: Lightly flour a clean countertop or lay out a piece of parchment paper (parchment makes for incredibly easy cleanup and transfer!). Turn the dough out onto this surface and gently pat or roll it into a rectangle or circle, aiming for a thickness of approximately ¾ to 1 inch. From my experience, cutting thicker scones doesn’t necessarily translate into a significantly thicker baked product; rather, it’s about consistent thickness for even baking. While Ree Drummond famously cuts her scones into triangles, I often prefer using round biscuit cutters for a classic look. Either method works beautifully, and the outcome will be equally delicious!
- Bake and Glaze: Arrange the cut scones on a parchment-lined baking sheet. Bake in a preheated oven (usually around 350°F / 175°C) for about 15-18 minutes, or until the tops are golden brown and a toothpick inserted into the center comes out clean. Let them cool on the baking sheet for a few minutes before transferring them to a wire rack to cool completely. While the scones cool, prepare the glorious vanilla glaze by whisking sifted powdered sugar, milk (adding gradually to achieve desired consistency), a dash of salt, and vanilla bean paste or extract until smooth. Once the scones are cool enough to handle, dip each one into the glaze, allowing any excess to drip off before returning them to the wire rack for the glaze to set.
It’s worth noting that the final yield will naturally vary depending on the size and shape you choose to cut your cream scone recipe. No matter the shape, the exquisite flavor and texture will remain consistent.

Frequently Asked Questions About Scones
Scones are delightful British baked goods, typically made from wheat or oat flour, and leavened with baking powder to give them a light, fluffy texture. They are shaped or cut into various forms (rounds, triangles, squares) and then baked until golden. Traditionally, scones are lightly sweetened and form a cornerstone of a classic cream tea or afternoon tea, often served with an accompaniment of jam and decadent clotted cream. While many scones are enjoyed plain, some, like our vanilla bean variety, are enhanced with a sweet glaze, adding an extra layer of flavor and moisture. The pronunciation of “scone” can vary across the British Isles, either rhyming with “gone” or “tone,” with Americans typically using the latter pronunciation.
The quintessential accompaniments for scones are clotted cream, rich whipped cream, or a tangy lemon curd. Beyond these classics, a variety of fruit jellies or jams (strawberry, raspberry, or apricot are popular choices) are also excellent. A smear of good quality butter can also highlight their delicate flavor. To complete the experience, always serve your scones with a steaming cup of hot tea (or coffee, if you prefer!) and consider adding a side of fresh fruit for a vibrant, refreshing contrast. Blueberries, raspberries, or sliced strawberries are perfect choices.
Scones are undeniably best enjoyed on the day they are baked, when they are at their peak freshness and tenderness. However, if you have leftovers, they can be stored in an airtight container at room temperature for up to 2-3 days. To maintain their quality for longer, I highly recommend freezing them. Simply place cooled scones in a freezer-safe bag or container, separating layers with parchment paper if stacking. They can be frozen for up to 1-2 months. Thaw at room temperature and warm gently in a preheated oven (around 300°F / 150°C) for 5-10 minutes to bring back some of their fresh-baked appeal.
Absolutely! While these Vanilla Bean Scones are a classic for a reason, this recipe provides an excellent base for experimentation. You can easily fold in other delicious additions to the dough. Consider incorporating fresh or dried berries (blueberries, cranberries, raspberries), chocolate chips (white, milk, or dark), citrus zest (lemon or orange), or even a hint of spice like cinnamon or cardamom. If adding wet ingredients like fresh fruit, you might need a tiny bit more flour to maintain the dough’s consistency. Let your creativity guide you!
You May Also Love These Scone and Breakfast Recipes
If you’ve enjoyed these delectable Vanilla Bean Scones, you’re sure to appreciate other variations and comforting breakfast ideas. Explore these fantastic recipes to expand your baking repertoire:
- Strawberry Shortcake Scones from The View From Great Island
- Lemon Scones with Nutmeg and Cherries from Taste and Tell
- Maple Scones from Two Peas and Their Pod
- Glazed Lemon Tea Scones
- Strawberry Buttermilk Scones
- Cranberry Eggnog Scones
- Raspberry Cream Scones
- More Easy Breakfast Recipes
- More Favorite Brunch Recipes
This classic recipe was first shared in February 2013 and has been lovingly updated in 2020 with refreshed photos and enhanced text to provide you with the best baking experience.
Stay connected and share your baking triumphs with me on social media @ Instagram, Facebook, and Pinterest. Don’t forget to tag me when you whip up one of my recipes! If you adore the results, please consider leaving a 5-star rating in the recipe card below – your feedback means the world.

Vanilla Bean Scones
10 minutes
18 minutes
28 minutes
12 scones
Perfectly tender vanilla scones generously coated with a sweet vanilla glaze!
Ingredients
For the Scones:
- 3 cups all-purpose flour
- ⅔ cups granulated sugar
- 5 teaspoons baking powder
- ¼ teaspoon salt
- 2 sticks (½ pound) unsalted butter, very cold and cut into small pieces
- 1 large egg
- ¾ cup heavy cream
- 2 whole vanilla beans (or 2 teaspoons vanilla extract or 2 teaspoons vanilla bean paste)
For the Vanilla Glaze:
- 2 ½ cups powdered sugar, sifted
- ¼ cup milk (add more gradually if you prefer a thinner icing)
- ½ teaspoon vanilla bean paste or vanilla extract
- Dash of salt
Instructions
- Preheat your oven to 350ºF (175ºC). Line a large baking sheet with parchment paper and set it aside.
- If using whole vanilla beans, split them lengthwise with a sharp knife and scrape out the fragrant vanilla seeds (“caviar”). Add these seeds to the heavy cream and stir gently to combine. Allow this mixture to rest for a few minutes while you prepare the dry ingredients.
- In a large mixing bowl, sift together the flour, granulated sugar, baking powder, and salt. Add the cold, diced butter to the dry ingredients. Use a pastry blender, two knives, or your fingertips to cut the butter into the flour mixture until it resembles coarse cornmeal with some pea-sized pieces of butter remaining. Work quickly to keep the butter cold.
- Whisk the egg into the vanilla-infused cream mixture. Pour this wet mixture into the dry ingredients. Gently stir with a fork or spatula until the dough just comes together. Be careful not to overmix. If the dough seems too dry, you may add a tiny bit more cream, one tablespoon at a time, until it forms a cohesive mass.
- Turn the dough out onto a lightly floured surface or a piece of parchment paper. Gently pat or roll the dough into a rectangle or circle that is approximately ¾ to 1 inch thick. Using a round cookie cutter or a sharp knife to cut triangles, cut out individual scones. Place the cut scones onto your prepared baking sheet. Bake for about 15-18 minutes, or until the tops are lightly golden brown. Let the scones cool on the pan for a few minutes before transferring them to a wire rack to cool completely.
- While the scones are cooling, prepare the glaze. If using a vanilla bean for the glaze, scrape its seeds into the milk and let sit briefly. Sift the powdered sugar into a mixing bowl and add a dash of salt. Gradually add the vanilla milk (or plain milk with vanilla extract/paste) and whisk until the glaze is smooth and free of lumps. Dip the top of each cooled scone into the glaze, allowing any excess to drip off, then return them to the wire rack for the glaze to set. Serve immediately or store as directed.
Notes
Yield may vary slightly depending on the size of the cookie cutter used.
Recipe adapted from The Pioneer Woman.
Nutrition Information:
Yield:
12
Serving Size:
1
Amount Per Serving:
Calories: 308Total Fat: 6gSaturated Fat: 4gTrans Fat: 0gUnsaturated Fat: 2gCholesterol: 33mgSodium: 274mgCarbohydrates: 59gFiber: 1gSugar: 34gProtein: 4g
HOW MUCH DID YOU LOVE THIS RECIPE?
Please leave a comment on the blog or share a photo on Pinterest
