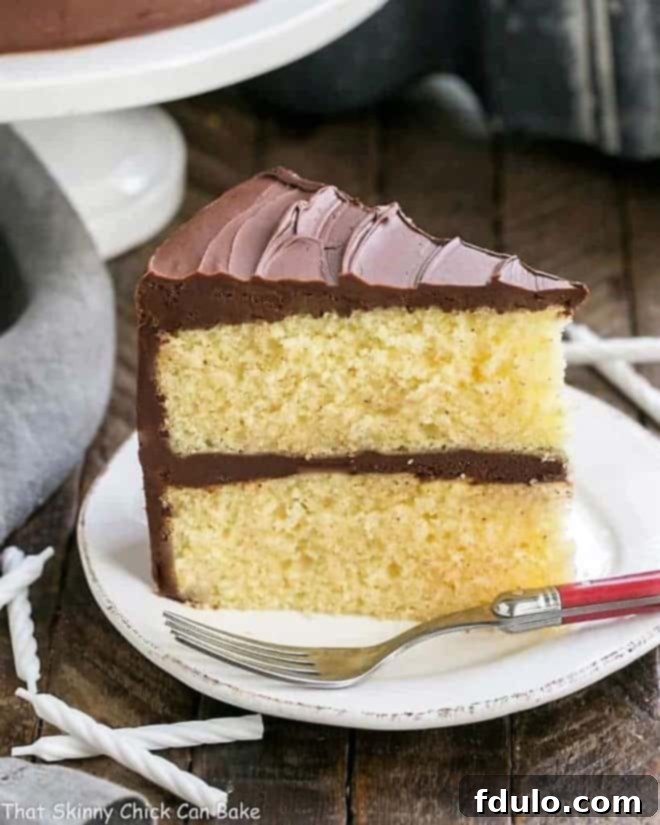
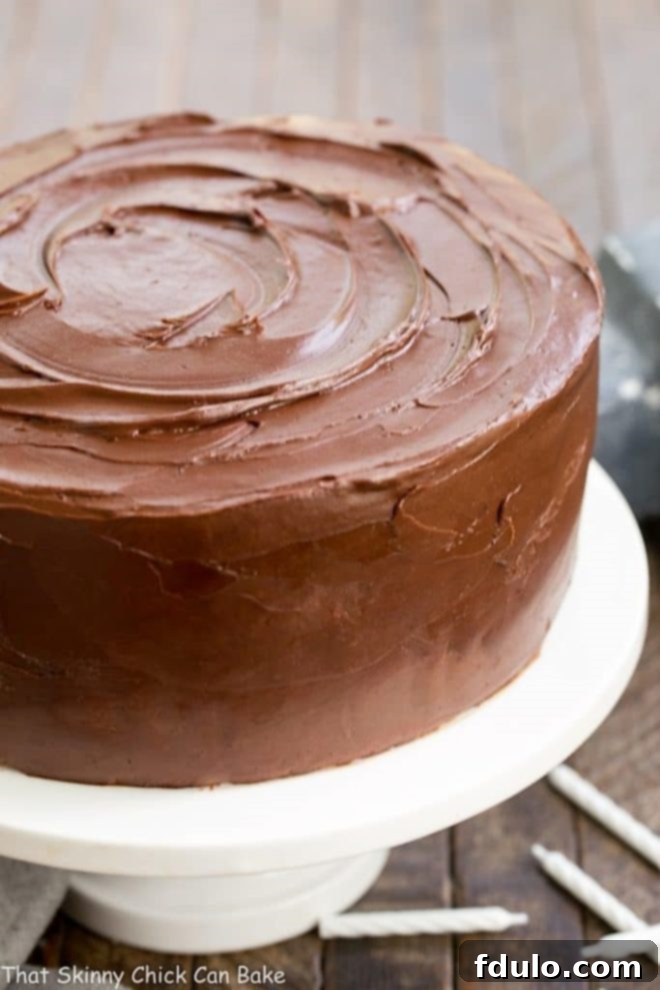
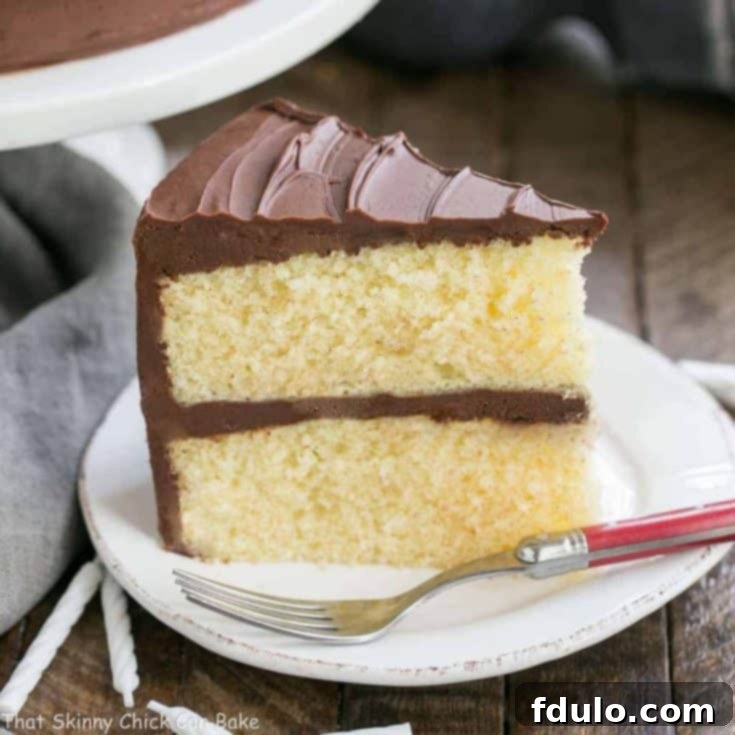
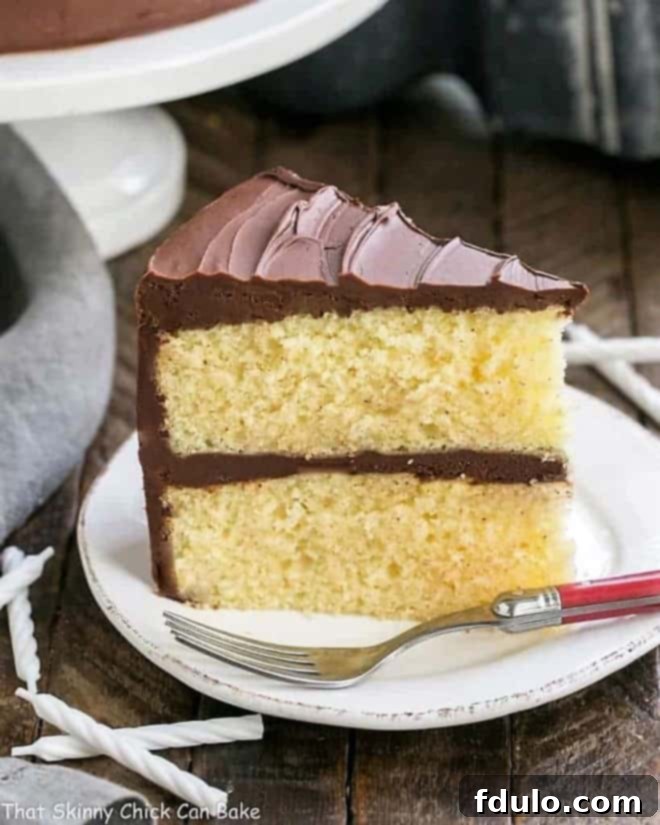
When searching for that quintessential dessert to mark a milestone, this **Classic Yellow Cake from Scratch** stands out. It’s celebrated for its incredibly tender, buttery crumb and crowned with a luscious, truly decadent chocolate frosting. This timeless confection is perfectly suited to elevate any special occasion, transforming ordinary moments into unforgettable celebrations.
Originally crafted to celebrate my daughter’s birthday, this cherished **Yellow Cake Recipe** also served a joyful purpose as part of a heartwarming online baby shower for our dear blogger friend, Angie from Big Bear’s Wife. It’s a cake that brings smiles, whether for family milestones or welcoming new life.

Why This Classic Yellow Cake is a Must-Make for Your Next Celebration
There’s something inherently special about a perfectly baked yellow cake, especially when paired with a rich, velvety chocolate frosting. This particular recipe isn’t just a dessert; it’s an experience that consistently earns rave reviews and becomes a requested staple for every festive gathering. Here’s why it deserves a spot in your baking repertoire:
- **The Ultimate Classic Combination:** The pairing of light, buttery yellow cake with decadent chocolate frosting is a beloved classic for a reason. It offers a harmonious balance of sweet, rich flavors and contrasting textures that appeal to nearly everyone, making it a guaranteed crowd-pleaser for all ages.
- **Unrivaled Moistness and Tender Crumb:** This recipe is meticulously developed to ensure your yellow cake boasts an exceptional moistness and a finely textured, tender crumb that practically melts in your mouth. Achieving this delicate balance is a hallmark of expert baking, and with our detailed guidance, you’ll master it.
- **A Dreamy, Glossy Double Chocolate Frosting:** Prepare for a frosting revelation! Our recipe calls for a generous pound of semi-sweet chocolate combined with rich Dutch-process cocoa powder, resulting in a profoundly chocolatey, glossy, and impossibly smooth frosting. It’s a chocolate lover’s dream, providing the perfect counterbalance to the cake’s subtle sweetness.
This irresistible combination of the best yellow cake and a luscious fudgy chocolate icing has become a frequent birthday request in my household. I recall a comical incident where I tried to gently steer my husband towards a new recipe (after all, as a food blogger, variety is key!). His response? A playful threat of receiving a chainsaw for my next birthday if he didn’t get his beloved cake! After a burst of hysterical laughter and a few hiccups on my end, I happily gave in. Some traditions, and some cakes, are simply too good to resist!

Baking Perfect Yellow Cake: Expert Tips for a Flawless Layer Cake
Creating a stunning layer cake with a fine, tender crumb, perfectly even layers, and an exquisite frosting requires attention to detail. These expert tips will guide you through each crucial step, ensuring your homemade yellow cake is nothing short of magnificent.
- **Impeccable Pan Preparation is Key:** The foundation of a successful cake begins with properly preparing your baking pans. To prevent any sticking and ensure easy release, generously butter your pans, then line the bottoms with a round of parchment paper. Butter the top surface of the parchment as well, and finally, dust the entire interior lightly with flour. This triple-layer of protection guarantees your cake layers will slide out effortlessly.
- **Achieve Even Layers with a Kitchen Scale:** For a professional-looking layer cake, consistency is paramount. After mixing your batter, use a kitchen scale to accurately divide it evenly between your prepared cake pans. This simple step ensures that each cake layer bakes to precisely the same depth, resulting in a perfectly balanced and beautiful finished cake that’s easy to stack and frost.
- **Mastering Batter Mixing with the Paddle Attachment:** When it comes to mixing your cake batter, opt for the paddle attachment on your stand mixer rather than the whisk. The paddle gently combines ingredients without incorporating too much air, which is crucial for preventing excessive gluten formation. Too much gluten can lead to a tough, chewy cake. By minimizing aeration and gluten development, the paddle helps achieve that coveted fine, tender crumb texture.
- **The Art of Alternately Adding Wet and Dry Ingredients:** This technique is a baker’s secret to superior cake texture. By adding your dry flour mixture and wet milk mixture alternately to the creamed butter and sugar, you allow the flour to effectively coat and envelop the fat particles. This process limits gluten development and evenly distributes the fat throughout the batter, resulting in an exceptionally tender, moist, and soft cake.
- **Avoid Overbaking at All Costs:** Overbaking is the quickest way to dry out a cake and compromise its tender texture. Keep a close eye on your cake as it bakes, and start checking for doneness a few minutes before the timer suggests. Insert a clean toothpick into the very center of the cake; if it comes out clean or with only a few moist crumbs attached, your cake is ready. A clean toothpick means it’s done; crumbly bits mean it’s still baking.
- **Proper Cooling is Essential for Structure and Frosting:** Patience is a virtue in baking, especially during the cooling phase. Once out of the oven, let your cakes cool in their pans for about 10-15 minutes. This allows them to firm up slightly before you attempt to remove them. After this initial cooling, carefully invert them onto wire cooling racks, peel off the parchment paper, and allow them to cool completely to room temperature before even thinking about frosting. Frosting a warm cake is a recipe for disaster, as the frosting will simply melt off.
Best Menu for a Baby Shower Celebration
Our dear blogger friend, Angie, recently welcomed her precious baby boy into the world on a beautiful Wednesday. Surrounded by her loving parents, her adorable son was greeted with immense joy and excitement. To celebrate this wonderful new chapter, a group of us blogger friends organized a delightful surprise virtual baby shower. Here’s a glimpse of the festive menu we curated:
Refreshing Beverages:
- Baby Blue Punch from Or Whatever You Do.
- Easy Fall Party Punch from Miss in the Kitchen.
- Simple & Fun Mimosa Bar from My Life Well Loved.
Delightful Appetizers & Salads:
- Creamy Grape Salad with Toasted Pecans from Unsophisticook.
- Mini Chicken and Waffles from Sweet Beginnings.
- Spicy Southern Deviled Eggs from This Gal Cooks.
Hearty Entrees:
- American Pierogi Casserole from Rants From My Crazy Kitchen.
- Chicken Satay Skewers with Peanut Butter Sauce from Culinary Adventures with Camilla.
- Pimento Cheese Tomato Ham Sliders from Honey and Birch.
Sweet Desserts:
- Brookies from Baked Bree.
- Caramel Corn from The Redhead Baker.
- Caramel Pecan Cheesecake from Cooking with Carlee.
- Chocolate Chip Clouds from All Day I Dream About Food.
- Lemon Donuts with Raspberry Glaze from Ashlee Marie.
- Pumpkin Cheesecake Brownie Bars from The Bitter Side of Sweet.
- Small Batch Rhubarb Strawberry Jam from The JavaCupcake Blog.
- Classic Yellow Butter Cake with Fudgy Chocolate Icing from That Skinny Chick Can Bake (That’s this delightful recipe!).
- The Perfect White Birthday Cake Recipe from That Skinny Chick Can Bake.
For a dessert that’s equally delicious but more portable, you’ll also adore this fantastic Yellow Cupcakes Recipe with Ganache Frosting!
Frequently Asked Questions About Yellow Cake
A classic yellow cake is renowned for its mild, inviting flavor profile, primarily characterized by the rich notes of butter and the warm essence of vanilla. Compared to other cakes, its taste is subtly sweet and remarkably balanced, often described as having an almost neutral, yet deeply comforting quality. The inclusion of whole eggs, rather than just egg whites (as in a white cake), contributes to its distinctive yellow hue and imparts a richer, slightly custardy depth, beautifully enhanced by the vanilla. This inherent balance is precisely why it pairs so perfectly with a vibrant, robust chocolate frosting, creating a harmonious and unforgettable dessert experience.
The origins of the yellow cake can be traced back to the 1800s, a pivotal era in baking history when leavening agents like baking powder and baking soda became widely accessible. These new ingredients offered revolutionary alternatives to traditional yeast and eggs for achieving lift and aeration in cakes. Initially, these early iterations of what we now know as yellow cake were often referred to as “celebration cakes,” signaling their special status for festive occasions. Culinary historians suggest that these early recipes may have evolved from the British pound cake, adapting its rich, dense structure with the lighter, fluffier texture afforded by chemical leaveners, thus paving the way for the beloved yellow cake we enjoy today.
The primary distinction between yellow cake and white cake lies in their use of eggs and fat. A classic yellow cake uses whole eggs, including the yolks, which give it its characteristic golden hue, richer flavor, and slightly denser, moister crumb due to the fat from the yolks. It often features butter as its main fat, contributing to its buttery taste. In contrast, a white cake typically uses only egg whites, resulting in a purer white color and a lighter, airier texture. White cakes often use shortening or a combination of shortening and butter to maintain their pale color, resulting in a less pronounced “buttery” flavor and a taste profile that relies more heavily on vanilla or other extracts. Both are delicious, but offer distinct experiences in color, texture, and flavor depth.
Stay connected with our baking adventures and delicious recipes through social media! Find us on Instagram, Facebook, and Pinterest. Don’t forget to tag us with #thatskinnychickcanbake when you try one of our creations! And if you love the results and want to show your appreciation, please consider giving this recipe a 5-star rating in the recipe card below.

Yellow Butter Cake Recipe with Decadent Chocolate Icing
40 minutes
35 minutes
1 hour 15 minutes
12 Servings
Indulge in the ultimate classic combination: a moist, buttery yellow cake perfectly complemented by a rich, fudgy chocolate icing! This scratch-made recipe is absolutely perfect for birthdays, anniversaries, holidays, or any special occasion that calls for a truly unforgettable dessert.
Ingredients You’ll Need
For the Moist Yellow Cake:
- 1 cup (2 sticks) unsalted butter, softened to room temperature, plus extra for greasing pans
- 1 ½ cups all-purpose flour, plus additional for dusting pans
- 1 ½ cups cake flour, for a tender crumb
- 1 tablespoon baking powder, for perfect lift
- ½ teaspoon fine sea salt, to balance flavors
- 1 ¾ cups granulated sugar
- 4 large eggs, at room temperature
- 2 teaspoons pure vanilla extract, for classic flavor
- 1 ¼ cups whole milk, at room temperature
For the Decadent Chocolate Frosting:
- 1 pound (about 2 cups) semi-sweet chocolate, finely chopped
- 6 tablespoons Dutch-process cocoa powder, for deep chocolate flavor
- 6 tablespoons boiling water
- 1 ½ cups (3 sticks) unsalted butter, softened to room temperature
- ½ cup powdered sugar, sifted
- 1 teaspoon pure vanilla extract
Step-by-Step Instructions
- Preheat your oven to 350ºF (175ºC). Prepare two 9-inch round cake pans by generously buttering them. Line the bottoms of each pan with a circle of parchment paper, then butter the parchment as well. Finally, dust the prepared pans lightly with flour, tapping out any excess; set aside. In a medium bowl, whisk together the all-purpose flour, cake flour, baking powder, and salt until thoroughly combined; set this dry mixture aside.
- In the large bowl of a stand mixer fitted with the paddle attachment, beat the softened butter and granulated sugar together on medium-high speed until the mixture is light, fluffy, and pale in color, typically about 3 minutes. Be sure to stop and scrape down the sides of the bowl with a spatula as needed to ensure even mixing.
- Add the eggs to the butter-sugar mixture one at a time, beating well after each addition until fully incorporated. Once all eggs are in, mix in the vanilla extract until just combined.
- With the mixer set to low speed, gradually add the reserved flour mixture to the wet ingredients in three separate additions, alternating with the milk in two additions. Begin and end with the flour mixture (Flour, Milk, Flour, Milk, Flour). Beat until just combined after each addition, taking care not to overmix the batter.
- Evenly pour the prepared cake batter into your two greased and floured 9-inch pans. Use an offset spatula to gently smooth the tops of the batter, ensuring even layers.
- Bake in the preheated oven for 30-35 minutes, or until the cakes are golden brown and a wooden skewer or cake tester inserted into the center of a cake comes out clean.
- Once baked, remove the cakes from the oven and let them cool in their pans on wire racks for approximately 10-15 minutes. This allows them to firm up. After this time, carefully invert the cakes onto the cooling racks, peel off the parchment paper from the bottoms, and allow them to cool completely to room temperature before frosting.
- Prepare the delicious chocolate icing only once the cake layers have cooled entirely.
- For the frosting, gently melt the chopped semi-sweet chocolate in a microwave-safe bowl. Heat in 30-second increments, stirring well after each interval, until the chocolate is completely melted and smooth. Set the melted chocolate aside to cool to room temperature, which should take about 15 minutes.
- In a small separate bowl, stir together the Dutch-process cocoa powder and boiling water until the cocoa is fully dissolved and forms a smooth paste. Set aside.
- In the bowl of your stand mixer fitted with the paddle attachment, combine the softened butter and sifted powdered sugar. Beat on medium speed until the mixture is light and fluffy, about 2-3 minutes, scraping down the sides of the bowl as needed.
- Add the vanilla extract and mix until incorporated. Then, add the cooled melted chocolate to the butter mixture and beat until thoroughly combined and smooth.
- Finally, add the cocoa-water mixture to the frosting and beat on medium speed until the frosting is silky smooth, glossy, and beautifully uniform in color and consistency.
- For the best results and a smooth finish, frost your completely cooled cake layers immediately while the frosting is fresh and at its most pliable.
Chef’s Notes & Pro Tips
This exquisite yellow cake recipe has been thoughtfully adapted from the renowned Martha Stewart’s Baking Handbook, ensuring a reliably delicious and perfectly textured result every time. For an even richer flavor, consider using high-quality butter and vanilla extract. Remember, room temperature ingredients are crucial for a smooth, emulsified batter, leading to a lighter and more uniform cake.
Recommended Baking Essentials
As an Amazon Associate and member of other affiliate programs, I earn from qualifying purchases, helping to support this blog at no extra cost to you.
- 9-inch Parchment Rounds
- 9-inch USA Pan Bakeware Round Cake Pan
- KitchenAid KSM150PSER Artisan Tilt-Head Stand Mixer
Nutrition Information:
Yield:
12
Serving Size:
1 slice
Amount Per Serving:
Calories: 821
Total Fat: 52g
Saturated Fat: 32g
Trans Fat: 2g
Unsaturated Fat: 17g
Cholesterol: 166mg
Sodium: 557mg
Carbohydrates: 87g
Fiber: 3g
Sugar: 55g
Protein: 8g
Thatskinnychickcanbake.com occasionally provides nutritional information for recipes published on this site. This data is offered as a courtesy and should be considered an estimate only. The information is typically derived from online calculators. While thatskinnychickcanbake.com strives to provide accurate nutritional data, these figures are approximate and can vary.
Several factors, such as the specific product types or brands of ingredients purchased, can alter the nutritional content of any given recipe. Furthermore, many recipes on thatskinnychickcanbake.com may suggest optional toppings, which may or may not be explicitly listed, and their nutritional information is not included in these calculations. Other variables, such as when salt amounts are listed “to taste,” mean the quantity will vary and is not factored into the recipe’s nutritional breakdown. Please also note that different online nutritional calculators can produce varying results.
For the most precise representation of the nutritional information for any recipe, we strongly recommend that you calculate it yourself using the exact ingredients and quantities you incorporate into your specific preparation. You bear sole responsibility for ensuring the accuracy of any nutritional information you obtain.
How Much Did You Love This Recipe?
We’d absolutely love to hear from you! Please leave a comment on the blog below to share your experience, or better yet, share a photo of your magnificent creation on Pinterest. Your feedback and photos inspire us!
