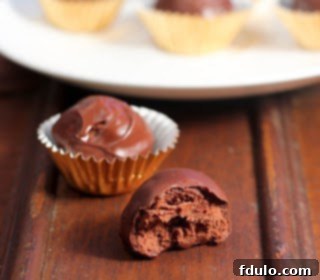
Mastering the Art of Homemade Chocolate Candies: Truffles and Caramels
There’s an undeniable magic in creating homemade confections, especially when chocolate is involved. The journey from raw ingredients to exquisite, melt-in-your-mouth treats is incredibly rewarding. This particular adventure began with a special challenge from the Daring Bakers community – an opportunity to dive deep into the world of candy making, focusing on the sophisticated technique of chocolate tempering. The allure of crafting perfect chocolate truffles and silky chocolate-covered caramels proved irresistible, prompting a return to the kitchen for this delightful August 2011 Daring Bakers’ Challenge, hosted by the talented Lisa of Parsley, Sage, Desserts and Line Drive and Mandy of What the Fruitcake?!. They tasked participants with creating “sinfully delicious candies,” a mission made even sweeter by the amazing prize offered by Chocoley.com for the most creative and delectable entry.
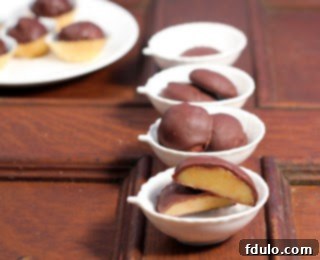
After a brief hiatus from the Daring Bakers challenges – due to vacations, family food preferences, and a generally packed schedule – the mention of chocolate, and more importantly, the intricate process of tempering chocolate, instantly reignited my passion. Who could resist homemade chocolate candy? Certainly not my family, especially if it was a nut-free indulgence. This challenge presented the perfect opportunity to expand my confectionery repertoire and conquer a technique that many home bakers find intimidating: chocolate tempering.
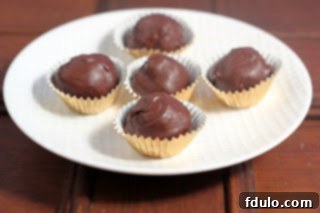
The Secret to Perfect Chocolate: Understanding Tempering
My chosen creations for this challenge were classic chocolate truffles and irresistible chocolate-covered caramels. Typically, when I prepare truffles, I opt for simpler coatings like cocoa powder, shredded coconut, or colorful sprinkles. This avoids the common dilemma associated with untempered chocolate: the dreaded “bloom” or unsightly gray streaks that appear the day after dipping. This phenomenon occurs when the chocolate’s fat crystals recrystallize in an unstable form, resulting in a dull appearance and often a crumbly texture.
Tempering chocolate is the meticulous process of heating and cooling chocolate to specific temperatures, encouraging the formation of stable cocoa butter crystals. This stable crystalline structure is what gives properly tempered chocolate its characteristic glossy finish, crisp snap when broken, and excellent shelf life, preventing bloom. While it might sound complex, and indeed my initial experience felt “a bit akin to watching paint dry,” mastering this technique is a game-changer for any serious home chocolatier. My first attempt involved a small batch of just 8 ounces, which, I quickly learned, extended the cooling time considerably. Performing this delicate task in the peak of summer, with the air conditioning struggling to keep the house below 80°F, added another layer of challenge. The cooling phase, from 113°F down to approximately 81°F, felt interminable. Reheating it to 90°F, however, was a blink-and-you-miss-it affair, leading me to suspect I might have slightly overshot the ideal temperature. Yet, even with these learning curves, the results were incredibly satisfying.
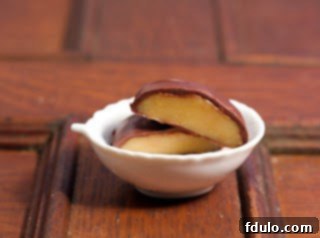
The Dipping Process: A Labor of Love
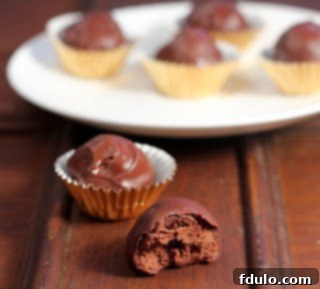
With the ganache balls and caramels perfectly chilled and awaiting their chocolate bath, the dipping commenced. This stage, though rewarding, proved to be a delicate dance. As the candies patiently waited their turn, they began to soften slightly, and the warmth of the tempered chocolate only accelerated this process. It became clear that a career as a professional chocolatier, with its demands for speed and flawless aesthetics, might not be my immediate calling. However, despite any minor imperfections in appearance, the bonbons themselves received universal acclaim – a testament to the irresistible combination of smooth chocolate, rich ganache, and chewy caramel. This challenge truly pushed me out of my comfort zone, and there’s nothing quite like a homemade chocolate treat to bring joy and giddiness to the family.
Classic Recipes for Homemade Indulgence
Here are the cherished recipes that formed the heart of this challenge, bringing generations of candy-making wisdom and sophisticated flavors to life in my kitchen:
Grandfather’s Caramels (from his circa 1952 Today’s Woman Candy Cookbook)
- 1 cup sugar
- 3/4 cup corn syrup
- 1/4 pound (1 stick) unsalted butter
- 1 cup evaporated milk, divided
- 1/2 teaspoon pure vanilla extract
Instructions:
- In a medium-sized, heavy-bottomed saucepan, combine the sugar, corn syrup, butter, and 1/2 cup of the evaporated milk. Place over medium heat.
- Cook the mixture, stirring occasionally, until it reaches 220°F (104°C) on a reliable candy thermometer.
- Carefully add the remaining 1/2 cup of evaporated milk to the saucepan. Continue to cook, stirring constantly to prevent scorching, until the mixture reaches 260°F (127°C).
- Remove the saucepan from the heat and stir in the vanilla extract.
- Pour the hot caramel into a lightly greased 8×8 inch pan or into individual candy molds for easier portioning.
- Allow the caramels to cool completely. If using a pan, cut them into squares when firm and wrap each in waxed paper to prevent sticking. For this challenge, I used candy molds for perfectly shaped caramels. Chill the caramels thoroughly until your tempered chocolate is ready for dipping.
Frangelico Ganache for Truffles (adapted from Nick Malgieri)
- 9 ounces high-quality semisweet chocolate, finely chopped
- 1/2 cup heavy whipping cream
- 2 tablespoons unsalted butter
- 1 tablespoon light corn syrup
- 2 tablespoons Frangelico or your preferred liqueur (e.g., Grand Marnier, Kahlúa)
Instructions:
- Place the chopped semisweet chocolate in a heatproof bowl. Gently melt the chocolate in the microwave using 30-second intervals, stirring thoroughly after each interval, until completely smooth. Set aside.
- In a large Pyrex measuring cup or microwave-safe bowl, combine the heavy cream, butter, and corn syrup. Heat in the microwave until the mixture just begins to bubble around the edges.
- Remove from the microwave and stir until the butter is fully melted and ingredients are well combined. Allow the mixture to cool for approximately 5 minutes.
- Pour the slightly cooled cream mixture over the melted chocolate. Whisk gently from the center outwards until a smooth, emulsified ganache forms.
- Stir in the Frangelico or chosen liqueur until fully incorporated.
- Refrigerate the ganache for 15-30 minutes, or until it has cooled significantly but is still pliable – almost at room temperature.
- Using an electric mixer, beat the ganache on medium speed until it achieves a light, fluffy consistency similar to frosting.
- Pipe or scoop rounds of ganache onto a parchment-lined cookie sheet. Chill these ganache centers thoroughly until the tempered chocolate is ready for dipping.
The Definitive Guide to Chocolate Tempering: The Seeding Method
Achieving that perfect glossy finish and satisfying snap on your homemade chocolates hinges entirely on proper tempering. The “seeding” method is a reliable technique for home cooks, utilizing already tempered chocolate (the “seed”) to guide the crystallization of freshly melted chocolate. For this project, I used about 8 ounces of semisweet chocolate, enough for half a batch of caramels and half a batch of ganache centers.
Essential Tempering Ranges:
Understanding these temperature benchmarks is crucial for success, as different types of chocolate have slightly varied ideal working temperatures:
- Celsius:
- Dark Chocolate: Melt to 45°C-50°C > Cool to 27°C > Reheat to 32°C
- Milk Chocolate: Melt to 45°C > Cool to 27°C > Reheat to 30°C
- White Chocolate: Melt to 45°C > Cool to 27°C > Reheat to 29°C
- Fahrenheit:
- Dark Chocolate: Melt to 113°F-122°F > Cool to 80.6°F > Reheat to 89.6°F
- Milk Chocolate: Melt to 113°F > Cool to 80.6°F > Reheat to 86°F
- White Chocolate: Melt to 113°F > Cool to 80.6°F > Reheat to 84.2°F
Step-by-Step Seeding Method for Couverture Chocolate:
- Preparation: If using chocolate in bar or slab form, finely chop it into small, uniform pieces (roughly the size of almonds). This ensures even melting.
- Initial Melting: Place approximately ⅔ of your chopped chocolate into a heatproof bowl. Reserve the remaining ⅓ of the chocolate pieces; these will be your “seeds.”
- Double Boiler Setup: Set the bowl over a saucepan of gently simmering water. Ensure the bottom of the bowl does not touch the water. A snug fit between the bowl and saucepan is crucial to prevent steam from escaping and condensing into water droplets, which can cause your chocolate to seize and become unusable.
- Gentle Melting: Using a clean rubber spatula, gently stir the chocolate. This promotes even melting and prevents hot spots.
- First Temperature Check: Monitor the chocolate’s temperature with a reliable thermometer. As soon as it reaches 45°C / 113°F (or between 45°C-50°C / 113°F-122°F for dark chocolate), immediately remove the bowl from the heat.
- Seeding and Cooling: Begin adding small amounts of your reserved ⅓ un-melted chocolate (the “seeds”) into the melted chocolate, stirring continuously. The solid chocolate pieces will help cool the mixture down and introduce stable cocoa butter crystals. Continue adding seeds until the chocolate cools to 27°C / 80.6°F (or between 80°F and 82°F for dark chocolate).
- Reheating to Working Temperature: Place the bowl back over the double boiler for a very short period, stirring constantly. Reheat the chocolate until it reaches its specific working temperature according to the chart above: 32°C/89.6°F for dark, 30°C/86°F for milk, and 29°C/84.2°F for white chocolate. Be incredibly vigilant at this stage; overheating will undo all your tempering efforts.
- Final Check: If a few small pieces of seed chocolate remain unmelted at the working temperature, you can gently stir them until dissolved, ensuring the temperature doesn’t rise further. Your chocolate is now perfectly tempered and ready for use in molds, dipping, or coating.
Advanced Tempering Tips for Success:
- Preventing Seizing: The absolute golden rule of chocolate tempering is to keep it away from water. Even a single drop can cause chocolate to seize, transforming it into a grainy, unusable mass. Always ensure your bowls and spatulas are completely dry.
- Consistent Temperature: If you’re dipping a large batch of truffles or caramels, your tempered chocolate will naturally start to cool and thicken. To maintain ideal viscosity, place the bowl over the simmering water for 30 seconds to 1 minute every 10-15 minutes. Crucially, do not let the temperature exceed its working range. You can also use a warmed glass bowl wrapped in a hot kitchen towel to help retain heat longer.
- Working with Quantity: Tempering larger amounts of chocolate is generally easier than small quantities, as larger masses retain heat more consistently. Don’t worry about leftover tempered chocolate; it can be stored in a cool, dry place and re-tempered for future use.
- The Thermometer is Your Friend: Unless you’re a seasoned professional who can gauge chocolate temperature by touch, a reliable digital thermometer is indispensable. A few degrees off can completely ruin the temper.
- No Fear of Mistakes: If you make an error in the tempering process, don’t despair! You can always restart from the beginning by reheating the chocolate and repeating the steps.
- Cooling Surfaces: While a marble or granite slab is often recommended for cooling in other tempering methods, a laminated countertop, glass, or steel surface can also work, though it may take a bit longer.
- Tool Choice: Opt for a rubber spatula over a wooden spoon during tempering, as wood can retain moisture and potentially introduce it to your chocolate.
- Alternative Seeding: For simplicity, you can drop one large chunk of already tempered chocolate (the “seed”) into your melted chocolate. This makes it easier to fish out the single piece once the desired temperature is reached, rather than sifting through multiple small bits.
The Joy of Creation and Sweet Rewards
Embarking on this Daring Bakers challenge was more than just following recipes; it was an immersive lesson in the science and art of confectionery. From the nostalgic charm of a grandfather’s caramel recipe to the sophisticated precision required for chocolate tempering, every step contributed to a deeper appreciation for homemade treats. The satisfaction of presenting a plate of glossy, perfectly snapped chocolate candies, knowing the effort and skill involved, is truly unparalleled. While the process of tempering can be demanding, the reward of indulging in these sinfully delicious chocolate truffles and velvety caramels makes every moment worthwhile. I encourage every home baker to step out of their comfort zone and experience the magic of mastering chocolate tempering – your taste buds, and those of your loved ones, will thank you.
Print These Delicious Candy Recipes
